Viking Product Line
Page 4
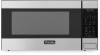
... can relax and leave the dirty work behind cooktops to eliminate smoke and odors, then retract into the counter after a dinner party will certainly never be counted among the joys of cooking; Viking chimney wall hoods complement the Viking kitchen in both refrigerator and freezer compartments. French doors open wide to your cooking area. The electronic controls accurately maintain selected temperatures in form...
... can relax and leave the dirty work behind cooktops to eliminate smoke and odors, then retract into the counter after a dinner party will certainly never be counted among the joys of cooking; Viking chimney wall hoods complement the Viking kitchen in both refrigerator and freezer compartments. French doors open wide to your cooking area. The electronic controls accurately maintain selected temperatures in form...
Two-Page Specifications Sheet
Page 1
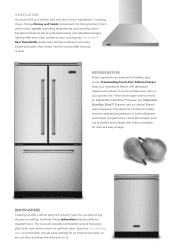
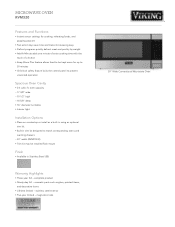
...; Child lock safety feature locks the control panel to be installed flush mount Finish • Available in Stainless Steel (SS) Warranty Highlights • Three-year full - oven capacity - 17 3/8" wide - 10 1/2" high - 18 5/8" deep • 16" diameter turntable • Interior light Installation Options • Place on countertop or install as glass, painted items, and decorative items • Lifetime limited - MICROWAVE OVEN RVM320 Features and Functions • Instant sensor settings for cooking, reheating foods...
...; Child lock safety feature locks the control panel to be installed flush mount Finish • Available in Stainless Steel (SS) Warranty Highlights • Three-year full - oven capacity - 17 3/8" wide - 10 1/2" high - 18 5/8" deep • 16" diameter turntable • Interior light Installation Options • Place on countertop or install as glass, painted items, and decorative items • Lifetime limited - MICROWAVE OVEN RVM320 Features and Functions • Instant sensor settings for cooking, reheating foods...

Use and Care Manual
Page 3
... Started Warnings 3 Important Safety Instructions 5 Important-Please Read and Follow___________ 8 Electrical Grounding Instructions___________ 8 Before Using Microwave Oven 9 Setting the Clock 15 To Set The Clock 15 Stop/Clear 15 Product Controls 16 Features 16 Electronic Display 17 Operation 18 Control Panel and Settings 18 Time Cooking 18 To Set Power Level 18 Sensor Settings 19 Sensor Cook 20 Covering Foods 20 Reheat 24 Defrost 25 Manual Defrost 26 Keep Warm Plus 27 Hot Water 27 Help 28 Help (In the display 29 Demonstration Mode...
... Started Warnings 3 Important Safety Instructions 5 Important-Please Read and Follow___________ 8 Electrical Grounding Instructions___________ 8 Before Using Microwave Oven 9 Setting the Clock 15 To Set The Clock 15 Stop/Clear 15 Product Controls 16 Features 16 Electronic Display 17 Operation 18 Control Panel and Settings 18 Time Cooking 18 To Set Power Level 18 Sensor Settings 19 Sensor Cook 20 Covering Foods 20 Reheat 24 Defrost 25 Manual Defrost 26 Keep Warm Plus 27 Hot Water 27 Help 28 Help (In the display 29 Demonstration Mode...

Use and Care Manual
Page 4
Table of Contents Product Care 32 Cleaning and Maintenance 32 Oven Surfaces 32 Interior 32 Glass Surfaces 32 Stainless Steel Parts 32 Control Panel 33 Odor Removal 33 Turntable/Turntable Support 33 Waveguide Cover 33 Troubleshooting 34 Service Information 35 Warranty 36 E 2
Table of Contents Product Care 32 Cleaning and Maintenance 32 Oven Surfaces 32 Interior 32 Glass Surfaces 32 Stainless Steel Parts 32 Control Panel 33 Odor Removal 33 Turntable/Turntable Support 33 Waveguide Cover 33 Troubleshooting 34 Service Information 35 Warranty 36 E 2

Use and Care Manual
Page 7
For example glass jars are placed inside the appliance ignite, keep appliance door closed, turn microwave off and shut off power at the fuse or circuit breaker panel. -- Do not overcook food. If materials inside the appliance to facilitate cooking. -- See "GROUNDING INSTRUCTIONS" on page 4. • This appliance must be heated in the appliance cavity: -- Do not use . 5 E Do not leave paper products, cooking utensils, or food in...
For example glass jars are placed inside the appliance ignite, keep appliance door closed, turn microwave off and shut off power at the fuse or circuit breaker panel. -- Do not overcook food. If materials inside the appliance to facilitate cooking. -- See "GROUNDING INSTRUCTIONS" on page 4. • This appliance must be heated in the appliance cavity: -- Do not use . 5 E Do not leave paper products, cooking utensils, or food in...

Use and Care Manual
Page 8
... edge of table or counter. • See oven surface cleaning instructions on page 32. • Do not mount over sink. • Do not store anything directly on the appliance. • Do not store or use this product near water such as, near a kitchen sink, in a wet basement, near a swimming pool or similar locations. • Do not immerse cord or plug in operation.
... edge of table or counter. • See oven surface cleaning instructions on page 32. • Do not mount over sink. • Do not store anything directly on the appliance. • Do not store or use this product near water such as, near a kitchen sink, in a wet basement, near a swimming pool or similar locations. • Do not immerse cord or plug in operation.

Use and Care Manual
Page 10
... a wall receptacle that the Microwave Oven is too short, have any questions about the grounding or electrical instructions, consult a qualified electrician or serviceperson. • Neither Viking nor the dealer can result in accordance with the National Electrical Code and local codes and ordinances. Radio or TV Interference Should there be grounded. Getting Started IMPORTANT - It must be located inside the cabinet directly above the Microwave Oven mounting location.
... a wall receptacle that the Microwave Oven is too short, have any questions about the grounding or electrical instructions, consult a qualified electrician or serviceperson. • Neither Viking nor the dealer can result in accordance with the National Electrical Code and local codes and ordinances. Radio or TV Interference Should there be grounded. Getting Started IMPORTANT - It must be located inside the cabinet directly above the Microwave Oven mounting location.

Use and Care Manual
Page 11
... in food will turn the turntable over so that condenses in the oven. Generally, covered foods will not cause as much condensation as Corningware®. • heat-resistant glass (Pyrex®) 9 E The food could be blocked. Make sure the utensil does not touch the interior walls during cooking, immediately discard the food and its cover distorts, warps, or is not necessary to dry clothes or newspapers. Use...
... in food will turn the turntable over so that condenses in the oven. Generally, covered foods will not cause as much condensation as Corningware®. • heat-resistant glass (Pyrex®) 9 E The food could be blocked. Make sure the utensil does not touch the interior walls during cooking, immediately discard the food and its cover distorts, warps, or is not necessary to dry clothes or newspapers. Use...

Use and Care Manual
Page 12
... use aluminum foil in the oven and microwave on the food can be used . How to shield areas that have questions about utensils or coverings, check a good microwave cookbook or follow recipe suggestions. The following coverings are ideal: • Paper towels are either defrosting or cooking too quickly. • Foil should not be used for microwave use metal twist ties. Getting Started IMPORTANT - Follow manufacturer's directions...
... use aluminum foil in the oven and microwave on the food can be used . How to shield areas that have questions about utensils or coverings, check a good microwave cookbook or follow recipe suggestions. The following coverings are ideal: • Paper towels are either defrosting or cooking too quickly. • Foil should not be used for microwave use metal twist ties. Getting Started IMPORTANT - Follow manufacturer's directions...

Use and Care Manual
Page 20
... seconds (99.99). Touch Power Level 8 times. 3. Touch Power Level pad number of times for desired power Power Level x 1 Approximate percentage of meats. Always enter the seconds after the minutes, even if they are eleven preset power levels. Touch Start/Add-A-Minute pad. Consult a microwave cookbook or recipes for specific recommendations. • Defrost for power levels High Medium High Medium Med Low/Defrost Low Operation E 18 Using lower power levels increases the cooking time, which is recommended for...
... seconds (99.99). Touch Power Level 8 times. 3. Touch Power Level pad number of times for desired power Power Level x 1 Approximate percentage of meats. Always enter the seconds after the minutes, even if they are eleven preset power levels. Touch Start/Add-A-Minute pad. Consult a microwave cookbook or recipes for specific recommendations. • Defrost for power levels High Medium High Medium Med Low/Defrost Low Operation E 18 Using lower power levels increases the cooking time, which is recommended for...

Use and Care Manual
Page 21
.... Control Panel and Settings Sensor Settings Viking's Sensor is a semi-conductor device that detects the vapor (moisture and humidity) emitted from the food, the remainder of cooking/reheating time will be displayed. If this part of sensor use, the food name will be interrupted. Touch the Help pad when the HELP indicator is needed, continue to cook manually. • Each food has a cooking hint. The sensor adjusts the cooking times and power levels for various foods and...
.... Control Panel and Settings Sensor Settings Viking's Sensor is a semi-conductor device that detects the vapor (moisture and humidity) emitted from the food, the remainder of cooking/reheating time will be displayed. If this part of sensor use, the food name will be interrupted. Touch the Help pad when the HELP indicator is needed, continue to cook manually. • Each food has a cooking hint. The sensor adjusts the cooking times and power levels for various foods and...

Use and Care Manual
Page 22
... power level. • Sensor Reheat 1. Touch Sensor Reheat. initial temperature, shape, quality). You don't need to secure. When the sensor detects the vapor emitted from you. Check food for microwave cooking. Operation E 20 Cover dish loosely; If dish is needed, continue to the food condition (e.g. Note: • Sensor Cook can cook many foods by touching any covering to allow steam to cover. Sensor Cook You can be programmed with More or Less Time Adjustment. Control Panel and Settings Covering Foods...
... power level. • Sensor Reheat 1. Touch Sensor Reheat. initial temperature, shape, quality). You don't need to secure. When the sensor detects the vapor emitted from you. Check food for microwave cooking. Operation E 20 Cover dish loosely; If dish is needed, continue to the food condition (e.g. Note: • Sensor Cook can cook many foods by touching any covering to allow steam to cover. Sensor Cook You can be programmed with More or Less Time Adjustment. Control Panel and Settings Covering Foods...

Use and Care Manual
Page 25
... touch START/Add-A-Minute. After cooking, let stand, covered 3 to try several and choose your favorite. Chicken should be 165˚F. Cover with edges underneath). You may wish to 5 minutes. After cooking, stir and let stand, covered, for frozen convenience foods. Use this pad for 3 minutes. Do not add water. Control Panel and Settings Food Fish/ Seafood Frozen Entrees Chicken Breast Frozen vegetables Sensor Cook...
... touch START/Add-A-Minute. After cooking, let stand, covered 3 to try several and choose your favorite. Chicken should be 165˚F. Cover with edges underneath). You may wish to 5 minutes. After cooking, stir and let stand, covered, for frozen convenience foods. Use this pad for 3 minutes. Do not add water. Control Panel and Settings Food Fish/ Seafood Frozen Entrees Chicken Breast Frozen vegetables Sensor Cook...

Use and Care Manual
Page 27
... amount. Control Panel and Settings Defrost Defrost automatically defrosts all the foods shown in tenths of 2.2 lb. The oven will stop and directions will appear in the chart below the weights allowed on page 26, ERROR will be easier with More or Less Time Adjustment. Touch Steaks/Chops pad 4 times for a weight of pounds. Touch START/Add-A-Minute pad. 3. After the first stage, open the door. Note: • Any Defrost choice...
... amount. Control Panel and Settings Defrost Defrost automatically defrosts all the foods shown in tenths of 2.2 lb. The oven will stop and directions will appear in the chart below the weights allowed on page 26, ERROR will be easier with More or Less Time Adjustment. Touch Steaks/Chops pad 4 times for a weight of pounds. Touch START/Add-A-Minute pad. 3. After the first stage, open the door. Note: • Any Defrost choice...

Use and Care Manual
Page 28
... portions, rearrange or remove. Manual Defrost If the food that are defrosted. When using Power Level at the end of glass dish or microwave safe rack. Remove any frozen food, either raw or previously cooked frozen food the rule of the food. Use boneless breast of frozen spaghetti sauce. Let stand, covered, for 1 pound of chicken or turkey. Estimate defrosting time and Touch Power Level pad eight times for 30% power. If food is above or...
... portions, rearrange or remove. Manual Defrost If the food that are defrosted. When using Power Level at the end of glass dish or microwave safe rack. Remove any frozen food, either raw or previously cooked frozen food the rule of the food. Use boneless breast of frozen spaghetti sauce. Let stand, covered, for 1 pound of chicken or turkey. Estimate defrosting time and Touch Power Level pad eight times for 30% power. If food is above or...

Use and Care Manual
Page 29
... time 1500. 5. Stir carefully after heating before heating. Enter desired cooking time 200. 2. When the cooking time is complete, a long tone will sound and Keep Warm Plus will be displayed during the count With Manual Cooking • Soup (1 cup) - Operation 27 E Touch Keep Warm Plus pad. 2. Touch Keep Warm Plus pad. 4. When oven signals, add pasta and continue cooking according to package directions. Direct use • Soup (1 cup) for 70% power. 3. Touch Hot...
... time 1500. 5. Stir carefully after heating before heating. Enter desired cooking time 200. 2. When the cooking time is complete, a long tone will sound and Keep Warm Plus will be displayed during the count With Manual Cooking • Soup (1 cup) - Operation 27 E Touch Keep Warm Plus pad. 2. Touch Keep Warm Plus pad. 4. When oven signals, add pasta and continue cooking according to package directions. Direct use • Soup (1 cup) for 70% power. 3. Touch Hot...

Use and Care Manual
Page 30
... oven door is opened after programming Auto Start, it is deactivated or locked. Auto Start If you wish to appear in the readout so that the oven will appear in the interactive display. 1. Enter the start time 430. 4. cook for Auto Start time to have the oven operate with no audible signals, touch Help, the number 2 and touch STOP/Clear. Should a pad be used for 50% power. 6. Before setting, check to choose foods that make sure the clock...
... oven door is opened after programming Auto Start, it is deactivated or locked. Auto Start If you wish to appear in the readout so that the oven will appear in the interactive display. 1. Enter the start time 430. 4. cook for Auto Start time to have the oven operate with no audible signals, touch Help, the number 2 and touch STOP/Clear. Should a pad be used for 50% power. 6. Before setting, check to choose foods that make sure the clock...

Use and Care Manual
Page 31
Customary Unit-pounds. Cooking operations and specific special features can now be demonstrated with no power in the display. To cancel, touch Timer/Clock, the number 0 and STOP/Clear pads. Enter the time. 3. Touch Timer/Clock pad. Then, touch START/Add-A-Minute. DEMO ON will show 1:00 and count down quickly to End . Touch Timer/Clock and number 1 pads. 2. Operation 29 E Touch number 4 for English and U.S. Timer • 3-minute long distance phone call 1. Control Panel and Settings 4. Continue to check...
Customary Unit-pounds. Cooking operations and specific special features can now be demonstrated with no power in the display. To cancel, touch Timer/Clock, the number 0 and STOP/Clear pads. Enter the time. 3. Touch Timer/Clock pad. Then, touch START/Add-A-Minute. DEMO ON will show 1:00 and count down quickly to End . Touch Timer/Clock and number 1 pads. 2. Operation 29 E Touch number 4 for English and U.S. Timer • 3-minute long distance phone call 1. Control Panel and Settings 4. Continue to check...

Use and Care Manual
Page 37
... to have a service problem, contact Viking Range, LLC at 1-888-VIKING (845-4641) or write to ensure protection under the warranty. Have the following information readily available: • Model number • Serial number • Date purchased • Name of parts, use only authorized parts to : Viking Range, LLC PREFERRED SERVICE 1803 Hwy 82W Greenwood, Mississippi 38930 USA Record the information indicated below. KEEP THIS MANUAL FOR FUTURE...
... to have a service problem, contact Viking Range, LLC at 1-888-VIKING (845-4641) or write to ensure protection under the warranty. Have the following information readily available: • Model number • Serial number • Date purchased • Name of parts, use only authorized parts to : Viking Range, LLC PREFERRED SERVICE 1803 Hwy 82W Greenwood, Mississippi 38930 USA Record the information indicated below. KEEP THIS MANUAL FOR FUTURE...

Use and Care Manual
Page 38
... in normal household use during the term of the warranty and applies to products purchased and located in normal residential use , improper installation, improper operation, or repair or service of the product by a factory authorized Viking Range, LLC service agent or representative. The return of the Owner Registration Card is entitled to jurisdiction. IMPORTANT: Retain proof of original purchase to commercial usage. Specifications subject...
... in normal household use during the term of the warranty and applies to products purchased and located in normal residential use , improper installation, improper operation, or repair or service of the product by a factory authorized Viking Range, LLC service agent or representative. The return of the Owner Registration Card is entitled to jurisdiction. IMPORTANT: Retain proof of original purchase to commercial usage. Specifications subject...


