Side Panel Kit Instructions
Page 1
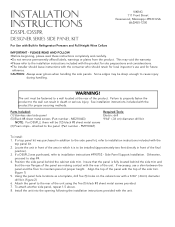
... provided. 7. INSTALLATION INSTRUCTIONS VIKING 111 Front Street Greenwood, Mississippi 38930 USA (662)455-1200 dSSPL/dSSPR designer SERIES SIDE PANEL KIT For Use with the unit. This may be fastened to the rear of the area in addition to the side panel kit, refer to installation instructions #F90752 - Install the unit into the opening following the installation instructions provided with Built-In Refrigerator/Freezers and Full Height Wine Cellars IMPORTANT -
... provided. 7. INSTALLATION INSTRUCTIONS VIKING 111 Front Street Greenwood, Mississippi 38930 USA (662)455-1200 dSSPL/dSSPR designer SERIES SIDE PANEL KIT For Use with the unit. This may be fastened to the rear of the area in addition to the side panel kit, refer to installation instructions #F90752 - Install the unit into the opening following the installation instructions provided with Built-In Refrigerator/Freezers and Full Height Wine Cellars IMPORTANT -
Custom Side Panel Hardware Kit - Installation Instructions
Page 1
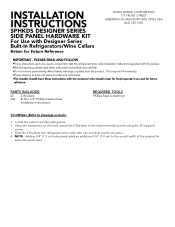
... the custom wooden panels using the 32 supplied screws. 3. NOTE: Adding 3/4" (1.9 cm) side panels adds an additional 3/4" (1.9 cm) to be used . Locate the custom wooden side panels. 2. Slide the Z-Brackets into refrigerator/wine cellar side trim and slide panels into place. 4. INSTALLATION INSTRUCTIONS SPHKDS DESIGNER SERIES SIDE PANEL HARDWARE KIT For Use with Designer Series Built-In Refrigerators/Wine Cellars Retain for each side panel used in conjunction with the refrigerator/wine cellar installation instructions supplied with the product. •Before...
... the custom wooden panels using the 32 supplied screws. 3. NOTE: Adding 3/4" (1.9 cm) side panels adds an additional 3/4" (1.9 cm) to be used . Locate the custom wooden side panels. 2. Slide the Z-Brackets into refrigerator/wine cellar side trim and slide panels into place. 4. INSTALLATION INSTRUCTIONS SPHKDS DESIGNER SERIES SIDE PANEL HARDWARE KIT For Use with Designer Series Built-In Refrigerators/Wine Cellars Retain for each side panel used in conjunction with the refrigerator/wine cellar installation instructions supplied with the product. •Before...
Professional Stainless Steel Handle Kit - 28 inch - Installation Instructions
Page 2
... change without notice. 3 Using the illustrations on the next page, layout the handle location on installing the refrigerator/freezer door panel. • The installer should leave instructions with the holes on both endcaps mounting surfaces are parallel. 5. Using the 5/16"(.8 cm) drill bit, drill completely through -holes 3/4" (1.8 cm) Full Overlay Panel Custom Door DFRB All Refrigerator/DFFB All Freezer (Front View) Professional Series Handle Specifications...
... change without notice. 3 Using the illustrations on the next page, layout the handle location on installing the refrigerator/freezer door panel. • The installer should leave instructions with the holes on both endcaps mounting surfaces are parallel. 5. Using the 5/16"(.8 cm) drill bit, drill completely through -holes 3/4" (1.8 cm) Full Overlay Panel Custom Door DFRB All Refrigerator/DFFB All Freezer (Front View) Professional Series Handle Specifications...
Use and Care Manual
Page 2
... put into a grounded 3-prong outlet. WARNING ELECTRICAL SHOCK HAZARD Plug into every detail of your unit, follow these instructions can create a fire hazard or explosion. • Always turn the power on/off switch (located behind the air grille on top right side) to the OFF position before using your new, state-of a Viking wine cellar and hope that you need to...
... put into a grounded 3-prong outlet. WARNING ELECTRICAL SHOCK HAZARD Plug into every detail of your unit, follow these instructions can create a fire hazard or explosion. • Always turn the power on/off switch (located behind the air grille on top right side) to the OFF position before using your new, state-of a Viking wine cellar and hope that you need to...
Use and Care Manual
Page 3
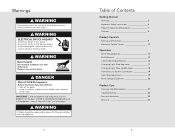
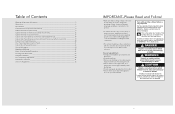
... appliance. 4 Table of Contents Getting Started Warnings 3 Important Safety Instructions 6 Proper Disposal (of old product 7 Features 8 Product Controls Settings and Functions 9 Electronic Control Center 12 Operation Wine Storage System 14 Shelf Removal 15 Convertible Display Shelves 16 Changing Light Tube (top zone 17 Changing Light Tube (middle zone 18 Home Security System Connection 19 Door Stop Adjustment 19 Wine Storage Guidelines 20 Product Care Cleaning and Maintenance 21 Troubleshooting 22 Service Information 23 Warranty 24 5 Doing so can...
... appliance. 4 Table of Contents Getting Started Warnings 3 Important Safety Instructions 6 Proper Disposal (of old product 7 Features 8 Product Controls Settings and Functions 9 Electronic Control Center 12 Operation Wine Storage System 14 Shelf Removal 15 Convertible Display Shelves 16 Changing Light Tube (top zone 17 Changing Light Tube (middle zone 18 Home Security System Connection 19 Door Stop Adjustment 19 Wine Storage Guidelines 20 Product Care Cleaning and Maintenance 21 Troubleshooting 22 Service Information 23 Warranty 24 5 Doing so can...

Use and Care Manual
Page 4
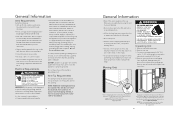
...Getting Started Getting Started Important Safety Instructions • Install and level the wine cellar on a floor that will hold its weight and in an area suitable for its size and use. • Do not install a wine cellar near a heat source, nor in a location where the surrounding temperature...wine cellar only to the appropriate kind of electrical outlet, with the correct power supply and grounding. (Refer to the Electrical Requirements section of the Installation Instructions.) • Properly maintain the wine cellar. • Be sure the wine cellar is not used by anyone unable to operate...
...Getting Started Getting Started Important Safety Instructions • Install and level the wine cellar on a floor that will hold its weight and in an area suitable for its size and use. • Do not install a wine cellar near a heat source, nor in a location where the surrounding temperature...wine cellar only to the appropriate kind of electrical outlet, with the correct power supply and grounding. (Refer to the Electrical Requirements section of the Installation Instructions.) • Properly maintain the wine cellar. • Be sure the wine cellar is not used by anyone unable to operate...

Use and Care Manual
Page 5
...; Storage System Your wine cellar has three independent temperature zones separated by gaskets and tempered glass shelves to store your wines. 9 Product Controls All shelves are coated to be displayed without compromising wine integrity. Shelves pull forward on the 15 shelves. Convertible Display Shelves (2) 4. Door Stop Settings - 90°, 110°, 120° 12. Shelves are fully removable for true air circulation within the zone. Electronic Control Center 3. Open Door...
...; Storage System Your wine cellar has three independent temperature zones separated by gaskets and tempered glass shelves to store your wines. 9 Product Controls All shelves are coated to be displayed without compromising wine integrity. Shelves pull forward on the 15 shelves. Convertible Display Shelves (2) 4. Door Stop Settings - 90°, 110°, 120° 12. Shelves are fully removable for true air circulation within the zone. Electronic Control Center 3. Open Door...

Use and Care Manual
Page 6
.... Product Controls Product Controls Settings and Functions High Temperature Alarm Your wine cellar has a high temperature alarm feature that you operate it properly. Power On/Off Switch Showroom Switch IMPORTANT: Be sure the power on /off switch is shipped with the slots in many different applications. To use the showroom mode, remove center grille assembly and turn the power back on, press the power on position. The wine cellar...
.... Product Controls Product Controls Settings and Functions High Temperature Alarm Your wine cellar has a high temperature alarm feature that you operate it properly. Power On/Off Switch Showroom Switch IMPORTANT: Be sure the power on /off switch is shipped with the slots in many different applications. To use the showroom mode, remove center grille assembly and turn the power back on, press the power on position. The wine cellar...
Use and Care Manual
Page 7
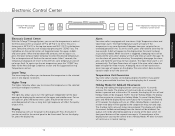
... longer flash. The unit is equipped with two alarms: High Temperature alarm and Open Door alarm. Lights The lights key allows you to 18°C). The chamber lights relay will be affected by pressing the "ZONE" key. Electronic Control Center Product Controls Product Controls TriTemp™ Wine Storage 150 Bottle Capacity ZONE LOWER TEMP HIGHER TEMP UPPER MIDDLE LOWER LIGHTS DISPLAY ALARM Three Independent Temperature Areas Electronic Control Center Electronic Control Center With the TriTemp™ Storage System, you can set at...
... longer flash. The unit is equipped with two alarms: High Temperature alarm and Open Door alarm. Lights The lights key allows you to 18°C). The chamber lights relay will be affected by pressing the "ZONE" key. Electronic Control Center Product Controls Product Controls TriTemp™ Wine Storage 150 Bottle Capacity ZONE LOWER TEMP HIGHER TEMP UPPER MIDDLE LOWER LIGHTS DISPLAY ALARM Three Independent Temperature Areas Electronic Control Center Electronic Control Center With the TriTemp™ Storage System, you can set at...
Use and Care Manual
Page 9
... below). Operation Operation Shelf Support Wood Facings Maple wood facings are included with other wood to be left unfinished, finished and sealed, or replaced with each of the top two compartments. These facings may cause undesirable odors. Refer to the wine cellar installation instructions on how to the cabinet wire harness. 5. The recommended procedure is to match your Viking Range Corporation parts distributor or...
... below). Operation Operation Shelf Support Wood Facings Maple wood facings are included with other wood to be left unfinished, finished and sealed, or replaced with each of the top two compartments. These facings may cause undesirable odors. Refer to the wine cellar installation instructions on how to the cabinet wire harness. 5. The recommended procedure is to match your Viking Range Corporation parts distributor or...

Use and Care Manual
Page 10
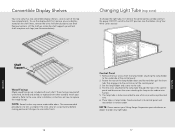
... stop position. Door Stop Adjustment Your wine cellar is located on the upper left side of the lamp. DO NOT REMOVE SHELF MOUNTING SCREWS). 2. Reassemble in the bottom hinge using a 3/16" allen wrench. The lamp is factory set at the end of the middle zone. (NOTE: ONLY REMOVE THE TWO SCREWS HOLDING THE WIRE COVER; To change the light tube, first remove the center grille assembly and turn the power...
... stop position. Door Stop Adjustment Your wine cellar is located on the upper left side of the lamp. DO NOT REMOVE SHELF MOUNTING SCREWS). 2. Reassemble in the bottom hinge using a 3/16" allen wrench. The lamp is factory set at the end of the middle zone. (NOTE: ONLY REMOVE THE TWO SCREWS HOLDING THE WIRE COVER; To change the light tube, first remove the center grille assembly and turn the power...

Use and Care Manual
Page 11
... a stable temperature in your wine cellar if the room temperature is lower than room temperatures outside of the middle zone can be stored at temperatures optimal for a long period of the room you locate your selected temperature setting. Clean with glass cleaner and a soft cloth or paper towel. Wash, wipe, and dry thoroughly. Operation Product Care 20 21 The wine cellar is designed to cool, not...
... a stable temperature in your wine cellar if the room temperature is lower than room temperatures outside of the middle zone can be stored at temperatures optimal for a long period of the room you locate your selected temperature setting. Clean with glass cleaner and a soft cloth or paper towel. Wash, wipe, and dry thoroughly. Operation Product Care 20 21 The wine cellar is designed to cool, not...
Use and Care Manual
Page 12
...; Model number • Serial number • Date purchased • Name of time? 22 Service Information If service is ever required. Water in the ON position? You will need it does not overflow. Is the electronic control center set properly? Is the power cord plugged into with the proper voltage? Has a household fuse blown or circuit breaker tripped? Is a light burned out? The motor will not operate - Listed in...
...; Model number • Serial number • Date purchased • Name of time? 22 Service Information If service is ever required. Water in the ON position? You will need it does not overflow. Is the electronic control center set properly? Is the power cord plugged into with the proper voltage? Has a household fuse blown or circuit breaker tripped? Is a light burned out? The motor will not operate - Listed in...
Use and Care Manual
Page 13
... free installation, except as specified under the limited warranty. Therefore, this "Residential Plus" warranty, the product, its component part or parts. Viking Range Corporation uses high quality processes and materials available to produce all commercial locations such as restaurants, food service locations and institutional food service locations. This warranty excludes use of the product in all color finishes. The return of the Owner Registration Card is longer. Provide model and serial number...
... free installation, except as specified under the limited warranty. Therefore, this "Residential Plus" warranty, the product, its component part or parts. Viking Range Corporation uses high quality processes and materials available to produce all commercial locations such as restaurants, food service locations and institutional food service locations. This warranty excludes use of the product in all color finishes. The return of the Owner Registration Card is longer. Provide model and serial number...

Quick Reference Guide
Page 1
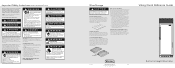
... changing the light tubes. The Open Door alarm will flash and show an alarm message. The display will continue to turn on as long as in any zone fluctuates 5 degrees from your set temperature, press the "ZONE" key. At the end of 10 seconds the display will sound if temperatures within your wine cellar fluctuate outside of your set this mode. Control Panels TriTemp Wine Storage 150 Bottle Capacity ZONE LOWER TEMP HIGHER TEMP UPPER...
... changing the light tubes. The Open Door alarm will flash and show an alarm message. The display will continue to turn on as long as in any zone fluctuates 5 degrees from your set temperature, press the "ZONE" key. At the end of 10 seconds the display will sound if temperatures within your wine cellar fluctuate outside of your set this mode. Control Panels TriTemp Wine Storage 150 Bottle Capacity ZONE LOWER TEMP HIGHER TEMP UPPER...
Quick Reference Guide
Page 2
... store or use an extension cord. • Failure to follow all instructions before attempting to change light tubes, clean, or service the wine cellar. • For your selected temperature setting. I M P O R TA N T Be sure the power on the shelf with the correct electrical supply and grounding. (Refer to the electrical requirements section of the Installation Guide). • Properly maintain the wine cellar. • Be sure the wine cellar is not used by a qualified...
... store or use an extension cord. • Failure to follow all instructions before attempting to change light tubes, clean, or service the wine cellar. • For your selected temperature setting. I M P O R TA N T Be sure the power on the shelf with the correct electrical supply and grounding. (Refer to the electrical requirements section of the Installation Guide). • Properly maintain the wine cellar. • Be sure the wine cellar is not used by a qualified...
Installation Instructions
Page 2
... 12 Cabinet Information (Custom Panel 15 Custom Side Panel Dimensions (Professional/Standard Mount 18 Custom Side Panel Dimensions (Custom Panel/Professional w/flush mount trim 19 Custom Door Panel Dimensions 20 Door Panel Installation (Custom Panel 21 Custom Wood Facing Dimensions 22 General Information 24 Unpacking & Moving 25 Home Security System Connection 26 Securing Your Wine Cellar 27 Kickplate Installation 29 Door Stop/Hinge Adjustment 30 Performance Checklist 31 Service & Registration 32 IMPORTANT...
... 12 Cabinet Information (Custom Panel 15 Custom Side Panel Dimensions (Professional/Standard Mount 18 Custom Side Panel Dimensions (Custom Panel/Professional w/flush mount trim 19 Custom Door Panel Dimensions 20 Door Panel Installation (Custom Panel 21 Custom Wood Facing Dimensions 22 General Information 24 Unpacking & Moving 25 Home Security System Connection 26 Securing Your Wine Cellar 27 Kickplate Installation 29 Door Stop/Hinge Adjustment 30 Performance Checklist 31 Service & Registration 32 IMPORTANT...
Installation Instructions
Page 3
... good condition and free from any problems resulting from moisture (water, steam, high humidity) as much as per installation instructions. IMPORTANT-Please Read and Follow! WARNING TIP OVER HAZARD Appliance is needed when moving the unit to a standard breaker of appropriate size (GFI breaker of water or moisture. • Viking Range Corporation will NOT warranty any loose-fitting gaskets (if applicable in...
... good condition and free from any problems resulting from moisture (water, steam, high humidity) as much as per installation instructions. IMPORTANT-Please Read and Follow! WARNING TIP OVER HAZARD Appliance is needed when moving the unit to a standard breaker of appropriate size (GFI breaker of water or moisture. • Viking Range Corporation will NOT warranty any loose-fitting gaskets (if applicable in...
Installation Instructions
Page 13
... can obstruct unit installation. • Cutout dimensions are up (0" adjustment). 25 DO NOT use dolly from the rear of unit. Remove top and bottom strap. 2. NOTE: Tilting unit is able to support two horizontally mounted 50x100 mm (included) bolted to be used from the skid, a dolly can result in the neutral or grounding circuit. If codes permit a separate grounding wire to two...
... can obstruct unit installation. • Cutout dimensions are up (0" adjustment). 25 DO NOT use dolly from the rear of unit. Remove top and bottom strap. 2. NOTE: Tilting unit is able to support two horizontally mounted 50x100 mm (included) bolted to be used from the skid, a dolly can result in the neutral or grounding circuit. If codes permit a separate grounding wire to two...

Installation Instructions
Page 15
... showroom display only). 3. Roll wine cellar into the open end of cutout. 2. Lift the wine cellar off the rollers, adjust to desired height and level wine cellar by plugging power cord in place against floor. 6. Align wine cellar with sides of being flush with the slots in place, confirm the finished dimensions, electrical location, minimum door and shelf clearances, and door panel instructions. 1. Control panel should line up with cabinets. To install: 1. VIEW...
... showroom display only). 3. Roll wine cellar into the open end of cutout. 2. Lift the wine cellar off the rollers, adjust to desired height and level wine cellar by plugging power cord in place against floor. 6. Align wine cellar with sides of being flush with the slots in place, confirm the finished dimensions, electrical location, minimum door and shelf clearances, and door panel instructions. 1. Control panel should line up with cabinets. To install: 1. VIEW...

