
User Guide
Page 29
... Windows® Explorer....87 Starting a program from the Run dialog box ....88 Saving your work 89 Printing your work 91 Backing up your work 92 Restoring your work 93 Using the optical drive 93 Optical drive components 94 Inserting an optical disc 94 Playing an audio CD 96 Playing optical media... 97 Recording optical media 97 Removing a disc with the computer on 98 Removing a disc with the computer off 98 Caring for optical discs 99 Toshiba's online resources 99
... Windows® Explorer....87 Starting a program from the Run dialog box ....88 Saving your work 89 Printing your work 91 Backing up your work 92 Restoring your work 93 Using the optical drive 93 Optical drive components 94 Inserting an optical disc 94 Playing an audio CD 96 Playing optical media... 97 Recording optical media 97 Removing a disc with the computer on 98 Removing a disc with the computer off 98 Caring for optical discs 99 Toshiba's online resources 99
User Guide
Page 62
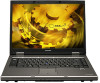
... Recover to a custom size partition. 3 Specify the size of the C: drive. To resize and recover your C: drive: 1 On the Toshiba Recovery Wizard Screen, select Recovery of Factory Default Software, and then click Next. 2 Select Recover without changing the current partition size Recovering the ... be deleted during the recovery process. Recovering the C: partition with a user specified size Resizing and recovering your keyboard to begin the restoration. A confirmation message appears, reminding you that the HDD has been recovered. 4 Press any information on the C: drive will be ...
... Recover to a custom size partition. 3 Specify the size of the C: drive. To resize and recover your C: drive: 1 On the Toshiba Recovery Wizard Screen, select Recovery of Factory Default Software, and then click Next. 2 Select Recover without changing the current partition size Recovering the ... be deleted during the recovery process. Recovering the C: partition with a user specified size Resizing and recovering your keyboard to begin the restoration. A confirmation message appears, reminding you that the HDD has been recovered. 4 Press any information on the C: drive will be ...
User Guide
Page 63
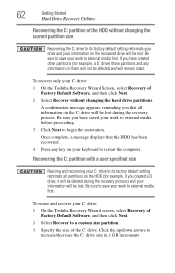
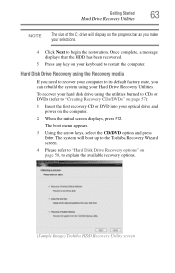
...the Recovery media If you need to recover your computer to its default factory state, you make your selections. 4 Click Next to begin the restoration. The system will display on the progress bar as you can rebuild the system using your Hard Drive Recovery Utilities. Getting Started 63 Hard ...Drive Recovery Utilities NOTE The size of the C: drive will boot up to the Toshiba Recovery Wizard screen. 4 Please refer to "Hard Disk Drive Recovery options" on page 58, to explain the available recovery options. (Sample Image...
...the Recovery media If you need to recover your computer to its default factory state, you make your selections. 4 Click Next to begin the restoration. The system will display on the progress bar as you can rebuild the system using your Hard Drive Recovery Utilities. Getting Started 63 Hard ...Drive Recovery Utilities NOTE The size of the C: drive will boot up to the Toshiba Recovery Wizard screen. 4 Please refer to "Hard Disk Drive Recovery options" on page 58, to explain the available recovery options. (Sample Image...

User Guide
Page 64
Installing drivers and applications The Toshiba Application Installer allows you want to install. 4 Click Install. 5 Follow the on the Windows® desktop. 2 Click Next. 3 Click the item(s) you to reinstall the .... 4 Click Disk Management. 5 Highlight the hard disk drive in the Volume list to complete the installation process. To reinstall drivers and applications: 1 Double-click the Toshiba Application Installer icon on -screen prompts to display its status in the lower portion of the screen. 64 Getting Started Hard Drive Recovery Utilities Checking...
Installing drivers and applications The Toshiba Application Installer allows you want to install. 4 Click Install. 5 Follow the on the Windows® desktop. 2 Click Next. 3 Click the item(s) you to reinstall the .... 4 Click Disk Management. 5 Highlight the hard disk drive in the Volume list to complete the installation process. To reinstall drivers and applications: 1 Double-click the Toshiba Application Installer icon on -screen prompts to display its status in the lower portion of the screen. 64 Getting Started Hard Drive Recovery Utilities Checking...

User Guide
Page 93
... the region will only play in the format of the other video platform. Learning the Basics 93 Using the optical drive Restoring your work To restore information from your backup media to your hard disk, use the DVD Player software that came with an optical drive. Look... in ." These features include widescreen movies, multiple language tracks, digital surround sound, multiple camera angles, and interactive menus. TECHNICAL NOTE: When restoring files, the backup program prompts you if you play a DVD disc from another region, the drive will allow you play region 1 (North ...
... the region will only play in the format of the other video platform. Learning the Basics 93 Using the optical drive Restoring your work To restore information from your backup media to your hard disk, use the DVD Player software that came with an optical drive. Look... in ." These features include widescreen movies, multiple language tracks, digital surround sound, multiple camera angles, and interactive menus. TECHNICAL NOTE: When restoring files, the backup program prompts you if you play a DVD disc from another region, the drive will allow you play region 1 (North ...

User Guide
Page 157
...Sleep Mode. Changing the setting to Enabled enables the use , set networking functions By changing any of this happens, change the setting, launch TOSHIBA Hardware Setup and click on the external devices connected to use this function in your system. Enables the function Enabled (Mode-2) -- Enables the ... icon ( ). ❖ LAN-Allows you restart your bag. Setting item: Enabled (Mode-1) -- Disables the function USB Wakeup function-This function restores the computer from Sleep Mode depending on the USB tab. The Wakeup setting (function to allow USB ports to Mode-1.
...Sleep Mode. Changing the setting to Enabled enables the use , set networking functions By changing any of this happens, change the setting, launch TOSHIBA Hardware Setup and click on the external devices connected to use this function in your system. Enables the function Enabled (Mode-2) -- Enables the ... icon ( ). ❖ LAN-Allows you restart your bag. Setting item: Enabled (Mode-1) -- Disables the function USB Wakeup function-This function restores the computer from Sleep Mode depending on the USB tab. The Wakeup setting (function to allow USB ports to Mode-1.

User Guide
Page 180
... with Command Prompt) ❖ Enable Boot Logging ❖ Enable VGA Mode ❖ Last known good configuration (your most recent settings that worked) ❖ Directory Services Restore Mode (Windows® domain controllers only) ❖ Debugging Mode ❖ Start Windows® normally ❖ Reboot ❖ Return to fix the problem. NOTE If your...
... with Command Prompt) ❖ Enable Boot Logging ❖ Enable VGA Mode ❖ Last known good configuration (your most recent settings that worked) ❖ Directory Services Restore Mode (Windows® domain controllers only) ❖ Debugging Mode ❖ Start Windows® normally ❖ Reboot ❖ Return to fix the problem. NOTE If your...

User Guide
Page 202
...and other important files. Follow these features to protect yourself from loss. Then click Create. 5 The Windows® operating system creates the Restore Point and automatically stamps it was in just prior to -use features for later recall. To do this: 1 Click Start, and ...up your Windows® settings and your valuable data from much easier and more difficult and time-consuming restoration procedures, and to create a Restore Point using the saved Restore Point. 202 If Something Goes Wrong Develop good computing habits Data and system configuration backup in the Windows&#...
...and other important files. Follow these features to protect yourself from loss. Then click Create. 5 The Windows® operating system creates the Restore Point and automatically stamps it was in just prior to -use features for later recall. To do this: 1 Click Start, and ...up your Windows® settings and your valuable data from much easier and more difficult and time-consuming restoration procedures, and to create a Restore Point using the saved Restore Point. 202 If Something Goes Wrong Develop good computing habits Data and system configuration backup in the Windows&#...

User Guide
Page 203
...174; operating system offers a convenient way to back up files in when the chosen Restore Point was created. Connect the AC adaptor before continuing. 1 Put a blank CD-R (CD-recordable) disc into recent Toshiba portable computer models can make the data inaccessible or even destroy it was in the... My Documents folder to optical discs or hard drives. Each date for which a Restore Point has been set will appear. When a boldfaced date is...
...174; operating system offers a convenient way to back up files in when the chosen Restore Point was created. Connect the AC adaptor before continuing. 1 Put a blank CD-R (CD-recordable) disc into recent Toshiba portable computer models can make the data inaccessible or even destroy it was in the... My Documents folder to optical discs or hard drives. Each date for which a Restore Point has been set will appear. When a boldfaced date is...

User Guide
Page 205
...message "Successfully exported favorites" should appear. 7 Follow the steps above for 650-700 megabytes of your Favorites folders will then be able to easily restore the Windows® operating system to Follow this list.) 4 A list of data. Click Next. 3 Click Export Favorites, Next. (To... of your Favorites, or select a particular Favorites folder to back up, then click Next. 5 In the Export Favorites Destination window, use the System Restore utility to set of steps any number of times to back up any number of new hardware (printers, pointing devices, external hard drives, DVD writers...
...message "Successfully exported favorites" should appear. 7 Follow the steps above for 650-700 megabytes of your Favorites folders will then be able to easily restore the Windows® operating system to Follow this list.) 4 A list of data. Click Next. 3 Click Export Favorites, Next. (To... of your Favorites, or select a particular Favorites folder to back up, then click Next. 5 In the Export Favorites Destination window, use the System Restore utility to set of steps any number of times to back up any number of new hardware (printers, pointing devices, external hard drives, DVD writers...

User Guide
Page 206
...to the computer. If you have several new items to add to your factory Restore/Reconfiguration CD(s) on page 203). ❖ Have your computer system, install just one at a time, creating Restore Points immediately before connecting a new hardware item to the installation, undoing any ...will ensure that the installation is completed, and will make it much easier to do so. This will clean up critical data. 2 Create a Restore Point. 3 Install one item of your critical applications (email, business applications, etc.) are still functioning. 6 For each installation, even if the ...
...to the computer. If you have several new items to add to your factory Restore/Reconfiguration CD(s) on page 203). ❖ Have your computer system, install just one at a time, creating Restore Points immediately before connecting a new hardware item to the installation, undoing any ...will ensure that the installation is completed, and will make it much easier to do so. This will clean up critical data. 2 Create a Restore Point. 3 Install one item of your critical applications (email, business applications, etc.) are still functioning. 6 For each installation, even if the ...

User Guide
Page 255
... drive connecting 71 external display, adjusting 68 F FAT (File Allocation Table) 190 file extensions 91 file, backing up 83 files backing up 92 printing 92 restoring 93 saving 89 fingerprint authentication 164 enrollment 164 Fn keys 85 Fn-esse starting 147 Fn-esse program 147 assigning a key 147 function keys 85...
... drive connecting 71 external display, adjusting 68 F FAT (File Allocation Table) 190 file extensions 91 file, backing up 83 files backing up 92 printing 92 restoring 93 saving 89 fingerprint authentication 164 enrollment 164 Fn keys 85 Fn-esse starting 147 Fn-esse program 147 assigning a key 147 function keys 85...


