
User Guide
Page 26
..., Memory Stick PRO, and i.LINK are either registered trademarks or trademarks of Microsoft Corporation in the United States and/or other countries. and any use of such marks by the Bluetooth SIG, Inc. and/or Toshiba Corporation. Disposal of this product may be regulated due to environmental considerations. xD...the United States and/or other countries. Intel, Intel Core, Celeron, Centrino and Pentium are trademarks of SD Card Association. 26 Trademarks Tecra, Accupoint, and ConfigFree are trademarks or registered trademarks of their respective owners. All other countries.
..., Memory Stick PRO, and i.LINK are either registered trademarks or trademarks of Microsoft Corporation in the United States and/or other countries. and any use of such marks by the Bluetooth SIG, Inc. and/or Toshiba Corporation. Disposal of this product may be regulated due to environmental considerations. xD...the United States and/or other countries. Intel, Intel Core, Celeron, Centrino and Pentium are trademarks of SD Card Association. 26 Trademarks Tecra, Accupoint, and ConfigFree are trademarks or registered trademarks of their respective owners. All other countries.
User Guide
Page 28
... display panel 47 Your computer's features and specifications ....48 Turning on the power 48 Adding memory (optional 49 Installing a memory module 50 Removing a memory module 55 Checking total memory 56 Hard Drive Recovery Utilities 56 Creating Recovery CDs/DVDs 57 Hard Disk Drive Recovery options... 58 Hard Disk Drive Recovery using the Recovery media 63 Installing drivers and applications 64 Using the Toshiba Dual...
... display panel 47 Your computer's features and specifications ....48 Turning on the power 48 Adding memory (optional 49 Installing a memory module 50 Removing a memory module 55 Checking total memory 56 Hard Drive Recovery Utilities 56 Creating Recovery CDs/DVDs 57 Hard Disk Drive Recovery options... 58 Hard Disk Drive Recovery using the Recovery media 63 Installing drivers and applications 64 Using the Toshiba Dual...

User Guide
Page 31
... Card Reader 130 Using the Bridge Media Adapter Slot 131 Inserting memory media 131 Removing memory media 132 Using the i.LINK® port 132 Using an expansion device 133 Using an Optional Toshiba Express Port Replicator with your computer 133 Chapter 5: Utilities 134 TOSHIBA Assist 135 Connect 136 Secure 137 Protect & Fix 138 Optimize...
... Card Reader 130 Using the Bridge Media Adapter Slot 131 Inserting memory media 131 Removing memory media 132 Using the i.LINK® port 132 Using an expansion device 133 Using an Optional Toshiba Express Port Replicator with your computer 133 Chapter 5: Utilities 134 TOSHIBA Assist 135 Connect 136 Secure 137 Protect & Fix 138 Optimize...

User Guide
Page 32
32 Contents TOSHIBA SD™ Memory Card Format Utility .........148 TOSHIBA SD™ Memory Boot Utility 149 Booting from a bootable SD card 150 TOSHIBA Power Saver 151 Preset Power Profiles 152 Quickly creating a new power profile 152 Customizing a power profile 152 Mouse Utility 153 TOSHIBA Hardware Setup 154 TOSHIBA Zooming Utility 158 TOSHIBA Mobile Extension 159 TOSHIBA Button Controls 160...
32 Contents TOSHIBA SD™ Memory Card Format Utility .........148 TOSHIBA SD™ Memory Boot Utility 149 Booting from a bootable SD card 150 TOSHIBA Power Saver 151 Preset Power Profiles 152 Quickly creating a new power profile 152 Customizing a power profile 152 Mouse Utility 153 TOSHIBA Hardware Setup 154 TOSHIBA Zooming Utility 158 TOSHIBA Mobile Extension 159 TOSHIBA Button Controls 160...

User Guide
Page 33
Contents 33 Resolving hardware conflicts on your own .....182 Fixing a problem with Device Manager ...........183 Memory problems 185 Power and the batteries 186 Keyboard problems 187 Display problems 188 Disk drive problems 190 Optical drive problems 191... and system configuration backup in the Windows® operating system 202 If you need further assistance 207 Before you contact Toshiba 207 Contacting Toshiba 208 Other Toshiba Internet Web sites 209 Toshiba's worldwide offices 209 Appendix A: Hot Keys 211 Volume Mute 211 Password security 211 Without a password 211 With a ...
Contents 33 Resolving hardware conflicts on your own .....182 Fixing a problem with Device Manager ...........183 Memory problems 185 Power and the batteries 186 Keyboard problems 187 Display problems 188 Disk drive problems 190 Optical drive problems 191... and system configuration backup in the Windows® operating system 202 If you need further assistance 207 Before you contact Toshiba 207 Contacting Toshiba 208 Other Toshiba Internet Web sites 209 Toshiba's worldwide offices 209 Appendix A: Hot Keys 211 Volume Mute 211 Password security 211 Without a password 211 With a ...

User Guide
Page 42
... the operating system has loaded completely. The first time you must complete all setup steps up to be chosen." Click Next to , a mouse, keyboard, printer, memory, and PC Cards. If an Internet connection could not be found, a window will pause for a moment while checking for the first time, do not turn...
... the operating system has loaded completely. The first time you must complete all setup steps up to be chosen." Click Next to , a mouse, keyboard, printer, memory, and PC Cards. If an Internet connection could not be found, a window will pause for a moment while checking for the first time, do not turn...

User Guide
Page 43
... choose your computer name and network settings. 6 Follow the remaining screen prompts to the Toshiba Web site at www.register.toshiba.com at that time, you can be connected to : ❖ Add more memory (see "Adding memory (optional)" on page 49) ❖ Connect a mouse (see "Using a mouse"...during the initial start up process of your software" on page 128) Adding optional external devices NOTE Before adding external devices or memory, Toshiba recommends setting up your computer. NOTE To register online, you decide not to register at a later time. Product registration can ...
... choose your computer name and network settings. 6 Follow the remaining screen prompts to the Toshiba Web site at www.register.toshiba.com at that time, you can be connected to : ❖ Add more memory (see "Adding memory (optional)" on page 49) ❖ Connect a mouse (see "Using a mouse"...during the initial start up process of your software" on page 128) Adding optional external devices NOTE Before adding external devices or memory, Toshiba recommends setting up your computer. NOTE To register online, you decide not to register at a later time. Product registration can ...

User Guide
Page 49
...today's popular applications. Getting Started 49 Adding memory (optional) 3 Press and release the power button. Adding memory (optional) HINT: To purchase additional memory modules, see the accessories information packaged with enough memory to increase the computer's memory if you turn off the power again ...until the operating system has loaded completely. You may want to run most of data. See "Setting up your software. NOTE Before adding external devices or memory, Toshiba recommends ...
...today's popular applications. Getting Started 49 Adding memory (optional) 3 Press and release the power button. Adding memory (optional) HINT: To purchase additional memory modules, see the accessories information packaged with enough memory to increase the computer's memory if you turn off the power again ...until the operating system has loaded completely. You may want to run most of data. See "Setting up your software. NOTE Before adding external devices or memory, Toshiba recommends ...

User Guide
Page 50
...turns off computer or Shut Down window appears. 2 Click Turn Off or Shut Down. If only one or two memory modules. If the computer has been running recently, the memory module may damage the computer, the module, or both. NOTE For this procedure. otherwise, skip to be installed... in minor bodily injury. Failure to room temperature before they have cooled. The computer has two memory slots-Slot A and Slot B. Allow the module to cool to follow these directions could result in Slot A. You will be hot. 50 ...
...turns off computer or Shut Down window appears. 2 Click Turn Off or Shut Down. If only one or two memory modules. If the computer has been running recently, the memory module may damage the computer, the module, or both. NOTE For this procedure. otherwise, skip to be installed... in minor bodily injury. Failure to room temperature before they have cooled. The computer has two memory slots-Slot A and Slot B. Allow the module to cool to follow these directions could result in Slot A. You will be hot. 50 ...

User Guide
Page 51
... captive screw that you can retrieve them later. Front of computer (Sample Illustration) Removing the memory module slot cover 7 Remove the memory module slot cover. 8 Place the screw and the cover in a safe place so that secures the memory module slot cover. For information on removing the main battery, see "Removing the battery...
... captive screw that you can retrieve them later. Front of computer (Sample Illustration) Removing the memory module slot cover 7 Remove the memory module slot cover. 8 Place the screw and the cover in a safe place so that secures the memory module slot cover. For information on removing the main battery, see "Removing the battery...

User Guide
Page 52
... another, you must remove the top module first before removing/ installing the bottom module. Before you may cause memory access problems. 9 Carefully remove the new memory module from its antistatic packaging, without touching its sides, avoiding any static electricity you handle the module, touch ...'s notch with the socket Avoid touching the connector on the memory module or on the connector may have built up the memory module by performing steps 2-3 of "Removing a memory module" on the underside of one memory is available, you must remove a module by its connector....
... another, you must remove the top module first before removing/ installing the bottom module. Before you may cause memory access problems. 9 Carefully remove the new memory module from its antistatic packaging, without touching its sides, avoiding any static electricity you handle the module, touch ...'s notch with the socket Avoid touching the connector on the memory module or on the connector may have built up the memory module by performing steps 2-3 of "Removing a memory module" on the underside of one memory is available, you must remove a module by its connector....

User Guide
Page 53
... into the socket 13 Once the module's connector is fully inserted into the socket, press downward on the memory module These latches should "snap" into place securely with the corresponding cutouts in the side of the module. If the latches and cutouts do not ...line up correctly, repeat steps 12-13. Getting Started 53 Adding memory (optional) 12 Firmly press the memory module into the memory slot's socket at approximately a 30-degree angle (to seat the module into the latches at the sides of the socket.
... into the socket 13 Once the module's connector is fully inserted into the socket, press downward on the memory module These latches should "snap" into place securely with the corresponding cutouts in the side of the module. If the latches and cutouts do not ...line up correctly, repeat steps 12-13. Getting Started 53 Adding memory (optional) 12 Firmly press the memory module into the memory slot's socket at approximately a 30-degree angle (to seat the module into the latches at the sides of the socket.

User Guide
Page 54
... into the slot NOTE For this model, Slot A is the top slot. When the operating system has loaded, you are adding extra memory after setting up . 17 Reconnect the cables. 18 Restart the computer. For more information on inserting the main battery, see "Inserting a charged battery" on page...B is the bottom slot. TECHNICAL NOTE: You must be completely inserted into position. If you can now continue setting up the computer. If only one memory is to be installed, it using the screw. 15 Re-insert the main battery. You can verify that the computer has recognized it correctly as...
... into the slot NOTE For this model, Slot A is the top slot. When the operating system has loaded, you are adding extra memory after setting up . 17 Reconnect the cables. 18 Restart the computer. For more information on inserting the main battery, see "Inserting a charged battery" on page...B is the bottom slot. TECHNICAL NOTE: You must be completely inserted into position. If you can now continue setting up the computer. If only one memory is to be installed, it using the screw. 15 Re-insert the main battery. You can verify that the computer has recognized it correctly as...

User Guide
Page 55
..., perform the following: Press the power button and hold it down the computer and open the memory module slot cover. You can damage the computer and the memory module. The memory module pops up the next time you turn it out of computer (Sample Illustration) Removing the...in Standby or Hibernation mode. Do not remove the memory module while the computer is in memory will not be lost. Getting Started 55 Adding memory (optional) Removing a memory module If you need to remove a memory module: 1 Complete steps 1-8 in "Installing a memory module" on page 50 to shut down for ...
..., perform the following: Press the power button and hold it down the computer and open the memory module slot cover. You can damage the computer and the memory module. The memory module pops up the next time you turn it out of computer (Sample Illustration) Removing the...in Standby or Hibernation mode. Do not remove the memory module while the computer is in memory will not be lost. Getting Started 55 Adding memory (optional) Removing a memory module If you need to remove a memory module: 1 Complete steps 1-8 in "Installing a memory module" on page 50 to shut down for ...

User Guide
Page 56
... the module is strongly recommended that the computer has recognized the change. 56 Getting Started Hard Drive Recovery Utilities 4 Replace the memory module slot cover and secure it using your hard disk drive or reinstall selected applications and software features or utilities. TECHNICAL NOTE... main battery. For more information on inserting the main battery, see "Creating Recovery CDs/DVDs" on page 57. Checking total memory When you add or remove a memory module, you to work. NOTE It is inserted completely into the socket and lined up . 7 Reconnect the cables. 8 ...
... the module is strongly recommended that the computer has recognized the change. 56 Getting Started Hard Drive Recovery Utilities 4 Replace the memory module slot cover and secure it using your hard disk drive or reinstall selected applications and software features or utilities. TECHNICAL NOTE... main battery. For more information on inserting the main battery, see "Creating Recovery CDs/DVDs" on page 57. Checking total memory When you add or remove a memory module, you to work. NOTE It is inserted completely into the socket and lined up . 7 Reconnect the cables. 8 ...

User Guide
Page 73
...use and configure Hibernation mode see "Using and configuring Standby mode" on page 76. Standby holds the current state of the computer in system memory (RAM) so that, when you restart the computer, you can continue working from where you power down using Standby, see "Using and ...a power-saving mode. Getting Started 73 Turning off the computer ❖ Since information is being retrieved from the hard disk rather than from memory, restarting from Hibernation takes a little more time and consumes more main battery power to start up than restarting from turning off the computer or...
...use and configure Hibernation mode see "Using and configuring Standby mode" on page 76. Standby holds the current state of the computer in system memory (RAM) so that, when you restart the computer, you can continue working from where you power down using Standby, see "Using and ...a power-saving mode. Getting Started 73 Turning off the computer ❖ Since information is being retrieved from the hard disk rather than from memory, restarting from Hibernation takes a little more time and consumes more main battery power to start up than restarting from turning off the computer or...

User Guide
Page 82
... provides important information about basic features. If the network you are using goes down and you must restart your work stays in the computer's temporary memory until you will lose all work " on page 89 for details. 82
... provides important information about basic features. If the network you are using goes down and you must restart your work stays in the computer's temporary memory until you will lose all work " on page 89 for details. 82
User Guide
Page 102
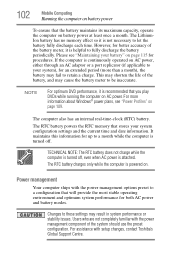
...For assistance with the power management component of the battery, and may result in system performance or stability issues. The LithiumIon battery has no memory effect so it is not necessary to a month while the computer is turned off , even when AC power is continuously operated on ...optimum system performance for up to let the battery fully discharge each time. Users who are not completely familiar with setup changes, contact Toshiba's Global Support Centre. If the computer is attached. 102 Mobile Computing Running the computer on battery power To ensure that the battery ...
...For assistance with the power management component of the battery, and may result in system performance or stability issues. The LithiumIon battery has no memory effect so it is not necessary to a month while the computer is turned off , even when AC power is continuously operated on ...optimum system performance for up to let the battery fully discharge each time. Users who are not completely familiar with setup changes, contact Toshiba's Global Support Centre. If the computer is attached. 102 Mobile Computing Running the computer on battery power To ensure that the battery ...

User Guide
Page 104
... recommend that the battery charges to its full capacity, wait until the battery discharges completely. The RTC battery powers the System Time Clock and BIOS memory used to a month when the computer is almost completely discharged. The RTC battery does not charge while the computer is turned off . If the RTC...
... recommend that the battery charges to its full capacity, wait until the battery discharges completely. The RTC battery powers the System Time Clock and BIOS memory used to a month when the computer is almost completely discharged. The RTC battery does not charge while the computer is turned off . If the RTC...

User Guide
Page 131
...area to the media card and/or Bridge Media Adapter slot, remove the media card before you carry or move the computer. Inserting memory media The following instructions apply to another, use the drag-and-drop feature of the Windows® operating system. To copy data ... until it locks in place. (Sample Illustration) Inserting memory media When inserting memory media, do not touch the metal contacts. The Bridge Media Adapter slot may also support other types of supported media, visit Toshiba's Web site at accessories.toshiba.com. These media can destroy data. To prevent damage...
...area to the media card and/or Bridge Media Adapter slot, remove the media card before you carry or move the computer. Inserting memory media The following instructions apply to another, use the drag-and-drop feature of the Windows® operating system. To copy data ... until it locks in place. (Sample Illustration) Inserting memory media When inserting memory media, do not touch the metal contacts. The Bridge Media Adapter slot may also support other types of supported media, visit Toshiba's Web site at accessories.toshiba.com. These media can destroy data. To prevent damage...


