

Owners Manual
Page 1
Others Maintenance Operations Preparations Before Using OWNER'S MANUAL DLP DATA PROJECTOR TDP-D1 TDP-D2 LAMP ON ON/STANDBY TEMP FAN INPUT MENU VOL.- AUTO KEYSTONE VOL.+ AUTO SET
Others Maintenance Operations Preparations Before Using OWNER'S MANUAL DLP DATA PROJECTOR TDP-D1 TDP-D2 LAMP ON ON/STANDBY TEMP FAN INPUT MENU VOL.- AUTO KEYSTONE VOL.+ AUTO SET

Owners Manual
Page 4
.... b) If liquid has been spilled, or objects have the same characteristics as an improper adjustment of the lamp rupturing, thoroughly clean the area around the projector and discard any edible items placed in damage and will often require extensive work by the manufacturer or have fallen into the product. Unauthorized substitutions...
.... b) If liquid has been spilled, or objects have the same characteristics as an improper adjustment of the lamp rupturing, thoroughly clean the area around the projector and discard any edible items placed in damage and will often require extensive work by the manufacturer or have fallen into the product. Unauthorized substitutions...

Owners Manual
Page 5
... extreme or sudden change in temperature, moisture may condense on the finish. DECLARATION OF CONFORMITY USA only TRADE NAME: DLP DATA PROJECTOR MODEL NAME: TDP-D1/ TDP-D2 RESPONSIBLE PARTY: TOSHIBA AMERICA INFORMATION SYSTEMS, INC. 9740 Irvine Blvd., Irvine, CA 92618-1697 U.S.A Phone: (949) 583-3000 This device... in temperature. Moisture Condensation Never operate this unit immediately after changing the fuse. When the unit is 220 to ship your projector. If cleaning with part 15 of 20° or more degrees. For maximum protection, repack the set as it from ...
... extreme or sudden change in temperature, moisture may condense on the finish. DECLARATION OF CONFORMITY USA only TRADE NAME: DLP DATA PROJECTOR MODEL NAME: TDP-D1/ TDP-D2 RESPONSIBLE PARTY: TOSHIBA AMERICA INFORMATION SYSTEMS, INC. 9740 Irvine Blvd., Irvine, CA 92618-1697 U.S.A Phone: (949) 583-3000 This device... in temperature. Moisture Condensation Never operate this unit immediately after changing the fuse. When the unit is 220 to ship your projector. If cleaning with part 15 of 20° or more degrees. For maximum protection, repack the set as it from ...

Owners Manual
Page 7
... : Projects expanded image (3) Focusing ring : Adjusts screen focus p.22 (4) Zooming lever : Adjusts screen size p.22 (5) Speaker : Plays audio (6) Control panel : Operates the projector p.14 (7) Air intake : Draws in air from which you purchased the product immediately. (1) (6) (11) (2) (7) (12) (3) (8) (4) (9) (5) (10) I ...destination. Follow the on -screen instructions to replace lamp p.32 (16) Tilt adjuster : Adjusts the projector's horizontal tilt p.22 13 Preparations Follow the on -screen instructions. Checking the package contents Please make sure...
... : Projects expanded image (3) Focusing ring : Adjusts screen focus p.22 (4) Zooming lever : Adjusts screen size p.22 (5) Speaker : Plays audio (6) Control panel : Operates the projector p.14 (7) Air intake : Draws in air from which you purchased the product immediately. (1) (6) (11) (2) (7) (12) (3) (8) (4) (9) (5) (10) I ...destination. Follow the on -screen instructions to replace lamp p.32 (16) Tilt adjuster : Adjusts the projector's horizontal tilt p.22 13 Preparations Follow the on -screen instructions. Checking the package contents Please make sure...

Owners Manual
Page 8
...terminal Input audio signals from a computer or video equipment. (4) AUDIO OUT terminal Outputs audio signals adjusted volume by a projector (5) VIDEO terminal Input video signals from video equipment. (6) S-VIDEO terminal Input S video signals from video equipment. (7) CONTROL terminal When operating the... projector via a computer, connect this manual, buttons are referred to as follows: Selection button ⇒ ; p.30 15 Preparations p....
...terminal Input audio signals from a computer or video equipment. (4) AUDIO OUT terminal Outputs audio signals adjusted volume by a projector (5) VIDEO terminal Input video signals from video equipment. (6) S-VIDEO terminal Input S video signals from video equipment. (7) CONTROL terminal When operating the... projector via a computer, connect this manual, buttons are referred to as follows: Selection button ⇒ ; p.30 15 Preparations p....

Owners Manual
Page 9
... and minus ends of the remote control. b (cm) 9.0 11.0 14.6 19.5 24.4 36.1 43.9 "a" is exposed to mount the projector on a ceiling requires special ceiling brackets (sold separately) and specialized knowledge. Floor-mounted front projection Floor-mounted rear projection Ceiling-mounted front projection Ceiling... or fluorescent lighting. • Do not drop or bang. • Do not leave in accordance with new ones. Mounting the projector on the ceiling, be placed in an accident. Preparing and using for full-size picture and no keystone adjustment) Screen As seen from...
... and minus ends of the remote control. b (cm) 9.0 11.0 14.6 19.5 24.4 36.1 43.9 "a" is exposed to mount the projector on a ceiling requires special ceiling brackets (sold separately) and specialized knowledge. Floor-mounted front projection Floor-mounted rear projection Ceiling-mounted front projection Ceiling... or fluorescent lighting. • Do not drop or bang. • Do not leave in accordance with new ones. Mounting the projector on the ceiling, be placed in an accident. Preparing and using for full-size picture and no keystone adjustment) Screen As seen from...

Owners Manual
Page 10
...OUT S-VIDEO CONTROL (Supplied) Power cord connector I Connecting the power cord 1 Insert the power cord connector into the AC IN socket of the projector. 2 Insert the power cord plug into the lens during operation. Audio system, etc. MENU VOL.+ AUTO KEYSTONE AUTO SET Remote Control ON/... for several seconds: ON, TEMP, and LAMP. Connection Before connection • Read the owner's manual of the device to be connected to the projector. • Some types of computer cannot be exchanged.) Computer DVD player VCR To audio output To USB port p.30 To Y/CB/CR output Green...
...OUT S-VIDEO CONTROL (Supplied) Power cord connector I Connecting the power cord 1 Insert the power cord connector into the AC IN socket of the projector. 2 Insert the power cord plug into the lens during operation. Audio system, etc. MENU VOL.+ AUTO KEYSTONE AUTO SET Remote Control ON/... for several seconds: ON, TEMP, and LAMP. Connection Before connection • Read the owner's manual of the device to be connected to the projector. • Some types of computer cannot be exchanged.) Computer DVD player VCR To audio output To USB port p.30 To Y/CB/CR output Green...

Owners Manual
Page 11
...adjust according to step 6 .) q Use the buttons to find and designate this state. C In standby mode Note • The projector consumes about 10 minutes) to operate for the first time after the message disappears.) 2 Press the ON/STANDBY button again. Unplugging the... Español Spanish Português ..........Portuguese Japanese .......Chinese (simplified) .......Chinese (traditional) Korean • After the first time the projector is projected. Click the Browse button of inputs appears on the computer when connecting a computer. (The supplied CD-ROM contains a driver...
...adjust according to step 6 .) q Use the buttons to find and designate this state. C In standby mode Note • The projector consumes about 10 minutes) to operate for the first time after the message disappears.) 2 Press the ON/STANDBY button again. Unplugging the... Español Spanish Português ..........Portuguese Japanese .......Chinese (simplified) .......Chinese (traditional) Korean • After the first time the projector is projected. Click the Browse button of inputs appears on the computer when connecting a computer. (The supplied CD-ROM contains a driver...

Owners Manual
Page 12
...Phase Frequency Adjust with to turn off the LCD display, see the owner's manual of your computer. • If a signal not supported by the projector is input, the icon will appear. • If a no signal is made using simple operations. This is characteristic of a lamp, and is ...not malfunction. (The lifetime of the lamp depends on the panel. If this projector (XGA) will be adjusted when an audio signal is recommended that these are not malfunctions. • Although this projector supports a wide range of RGB signals p.36 , any resolutions not supported by this happens,...
...Phase Frequency Adjust with to turn off the LCD display, see the owner's manual of your computer. • If a signal not supported by the projector is input, the icon will appear. • If a no signal is made using simple operations. This is characteristic of a lamp, and is ...not malfunction. (The lifetime of the lamp depends on the panel. If this projector (XGA) will be adjusted when an audio signal is recommended that these are not malfunctions. • Although this projector supports a wide range of RGB signals p.36 , any resolutions not supported by this happens,...

Owners Manual
Page 13
...The picture and sound are cut off the picture and sound temporarily (Mute) When you want to temporarily project the images of correcting this projector's images and sound can be frozen. The Mute function is paused. The picture is released when pressing the MUTE button again. The Freeze ...effect. • Operating any other equipment. Notes • The icon will release the freeze. • Even if an image is frozen on the projector, it to its original size.) Remote Control CLICK L-CLI 3 Press and hold down the move the enlarged area. DRAG 1 Press the AUTO KEYSTONE button...
...The picture and sound are cut off the picture and sound temporarily (Mute) When you want to temporarily project the images of correcting this projector's images and sound can be frozen. The Mute function is paused. The picture is released when pressing the MUTE button again. The Freeze ...effect. • Operating any other equipment. Notes • The icon will release the freeze. • Even if an image is frozen on the projector, it to its original size.) Remote Control CLICK L-CLI 3 Press and hold down the move the enlarged area. DRAG 1 Press the AUTO KEYSTONE button...

Owners Manual
Page 14
...Operations Using the menus You can be used as P (positive) or N (negative) for TDP-D2: TDPLD2) (sold separately) prepared. 5: [Version] shows the version of the projector's internal control program. Adjustments & Settings of selected category. These marks signify the items can ... information will not be refreshed if the status changes. I Displaying Information [Status display] This displays information about getting a replacement lamp (for TDP-D1: TDPLD1 and for [H/V]. 4: Displays [Lamp time] as a reference. Select a Category Select a category by using . Image adjustment ...
...Operations Using the menus You can be used as P (positive) or N (negative) for TDP-D2: TDPLD2) (sold separately) prepared. 5: [Version] shows the version of the projector's internal control program. Adjustments & Settings of selected category. These marks signify the items can ... information will not be refreshed if the status changes. I Displaying Information [Status display] This displays information about getting a replacement lamp (for TDP-D1: TDPLD1 and for [H/V]. 4: Displays [Lamp time] as a reference. Select a Category Select a category by using . Image adjustment ...

Owners Manual
Page 15
....43. 2: Up/down until turning off the power: Off (not turned off Power on Description Set projection mode in its original position, place the projector on is set to Auto, press the ON/STANDBY button to turn off . I The default setting menu This menu shows placement status and other menus... with Placement Style p.21 (Placed on floor) (Rear) (Hung from ceiling) (Back hung from ceiling) Set the time to wait after a power outage, the projector power will not appear on the power when the ON/STANDBY button is pressed (Manual), or the main power switch is used Standard Economy Note...
....43. 2: Up/down until turning off the power: Off (not turned off Power on Description Set projection mode in its original position, place the projector on is set to Auto, press the ON/STANDBY button to turn off . I The default setting menu This menu shows placement status and other menus... with Placement Style p.21 (Placed on floor) (Rear) (Hung from ceiling) (Back hung from ceiling) Set the time to wait after a power outage, the projector power will not appear on the power when the ON/STANDBY button is pressed (Manual), or the main power switch is used Standard Economy Note...

Owners Manual
Page 16
...of a ceiling-mounted unit from your dealer for extended periods, images will be operated using the projector, the lamp will appear dark, and the lamp could burn out. Next, move , then ...A computer can support USB1.1. CAUTION • Request cleaning and maintenance of use the specified lamp (for TDP-D1: TDPLD1 and it for the lamp to 3 years. However, please note that cooling fans should break...the cloth in a neutral detergent diluted in the direction that is recommended that Toshiba does not the guarantee operation of file Use the PAGE UP and PAGE DOWN buttons to a...
...of a ceiling-mounted unit from your dealer for extended periods, images will be operated using the projector, the lamp will appear dark, and the lamp could burn out. Next, move , then ...A computer can support USB1.1. CAUTION • Request cleaning and maintenance of use the specified lamp (for TDP-D1: TDPLD1 and it for the lamp to 3 years. However, please note that cooling fans should break...the cloth in a neutral detergent diluted in the direction that is recommended that Toshiba does not the guarantee operation of file Use the PAGE UP and PAGE DOWN buttons to a...
Owners Manual
Page 17
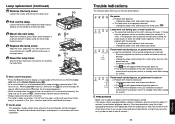
... Unplugging the power cord repeatedly when the temperature is high will appear before cooling is complete, give the lamp time (about 1 minute then the projector returns to standby mode after cooling for a short while, then turn the power back on , either the lamp needs replacing, or there is ..., the icon and a message will appear before plugging it . (Dirt, jolts, scratches and the like could break the lamp.) Used Lamps This projector's lamps contain trace amounts of internal abnormalities. If the lamp overheats it in, then screw in the screw loosened in . Loosen the screws and ...
... Unplugging the power cord repeatedly when the temperature is high will appear before cooling is complete, give the lamp time (about 1 minute then the projector returns to standby mode after cooling for a short while, then turn the power back on , either the lamp needs replacing, or there is ..., the icon and a message will appear before plugging it . (Dirt, jolts, scratches and the like could break the lamp.) Used Lamps This projector's lamps contain trace amounts of internal abnormalities. If the lamp overheats it in, then screw in the screw loosened in . Loosen the screws and ...

Owners Manual
Page 18
...the color, tint, R-level, G-level, or B-level adjustments off ? p.16 • Is the remote control being used within the projector's supported range? Before calling service personnel If you think something generating an abnormal video signal, for usage environment Temp: 0°C to AUDIO... 75 Ω AUDIO IN terminal 3.5 mm dia. Is it connected to 70% Display system DLPTM (1-tip DMDTM) Native resolution 1,024H × 768V XGA Lens Zoom lens F=2.4-2.6 f=24.19-30.65 mm Lamp High-pressure mercury lamp Projection screen size 37 - 180 inches Projection distance 1.5 - 6 m ...
...the color, tint, R-level, G-level, or B-level adjustments off ? p.16 • Is the remote control being used within the projector's supported range? Before calling service personnel If you think something generating an abnormal video signal, for usage environment Temp: 0°C to AUDIO... 75 Ω AUDIO IN terminal 3.5 mm dia. Is it connected to 70% Display system DLPTM (1-tip DMDTM) Native resolution 1,024H × 768V XGA Lens Zoom lens F=2.4-2.6 f=24.19-30.65 mm Lamp High-pressure mercury lamp Projection screen size 37 - 180 inches Projection distance 1.5 - 6 m ...

Owners Manual
Page 19
... DDC data 13 Horizontal sync signal 14 Vertical sync signal 15 DDC clock GND (PB ∗ Do not connect anything. 37 Others Please adjust the projector if this reason, some information may be compressed. p.23 ) Resolution 720 x 400 640 x 480 800 x 600 832 x 624 1024 x 768 1152 x .../PR signals: 1.0V (p-p) 75 Ω 0.7V (p-p) 75 Ω Pin Pin description No. Specifications (Continued) I Pin assignment of supported signals (RGB signals) This projector supports the following RGB signals. For this happens. (Press the AUTO SET button, and adjust automatically or manually.
... DDC data 13 Horizontal sync signal 14 Vertical sync signal 15 DDC clock GND (PB ∗ Do not connect anything. 37 Others Please adjust the projector if this reason, some information may be compressed. p.23 ) Resolution 720 x 400 640 x 480 800 x 600 832 x 624 1024 x 768 1152 x .../PR signals: 1.0V (p-p) 75 Ω 0.7V (p-p) 75 Ω Pin Pin description No. Specifications (Continued) I Pin assignment of supported signals (RGB signals) This projector supports the following RGB signals. For this happens. (Press the AUTO SET button, and adjust automatically or manually.

Owners Manual
Page 20
...video input select Command IN1 IN2 IN3 IN4 Note • Contact your dealer for the replies from the projector before sending the next command. Succeed ACK (06h) ESC (1Bh) .... for TDP-D1: TDPLD1, for improvements, etc. 38 I CONTROL terminal G Pin assignment 12 4 3 5 ... CTS DSR GND RTS N.C TXD N.C Description Receiving data Consent to send Data set ready Signal ground Request to change without notice for TDP-D2: TDPLD2 Note • Design, specifications, etc. For input commands, only ASCII-compliant all-uppercase alphanumeric characters supported. subject to send ...
...video input select Command IN1 IN2 IN3 IN4 Note • Contact your dealer for the replies from the projector before sending the next command. Succeed ACK (06h) ESC (1Bh) .... for TDP-D1: TDPLD1, for improvements, etc. 38 I CONTROL terminal G Pin assignment 12 4 3 5 ... CTS DSR GND RTS N.C TXD N.C Description Receiving data Consent to send Data set ready Signal ground Request to change without notice for TDP-D2: TDPLD2 Note • Design, specifications, etc. For input commands, only ASCII-compliant all-uppercase alphanumeric characters supported. subject to send ...


