
User Guide
Page 71
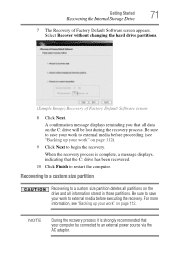
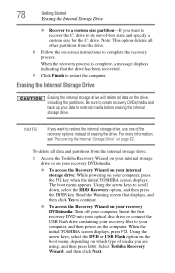
Select Recover without changing the hard drive partitions. (Sample Image) Recovery of Factory Default Software screen appears. NOTE During the recovery process it is complete, a message displays, indicating that the C: drive has been recovered. 10 Click Finish ... Started 71 Recovering the Internal Storage Drive 7 The Recovery of Factory Default Software screen 8 Click Next. Be sure to save your work to begin the recovery. Recovering to a custom size partition Recovering to a custom size partition deletes all partitions on the drive and all data on the C: drive will...
Select Recover without changing the hard drive partitions. (Sample Image) Recovery of Factory Default Software screen appears. NOTE During the recovery process it is complete, a message displays, indicating that the C: drive has been recovered. 10 Click Finish ... Started 71 Recovering the Internal Storage Drive 7 The Recovery of Factory Default Software screen 8 Click Next. Be sure to save your work to begin the recovery. Recovering to a custom size partition Recovering to a custom size partition deletes all partitions on the drive and all data on the C: drive will...
User Guide
Page 72
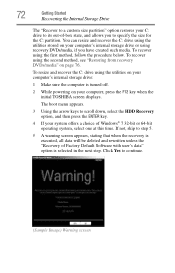
...not, skip to continue. (Sample Image) Warning screen The boot menu appears. 3 Using the arrow keys to scroll down, select the HDD Recovery option, and then press the ENTER key. 4 If your computer, press the F12 key when the initial TOSHIBA screen displays. To resize and recover the C: drive... using recovery DVDs/media, if you to specify the size for the C: partition. Click Yes to step 5. 5 A warning screen appears, stating that when the recovery is executed, all data will ...
...not, skip to continue. (Sample Image) Warning screen The boot menu appears. 3 Using the arrow keys to scroll down, select the HDD Recovery option, and then press the ENTER key. 4 If your computer, press the F12 key when the initial TOSHIBA screen displays. To resize and recover the C: drive... using recovery DVDs/media, if you to specify the size for the C: partition. Click Yes to step 5. 5 A warning screen appears, stating that when the recovery is executed, all data will ...
User Guide
Page 73
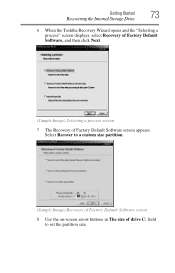
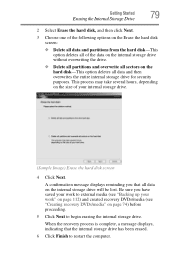
Getting Started 73 Recovering the Internal Storage Drive 6 When the Toshiba Recovery Wizard opens and the "Selecting a process" screen displays, select Recovery of Factory Default Software, and then click Next. (Sample Image) Selecting a process screen 7 The Recovery of drive C: field to a custom size partition. (Sample Image) Recovery of Factory Default Software screen 8 Use the on-screen arrow buttons in The size of Factory Default Software screen appears. Select Recover to set the partition size.
Getting Started 73 Recovering the Internal Storage Drive 6 When the Toshiba Recovery Wizard opens and the "Selecting a process" screen displays, select Recovery of Factory Default Software, and then click Next. (Sample Image) Selecting a process screen 7 The Recovery of drive C: field to a custom size partition. (Sample Image) Recovery of Factory Default Software screen 8 Use the on-screen arrow buttons in The size of Factory Default Software screen appears. Select Recover to set the partition size.
User Guide
Page 76
... so that your system from recovery DVDs/media The recovery process deletes information stored on -screen prompts to external media before executing the recovery (see "Recovering the Internal Storage Drive" on... the discs during recovery. NOTE If you can restore your system to a custom size partition For more information on these options, see "Backing up your recovery DVDs/media.... 76 Getting Started Recovering the Internal Storage Drive 5 Click the Create button in the TOSHIBA Recovery Media Creator utility dialog box. 6 Follow the on the internal storage drive. Restoring...
... so that your system from recovery DVDs/media The recovery process deletes information stored on -screen prompts to external media before executing the recovery (see "Recovering the Internal Storage Drive" on... the discs during recovery. NOTE If you can restore your system to a custom size partition For more information on these options, see "Backing up your recovery DVDs/media.... 76 Getting Started Recovering the Internal Storage Drive 5 Click the Create button in the TOSHIBA Recovery Media Creator utility dialog box. 6 Follow the on the internal storage drive. Restoring...
User Guide
Page 78
...more information, see "Recovering the Internal Storage Drive" on -screen instructions to complete the recovery process. Select Toshiba Recovery Wizard, and then click Next. 78 Getting Started Erasing the Internal Storage Drive ❖ Recover to a custom size partition-If you are using, and then press Enter. To ...to restore the internal storage drive, use one of the recovery options instead of -box state and specify a custom size for the C: drive. When the initial TOSHIBA screen displays, press F12. Using the arrow keys, select the DVD or USB Flash option on the boot menu, depending...
...more information, see "Recovering the Internal Storage Drive" on -screen instructions to complete the recovery process. Select Toshiba Recovery Wizard, and then click Next. 78 Getting Started Erasing the Internal Storage Drive ❖ Recover to a custom size partition-If you are using, and then press Enter. To ...to restore the internal storage drive, use one of the recovery options instead of -box state and specify a custom size for the C: drive. When the initial TOSHIBA screen displays, press F12. Using the arrow keys, select the DVD or USB Flash option on the boot menu, depending...
User Guide
Page 79
...internal storage drive has been erased. 6 Click Finish to begin erasing the internal storage drive. This process may take several hours, depending on the size of the data on the internal storage drive without overwriting the drive. ❖ Delete all partitions and overwrite all sectors on page 74) before ...Internal Storage Drive 2 Select Erase the hard disk, and then click Next. 3 Choose one of the following options on the Erase the hard disk screen: ❖ Delete all data and partitions from the hard disk-This option deletes all of your work" on page 112) and created recovery DVDs/...
...internal storage drive has been erased. 6 Click Finish to begin erasing the internal storage drive. This process may take several hours, depending on the size of the data on the internal storage drive without overwriting the drive. ❖ Delete all partitions and overwrite all sectors on page 74) before ...Internal Storage Drive 2 Select Erase the hard disk, and then click Next. 3 Choose one of the following options on the Erase the hard disk screen: ❖ Delete all data and partitions from the hard disk-This option deletes all of your work" on page 112) and created recovery DVDs/...
User Guide
Page 104
cursor positioning keys; Most of the entire screen, press the Fn + PRTSC key. A standard full-size keyboard includes two Enter, Ctrl, and Alt keys; and a numeric keypad. To capture only the active window displayed, press Fn + ALT while simultaneously ...Fn key, you to the P740 series. Although your keyboard emulate a full-size keyboard NOTE This section applies to emulate a full-size keyboard. 104 Learning the Basics Using the keyboard NOTE P750, P770 series keyboards To capture a print screen of the time, this does not matter. Making your computer's keyboard layout is...
cursor positioning keys; Most of the entire screen, press the Fn + PRTSC key. A standard full-size keyboard includes two Enter, Ctrl, and Alt keys; and a numeric keypad. To capture only the active window displayed, press Fn + ALT while simultaneously ...Fn key, you to the P740 series. Although your keyboard emulate a full-size keyboard NOTE This section applies to emulate a full-size keyboard. 104 Learning the Basics Using the keyboard NOTE P750, P770 series keyboards To capture a print screen of the time, this does not matter. Making your computer's keyboard layout is...
User Guide
Page 190
... the secondary control button, then clicking Personalize. To change the settings for an external monitor. Reduce the size of these components individually. This opens the Personalization window. If this , press Fn and F5 simultaneously (once). If you through the display options. The screen does not look correct. Choose a theme for your hardware.
... the secondary control button, then clicking Personalize. To change the settings for an external monitor. Reduce the size of these components individually. This opens the Personalization window. If this , press Fn and F5 simultaneously (once). If you through the display options. The screen does not look correct. Choose a theme for your hardware.
User Guide
Page 209
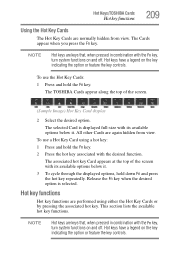
... Select the desired option. Release the Fn key when the desired option is displayed full-size with its available options below it . 3 To cycle through the displayed options, hold ... in combination with the desired function. Hot keys have a legend on and off . Hot Keys/TOSHIBA Cards Hot key functions 209 Using the Hot Key Cards The Hot Key Cards are again hidden from...that , when pressed in combination with its available options below it . The TOSHIBA Cards appear along the top of the screen with the Fn key, turn system functions on the key indicating the option ...
... Select the desired option. Release the Fn key when the desired option is displayed full-size with its available options below it . 3 To cycle through the displayed options, hold ... in combination with the desired function. Hot keys have a legend on and off . Hot Keys/TOSHIBA Cards Hot key functions 209 Using the Hot Key Cards The Hot Key Cards are again hidden from...that , when pressed in combination with its available options below it . The TOSHIBA Cards appear along the top of the screen with the Fn key, turn system functions on the key indicating the option ...
User Guide
Page 234
...for your computer's main memory. The smallest dot that can be produced on a screen or printer. When capitalized, refers to a standard that moves on the screen. The shape and purpose of a file include the file's type, size, and creation date. For example, the properties of the pointer varies depending on ...the program you are using and what you turn off your finger across the touch pad or move the pointer on the screen when you to a network or a peripheral...
...for your computer's main memory. The smallest dot that can be produced on a screen or printer. When capitalized, refers to a standard that moves on the screen. The shape and purpose of a file include the file's type, size, and creation date. For example, the properties of the pointer varies depending on ...the program you are using and what you turn off your finger across the touch pad or move the pointer on the screen when you to a network or a peripheral...


