
User Manual
Page 27
... display devices 64 Directing the display output when you turn on the computer 64 Adjusting the quality of the external display......66 Using an external keyboard 66 Using a mouse 66 Connecting a printer 67 Setting up a printer 68 Connecting an optional external diskette drive........69 Turning off the computer 70 Options for...
... display devices 64 Directing the display output when you turn on the computer 64 Adjusting the quality of the external display......66 Using an external keyboard 66 Using a mouse 66 Connecting a printer 67 Setting up a printer 68 Connecting an optional external diskette drive........69 Turning off the computer 70 Options for...
User Manual
Page 28
28 Contents Chapter 2: Learning the Basics 81 Computing tips 81 Using the keyboard 83 Character keys 83 Making your keyboard emulate a full-size keyboard 84 Ctrl, Fn, and Alt keys 84 Function keys 85 Windows special keys 85 Overlay keys 85 Using the overlay to type numeric data 86 ... 101 Creating a CD 101 Removing a disc with the computer on...........102 Removing a disc with the computer off ..........103 Caring for CD or DVD Discs 103 Toshiba's online resources 104
28 Contents Chapter 2: Learning the Basics 81 Computing tips 81 Using the keyboard 83 Character keys 83 Making your keyboard emulate a full-size keyboard 84 Ctrl, Fn, and Alt keys 84 Function keys 85 Windows special keys 85 Overlay keys 85 Using the overlay to type numeric data 86 ... 101 Creating a CD 101 Removing a disc with the computer on...........102 Removing a disc with the computer off ..........103 Caring for CD or DVD Discs 103 Toshiba's online resources 104
User Manual
Page 31
...assign a key 157 Using the keyboard or pointing device to assign a key 157 Viewing existing key assignments 159 Changing or removing existing key assignments 159 TOSHIBA Hotkey Utility 160 TOSHIBA SD™ Memory Card Format Utility .........160 TOSHIBA Power Management 162 Preset Power ...Profiles 163 Quickly creating a new power profile 163 Customizing a power profile 164 Mouse Utility 164 TOSHIBA HW Setup 165 TOSHIBA Zooming Utility 167 TOSHIBA Button Controls 169 CD/DVD Drive Acoustic Silencer 170 Fingerprint Authentication Utility 171 Fingerprint Enrollment 171 Fingerprint...
...assign a key 157 Using the keyboard or pointing device to assign a key 157 Viewing existing key assignments 159 Changing or removing existing key assignments 159 TOSHIBA Hotkey Utility 160 TOSHIBA SD™ Memory Card Format Utility .........160 TOSHIBA Power Management 162 Preset Power ...Profiles 163 Quickly creating a new power profile 163 Customizing a power profile 164 Mouse Utility 164 TOSHIBA HW Setup 165 TOSHIBA Zooming Utility 167 TOSHIBA Button Controls 169 CD/DVD Drive Acoustic Silencer 170 Fingerprint Authentication Utility 171 Fingerprint Enrollment 171 Fingerprint...
User Manual
Page 32
... hardware conflicts on your own .....191 Fixing a problem with Device Manager ...........192 Memory problems 194 Power and the batteries 195 Keyboard problems 197 Display problems 198 Disk drive problems 200 CD-RW/DVD-ROM or multi-function drive problems 203 Sound system problems ...216 Data and system configuration backup in Windows XP 217 If you need further assistance 223 Before you contact Toshiba 223 Contacting Toshiba 224 Other Toshiba Internet Web sites 225 Toshiba's worldwide offices 225 Appendix A: Hot Keys 227 Volume Mute 227 Password security 228 Without a password 228...
... hardware conflicts on your own .....191 Fixing a problem with Device Manager ...........192 Memory problems 194 Power and the batteries 195 Keyboard problems 197 Display problems 198 Disk drive problems 200 CD-RW/DVD-ROM or multi-function drive problems 203 Sound system problems ...216 Data and system configuration backup in Windows XP 217 If you need further assistance 223 Before you contact Toshiba 223 Contacting Toshiba 224 Other Toshiba Internet Web sites 225 Toshiba's worldwide offices 225 Appendix A: Hot Keys 227 Volume Mute 227 Password security 228 Without a password 228...
User Manual
Page 33
... 232 Display modes 233 Display brightness 233 Disabling or enabling the TouchPad 234 Zooming applications in/out 234 Keyboard hot keys 235 Appendix B: Power Cord/Cable Connectors 236 Appendix C: Using ConfigFree™ with your Toshiba Computer 237 Getting Started 238 Starting ConfigFree 238 ConfigFree Utilities 240 Connectivity Doctor 240 Search for Wireless...
... 232 Display modes 233 Display brightness 233 Disabling or enabling the TouchPad 234 Zooming applications in/out 234 Keyboard hot keys 235 Appendix B: Power Cord/Cable Connectors 236 Appendix C: Using ConfigFree™ with your Toshiba Computer 237 Getting Started 238 Starting ConfigFree 238 ConfigFree Utilities 240 Connectivity Doctor 240 Search for Wireless...
User Manual
Page 43
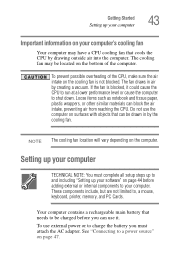
... air from reaching the CPU. Do not use it could cause the CPU to run at a lower performance level or cause the computer to , a mouse, keyboard, printer, memory, and PC Cards. These components include, but are not limited to shut down. Getting Started Setting up your computer 43 Important information on...
... air from reaching the CPU. Do not use it could cause the CPU to run at a lower performance level or cause the computer to , a mouse, keyboard, printer, memory, and PC Cards. These components include, but are not limited to shut down. Getting Started Setting up your computer 43 Important information on...
User Manual
Page 46
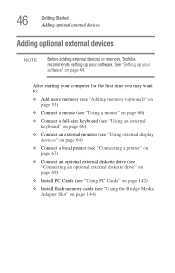
... on page 144) 46 Getting Started Adding optional external devices Adding optional external devices NOTE Before adding external devices or memory, Toshiba recommends setting up your software. After starting your computer for the first time you may want to: ❖ Add more memory (...Adding memory (optional)" on page 53) ❖ Connect a mouse (see "Using a mouse" on page 66) ❖ Connect a full-size keyboard (see "Using an external keyboard" on page 66) ❖ Connect an external monitor (see "Using external display devices" on page 64) ❖ Connect a local printer (see...
... on page 144) 46 Getting Started Adding optional external devices Adding optional external devices NOTE Before adding external devices or memory, Toshiba recommends setting up your software. After starting your computer for the first time you may want to: ❖ Add more memory (...Adding memory (optional)" on page 53) ❖ Connect a mouse (see "Using a mouse" on page 66) ❖ Connect a full-size keyboard (see "Using an external keyboard" on page 66) ❖ Connect an external monitor (see "Using external display devices" on page 64) ❖ Connect a local printer (see...
User Manual
Page 61
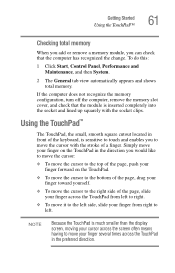
... the TouchPad in the preferred direction. NOTE Because the TouchPad is inserted completely into the socket and lined up squarely with the stroke of the keyboard, is sensitive to touch and enables you to left side, slide your finger from left to right. ❖ To move it to the left . If...
... the TouchPad in the preferred direction. NOTE Because the TouchPad is inserted completely into the socket and lined up squarely with the stroke of the keyboard, is sensitive to touch and enables you to left side, slide your finger from left to right. ❖ To move it to the left . If...

User Manual
Page 66
... a USB mouse to a USB port on to the upper-right side of the external display device. The computer's USB ports support any USBcompatible keyboard. See your system, the mouse cursor may need to its original position. NOTE After logging on your computer. The external display device must set...to your computer. See the video device documentation for more information. TECHNICAL NOTE: To use a standard mouse, you may move to your Toshiba sales representative for additional configuration steps. Using a mouse If you prefer to use one to match the resolution of the screen.
... a USB mouse to a USB port on to the upper-right side of the external display device. The computer's USB ports support any USBcompatible keyboard. See your system, the mouse cursor may need to its original position. NOTE After logging on your computer. The external display device must set...to your computer. See the video device documentation for more information. TECHNICAL NOTE: To use a standard mouse, you may move to your Toshiba sales representative for additional configuration steps. Using a mouse If you prefer to use one to match the resolution of the screen.
User Manual
Page 79
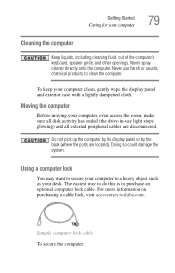
... wipe the display panel and exterior case with a lightly dampened cloth. For more information on purchasing a cable lock, visit accessories.toshiba.com. Sample computer lock cable To secure the computer: To keep your computer 79 Cleaning the computer Keep liquids, including cleaning fluid..., out of the computer's keyboard, speaker grille, and other openings. Never use light stops glowing) and all external peripheral cables are located). Never spray cleaner directly...
... wipe the display panel and exterior case with a lightly dampened cloth. For more information on purchasing a cable lock, visit accessories.toshiba.com. Sample computer lock cable To secure the computer: To keep your computer 79 Cleaning the computer Keep liquids, including cleaning fluid..., out of the computer's keyboard, speaker grille, and other openings. Never use light stops glowing) and all external peripheral cables are located). Never spray cleaner directly...
User Manual
Page 83
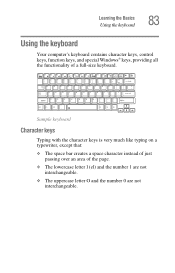
Learning the Basics Using the keyboard 83 Using the keyboard Your computer's keyboard contains character keys, control keys, function keys, and special Windows® keys, providing all the functionality of the page. ❖ The lowercase letter l (el)... and the number 1 are not interchangeable. ❖ The uppercase letter O and the number 0 are not interchangeable. Sample keyboard Character keys Typing with the character keys is very much like typing on a typewriter, except that: ❖ The space bar creates a space character instead of...
Learning the Basics Using the keyboard 83 Using the keyboard Your computer's keyboard contains character keys, control keys, function keys, and special Windows® keys, providing all the functionality of the page. ❖ The lowercase letter l (el)... and the number 1 are not interchangeable. ❖ The uppercase letter O and the number 0 are not interchangeable. Sample keyboard Character keys Typing with the character keys is very much like typing on a typewriter, except that: ❖ The space bar creates a space character instead of...

User Manual
Page 84
... positioning keys; and a numeric keypad. Most of the enhanced keyboard. For more information, see your computer's keyboard layout is compatible with one Ctrl key. 84 Learning the Basics Using the keyboard Making your keyboard emulate a full-size keyboard Although your program documentation. editing keys; Pressing the Fn key...assign separate functions to the right and left Ctrl and Alt keys, or to emulate a full-size keyboard. Using the Fn key, you are using. Your computer's keyboard has only one Enter and one of the specially marked keys allows you to the regular and numeric...
... positioning keys; and a numeric keypad. Most of the enhanced keyboard. For more information, see your computer's keyboard layout is compatible with one Ctrl key. 84 Learning the Basics Using the keyboard Making your keyboard emulate a full-size keyboard Although your program documentation. editing keys; Pressing the Fn key...assign separate functions to the right and left Ctrl and Alt keys, or to emulate a full-size keyboard. Using the Fn key, you are using. Your computer's keyboard has only one Enter and one of the specially marked keys allows you to the regular and numeric...

User Manual
Page 85
...you enter numeric data or control the cursor as the secondary mouse button Overlay keys The keys with gray numbers and symbols on a desktop computer's keyboard. For more information, see "Fn-esse®" on page 155, or "Hot Keys" on the computer. Windows special keys Windows key Application... key Sample Windows special keys Your computer's keyboard has two keys that have special functions in combination with the Fn key, function keys marked with icons execute specific functions on page 227. ...
...you enter numeric data or control the cursor as the secondary mouse button Overlay keys The keys with gray numbers and symbols on a desktop computer's keyboard. For more information, see "Fn-esse®" on page 155, or "Hot Keys" on the computer. Windows special keys Windows key Application... key Sample Windows special keys Your computer's keyboard has two keys that have special functions in combination with the Fn key, function keys marked with icons execute specific functions on page 227. ...

User Manual
Page 86
... control keys when the numeric overlay is on: ❖ Press and hold down Shift while you type the letters. 86 Learning the Basics Using the keyboard Sample numeric and cursor control overlay Using the overlay to type alphabetic characters while the numeric overlay is on. To turn the numeric overlay on...
... control keys when the numeric overlay is on: ❖ Press and hold down Shift while you type the letters. 86 Learning the Basics Using the keyboard Sample numeric and cursor control overlay Using the overlay to type alphabetic characters while the numeric overlay is on. To turn the numeric overlay on...
User Manual
Page 87
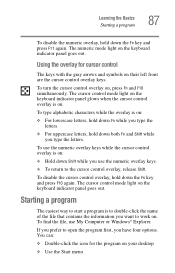
... To use the numeric overlay keys while the cursor control overlay is on , press Fn and F10 simultaneously. The cursor control mode light on the keyboard indicator panel goes out. If you prefer to work on your desktop ❖ Use the Start menu Learning the Basics Starting a program 87 To ...❖ For uppercase letters, hold down Shift while you want to open the program first, you type the letters. The numeric mode light on the keyboard indicator panel goes out. To find the file, use the numeric overlay keys. ❖ To return to double-click the name of the file that...
... To use the numeric overlay keys while the cursor control overlay is on , press Fn and F10 simultaneously. The cursor control mode light on the keyboard indicator panel goes out. If you prefer to work on your desktop ❖ Use the Start menu Learning the Basics Starting a program 87 To ...❖ For uppercase letters, hold down Shift while you want to open the program first, you type the letters. The numeric mode light on the keyboard indicator panel goes out. To find the file, use the numeric overlay keys. ❖ To return to double-click the name of the file that...
User Manual
Page 92
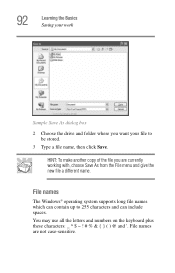
You may use all the letters and numbers on the keyboard plus these characters and '. HINT: To make another copy of the file you want your work Sample Save As dialog box 2 Choose the drive and folder where you are not case-sensitive. File names are currently working with, choose Save As from the File menu and give the new file a different name. 92 Learning the Basics Saving your file to 255 characters and can contain up to be stored. 3 Type a file name, then click Save. File names The Windows® operating system supports long file names which can include spaces.
You may use all the letters and numbers on the keyboard plus these characters and '. HINT: To make another copy of the file you want your work Sample Save As dialog box 2 Choose the drive and folder where you are not case-sensitive. File names are currently working with, choose Save As from the File menu and give the new file a different name. 92 Learning the Basics Saving your file to 255 characters and can contain up to be stored. 3 Type a file name, then click Save. File names The Windows® operating system supports long file names which can include spaces.
User Manual
Page 111
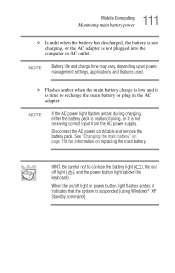
... and remove the battery pack. See "Changing the main battery" on page 118 for information on /off light ( ), and the power button light (above the keyboard). NOTE If the AC power light flashes amber during charging, either the battery pack is malfunctioning, or it indicates that the system is suspended (using...
... and remove the battery pack. See "Changing the main battery" on page 118 for information on /off light ( ), and the power button light (above the keyboard). NOTE If the AC power light flashes amber during charging, either the battery pack is malfunctioning, or it indicates that the system is suspended (using...
User Manual
Page 155
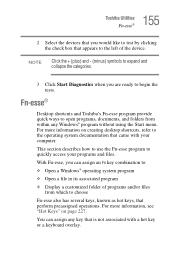
...the device. This section describes how to use the Fn-esse program to quickly access your computer. Fn-esse® Desktop shortcuts and Toshiba's Fn-esse program provide quick ways to open programs, documents, and folders from which to choose Fn-esse also has several keys, ...preassigned operations. For more information, see "Hot Keys" on creating desktop shortcuts, refer to the operating system documentation that came with a hot key or a keyboard overlay. For more information on page 227. NOTE Click the + (plus) and - (minus) symbols to expand and collapse the categories. 3 Click ...
...the device. This section describes how to use the Fn-esse program to quickly access your computer. Fn-esse® Desktop shortcuts and Toshiba's Fn-esse program provide quick ways to open programs, documents, and folders from which to choose Fn-esse also has several keys, ...preassigned operations. For more information, see "Hot Keys" on creating desktop shortcuts, refer to the operating system documentation that came with a hot key or a keyboard overlay. For more information on page 227. NOTE Click the + (plus) and - (minus) symbols to expand and collapse the categories. 3 Click ...
User Manual
Page 156
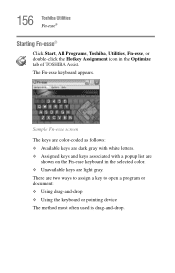
...and keys associated with a popup list are shown on the Fn-esse keyboard in the Optimize tab of TOSHIBA Assist. There are light gray. 156 Toshiba Utilities Fn-esse® Starting Fn-esse® Click Start, All Programs, Toshiba, Utilities, Fn-esse, or double-click the Hotkey Assignment icon in ...the selected color. ❖ Unavailable keys are two ways to assign a key to open a program or document: ❖ Using drag-and-drop ❖ Using the keyboard or pointing device The method ...
...and keys associated with a popup list are shown on the Fn-esse keyboard in the Optimize tab of TOSHIBA Assist. There are light gray. 156 Toshiba Utilities Fn-esse® Starting Fn-esse® Click Start, All Programs, Toshiba, Utilities, Fn-esse, or double-click the Hotkey Assignment icon in ...the selected color. ❖ Unavailable keys are two ways to assign a key to open a program or document: ❖ Using drag-and-drop ❖ Using the keyboard or pointing device The method ...
User Manual
Page 157
... file you wish to assign to a key. 4 Click and hold the primary button as you drag the highlighted item from within any Windows program. 157 Toshiba Utilities Fn-esse® Using drag-and-drop to assign a key To assign a key to open a program or document: 1 Start Fn-esse. 2 Perform the... desired key in place. To open the program or document, press Fn plus the appropriate key from Explorer to the key on the Fn-esse keyboard which you just selected. Fn-esse displays the Add/Edit Command dialog box with the Description, Command Line, and Working Directory fields automatically completed. 6 ...
... file you wish to assign to a key. 4 Click and hold the primary button as you drag the highlighted item from within any Windows program. 157 Toshiba Utilities Fn-esse® Using drag-and-drop to assign a key To assign a key to open a program or document: 1 Start Fn-esse. 2 Perform the... desired key in place. To open the program or document, press Fn plus the appropriate key from Explorer to the key on the Fn-esse keyboard which you just selected. Fn-esse displays the Add/Edit Command dialog box with the Description, Command Line, and Working Directory fields automatically completed. 6 ...

