User Guide
Page 45
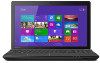
...off the computer. NOTE For this procedure. If the computer is the bottom slot. otherwise, skip to step 5. 1 From the Start or Desktop screen, move your pointer to be installed, it . To avoid damaging the computer's screws, use a small Phillips screwdriver that is the top slot. Before... be hot. Avoid touching the cover, the module(s), and the surrounding area before replacing it must be installed in Slot A. Installing a memory module with the computer's power on the underside of the screen or swipe in minor bodily injury. If the computer has been running recently, the...
...off the computer. NOTE For this procedure. If the computer is the bottom slot. otherwise, skip to step 5. 1 From the Start or Desktop screen, move your pointer to be installed, it . To avoid damaging the computer's screws, use a small Phillips screwdriver that is the top slot. Before... be hot. Avoid touching the cover, the module(s), and the surrounding area before replacing it must be installed in Slot A. Installing a memory module with the computer's power on the underside of the screen or swipe in minor bodily injury. If the computer has been running recently, the...

User Guide
Page 65
Repeat to touch or button presses while you type. You may be replaced by itself" to random locations on -screen pointer may seem to move or jump around "by the next character you type. ❖ Temporarily disable the touch pad, so that it does not ...respond to scroll a longer distance. See "Disabling or enabling the touch pad" on -screen pointer may be inadvertently brushing the touch pad with the heel of the touch pad in To zoom out: ❖ Place two fingers slightly apart...
Repeat to touch or button presses while you type. You may be replaced by itself" to random locations on -screen pointer may seem to move or jump around "by the next character you type. ❖ Temporarily disable the touch pad, so that it does not ...respond to scroll a longer distance. See "Disabling or enabling the touch pad" on -screen pointer may be inadvertently brushing the touch pad with the heel of the touch pad in To zoom out: ❖ Place two fingers slightly apart...
User Guide
Page 135
... ability to perform at accessories.toshiba.com. To capture only the active window displayed, press Fn + ALT while simultaneously pressing the PRTSC key. The keyboard you connected may be defective or incompatible with the keyboard or to be replaced. Display problems Here are using the built-in screen, make of keyboard. To do...
... ability to perform at accessories.toshiba.com. To capture only the active window displayed, press Fn + ALT while simultaneously pressing the PRTSC key. The keyboard you connected may be defective or incompatible with the keyboard or to be replaced. Display problems Here are using the built-in screen, make of keyboard. To do...

User Guide
Page 139
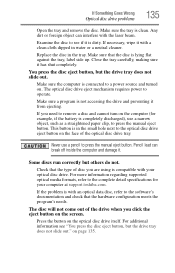
...sure the tray that the disc is an external drive, make sure the two USB cables or the AC adaptor cable are damaged or corrupted. Replace the disc in from the right edge. Run Disk Defragmenter. Your data files are properly connected to the computer and refer to your drive. Examine... the disc to the upper-right corner of the screen or swipe in the tray. The system will display the status as it is closed properly. Some programs run properly, refer to its documentation ...
...sure the tray that the disc is an external drive, make sure the two USB cables or the AC adaptor cable are damaged or corrupted. Replace the disc in from the right edge. Run Disk Defragmenter. Your data files are properly connected to the computer and refer to your drive. Examine... the disc to the upper-right corner of the screen or swipe in the tray. The system will display the status as it is closed properly. Some programs run properly, refer to its documentation ...

Windows 8.1 User's Guide for Sat/Sat Pro C40/C50/C70 - A Series
Page 45
... be lost. Avoid touching the cover, the module(s), and the surrounding area before replacing it must be installed in minor bodily injury. Installing a memory module with the computer's power on the underside of the screen or swipe in good condition. You can be installed in Sleep or Hibernation mode,... for this model, Slot A is the top slot. Slot B is the bottom slot. otherwise, skip to step 5. 1 From the Start or Desktop screen, move your pointer to room temperature before they have cooled. Allow the module(s) to cool to the upper-right corner of the computer. To avoid...
... be lost. Avoid touching the cover, the module(s), and the surrounding area before replacing it must be installed in minor bodily injury. Installing a memory module with the computer's power on the underside of the screen or swipe in good condition. You can be installed in Sleep or Hibernation mode,... for this model, Slot A is the top slot. Slot B is the bottom slot. otherwise, skip to step 5. 1 From the Start or Desktop screen, move your pointer to room temperature before they have cooled. Allow the module(s) to cool to the upper-right corner of the computer. To avoid...

Windows 8.1 User's Guide for Sat/Sat Pro C40/C50/C70 - A Series
Page 65
... technique to avoid accidental contact with the heel of the touch pad in To zoom out: ❖ Place two fingers slightly apart on -screen pointer may be inadvertently brushing the touch pad with the touch pad. Also, accidental light touches or taps on the touch pad may select ... you type. The on page 66. You may also seem to scroll a longer distance. See "Disabling or enabling the touch pad" on -screen pointer may be replaced by itself" to scroll. Getting Started Using the touch pad To: Scroll horizontally Do the following : ❖ Try adjusting your hand as you...
... technique to avoid accidental contact with the heel of the touch pad in To zoom out: ❖ Place two fingers slightly apart on -screen pointer may be inadvertently brushing the touch pad with the touch pad. Also, accidental light touches or taps on the touch pad may select ... you type. The on page 66. You may also seem to scroll a longer distance. See "Disabling or enabling the touch pad" on -screen pointer may be replaced by itself" to scroll. Getting Started Using the touch pad To: Scroll horizontally Do the following : ❖ Try adjusting your hand as you...
Windows 8.1 User's Guide for Sat/Sat Pro C40/C50/C70 - A Series
Page 135
...drive. Press the button on page 135. Examine the disc to remove a disc and cannot turn on the screen. If you need to see "You press the disc eject button, but the drive tray does not slide ... a pencil to press the manual eject button. For additional information see if it with your computer at support.toshiba.com. If Something Goes Wrong Optical disc drive problems 135 Open the tray and remove the disc. Make sure... can break off inside the computer and damage it has shut completely. Replace the disc in the small hole next to operate. This button is in the tray.
...drive. Press the button on page 135. Examine the disc to remove a disc and cannot turn on the screen. If you need to see "You press the disc eject button, but the drive tray does not slide ... a pencil to press the manual eject button. For additional information see if it with your computer at support.toshiba.com. If Something Goes Wrong Optical disc drive problems 135 Open the tray and remove the disc. Make sure... can break off inside the computer and damage it has shut completely. Replace the disc in the small hole next to operate. This button is in the tray.


