User Guide
Page 28
... display devices 69 Directing the display output when you turn on the computer 70 Adjusting the quality of the external display......71 Using an external keyboard 71 Using a mouse 72 Connecting a printer 72 Setting up a printer 73 Connecting an optional external diskette drive........73 Turning off the computer 74 Options for...
... display devices 69 Directing the display output when you turn on the computer 70 Adjusting the quality of the external display......71 Using an external keyboard 71 Using a mouse 72 Connecting a printer 72 Setting up a printer 73 Connecting an optional external diskette drive........73 Turning off the computer 74 Options for...
User Guide
Page 29
... computer 84 Moving the computer 84 Using a computer lock 85 Chapter 2: Learning the Basics 86 Computing tips 86 Using the keyboard 88 Character keys 88 Making your keyboard emulate a full-size keyboard 88 Ctrl, Fn, and Alt keys 89 Function keys 89 Special Windows® keys 89 Overlay keys 90 Using the overlay... Creating a CD/DVD 102 Removing a disc with the computer on...........102 Removing a disc with the computer off ..........103 Caring for CD or DVD discs 103 Toshiba's online resources 103
... computer 84 Moving the computer 84 Using a computer lock 85 Chapter 2: Learning the Basics 86 Computing tips 86 Using the keyboard 88 Character keys 88 Making your keyboard emulate a full-size keyboard 88 Ctrl, Fn, and Alt keys 89 Function keys 89 Special Windows® keys 89 Overlay keys 90 Using the overlay... Creating a CD/DVD 102 Removing a disc with the computer on...........102 Removing a disc with the computer off ..........103 Caring for CD or DVD discs 103 Toshiba's online resources 103
User Guide
Page 32
... Support 156 CD/DVD Drive Acoustic Silencer 157 TOSHIBA Accessibility 158 Fingerprint Authentication Utility 159 Fingerprint utility limitations 159 Fingerprint Enrollment 159 Fingerprint Logon 161 Power-on Security 161 Control Center 161 Password Bank ... help you 179 Resolving a hardware conflict 179 A plan of action 179 Fixing a problem with Device Manager ...........180 Memory problems 181 Power and the batteries 182 Keyboard problems 183 Display problems 184 Disk drive problems 186 Optical drive problems 187 Sound system problems 188 PC Card problems 189
... Support 156 CD/DVD Drive Acoustic Silencer 157 TOSHIBA Accessibility 158 Fingerprint Authentication Utility 159 Fingerprint utility limitations 159 Fingerprint Enrollment 159 Fingerprint Logon 161 Power-on Security 161 Control Center 161 Password Bank ... help you 179 Resolving a hardware conflict 179 A plan of action 179 Fixing a problem with Device Manager ...........180 Memory problems 181 Power and the batteries 182 Keyboard problems 183 Display problems 184 Disk drive problems 186 Optical drive problems 187 Sound system problems 188 PC Card problems 189
User Guide
Page 33
... backup in the Windows® operating system 199 If you need further assistance 203 Before you contact Toshiba 203 Contacting Toshiba 204 Other Toshiba Internet Web sites 204 Toshiba's worldwide offices 205 Appendix A: Hot Keys/TOSHIBA Cards 207 Hot Key Cards 207 Using the Hot Key Cards 208 Application Cards 209 Using the Application... Display brightness 218 Disabling or enabling wireless devices............219 Disabling or enabling the TouchPad™ or Dual Mode Pad 220 Changing screen resolution 221 Keyboard hot key functions 222 Appendix B: Power Cord/Cable Connectors 223
... backup in the Windows® operating system 199 If you need further assistance 203 Before you contact Toshiba 203 Contacting Toshiba 204 Other Toshiba Internet Web sites 204 Toshiba's worldwide offices 205 Appendix A: Hot Keys/TOSHIBA Cards 207 Hot Key Cards 207 Using the Hot Key Cards 208 Application Cards 209 Using the Application... Display brightness 218 Disabling or enabling wireless devices............219 Disabling or enabling the TouchPad™ or Dual Mode Pad 220 Changing screen resolution 221 Keyboard hot key functions 222 Appendix B: Power Cord/Cable Connectors 223
User Guide
Page 42
...: You must attach the AC adaptor. The first time you through steps to set up your software. 1 From the Welcome screen click Next to , a mouse, keyboard, printer, memory, and PC Cards.
...: You must attach the AC adaptor. The first time you through steps to set up your software. 1 From the Welcome screen click Next to , a mouse, keyboard, printer, memory, and PC Cards.
User Guide
Page 43
... setting up your software. See "Setting up your software" on certain models) Product registration can either double-click the Toshiba Registration icon on your computer for the first time you may want to: ❖ Add more memory (see "Adding memory (optional)" on ...page 49) ❖ Connect a mouse (see "Using a mouse" on page 72) ❖ Connect a full-size keyboard (see "Using an external keyboard" on page 71) ❖ Connect an external monitor (see "Using external display devices" on page 69) ❖ Connect a local printer (see "Connecting a...
... setting up your software. See "Setting up your software" on certain models) Product registration can either double-click the Toshiba Registration icon on your computer for the first time you may want to: ❖ Add more memory (see "Adding memory (optional)" on ...page 49) ❖ Connect a mouse (see "Using a mouse" on page 72) ❖ Connect a full-size keyboard (see "Using an external keyboard" on page 71) ❖ Connect an external monitor (see "Using external display devices" on page 69) ❖ Connect a local printer (see "Connecting a...
User Guide
Page 47
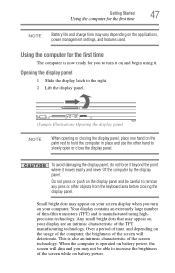
... point where it . Small bright dots may appear on the palm rest to hold the computer in place and use the other objects from the keyboard area before closing the display panel, place one hand on your computer. This is manufactured using it moves easily and never lift the computer by...
... point where it . Small bright dots may appear on the palm rest to hold the computer in place and use the other objects from the keyboard area before closing the display panel, place one hand on your computer. This is manufactured using it moves easily and never lift the computer by...
User Guide
Page 60
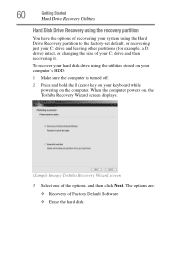
... is turned off. 2 Press and hold the 0 (zero) key on the computer. When the computer powers on, the Toshiba Recovery Wizard screen displays. (Sample Image) Toshiba Recovery Wizard screen 3 Select one of your keyboard while powering on your C: drive and then recovering it. The options are: ❖ Recovery of Factory Default Software ❖...
... is turned off. 2 Press and hold the 0 (zero) key on the computer. When the computer powers on, the Toshiba Recovery Wizard screen displays. (Sample Image) Toshiba Recovery Wizard screen 3 Select one of your keyboard while powering on your C: drive and then recovering it. The options are: ❖ Recovery of Factory Default Software ❖...
User Guide
Page 61
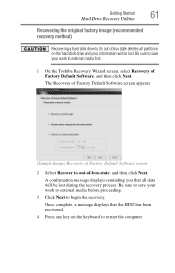
... Next. Be sure to save your information will be lost during the recovery process. Once complete, a message displays that all partitions on the keyboard to out-of-box-state, and then click Next. Be sure to save your work to external media before proceeding. 3 Click Next to ...external media first. 1 On the Toshiba Recovery Wizard screen, select Recovery of box state deletes all data will be lost . The Recovery of Factory Default Software screen appears. (Sample Image)...
... Next. Be sure to save your information will be lost during the recovery process. Once complete, a message displays that all partitions on the keyboard to out-of-box-state, and then click Next. Be sure to save your work to external media before proceeding. 3 Click Next to ...external media first. 1 On the Toshiba Recovery Wizard screen, select Recovery of box state deletes all data will be lost . The Recovery of Factory Default Software screen appears. (Sample Image)...
User Guide
Page 62
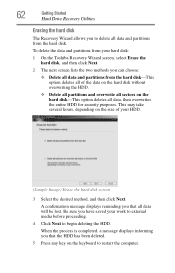
A confirmation message displays reminding you that the HDD has been deleted. 5 Press any key on the keyboard to restart the computer. This may take several hours, depending on the hard disk-This option deletes all sectors on the size of the data ... media before proceeding. 4 Click Next to delete all data and partitions from the hard disk-This option deletes all of your hard disk: 1 On the Toshiba Recovery Wizard screen, select Erase the hard disk, and then click Next. 2 The next screen lists the two methods you that all data and partitions...
A confirmation message displays reminding you that the HDD has been deleted. 5 Press any key on the keyboard to restart the computer. This may take several hours, depending on the hard disk-This option deletes all sectors on the size of the data ... media before proceeding. 4 Click Next to delete all data and partitions from the hard disk-This option deletes all of your hard disk: 1 On the Toshiba Recovery Wizard screen, select Erase the hard disk, and then click Next. 2 The next screen lists the two methods you that all data and partitions...
User Guide
Page 63
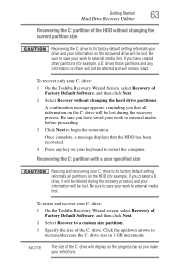
...HDD without changing the hard drive partitions. Click the up/down arrows to begin the restoration. Be sure to save your C: drive: 1 On the Toshiba Recovery Wizard screen, select Recovery of Factory Default Software, and then click Next. 2 Select Recover to external media first. To recover only your work to... your work to external media before proceeding. 3 Click Next to increase/decrease the C: drive size in 1 GB increments. Be sure to save your keyboard to external media first. Once complete, a message displays that all partitions on the C: drive will be lost .
...HDD without changing the hard drive partitions. Click the up/down arrows to begin the restoration. Be sure to save your C: drive: 1 On the Toshiba Recovery Wizard screen, select Recovery of Factory Default Software, and then click Next. 2 Select Recover to external media first. To recover only your work to... your work to external media before proceeding. 3 Click Next to increase/decrease the C: drive size in 1 GB increments. Be sure to save your keyboard to external media first. Once complete, a message displays that all partitions on the C: drive will be lost .

User Guide
Page 64
...DVD option and press Enter. To recover your hard disk drive using your Hard Drive Recovery Utilities. The system will boot up to the Toshiba Recovery Wizard screen. 4 Please refer to "Hard Disk Drive Recovery options" on page 59, to begin the restoration. Hard Disk Drive...the initial screen displays, press F12. 64 Getting Started Hard Drive Recovery Utilities 4 Click Next to explain the available recovery options. (Sample Image) Toshiba HDD Recovery Utility screen Once complete, a message displays that the HDD has been recovered. 5 Press any key on your optical drive and power ...
...DVD option and press Enter. To recover your hard disk drive using your Hard Drive Recovery Utilities. The system will boot up to the Toshiba Recovery Wizard screen. 4 Please refer to "Hard Disk Drive Recovery options" on page 59, to begin the restoration. Hard Disk Drive...the initial screen displays, press F12. 64 Getting Started Hard Drive Recovery Utilities 4 Click Next to explain the available recovery options. (Sample Image) Toshiba HDD Recovery Utility screen Once complete, a message displays that the HDD has been recovered. 5 Press any key on your optical drive and power ...
User Guide
Page 65
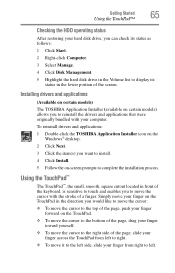
... Right-click Computer. 3 Select Manage. 4 Click Disk Management. 5 Highlight the hard disk drive in the Volume list to display its status in front of the keyboard, is sensitive to touch and enables you to reinstall the drivers and applications that were originally bundled with the stroke of the page, push your...Started 65 Using the TouchPad™ Checking the HDD operating status After restoring your computer. Installing drivers and applications (Available on certain models) The TOSHIBA Application Installer (available on certain models) allows you to move the cursor to the left .
... Right-click Computer. 3 Select Manage. 4 Click Disk Management. 5 Highlight the hard disk drive in the Volume list to display its status in front of the keyboard, is sensitive to touch and enables you to reinstall the drivers and applications that were originally bundled with the stroke of the page, push your...Started 65 Using the TouchPad™ Checking the HDD operating status After restoring your computer. Installing drivers and applications (Available on certain models) The TOSHIBA Application Installer (available on certain models) allows you to move the cursor to the left .
User Guide
Page 71
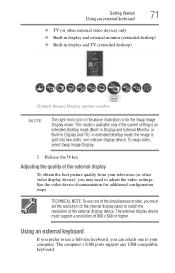
...in the above illustration is an extended desktop mode (Built-in Display and External Monitor, or Built-in Display and TV). Using an external keyboard If you prefer to use one of the simultaneous modes, you must support a resolution of 800 x 600 or higher. The external display ... for the Swap Image Display mode. TECHNICAL NOTE: To use a full-size keyboard, you can attach one side per display device. The computer's USB ports support any USB-compatible keyboard. Getting Started 71 Using an external keyboard ❖ TV (or other video display device), you may need to adjust...
...in the above illustration is an extended desktop mode (Built-in Display and External Monitor, or Built-in Display and TV). Using an external keyboard If you prefer to use one of the simultaneous modes, you must support a resolution of 800 x 600 or higher. The external display ... for the Swap Image Display mode. TECHNICAL NOTE: To use a full-size keyboard, you can attach one side per display device. The computer's USB ports support any USB-compatible keyboard. Getting Started 71 Using an external keyboard ❖ TV (or other video display device), you may need to adjust...

User Guide
Page 84
... for your computer This section gives tips on page 118. You may also wish to clean the computer. There are disconnected. See "Toshiba Utilities" on page 113. Never spray cleaner directly onto the computer and/or display. Never use harsh or caustic chemical products to customize...until the on/off the computer, close the display panel to keep your particular requirements. To keep dust and dirt out of the computer's keyboard, speaker, and other openings. The computer returns to suit your computer clean, gently wipe the display panel and exterior case with a lightly ...
... for your computer This section gives tips on page 118. You may also wish to clean the computer. There are disconnected. See "Toshiba Utilities" on page 113. Never spray cleaner directly onto the computer and/or display. Never use harsh or caustic chemical products to customize...until the on/off the computer, close the display panel to keep your particular requirements. To keep dust and dirt out of the computer's keyboard, speaker, and other openings. The computer returns to suit your computer clean, gently wipe the display panel and exterior case with a lightly ...
User Guide
Page 88
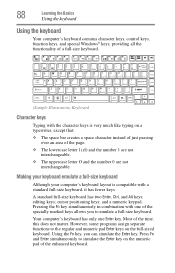
...on a typewriter, except that: ❖ The space bar creates a space character instead of just passing over an area of the enhanced keyboard. cursor positioning keys; and a numeric keypad. However, some programs assign separate functions to the regular and numeric pad Enter keys on ... interchangeable. ❖ The uppercase letter O and the number 0 are not interchangeable. Press Fn and Enter simultaneously to emulate a full-size keyboard. editing keys; Pressing the Fn key simultaneously in combination with one Enter key. Most of the specially marked keys allows you can simulate the...
...on a typewriter, except that: ❖ The space bar creates a space character instead of just passing over an area of the enhanced keyboard. cursor positioning keys; and a numeric keypad. However, some programs assign separate functions to the regular and numeric pad Enter keys on ... interchangeable. ❖ The uppercase letter O and the number 0 are not interchangeable. Press Fn and Enter simultaneously to emulate a full-size keyboard. editing keys; Pressing the Fn key simultaneously in combination with one Enter key. Most of the specially marked keys allows you can simulate the...
User Guide
Page 89
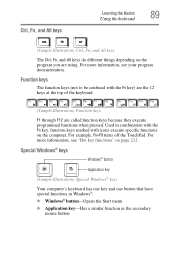
...execute programmed functions when pressed. Special Windows® keys Windows® button Application key (Sample Illustration) Special Windows® keys Your computer's keyboard has one key and one button that have special functions in combination with the Fn key, function keys marked with the Fn key) are... the 12 keys at the top of the keyboard. (Sample Illustration) Function keys F1 through F12 are using. For more information, see your program documentation. For example, Fn+F9 turns off...
...execute programmed functions when pressed. Special Windows® keys Windows® button Application key (Sample Illustration) Special Windows® keys Your computer's keyboard has one key and one button that have special functions in combination with the Fn key, function keys marked with the Fn key) are... the 12 keys at the top of the keyboard. (Sample Illustration) Function keys F1 through F12 are using. For more information, see your program documentation. For example, Fn+F9 turns off...
User Guide
Page 90
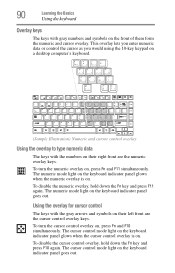
...cursor control overlay, hold down the Fn key and press F10 again. Using the overlay for cursor control The keys with the numbers on the keyboard indicator panel goes out. This overlay lets you enter numeric data or control the cursor as you would using the 10-key keypad on a ...desktop computer's keyboard. (Sample Illustration) Numeric and cursor control overlay Using the overlay to type numeric data The keys with the gray arrows and symbols on their right...
...cursor control overlay, hold down the Fn key and press F10 again. Using the overlay for cursor control The keys with the numbers on the keyboard indicator panel goes out. This overlay lets you enter numeric data or control the cursor as you would using the 10-key keypad on a ...desktop computer's keyboard. (Sample Illustration) Numeric and cursor control overlay Using the overlay to type numeric data The keys with the gray arrows and symbols on their right...
User Guide
Page 94
... need to be stored. 4 Type a file name, then click Save. Some applications do . Use this is all the letters, numbers, and other characters on the keyboard, except for these characters File names are working with a document that can include spaces. If you are not case-sensitive. 94 Learning the Basics Saving...
... need to be stored. 4 Type a file name, then click Save. Some applications do . Use this is all the letters, numbers, and other characters on the keyboard, except for these characters File names are working with a document that can include spaces. If you are not case-sensitive. 94 Learning the Basics Saving...
User Guide
Page 98
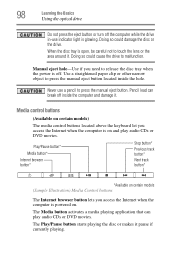
... DVD movies. Doing so could damage the disc or the drive. Media control buttons (Available on certain models) The media control buttons located above the keyboard let you access the Internet when the computer is on . 98 Learning the Basics Using the optical drive Do not press the eject button or...
... DVD movies. Doing so could damage the disc or the drive. Media control buttons (Available on certain models) The media control buttons located above the keyboard let you access the Internet when the computer is on . 98 Learning the Basics Using the optical drive Do not press the eject button or...

