User Manual
Page 45
NOTE The names of Microsoft's End User License Agreement and click Next. 3 Select the appropriate option from the Help protect your computer screen and click Next. 4 Enter the computer name and description and click Next or Skip. 5 Select how your software setup choices. The first...which windows appear, may vary according to the Internet and click Next. Setting up your software. 1 From the welcome screen click Next to enter the Setup Wizard. 2 Confirm acceptance of windows displayed, and the order in modem to a telephone line (see "Connecting the modem to a telephone line" on your ...
NOTE The names of Microsoft's End User License Agreement and click Next. 3 Select the appropriate option from the Help protect your computer screen and click Next. 4 Enter the computer name and description and click Next or Skip. 5 Select how your software setup choices. The first...which windows appear, may vary according to the Internet and click Next. Setting up your software. 1 From the welcome screen click Next to enter the Setup Wizard. 2 Confirm acceptance of windows displayed, and the order in modem to a telephone line (see "Connecting the modem to a telephone line" on your ...
User Manual
Page 46
... connected to the Internet via your computer name and network settings. 6 Follow the remaining screen prompts to set up a printer" on your computer. Registering your computer with Toshiba If an Internet connection could not be found, a window will not diminish Customer rights ...under this time to complete the setup process. Customer failure to continue. Click Next to complete Product Registration will display the message: "An Internet...
... connected to the Internet via your computer name and network settings. 6 Follow the remaining screen prompts to set up a printer" on your computer. Registering your computer with Toshiba If an Internet connection could not be found, a window will not diminish Customer rights ...under this time to complete the setup process. Customer failure to continue. Click Next to complete Product Registration will display the message: "An Internet...
User Manual
Page 51
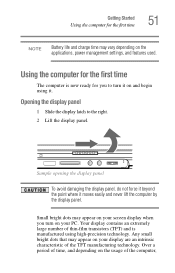
... the computer by the display panel. Opening the display panel 1 Slide the display latch to turn on your PC. Sample opening the display panel To avoid damaging the display panel, do not force it beyond the point where it . Small bright dots may appear on your screen display when you to the right.... 2 Lift the display panel. Getting Started Using the computer for the first time 51 NOTE Battery life and charge time may appear on your display are an intrinsic characteristic of the TFT manufacturing technology....
... the computer by the display panel. Opening the display panel 1 Slide the display latch to turn on your PC. Sample opening the display panel To avoid damaging the display panel, do not force it beyond the point where it . Small bright dots may appear on your screen display when you to the right.... 2 Lift the display panel. Getting Started Using the computer for the first time 51 NOTE Battery life and charge time may appear on your display are an intrinsic characteristic of the TFT manufacturing technology....
User Manual
Page 62
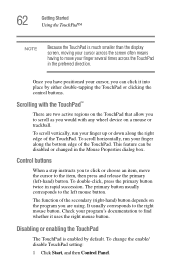
...the right edge of the TouchPad. This feature can click it uses the right mouse button. Check your finger several times across the screen often means having to move the cursor to find whether it into place by default. Disabling or enabling the TouchPad The TouchPad is ...much smaller than the display screen, moving your cursor across the TouchPad in the preferred direction. 62 Getting Started Using the TouchPad™ NOTE Because the TouchPad is enabled...
...the right edge of the TouchPad. This feature can click it uses the right mouse button. Check your finger several times across the screen often means having to move the cursor to find whether it into place by default. Disabling or enabling the TouchPad The TouchPad is ...much smaller than the display screen, moving your cursor across the TouchPad in the preferred direction. 62 Getting Started Using the TouchPad™ NOTE Because the TouchPad is enabled...
User Manual
Page 64
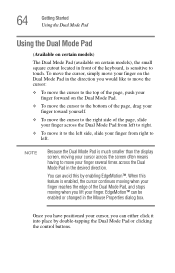
... the cursor, simply move it into place by enabling EdgeMotion™. NOTE Because the Dual Mode Pad is much smaller than the display screen, moving your cursor across the screen often means having to move your finger several times across the Dual Mode Pad in the direction you would like to move the...
... the cursor, simply move it into place by enabling EdgeMotion™. NOTE Because the Dual Mode Pad is much smaller than the display screen, moving your cursor across the screen often means having to move your finger several times across the Dual Mode Pad in the direction you would like to move the...
User Manual
Page 68
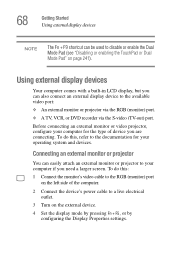
...3 Turn on the external device. 4 Set the display mode by pressing Fn + F5, or by configuring the Display Properties settings. To do this : 1 Connect the... (monitor) port on page 241). Using external display devices Your computer comes with a built-in LCD display, but you are connecting. Before connecting an external...configure your operating system and devices. 68 Getting Started Using external display devices NOTE The Fn + F9 shortcut can be used to ...computer for the type of device you can also connect an external display device to disable or enable the Dual Mode Pad (see "Disabling...
...3 Turn on the external device. 4 Set the display mode by pressing Fn + F5, or by configuring the Display Properties settings. To do this : 1 Connect the... (monitor) port on page 241). Using external display devices Your computer comes with a built-in LCD display, but you are connecting. Before connecting an external...configure your operating system and devices. 68 Getting Started Using external display devices NOTE The Fn + F9 shortcut can be used to ...computer for the type of device you can also connect an external display device to disable or enable the Dual Mode Pad (see "Disabling...
User Manual
Page 70
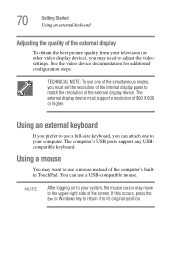
...to use a USB-compatible mouse. If this occurs, press the Esc or Windows key to return it to the upper-right side of the screen. NOTE After logging on to your system, the mouse cursor may move to its original position. Using a mouse You may need to adjust ...: To use a full-size keyboard, you can use a mouse instead of the computer's builtin TouchPad. The external display device must set the resolution of the internal display panel to match the resolution of the external display device. 70 Getting Started Using an external keyboard Adjusting the quality of the external...
...to use a USB-compatible mouse. If this occurs, press the Esc or Windows key to return it to the upper-right side of the screen. NOTE After logging on to your system, the mouse cursor may move to its original position. Using a mouse You may need to adjust ...: To use a full-size keyboard, you can use a mouse instead of the computer's builtin TouchPad. The external display device must set the resolution of the internal display panel to match the resolution of the external display device. 70 Getting Started Using an external keyboard Adjusting the quality of the external...

User Manual
Page 78
... to Shut down if you want the computer to activate it using Toshiba's Power Saver utility. 1 Click Start, Control Panel, then click Performance and Maintenance. 2 Click the Toshiba Power Saver icon. 3 Click on the Setup Action tab. Sample setup action settings screen 4 Select the options you want from the drop-down lists. ❖... to shut down when you press the power button. ❖ When I press the power button Set this option to Shut down if you close the display panel.
... to Shut down if you want the computer to activate it using Toshiba's Power Saver utility. 1 Click Start, Control Panel, then click Performance and Maintenance. 2 Click the Toshiba Power Saver icon. 3 Click on the Setup Action tab. Sample setup action settings screen 4 Select the options you want from the drop-down lists. ❖... to shut down when you press the power button. ❖ When I press the power button Set this option to Shut down if you close the display panel.
User Manual
Page 81
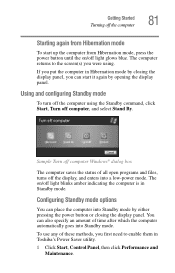
...can start up the computer from Hibernation mode To start it again by either pressing the power button or closing the display panel, you first need to the screen(s) you were using the Standby command, click Start, Turn off computer, and select Stand By. Configuring Standby mode ... the power button until the on /off light blinks amber indicating the computer is in Standby mode. The computer returns to enable them in Toshiba's Power Saver utility. 1 Click Start, Control Panel, then click Performance and Maintenance. Using and configuring Standby mode To turn off the computer...
...can start up the computer from Hibernation mode To start it again by either pressing the power button or closing the display panel, you first need to the screen(s) you were using the Standby command, click Start, Turn off computer, and select Stand By. Configuring Standby mode ... the power button until the on /off light blinks amber indicating the computer is in Standby mode. The computer returns to enable them in Toshiba's Power Saver utility. 1 Click Start, Control Panel, then click Performance and Maintenance. Using and configuring Standby mode To turn off the computer...

User Manual
Page 82
...page 165. The computer returns to the screen(s) you have turned off the computer, close the display panel to go into Standby mode by either pressing the power button or closing the display panel, you can place it again by closing the display panel, depending on the Standby options set....start up the computer from Standby mode To start it into Standby mode when you close the display panel. 5 Click Apply. 6 Click OK. NOTE For more information about the Power Saver utility, see "TOSHIBA Power Saver" on /off light glows blue. 82 Getting Started Turning off the computer 2 ...
...page 165. The computer returns to the screen(s) you have turned off the computer, close the display panel to go into Standby mode by either pressing the power button or closing the display panel, you can place it again by closing the display panel, depending on the Standby options set....start up the computer from Standby mode To start it into Standby mode when you close the display panel. 5 Click Apply. 6 Click OK. NOTE For more information about the Power Saver utility, see "TOSHIBA Power Saver" on /off light glows blue. 82 Getting Started Turning off the computer 2 ...
User Manual
Page 128
... you will explore some of the special features of your system. Chapter 4 Exploring Your Computer's Features In this guide may appear slightly different from the screens displayed by your system. 128
... you will explore some of the special features of your system. Chapter 4 Exploring Your Computer's Features In this guide may appear slightly different from the screens displayed by your system. 128

User Manual
Page 139
... To send and receive email of your own, you need a mailbox on their computer screens. 139 Exploring Your Computer's Features An overview of using the Internet Surfing the Internet Once connected to the Internet, the Web browser displays a home page, for example, your ISP's home page on -one or in the Web...
... To send and receive email of your own, you need a mailbox on their computer screens. 139 Exploring Your Computer's Features An overview of using the Internet Surfing the Internet Once connected to the Internet, the Web browser displays a home page, for example, your ISP's home page on -one or in the Web...
User Manual
Page 141
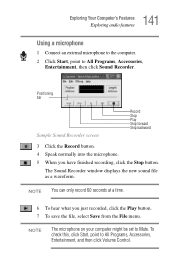
... Mute. NOTE The microphone on your computer might be set to All Programs, Accessories, Entertainment, then click Sound Recorder. The Sound Recorder window displays the new sound file as a waveform. NOTE You can only record 60 seconds at a time. 6 To hear what you have finished recording..., click the Stop button. Positioning bar Sample Sound Recorder screen Record Stop Play Skip forward Skip backward 3 Click the Record button. 4 Speak normally into the microphone. 5 When you just recorded, click the ...
... Mute. NOTE The microphone on your computer might be set to All Programs, Accessories, Entertainment, then click Sound Recorder. The Sound Recorder window displays the new sound file as a waveform. NOTE You can only record 60 seconds at a time. 6 To hear what you have finished recording..., click the Stop button. Positioning bar Sample Sound Recorder screen Record Stop Play Skip forward Skip backward 3 Click the Record button. 4 Speak normally into the microphone. 5 When you just recorded, click the ...
User Manual
Page 169
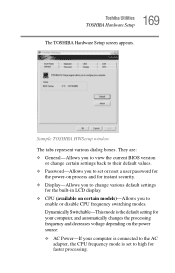
169 Toshiba Utilities TOSHIBA Hardware Setup The TOSHIBA Hardware Setup screen appears. Dynamically Switchable-This mode is the default setting for ...user password for the power-on certain models)-Allows you to enable or disable CPU frequency switching modes. Sample TOSHIBA HWSetup window The tabs represent various dialog boxes. They are: ❖ General-Allows you to view the...-Allows you to set to high for the built-in LCD display. ❖ CPU (available on process and for instant security. ❖ Display-Allows you to change various default settings for faster processing.
169 Toshiba Utilities TOSHIBA Hardware Setup The TOSHIBA Hardware Setup screen appears. Dynamically Switchable-This mode is the default setting for ...user password for the power-on certain models)-Allows you to enable or disable CPU frequency switching modes. Sample TOSHIBA HWSetup window The tabs represent various dialog boxes. They are: ❖ General-Allows you to view the...-Allows you to set to high for the built-in LCD display. ❖ CPU (available on process and for instant security. ❖ Display-Allows you to change various default settings for faster processing.

User Manual
Page 172
172 Toshiba Utilities TOSHIBA SD Memory Card Format Utility TOSHIBA SD Memory Card Format Utility This utility is used to begin formatting. Sample SD Memory Card Format screen 2 Select the drive corresponding to the SD memory card. 3 Select the formatting option: ❖ Quick Format ❖ Full Format ...The formatting progress is completed, click Close to exit the utility. The SD Memory Card Format screen appears. To format an SD memory card using this utility: 1 Click Start, All Programs, Toshiba, Utilities, SD Memory Card Format utility, or click the SD Memory Card icon in the ...
172 Toshiba Utilities TOSHIBA SD Memory Card Format Utility TOSHIBA SD Memory Card Format Utility This utility is used to begin formatting. Sample SD Memory Card Format screen 2 Select the drive corresponding to the SD memory card. 3 Select the formatting option: ❖ Quick Format ❖ Full Format ...The formatting progress is completed, click Close to exit the utility. The SD Memory Card Format screen appears. To format an SD memory card using this utility: 1 Click Start, All Programs, Toshiba, Utilities, SD Memory Card Format utility, or click the SD Memory Card icon in the ...
User Manual
Page 185
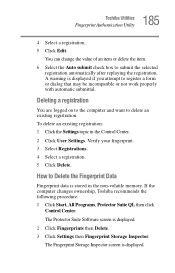
... Fingerprint Authentication Utility 4 Select a registration. 5 Click Edit. If the computer changes ownership, Toshiba recommends the following procedure: 1 Click Start, All Programs, Protector Suite QL then click Control Center. To delete an existing registration: 1 ... are logged on to the computer and want to submit the selected registration automatically after replaying the registration. The Fingerprint Storage Inspector screen is displayed. 2 Click Fingerprints then Delete. 3 Click Settings then Fingerprint Storage Inspector. How to Delete the Fingerprint Data Fingerprint data is...
... Fingerprint Authentication Utility 4 Select a registration. 5 Click Edit. If the computer changes ownership, Toshiba recommends the following procedure: 1 Click Start, All Programs, Protector Suite QL then click Control Center. To delete an existing registration: 1 ... are logged on to the computer and want to submit the selected registration automatically after replaying the registration. The Fingerprint Storage Inspector screen is displayed. 2 Click Fingerprints then Delete. 3 Click Settings then Fingerprint Storage Inspector. How to Delete the Fingerprint Data Fingerprint data is...
User Manual
Page 186
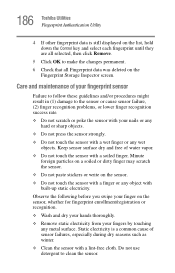
...of sensor failures, especially during dry seasons such as winter. ❖ Clean the sensor with a soiled finger. Static electricity is still displayed on the list, hold down the Control key and select each fingerprint until they are all selected, then click Remove. 5 Click OK ...to make the changes permanent. 6 Check that all Fingerprint data was deleted on the Fingerprint Storage Inspector screen. Do not use detergent to clean the sensor. 186 Toshiba Utilities Fingerprint Authentication Utility 4 If other fingerprint data is a common cause of your fingerprint sensor Failure to ...
...of sensor failures, especially during dry seasons such as winter. ❖ Clean the sensor with a soiled finger. Static electricity is still displayed on the list, hold down the Control key and select each fingerprint until they are all selected, then click Remove. 5 Click OK ...to make the changes permanent. 6 Check that all Fingerprint data was deleted on the Fingerprint Storage Inspector screen. Do not use detergent to clean the sensor. 186 Toshiba Utilities Fingerprint Authentication Utility 4 If other fingerprint data is a common cause of your fingerprint sensor Failure to ...

User Manual
Page 188
... A warning message will be displayed when recognition is abnormal or recognition is not liable for any failure or damage that the fingerprint sensor will be instances where certain users are unable to register their fingerprints due to user. ❖ Toshiba does not guarantee that this ... ❖ The recognition success rate may be error-free. ❖ Toshiba does not guarantee that might arise out of the use of this fingerprint recognition technology will recognize the enrolled user or accurately screen out unauthorized users at all times. However, there may differ from user...
... A warning message will be displayed when recognition is abnormal or recognition is not liable for any failure or damage that the fingerprint sensor will be instances where certain users are unable to register their fingerprints due to user. ❖ Toshiba does not guarantee that this ... ❖ The recognition success rate may be error-free. ❖ Toshiba does not guarantee that might arise out of the use of this fingerprint recognition technology will recognize the enrolled user or accurately screen out unauthorized users at all times. However, there may differ from user...
User Manual
Page 193
... pressing any key to restart the computer. 193 If Something Goes Wrong The Windows® operating system is not working correctly. The computer displays the Non-System disk or disk error message. Make sure there is not accessing the hard disk or the optional external diskette drive." For... do not leave the computer in the Startup menu to start. ❖ The operating system responds differently from the normal routine. ❖ The screen does not look right. For more information see "The computer is no diskette in some way such as installing a new program or adding a ...
... pressing any key to restart the computer. 193 If Something Goes Wrong The Windows® operating system is not working correctly. The computer displays the Non-System disk or disk error message. Make sure there is not accessing the hard disk or the optional external diskette drive." For... do not leave the computer in the Startup menu to start. ❖ The operating system responds differently from the normal routine. ❖ The screen does not look right. For more information see "The computer is no diskette in some way such as installing a new program or adding a ...
User Manual
Page 206
...hardware conflict 4 Click OK. Devices that may appear on the usage of the computer, the brightness of the screen technology. Over a period of time, and depending on your screen display when you are having trouble accessing a disk, or one or more files appear to be able to have garbage... in Internal/External mode, and not simultaneous mode. The display mode is also an intrinsic characteristic of the screen will deteriorate. This is ...
...hardware conflict 4 Click OK. Devices that may appear on the usage of the computer, the brightness of the screen technology. Over a period of time, and depending on your screen display when you are having trouble accessing a disk, or one or more files appear to be able to have garbage... in Internal/External mode, and not simultaneous mode. The display mode is also an intrinsic characteristic of the screen will deteriorate. This is ...


