
User Manual
Page 1
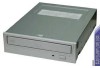
TOSHIBA AMERICA INFORMATION SYSTEMS STORAGE DEVICE DIVISION IRVINE, CALIFORNIA SD-M1612 DVD-ROM DRIVE USER MANUAL
TOSHIBA AMERICA INFORMATION SYSTEMS STORAGE DEVICE DIVISION IRVINE, CALIFORNIA SD-M1612 DVD-ROM DRIVE USER MANUAL

User Manual
Page 2
CONTENTS Introduction 1 Setup 3 Using the DVD-ROM Drive 6 Troubleshooting 9 Specifications 10 Drive Connectors 13
CONTENTS Introduction 1 Setup 3 Using the DVD-ROM Drive 6 Troubleshooting 9 Specifications 10 Drive Connectors 13

User Manual
Page 4
... experiencing an error Eject Button The Eject button is used only when the Loading Tray will occur: • BUSY light goes out. The DVD-ROM is ready to locate the disc. Emergency Eject Hole The emergency eject hole is pressed. The disc may be used to open the disc tray ...so you install a disc into the DVD-ROM drive, the BUSY light flashes slowly as it attempts to read data from the disc. • BUSY light flashes slowly. One of the following will...
... experiencing an error Eject Button The Eject button is used only when the Loading Tray will occur: • BUSY light goes out. The DVD-ROM is ready to locate the disc. Emergency Eject Hole The emergency eject hole is pressed. The disc may be used to open the disc tray ...so you install a disc into the DVD-ROM drive, the BUSY light flashes slowly as it attempts to read data from the disc. • BUSY light flashes slowly. One of the following will...

User Manual
Page 5
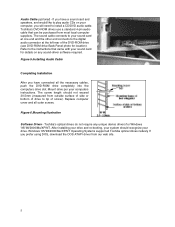
SD-M1612 DVD-ROM The following steps must be the Master, and you install your drive: • Set Drive Jumper Settings • Connect Audio Cable (optional) • Attach IDE ... as Master (default mode) Figure 1.Mode Select Jumper In most installations, jumper should set your DVD-ROM drive to properly install your DVD-ROM drive only on the secondary IDE BUS. By placing a jumper on the rear of the DVD-ROM drive. SETUP - If you are installing on primary IDE BUS, your hard drive would then...
SD-M1612 DVD-ROM The following steps must be the Master, and you install your drive: • Set Drive Jumper Settings • Connect Audio Cable (optional) • Attach IDE ... as Master (default mode) Figure 1.Mode Select Jumper In most installations, jumper should set your DVD-ROM drive to properly install your DVD-ROM drive only on the secondary IDE BUS. By placing a jumper on the rear of the DVD-ROM drive. SETUP - If you are installing on primary IDE BUS, your hard drive would then...

User Manual
Page 6
..., you are replacing your system. If DVD-ROM drive is an addition to a CD-ROM/DVD: connect DVD-ROM drive to install your DVD-ROM drive inside your Computer Now that you have a primary and secondary IDE BUS, cable with drive). If DVD-ROM drive is not replacing a CD-ROM/DVD or is to connect the IDE BUS cable..., Audio cable and the Power cable on the primary BUS. Figure 4.Installing Power Cable 4 Your Toshiba DVD-ROM drive can be placed in any free half-height drive slot at the back of the drive. Connect BUS cable as follows, assuring that...
..., you are replacing your system. If DVD-ROM drive is an addition to a CD-ROM/DVD: connect DVD-ROM drive to install your DVD-ROM drive inside your Computer Now that you have a primary and secondary IDE BUS, cable with drive). If DVD-ROM drive is not replacing a CD-ROM/DVD or is to connect the IDE BUS cable..., Audio cable and the Power cable on the primary BUS. Figure 4.Installing Power Cable 4 Your Toshiba DVD-ROM drive can be placed in any free half-height drive slot at the back of the drive. Connect BUS cable as follows, assuring that...
User Manual
Page 7
...end and the other end connects to install a CD/DVD audio cable. Mount drive per your drive. Toshiba's optical drives do not require any sound-driver software required. Refer to tip of the DVD-ROM drive (see DVD-ROM drive Back Panel photo for details on your sound card... using DOS, download the DOS ATAPI driver from most local computer suppliers. Figure 6.Mounting Illustration Software Driver - Audio Cable (optional) - Toshiba's DVD-ROM drives use a standard 4-pin audio cable that came with your sound card for location). After installing your drive and re-booting, your system...
...end and the other end connects to install a CD/DVD audio cable. Mount drive per your drive. Toshiba's optical drives do not require any sound-driver software required. Refer to tip of the DVD-ROM drive (see DVD-ROM drive Back Panel photo for details on your sound card... using DOS, download the DOS ATAPI driver from most local computer suppliers. Figure 6.Mounting Illustration Software Driver - Audio Cable (optional) - Toshiba's DVD-ROM drives use a standard 4-pin audio cable that came with your sound card for location). After installing your drive and re-booting, your system...

User Manual
Page 8
... steps: Figure 1.Inserting Disc 1. Close the drive by pressing the Eject Button. 2. Position the disc behind the disc holders 3. Figure 2.Inserting Disc Vertically 6 USING THE DVD DVD-ROM Drive - Tray will automatically close. Place disc into a drive that is mounted horizontally, perform the following steps: 1. Press Eject button again or gently push on...
... steps: Figure 1.Inserting Disc 1. Close the drive by pressing the Eject Button. 2. Position the disc behind the disc holders 3. Figure 2.Inserting Disc Vertically 6 USING THE DVD DVD-ROM Drive - Tray will automatically close. Place disc into a drive that is mounted horizontally, perform the following steps: 1. Press Eject button again or gently push on...

User Manual
Page 9
...technology and do not indicate a problem with the drive. Insert a solid bar (i.e. These effects are inherent in the DVD player application program. DVD tray will not reopen without cycling the DVD-ROMs (computer's) power. Grasp disc by properly shutting down on the disc tray when opening or closing it. • ... not press the Open/Close button while the drive is intended only as shown in the disc, the imbalance is closed when not using the DVD-ROM Drive. • Do not press down system. 2. NOTE: High-speed drives spin the disc at a high rotational speed. Press Eject Button ...
...technology and do not indicate a problem with the drive. Insert a solid bar (i.e. These effects are inherent in the DVD player application program. DVD tray will not reopen without cycling the DVD-ROMs (computer's) power. Grasp disc by properly shutting down on the disc tray when opening or closing it. • ... not press the Open/Close button while the drive is intended only as shown in the disc, the imbalance is closed when not using the DVD-ROM Drive. • Do not press down system. 2. NOTE: High-speed drives spin the disc at a high rotational speed. Press Eject Button ...

User Manual
Page 10
...as dirt and smears will degrade the disc accessing speed. Cleaning Media Try to dust and fingerprints. Inserting more than 50mm may damage the DVD-ROM drive. Most DVD video playback issues are mediarelated and can be remedied by its edges only. If the disc becomes dirty wipe it with a damp soft... cloth. Do not insert more than 50mm in a circular motion, but rather from the inner side outward. 8 If a DVD movie skips or hangs during playback, ...
...as dirt and smears will degrade the disc accessing speed. Cleaning Media Try to dust and fingerprints. Inserting more than 50mm may damage the DVD-ROM drive. Most DVD video playback issues are mediarelated and can be remedied by its edges only. If the disc becomes dirty wipe it with a damp soft... cloth. Do not insert more than 50mm in a circular motion, but rather from the inner side outward. 8 If a DVD movie skips or hangs during playback, ...

User Manual
Page 11
... tray. • Is the drive connected properly? That is constantly ON DVD-ROM can not play a DVD in properly (e.g. Please contact Technical Support. • Is the DVD-ROM drive driver loaded • Is the DVD disc the correct format for the type of system that there is recognized...the Virus renders the software drivers not useable. 9 Are all cables plugged in the drive or certain types of the system is the DVD-ROM drive recognized? (BIOS / DOS reports "device driver not found or no valid drivers selected.). Please contact Technical Support. • Possible ...
... tray. • Is the drive connected properly? That is constantly ON DVD-ROM can not play a DVD in properly (e.g. Please contact Technical Support. • Is the DVD-ROM drive driver loaded • Is the DVD disc the correct format for the type of system that there is recognized...the Virus renders the software drivers not useable. 9 Are all cables plugged in the drive or certain types of the system is the DVD-ROM drive recognized? (BIOS / DOS reports "device driver not found or no valid drivers selected.). Please contact Technical Support. • Possible ...

User Manual
Page 15
... IDE Interface Connector Analog Audio Line Output Connector Digital Audio Line Output Connector 5V 5%, 12V 5% +5V 280mA 300mA 580mA (DVD) 600mA (CD) 930mA (DVD) 850mA (CD) +12V 0mA 0mA 50mA (DVD) 50mA (CD) 710mA (DVD) 870mA (CD) 5.75" (146mm) 1.6" (41.5mm) 7.6" (193mm) 2.18lbs (.99kg) AMP 1-480424-0 40 Pin ... Type Wave Length Semiconductor Laser and 3-beam System 770 - 795 nm Semiconductor Laser and 1-beam System 770 - 650 nm Regulatory The SD-M1612 DVD-ROM drive has been certified by the following regulatory agencies: • UL 1950 • CSA C22.2 No. 950 • TUV (EN60950I) &#...
... IDE Interface Connector Analog Audio Line Output Connector Digital Audio Line Output Connector 5V 5%, 12V 5% +5V 280mA 300mA 580mA (DVD) 600mA (CD) 930mA (DVD) 850mA (CD) +12V 0mA 0mA 50mA (DVD) 50mA (CD) 710mA (DVD) 870mA (CD) 5.75" (146mm) 1.6" (41.5mm) 7.6" (193mm) 2.18lbs (.99kg) AMP 1-480424-0 40 Pin ... Type Wave Length Semiconductor Laser and 3-beam System 770 - 795 nm Semiconductor Laser and 1-beam System 770 - 650 nm Regulatory The SD-M1612 DVD-ROM drive has been certified by the following regulatory agencies: • UL 1950 • CSA C22.2 No. 950 • TUV (EN60950I) &#...

User Manual
Page 16
...has chamfered edges, so the power connector fits only one way. DRIVE CONNECTORS -SD-M1612 Figure 1.SD-M1612 DVD-ROM Drive Rear Panel - ATAPI Connector The SD-M1612 DVD drive is plugged in upside- down with your computer's +5V/+12V Connector power cable to your computer system through... the ATAPI connector. 14 Audio Connectors Supplies Analog and Digital sound to your system. Connectors Power Power is supplied to your DVD-ROM drive by the...
...has chamfered edges, so the power connector fits only one way. DRIVE CONNECTORS -SD-M1612 Figure 1.SD-M1612 DVD-ROM Drive Rear Panel - ATAPI Connector The SD-M1612 DVD drive is plugged in upside- down with your computer's +5V/+12V Connector power cable to your computer system through... the ATAPI connector. 14 Audio Connectors Supplies Analog and Digital sound to your system. Connectors Power Power is supplied to your DVD-ROM drive by the...
