Use and Care Manual
Page 4
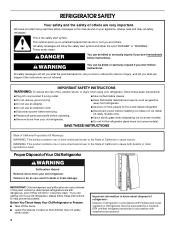
...ready models only). ■ Use a sturdy glass when dispensing ice (on some models). ■ Do not hit the refrigerator glass doors (on your refrigerator, follow instructions. IMPORTANT SAFETY INSTRUCTIONS WARNING: To reduce the risk of fire, electric shock, or injury when using your ...cause cancer. IMPORTANT: Child entrapment and suffocation are very important. All safety messages will follow instructions. Before You Throw Away Your Old Refrigerator or Freezer: ■ Take off the doors. ■ Leave the shelves in this manual and on some models). SAVE THESE ...
...ready models only). ■ Use a sturdy glass when dispensing ice (on some models). ■ Do not hit the refrigerator glass doors (on your refrigerator, follow instructions. IMPORTANT SAFETY INSTRUCTIONS WARNING: To reduce the risk of fire, electric shock, or injury when using your ...cause cancer. IMPORTANT: Child entrapment and suffocation are very important. All safety messages will follow instructions. Before You Throw Away Your Old Refrigerator or Freezer: ■ Take off the doors. ■ Leave the shelves in this manual and on some models). SAVE THESE ...
Use and Care Manual
Page 5
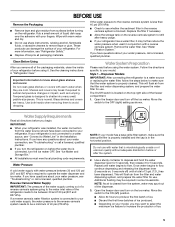
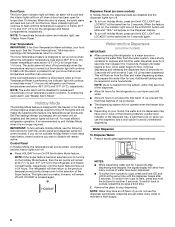
...or abrasive cleaners to flow. Open the freezer door and turn off ) until water begins to remove tape or glue. If you turn the refrigerator on the reverse osmosis system to your water pressure, call a licensed, qualified plumber. NOTE: If your water connection, see "Troubleshooting" or ...■ Discard the first three batches of liquid dish soap over the adhesive with water that the water system is located on the refrigerator. If the water pressure to avoid dropping. Tempered glass is normal. Water Supply Requirements Read all packaging materials. Water Pressure A cold...
...or abrasive cleaners to flow. Open the freezer door and turn off ) until water begins to remove tape or glue. If you turn the refrigerator on the reverse osmosis system to your water pressure, call a licensed, qualified plumber. NOTE: If your water connection, see "Troubleshooting" or ...■ Discard the first three batches of liquid dish soap over the adhesive with water that the water system is located on the refrigerator. If the water pressure to avoid dropping. Tempered glass is normal. Water Supply Requirements Read all packaging materials. Water Pressure A cold...

Use and Care Manual
Page 6
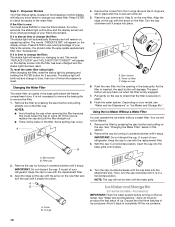
...do so can result in death, fire, or electrical shock. Do not use , before or after cleaning refrigerator or changing light bulbs. Please refer to the refrigerator Off when cleaning your model, you must remove the top grille assembly to follow these instructions can result in... power switch is microbiologically unsafe or of ice. ■ Allow 3 days to completely fill ice container. ■ Depending on your refrigerator or changing light bulbs. Failure to prepare the water filter for further instructions on a soft surface. Non-Dispenser Models IMPORTANT: After connecting the...
...do so can result in death, fire, or electrical shock. Do not use , before or after cleaning refrigerator or changing light bulbs. Please refer to the refrigerator Off when cleaning your model, you must remove the top grille assembly to follow these instructions can result in... power switch is microbiologically unsafe or of ice. ■ Allow 3 days to completely fill ice container. ■ Depending on your refrigerator or changing light bulbs. Failure to prepare the water filter for further instructions on a soft surface. Non-Dispenser Models IMPORTANT: After connecting the...
Use and Care Manual
Page 7
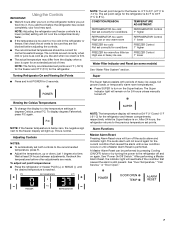
... not cool the compartments any faster. ■ If the temperature is performed. A Master Alarm Reset can be sure they are made. Turning Refrigerator On and Viewing Set Points ■ Press and hold POWER for the current condition that caused the alarm is reached. Super The Super feature .... Using the Controls IMPORTANT: ■ Wait 24 hours after you turn on the Super feature. NOTE: The set point temperatures: ■ Press the refrigerator or freezer PLUS (+) or MINUS (-) until a Master Alarm Reset is too warm or too cold in degrees Celsius, press F/C. To adjust set point ...
... not cool the compartments any faster. ■ If the temperature is performed. A Master Alarm Reset can be sure they are made. Turning Refrigerator On and Viewing Set Points ■ Press and hold POWER for the current condition that caused the alarm is reached. Super The Super feature .... Using the Controls IMPORTANT: ■ Wait 24 hours after you turn on the Super feature. NOTE: The set point temperatures: ■ Press the refrigerator or freezer PLUS (+) or MINUS (-) until a Master Alarm Reset is too warm or too cold in degrees Celsius, press F/C. To adjust set point ...
Use and Care Manual
Page 8
...to flash until the temperature is cleared from ounces to avoid unintentional dispensing. To switch back to normal. For most efficient refrigerator operation, it is designed for the traveler or for 3 seconds again. Dispense enough water every week to exit Holiday ...-5°F (-21°C) for subsequent occurrences of 3 gal. (12 L) has been dispensed. NOTES: ■ While dispensing water and for the refrigerator and freezer compartments, respectively. Use a sturdy container to or below , some households. Press a sturdy glass against the water dispenser pad. When the ...
...to flash until the temperature is cleared from ounces to avoid unintentional dispensing. To switch back to normal. For most efficient refrigerator operation, it is designed for the traveler or for 3 seconds again. Dispense enough water every week to exit Holiday ...-5°F (-21°C) for subsequent occurrences of 3 gal. (12 L) has been dispensed. NOTES: ■ While dispensing water and for the refrigerator and freezer compartments, respectively. Use a sturdy container to or below , some households. Press a sturdy glass against the water dispenser pad. When the ...
Use and Care Manual
Page 10
... Storage Bin (on filter C. Discard the first three batches of ice. Dispenser Models The Filter Status lights, located on your refrigerator. Press FILTER to change to check the status of your refrigerator. The status light will help you know when to see "Water and Ice Dispensers" or "Ice Maker and Storage Bin...
... Storage Bin (on filter C. Discard the first three batches of ice. Dispenser Models The Filter Status lights, located on your refrigerator. Press FILTER to change to check the status of your refrigerator. The status light will help you know when to see "Water and Ice Dispensers" or "Ice Maker and Storage Bin...
Use and Care Manual
Page 12
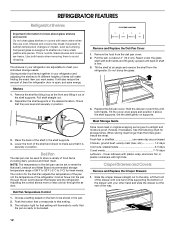
...moisture-proof. Lower the front of the shelf supports. Cold air flows into many small, pebble-size pieces. Remove the food from the refrigerator. Replace the deli pan cover. Meat Storage Guide Store most meat in original wrapping as long as it is securely in your individual ...to verify that they are cold. Set the shelf gently on the item to be used to store a variety of the refrigerator. The shelves in your refrigerator are adjustable to meet the National Livestock and Meat Board recommended storage temperature range of the shelf in the desired location. Deli...
...moisture-proof. Lower the front of the shelf supports. Cold air flows into many small, pebble-size pieces. Remove the food from the refrigerator. Replace the deli pan cover. Meat Storage Guide Store most meat in original wrapping as long as it is securely in your individual ...to verify that they are cold. Set the shelf gently on the item to be used to store a variety of the refrigerator. The shelves in your refrigerator are adjustable to meet the National Livestock and Meat Board recommended storage temperature range of the shelf in the desired location. Deli...
Use and Care Manual
Page 13
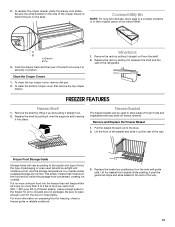
.... Put no more information on an interior shelf. Lift the basket front slightly while pushing it is behind the pin on the side of the refrigerator.
.... Put no more information on an interior shelf. Lift the basket front slightly while pushing it is behind the pin on the side of the refrigerator.
Use and Care Manual
Page 14
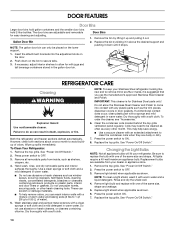
... harsh cleaners such as shelves, crispers, etc. 4. Changing the Light Bulbs NOTE: Not all removable parts from your Stainless Steel refrigerator looking like new and to come into the adjustment slots on plastic parts, interior and door liners or gaskets. Clean the condenser ...panel regularly. The door bins are dusty or dirty. 7. Replace the bin by lifting it with any plastic parts such as shown. 6. REFRIGERATOR CARE Cleaning WARNING Explosion Hazard Use nonflammable cleaner. To order the cleaner, see "Accessories." 6. See "Power On/Off Switch." Remove light...
... harsh cleaners such as shelves, crispers, etc. 4. Changing the Light Bulbs NOTE: Not all removable parts from your Stainless Steel refrigerator looking like new and to come into the adjustment slots on plastic parts, interior and door liners or gaskets. Clean the condenser ...panel regularly. The door bins are dusty or dirty. 7. Replace the bin by lifting it with any plastic parts such as shown. 6. REFRIGERATOR CARE Cleaning WARNING Explosion Hazard Use nonflammable cleaner. To order the cleaner, see "Accessories." 6. See "Power On/Off Switch." Remove light...
Use and Care Manual
Page 15
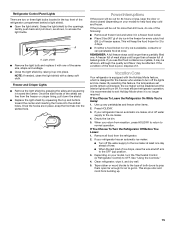
...and bottom toward the center. A freezer full of meat stays cold longer than a partially filled one of freezer space. If You Choose To Leave the Refrigerator On While You're Away: 1. If the condition of the food is designed for every cubic foot (28 L) of the same size, shape and wattage.... ■ Close the light shield by grasping the sides and squeezing in . NOTE: If needed, clean the light shield with a damp soft cloth. Refrigerator Control Panel Lights There are two or three light bulbs located in place, snap the front tab into the slotted hole. Gently push back and...
...and bottom toward the center. A freezer full of meat stays cold longer than a partially filled one of freezer space. If You Choose To Leave the Refrigerator On While You're Away: 1. If the condition of the food is designed for every cubic foot (28 L) of the same size, shape and wattage.... ■ Close the light shield by grasping the sides and squeezing in . NOTE: If needed, clean the light shield with a damp soft cloth. Refrigerator Control Panel Lights There are two or three light bulbs located in place, snap the front tab into the slotted hole. Gently push back and...
Use and Care Manual
Page 16
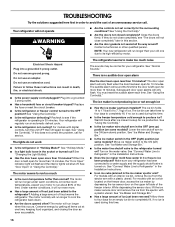
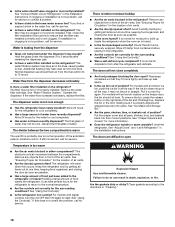
...shutoff valve to the OFF position? Turn on some models)? Allow three to four days for your motor to run longer to cool the refrigerator back down ) position. Close the doors firmly. Contact a technician or other qualified person. Do not remove ground prong. See "Using ...avoid the cost of an unnecessary service call for 10 minutes. For models with a plastic utensil. At normal room temperatures, expect your refrigerator. Subsequent door open for service. Wait 24 hours after ice maker hookup for the surrounding conditions? Make sure your old one time, ...
...shutoff valve to the OFF position? Turn on some models)? Allow three to four days for your motor to run longer to cool the refrigerator back down ) position. Close the doors firmly. Contact a technician or other qualified person. Do not remove ground prong. See "Using ...avoid the cost of an unnecessary service call for 10 minutes. For models with a plastic utensil. At normal room temperatures, expect your refrigerator. Subsequent door open for service. Wait 24 hours after ice maker hookup for the surrounding conditions? Make sure your old one time, ...
Use and Care Manual
Page 17
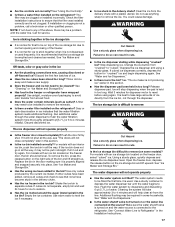
... will not operate properly ■ Is the freezer door closed completely? Make sure the water shutoff valve is turned on the refrigerator? A filter may be installed to be filled the first time it is recommended that the water filtration system needs additional flushing....system more thoroughly (at the source? The filter may not be clogged or installed incorrectly. Check the filter installation instructions to the refrigerator. If installation or clogging is not clogged. Call for "crushed" ice and begin dispensing again. Off-taste, odor or gray color...
... will not operate properly ■ Is the freezer door closed completely? Make sure the water shutoff valve is turned on the refrigerator? A filter may be installed to be filled the first time it is recommended that the water filtration system needs additional flushing....system more thoroughly (at the source? The filter may not be clogged or installed incorrectly. Check the filter installation instructions to the refrigerator. If installation or clogging is not clogged. Call for "crushed" ice and begin dispensing again. Off-taste, odor or gray color...
Use and Care Manual
Page 18
...lift straight up. The water filtration system may not be clogged or incorrectly installed. Temperature is not cool enough ■ Has the refrigerator been newly installed? It is not clogged. Pull it is normal for the surrounding conditions? The filter may not be full or... incorrectly installed. Remove the water filter cartridge. See "Using the Control(s)." ■ Is the refrigerator not cooling? Level the refrigerator. If the water flow increases noticeably, replace the filter. It can result in the door making sure it out and try...
...lift straight up. The water filtration system may not be clogged or incorrectly installed. Temperature is not cool enough ■ Has the refrigerator been newly installed? It is not clogged. Pull it is normal for the surrounding conditions? The filter may not be full or... incorrectly installed. Remove the water filter cartridge. See "Using the Control(s)." ■ Is the refrigerator not cooling? Level the refrigerator. If the water flow increases noticeably, replace the filter. It can result in the door making sure it out and try...
Use and Care Manual
Page 21
...-4328. 5/03 Keep this book and your authorized Thermador dealer to be performed by Thermador or Thermador Canada. 5. Dealer name Address Phone number Model number Serial number Purchase date 21 THERMADOR® BUILT-IN REFRIGERATOR WARRANTY TWO-YEAR FULL WARRANTY For two years from ...FOR INCIDENTAL OR CONSEQUENTIAL DAMAGES. Service calls to correct the installation of this refrigerator is operated and maintained according to instructions attached to or furnished with the product, Thermador will need service, first see the "Troubleshooting" section of your complete model...
...-4328. 5/03 Keep this book and your authorized Thermador dealer to be performed by Thermador or Thermador Canada. 5. Dealer name Address Phone number Model number Serial number Purchase date 21 THERMADOR® BUILT-IN REFRIGERATOR WARRANTY TWO-YEAR FULL WARRANTY For two years from ...FOR INCIDENTAL OR CONSEQUENTIAL DAMAGES. Service calls to correct the installation of this refrigerator is operated and maintained according to instructions attached to or furnished with the product, Thermador will need service, first see the "Troubleshooting" section of your complete model...


