Installation Manual
Page 3
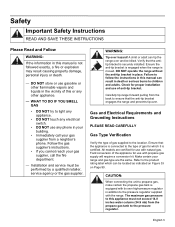
...anti-tip bracket is engaged when the range is being installed. 2. WARNING: If the information in this manual can tip the range over and be sure that the anti-tip bracket engages the cast aluminum base and prevents tipover. Installation must be performed by a qualified or licensed contractor,...any appliance. • Do not touch any electrical switch. • Do not use any other flammable vapors and liquids in this manual is securely installed. OWNER: Please retain these instructions for the owner. A child or adult can result in death or serious burns to follow the ...
...anti-tip bracket is engaged when the range is being installed. 2. WARNING: If the information in this manual can tip the range over and be sure that the anti-tip bracket engages the cast aluminum base and prevents tipover. Installation must be performed by a qualified or licensed contractor,...any appliance. • Do not touch any electrical switch. • Do not use any other flammable vapors and liquids in this manual is securely installed. OWNER: Please retain these instructions for the owner. A child or adult can result in death or serious burns to follow the ...
Installation Manual
Page 17
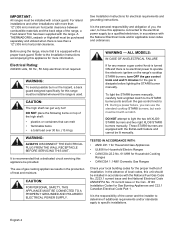
...adjustment of the pressure regulator. Do not attempt any kind to check for the purpose of shutting off the gas supply. A manual gas shut-off valve must be installed external to the appliance, in a location accessible from the gas supply piping system during any pressure testing of the gas supply ... the gas supply and the appliance inlet pipe, which exits the rear, lower right of the flex line is turned off at the manual shut-off valve before installation. • Use pipe sealing compound or Teflon® tape on the pipe threads, and be at least 6.0" W.C. (14.9 mb) for natural ...
...adjustment of the pressure regulator. Do not attempt any kind to check for the purpose of shutting off the gas supply. A manual gas shut-off valve must be installed external to the appliance, in a location accessible from the gas supply piping system during any pressure testing of the gas supply ... the gas supply and the appliance inlet pipe, which exits the rear, lower right of the flex line is turned off at the manual shut-off valve before installation. • Use pipe sealing compound or Teflon® tape on the pipe threads, and be at least 6.0" W.C. (14.9 mb) for natural ...
Installation Manual
Page 32
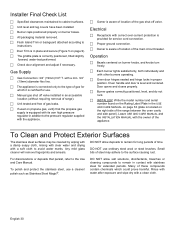
...with a damp soapy cloth, rinsing with clear water and drying with the owner of the main circuit breaker. Leave USE AND CARE MANUAL and the INSTALLATION MANUAL with a soft cloth to remain for extended periods. Rinse with water after exposure and wipe dry with stainless steel for long periods ...closes properly. Burner grates correctly positioned, level, and do not rock. INSTALLER: Write the model number and serial number found on the Rating Label Plate in the USE AND CARE MANUAL on page 32 (plate is located on propane gas, verify that persist, refer to remain ...
...with a damp soapy cloth, rinsing with clear water and drying with the owner of the main circuit breaker. Leave USE AND CARE MANUAL and the INSTALLATION MANUAL with a soft cloth to remain for extended periods. Rinse with water after exposure and wipe dry with stainless steel for long periods ...closes properly. Burner grates correctly positioned, level, and do not rock. INSTALLER: Write the model number and serial number found on the Rating Label Plate in the USE AND CARE MANUAL on page 32 (plate is located on propane gas, verify that persist, refer to remain ...
Use and Care Manual
Page 7
...your gas supplier, call your gas supplier from a neighbor's phone. Verify that the antitip bracket is moved. All models are the same. Installation and service must not exceed 14.0 inches water column (34.9 mb) from the back to the pressure regulator supplied with propane gas supply ...will require a conversion kit. Ensure the anti-tip bracket is engaged when the range is securely installed. Refer to this manual can be performed by a qualified installer, service agency or the gas supplier. The maximum gas pressure to the product rating label which it is not...
...your gas supplier, call your gas supplier from a neighbor's phone. Verify that the antitip bracket is moved. All models are the same. Installation and service must not exceed 14.0 inches water column (34.9 mb) from the back to the pressure regulator supplied with propane gas supply ...will require a conversion kit. Ensure the anti-tip bracket is engaged when the range is securely installed. Refer to this manual can be performed by a qualified installer, service agency or the gas supplier. The maximum gas pressure to the product rating label which it is not...
Use and Care Manual
Page 8
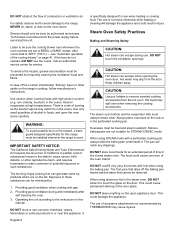
...Gas Code No. Z223.1 current issue and the National Electrical Code ANSI/NFPA No. 70 current issue or the Can - A THERMADOR® Lowback or Highshelf must be purchased separately and utilized when there is equipped with a proper back guard. Before using the ...accordance with the ExtraLow® feature and cannot be lit manually. It is used. CAUTION: FOR PERSONAL SAFETY, THIS APPLIANCE MUST BE CONNECTED TO A PROPERLY GROUNDED AND POLARIZED ELECTRICAL POWER SUPPLY. For island installations and other installations with more information. WARNING: ALWAYS DISCONNECT THE ELECTRICAL PLUG...
...Gas Code No. Z223.1 current issue and the National Electrical Code ANSI/NFPA No. 70 current issue or the Can - A THERMADOR® Lowback or Highshelf must be purchased separately and utilized when there is equipped with a proper back guard. Before using the ...accordance with the ExtraLow® feature and cannot be lit manually. It is used. CAUTION: FOR PERSONAL SAFETY, THIS APPLIANCE MUST BE CONNECTED TO A PROPERLY GROUNDED AND POLARIZED ELECTRICAL POWER SUPPLY. For island installations and other installations with more information. WARNING: ALWAYS DISCONNECT THE ELECTRICAL PLUG...
Use and Care Manual
Page 9
... new THERMADOR PROFESSIONAL® range has been designed to accumulate on fan or filter. Wait at high settings. Children and pets should not be followed, including the following: Read this Use and Care Manual carefully before using this restaurant caliber range as this manual. They...dissipate. Boilovers cause smoking and greasy spillovers that they could be a safe, reliable appliance. Use proper pan size. Insure proper installation and servicing. All other servicing should never be referred to the range. This can catch fire and plastic items may ignite. Some...
... new THERMADOR PROFESSIONAL® range has been designed to accumulate on fan or filter. Wait at high settings. Children and pets should not be followed, including the following: Read this Use and Care Manual carefully before using this restaurant caliber range as this manual. They...dissipate. Boilovers cause smoking and greasy spillovers that they could be a safe, reliable appliance. Use proper pan size. Insure proper installation and servicing. All other servicing should never be referred to the range. This can catch fire and plastic items may ignite. Some...
Use and Care Manual
Page 12
... the instructions in foods, and open appliance door. Technicians must be prevented by THERMADOR® may spill over when removing the cooking accessories. To avoid a fire hazard, ...grease accumulation must disconnect the power supply before servicing this manual. Use caution when cooking foods with gas. 2. There is a risk of potential exposure.... The fruit juice that drips off the baking pan leaves behind stains that cannot be installed whenever the range is specifically designed for service. This could cause corrosion of combustion or ventilation...
... the instructions in foods, and open appliance door. Technicians must be prevented by THERMADOR® may spill over when removing the cooking accessories. To avoid a fire hazard, ...grease accumulation must disconnect the power supply before servicing this manual. Use caution when cooking foods with gas. 2. There is a risk of potential exposure.... The fruit juice that drips off the baking pan leaves behind stains that cannot be installed whenever the range is specifically designed for service. This could cause corrosion of combustion or ventilation...
Use and Care Manual
Page 19
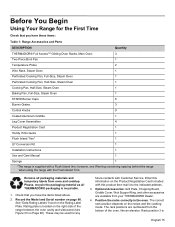
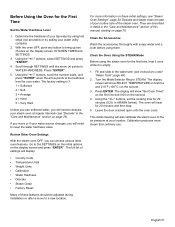
... when using the range with a Flush Island trim; Check that you have these items: Table 1: Range Accessories and Parts DESCRIPTION Quantity THERMADOR® Full Access™ Gliding Oven Racks, Main Oven 3 Two-Piece Broil Pan 1 Temperature Probe 2 Wire Rack, Steam Oven... Aluminum Griddle 1 Leg Cover Assemblies 4 Product Registration Card 1 Handy Hints Guide 1 Flush Island Trim* 1 LP Conversion Kit 1 Installation Instructions 1 Use and Care Manual 1 Sponge 1 *The range is English 15 These may be used for the First Time Check that you have the items listed ...
... when using the range with a Flush Island trim; Check that you have these items: Table 1: Range Accessories and Parts DESCRIPTION Quantity THERMADOR® Full Access™ Gliding Oven Racks, Main Oven 3 Two-Piece Broil Pan 1 Temperature Probe 2 Wire Rack, Steam Oven... Aluminum Griddle 1 Leg Cover Assemblies 4 Product Registration Card 1 Handy Hints Guide 1 Flush Island Trim* 1 LP Conversion Kit 1 Installation Instructions 1 Use and Care Manual 1 Sponge 1 *The range is English 15 These may be used for the First Time Check that you have the items listed ...
Use and Care Manual
Page 29
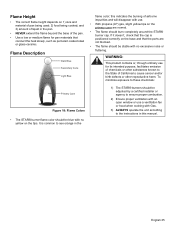
... With propane (LP) gas, slight yellow tips on the primary cone are not blocked. • The flame should be adjusted by a certified installer or agency to ensure proper combustion. 2) Ensure proper ventilation with an open window or use for its intended purpose, facilitates emission of chemicals or ...other reproductive harm. this manual. If it doesn't, check that the cap is common to see orange in the 1) The STAR® burners should be blue with Gas....
... With propane (LP) gas, slight yellow tips on the primary cone are not blocked. • The flame should be adjusted by a certified installer or agency to ensure proper combustion. 2) Ensure proper ventilation with an open window or use for its intended purpose, facilitates emission of chemicals or ...other reproductive harm. this manual. If it doesn't, check that the cap is common to see orange in the 1) The STAR® burners should be blue with Gas....
Use and Care Manual
Page 34
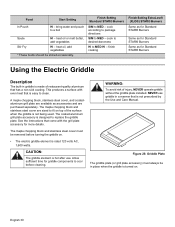
...STAR® Burners Using the Electric Griddle Description The built-in place when the griddle is not prescribed by the Use and Care Manual. Finish Setting Standard STAR® Burners SIM to cool before turning the griddle on . The maple chopping block and stainless steel... that is rated 120 volts AC, 1,600 watts. CAUTION: The griddle element is made of injury, NEVER operate griddle without the griddle plate installed. heat oil, add vegetables * These foods should be removed before cleaning. finish cooking Finish Setting ExtraLow® (XLO®) STAR® ...
...STAR® Burners Using the Electric Griddle Description The built-in place when the griddle is not prescribed by the Use and Care Manual. Finish Setting Standard STAR® Burners SIM to cool before turning the griddle on . The maple chopping block and stainless steel... that is rated 120 volts AC, 1,600 watts. CAUTION: The griddle element is made of injury, NEVER operate griddle without the griddle plate installed. heat oil, add vegetables * These foods should be removed before cleaning. finish cooking Finish Setting ExtraLow® (XLO®) STAR® ...
Use and Care Manual
Page 35
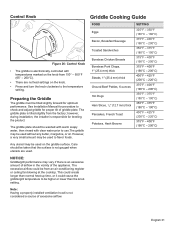
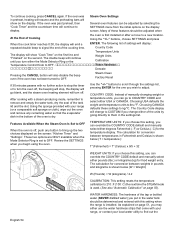
... performance may vary if there is an excessive amount of airflow in the vicinity of excessive airflow. English 31 however, during installation, the installer is responsible for proper tilt of griddle plate. However, a very small amount may be taken that the surface is not ... 220°C) 375°F - 400°F (190°C - 200°C) Any utensil may be tilted slightly forward for optimum performance. See Installation Manual for procedure to check and adjust griddle for leveling the product. Control Knob LIGHT OFF OFF Figure 26: Control Knob • The griddle is electronically...
... performance may vary if there is an excessive amount of airflow in the vicinity of excessive airflow. English 31 however, during installation, the installer is responsible for proper tilt of griddle plate. However, a very small amount may be taken that the surface is not ... 220°C) 375°F - 400°F (190°C - 200°C) Any utensil may be tilted slightly forward for optimum performance. See Installation Manual for procedure to check and adjust griddle for leveling the product. Control Knob LIGHT OFF OFF Figure 26: Control Knob • The griddle is electronically...
Use and Care Manual
Page 55
.... Turn the Mode Selector Ring to the hardness level for 20 minutes (0:20, in the "Care and Maintenance" section of this manual, starting on these features should be adjusted during installation or after a move or if your routine care of these initial settings, see instructions under "Water Tank", page 49). 2. The oven...
.... Turn the Mode Selector Ring to the hardness level for 20 minutes (0:20, in the "Care and Maintenance" section of this manual, starting on these features should be adjusted during installation or after a move or if your routine care of these initial settings, see instructions under "Water Tank", page 49). 2. The oven...
Use and Care Manual
Page 58
...bottled water (NEVER distilled water) you change to remove and empty the water tank, dry the seal of the oven is first installed or after a move to adjust. The calculation for conversion between temperatures in preheat, heating will resume and the preheating bars will... 32 HI OFF OFF OVEN LIGHT E>NTKCSEEioRTtoTckIhNTeGinSmeTrimer - + CA WEIGHT UNITS: If you choose this setting, you can override the COUNTRY CODE default and manually select either of the cooking time. WATER HARDNESS: The hardness of these settings to OFF. If the oven was past preheat, then "Cook Timer"...
...bottled water (NEVER distilled water) you change to remove and empty the water tank, dry the seal of the oven is first installed or after a move to adjust. The calculation for conversion between temperatures in preheat, heating will resume and the preheating bars will... 32 HI OFF OFF OVEN LIGHT E>NTKCSEEioRTtoTckIhNTeGinSmeTrimer - + CA WEIGHT UNITS: If you choose this setting, you can override the COUNTRY CODE default and manually select either of the cooking time. WATER HARDNESS: The hardness of these settings to OFF. If the oven was past preheat, then "Cook Timer"...
Use and Care Manual
Page 91
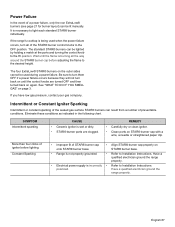
...all the way around the STAR® burner cap before lighting Constant Sparking • Improper fit of the STAR® burner control knobs to Installation Instructions. See "WHAT TO DO IF YOU SMELL GAS" on STAR® burner cap with a wire, a needle or straightened paper clip...STAR® burner cap onto STAR® burner base. • Align STAR® burner cap properly on the outer sides cannot be lit manually. Have a qualified electrician ground the range properly. Eliminate these conditions as indicated in the following chart. REMEDY • Carefully dry or clean igniter...
...all the way around the STAR® burner cap before lighting Constant Sparking • Improper fit of the STAR® burner control knobs to Installation Instructions. See "WHAT TO DO IF YOU SMELL GAS" on STAR® burner cap with a wire, a needle or straightened paper clip...STAR® burner cap onto STAR® burner base. • Align STAR® burner cap properly on the outer sides cannot be lit manually. Have a qualified electrician ground the range properly. Eliminate these conditions as indicated in the following chart. REMEDY • Carefully dry or clean igniter...
