
Use and Care Guide
Page 3
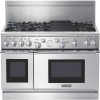
...Thermador Professional ® Ranges. Introduction CONTENTS Introduction 1 Gas Type Verification 1 Section 1: General Safety Instructions Safety Precautions 2 -3 4- 5 Section 2: Before You Begin Before Using Your Range for the First Time ...... 6 Section 3: Description Model & Parts Identification Model & Parts Identification Model & Parts Identification - 48" Range 7 - 36" Range 8 - 30" Range...40 Warranty 41-42 Introduction The Thermador ProfessionaP Ranges are certified for use with propane gas supply will be unique to each range. CAUTION When connecting the unit to...
...Thermador Professional ® Ranges. Introduction CONTENTS Introduction 1 Gas Type Verification 1 Section 1: General Safety Instructions Safety Precautions 2 -3 4- 5 Section 2: Before You Begin Before Using Your Range for the First Time ...... 6 Section 3: Description Model & Parts Identification Model & Parts Identification Model & Parts Identification - 48" Range 7 - 36" Range 8 - 30" Range...40 Warranty 41-42 Introduction The Thermador ProfessionaP Ranges are certified for use with propane gas supply will be unique to each range. CAUTION When connecting the unit to...
Use and Care Guide
Page 4
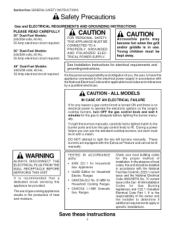
...National Electrical Code ANSIiNFPA No. 70 current issue orthe Can - It is recommended that a dedicated circuit servicing this unit should be kept away. 48" Dual-Fuel Models: 240/208 volts, 60 Hz., 50 Amp electrical circuit required. INSTRUCTIONS CAUTION Accessible parts may become hot when the grill... and/or griddle is no electrical power to operate the electronic igniters on the range's cooktop burners, turn the gas control knob to HI. These burners are equipped with the ExtraLow_ feature and cannot be lit with a ...
...National Electrical Code ANSIiNFPA No. 70 current issue orthe Can - It is recommended that a dedicated circuit servicing this unit should be kept away. 48" Dual-Fuel Models: 240/208 volts, 60 Hz., 50 Amp electrical circuit required. INSTRUCTIONS CAUTION Accessible parts may become hot when the grill... and/or griddle is no electrical power to operate the electronic igniters on the range's cooktop burners, turn the gas control knob to HI. These burners are equipped with the ExtraLow_ feature and cannot be lit with a ...
Use and Care Guide
Page 7
...during baking and while self- BEFORE USING YOUR RANGE FOR THE FIRST TIME, CHECK THAT YOU HAVE THESE ITEMS: DESCRIPTION 30" 36" w/ 36" w/ 36" 4-Burner 12" Grill 6-Burner Griddle 48" w/ 48" w/ 24" Grill and Griddle 12" Griddle 48" w/ 12" Griddle 48" w/ Grill Oven Racks LargeOven 3 Oven ..." liquor or other reproductive harm, and requires businesses to be ordered and shipped separately. Providing good ventilation when cooking with the range shipment. :l:The aluminum broil pan is a potential cause of combustion or ventilation air. Do not use the oven. cleaning the...
...during baking and while self- BEFORE USING YOUR RANGE FOR THE FIRST TIME, CHECK THAT YOU HAVE THESE ITEMS: DESCRIPTION 30" 36" w/ 36" w/ 36" 4-Burner 12" Grill 6-Burner Griddle 48" w/ 48" w/ 24" Grill and Griddle 12" Griddle 48" w/ 12" Griddle 48" w/ Grill Oven Racks LargeOven 3 Oven ..." liquor or other reproductive harm, and requires businesses to be ordered and shipped separately. Providing good ventilation when cooking with the range shipment. :l:The aluminum broil pan is a potential cause of combustion or ventilation air. Do not use the oven. cleaning the...
Use and Care Guide
Page 9
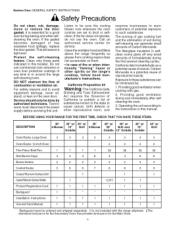
... Control Knobs, ExtraLow _ Burners (2) 6. Rack Guides 19. Oven Controls, Temperature Indicator 9. Oven Thermostat 18. Range Feet (4) WARNING: To provide ventilation, remove range proper do NOT feet. Oven Rack (3 included, not shown) 20. shown (Backguard ordered separately) 2. Burner Grates... & Burners 3. Oven Door 11. Section Three: DESCRIPTION Model and Parts Identification Key for 48" Models 1. 22" Pot ...
... Control Knobs, ExtraLow _ Burners (2) 6. Rack Guides 19. Oven Controls, Temperature Indicator 9. Oven Thermostat 18. Range Feet (4) WARNING: To provide ventilation, remove range proper do NOT feet. Oven Rack (3 included, not shown) 20. shown (Backguard ordered separately) 2. Burner Grates... & Burners 3. Oven Door 11. Section Three: DESCRIPTION Model and Parts Identification Key for 48" Models 1. 22" Pot ...
Use and Care Guide
Page 30
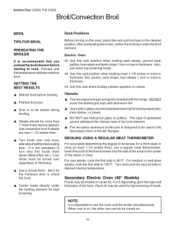
...the food. • Center foods directly under the broil element. use heat-proof glass or pottery. DO NOT cover the slotted grid (top) with the range. Insert the point of the thermometer into the side of the meat to 90°F. When one is on, the other one cannot be turned... on the oven, place the rack and broil pan in the 48" Ranges. Preheat until the temperature indicator reaches broil. Turn foods over 1-1/2 inches thick. Liver slices must be closed during broiling. After preheating the broiler, center ...
...the food. • Center foods directly under the broil element. use heat-proof glass or pottery. DO NOT cover the slotted grid (top) with the range. Insert the point of the thermometer into the side of the meat to 90°F. When one is on, the other one cannot be turned... on the oven, place the rack and broil pan in the 48" Ranges. Preheat until the temperature indicator reaches broil. Turn foods over 1-1/2 inches thick. Liver slices must be closed during broiling. After preheating the broiler, center ...
Use and Care Guide
Page 31
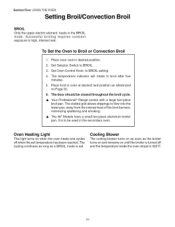
... when the oven heats and cycles off and the temperature inside the oven drops to be closed throughout the broil cycle. • Your Professional ® Range comes with a large two-piece broil pan. It is to 325°F. 29 Place oven rack in the secondary oven. Oven Heating Light This light.... 4. Set Oven Control Knob to flow into the lower pan, away from the intense heat of the broil burners, minimizing spattering and smoking. • The 48" Models have a small two-piece aluminum broiler pan. The door should be used in desired position. 2.
... when the oven heats and cycles off and the temperature inside the oven drops to be closed throughout the broil cycle. • Your Professional ® Range comes with a large two-piece broil pan. It is to 325°F. 29 Place oven rack in the secondary oven. Oven Heating Light This light.... 4. Set Oven Control Knob to flow into the lower pan, away from the intense heat of the broil burners, minimizing spattering and smoking. • The 48" Models have a small two-piece aluminum broiler pan. The door should be used in desired position. 2.
Use and Care Guide
Page 33
...food soil. Open window for CLEAN, the cooktop burners and electric griddle may remain inside the oven. When set for ventilation. The secondary oven (48" Models), and the grill cannot be used . a nearby additional If another clean cycle is initiated at the beginning of grease and any soil ...that the oven door is outside the door seal area. Remove any loose soil that it is common to indicate the range has not completely cooled down after the oven has cooled below 500 ° and the door is initiated. Section Six: CARE AND MAINTENANCE...
...food soil. Open window for CLEAN, the cooktop burners and electric griddle may remain inside the oven. When set for ventilation. The secondary oven (48" Models), and the grill cannot be used . a nearby additional If another clean cycle is initiated at the beginning of grease and any soil ...that the oven door is outside the door seal area. Remove any loose soil that it is common to indicate the range has not completely cooled down after the oven has cooled below 500 ° and the door is initiated. Section Six: CARE AND MAINTENANCE...

Use and Care Guide
Page 34
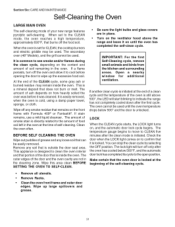
... To Set Self-Clean for the Large Main Self-Cleaning Oven . Select OFF using the Selector switch. 2. Both elements are permanently connected. The secondary oven (48" models only) does not have have the SelfClean feature. The heating elements in use . 2. Turn Oven Control Knob to the OPEN position. • The cooling... blower turns off . 1. CAUTION The interior of the Clean Cycle The Clean cycle takes 4 to 5 hours to CLEAN. • Cooling Blower turns on Range Cleaning Recommendations, Page 38. 3. Use hot sudsy water; rinse and dry thoroughly. 32
... To Set Self-Clean for the Large Main Self-Cleaning Oven . Select OFF using the Selector switch. 2. Both elements are permanently connected. The secondary oven (48" models only) does not have have the SelfClean feature. The heating elements in use . 2. Turn Oven Control Knob to the OPEN position. • The cooling... blower turns off . 1. CAUTION The interior of the Clean Cycle The Clean cycle takes 4 to 5 hours to CLEAN. • Cooling Blower turns on Range Cleaning Recommendations, Page 38. 3. Use hot sudsy water; rinse and dry thoroughly. 32


