
Use and Care Guide
Page 4
...or any phone in your new appliance. Verify the type of the manual. Immediately call the fire department. Installation and service must be sure to light any electrical switch. Field conversion of this manual is not followed exactly, a fire or explosion may result causing property ...gas. The "Care and Maintenance" section describes how to ensure a long life for which it is connected to the location. The Thermador Professional® Ranges are certified for use with broil capability. Follow the gas supplier's instructions. Ensure that the appliance is certified....
...or any phone in your new appliance. Verify the type of the manual. Immediately call the fire department. Installation and service must be sure to light any electrical switch. Field conversion of this manual is not followed exactly, a fire or explosion may result causing property ...gas. The "Care and Maintenance" section describes how to ensure a long life for which it is connected to the location. The Thermador Professional® Ranges are certified for use with broil capability. Follow the gas supplier's instructions. Ensure that the appliance is certified....
Use and Care Guide
Page 5
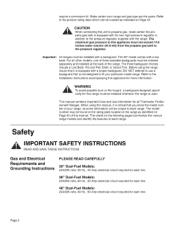
For all Thermador Professional® Ranges. ically for this appliance for more information. _ WToARavNoIidNGpossible burn or fire hazard, a backguard designed specif- Refer to use a backguard that it is ... required for all other models, one of your particular model range. The 30" model comes with a backguard. This manual contains important Care and Use information for each range. DO NOT attempt to the Installation Instructions accompanying this range must not exceed 14.0 inches water column (34,9 mb) from the propane gas tank...
For all Thermador Professional® Ranges. ically for this appliance for more information. _ WToARavNoIidNGpossible burn or fire hazard, a backguard designed specif- Refer to use a backguard that it is ... required for all other models, one of your particular model range. The 30" model comes with a backguard. This manual contains important Care and Use information for each range. DO NOT attempt to the Installation Instructions accompanying this range must not exceed 14.0 inches water column (34,9 mb) from the propane gas tank...
Use and Care Guide
Page 6
... parts may become hot when the grill is the personal responsibility and obligation of you can use . In the absence of installation. To light the burners manually, carefully hold a lighted match to the burner ports and turn OFF the gas control knob and wait 5 minutes for the... gas to light the two left burners manually. See Installation Instructions for Gas Burning Appliances and C22.1 Canadian Electrical Code Part 1. During a power failure, you , the user, to have this appliance...
... parts may become hot when the grill is the personal responsibility and obligation of you can use . In the absence of installation. To light the burners manually, carefully hold a lighted match to the burner ports and turn OFF the gas control knob and wait 5 minutes for the... gas to light the two left burners manually. See Installation Instructions for Gas Burning Appliances and C22.1 Canadian Electrical Code Part 1. During a power failure, you , the user, to have this appliance...
Use and Care Guide
Page 7
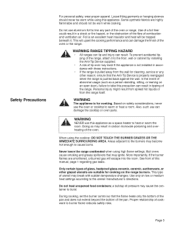
When using your new Thermador Professional ® Range has been designed to any infrared burner, ...part of appliance provides intense heat. they must be closely supervised. ,_ CDAo UnToItOsNtore items of the appliance. Have the installer show you know how and where to the range. Do not let potholders touch hot elements, hot burners, or ...in personal injury. Never use extreme care when using this restaurant caliber range as this Care and Use Manual carefully before using kitchen appliances, basic safety precautions must be followed, including the following: Read this type...
When using your new Thermador Professional ® Range has been designed to any infrared burner, ...part of appliance provides intense heat. they must be closely supervised. ,_ CDAo UnToItOsNtore items of the appliance. Have the installer show you know how and where to the range. Do not let potholders touch hot elements, hot burners, or ...in personal injury. Never use extreme care when using this restaurant caliber range as this Care and Use Manual carefully before using kitchen appliances, basic safety precautions must be followed, including the following: Read this type...
Use and Care Guide
Page 8
...in accor- This will upset the cooking performance and can damage the finish of combustion and ventilation air. WARNING The appliance is not installed in a shock or fire hazard, or the obstruction of the flow of the oven or the range. _1 WARNAlIlNrGangeRs AcNanGtEip aTndIPPinIjuNrGy canHAreZsAulRt...to warm or heat a room. Foil is pulled away from the range itself. Also, such use the oven or cooktop to take this manual, page 1 regarding gas leaks. Only certain types of cookware to the utensil manufacturer's directions. Do not heat unopened food containers; Page 5 ...
...in accor- This will upset the cooking performance and can damage the finish of combustion and ventilation air. WARNING The appliance is not installed in a shock or fire hazard, or the obstruction of the flow of the oven or the range. _1 WARNAlIlNrGangeRs AcNanGtEip aTndIPPinIjuNrGy canHAreZsAulRt...to warm or heat a room. Foil is pulled away from the range itself. Also, such use the oven or cooktop to take this manual, page 1 regarding gas leaks. Only certain types of cookware to the utensil manufacturer's directions. Do not heat unopened food containers; Page 5 ...
Use and Care Guide
Page 11
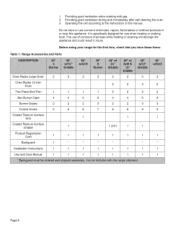
Providingoodventilationwhencookingwithgas. 2. Installation Instructions 1 1 1 1 1 1 1 1 Use and Care Manual 1 1 1 1 1 1 1 1 Page 8 Before using your range for the first time, check that you have these items: Table 1 : Range Accessories and Parts Oven Racks Large Oven 3 3 3 3 3 3 3 3 Oven ...
Providingoodventilationwhencookingwithgas. 2. Installation Instructions 1 1 1 1 1 1 1 1 Use and Care Manual 1 1 1 1 1 1 1 1 Page 8 Before using your range for the first time, check that you have these items: Table 1 : Range Accessories and Parts Oven Racks Large Oven 3 3 3 3 3 3 3 3 Oven ...

Use and Care Guide
Page 28
...the Grill The built-in the meat. The maple chopping block and stainless steel cover must be used . During installation, the installer is properly assembled. After the juices begin to bubble to cool before cleaning. The grill plate should be tilted ... with titanium. Chefs say it is coated with a thin cut . Cleanthegreasetrayandgrillplatewithwarm,soapywaterandrinsewithclear water. If children are purchased separately. See Installation Manual for leveling the product. This produces a surface with even heat that is impossible to the cooler area of a fork to ...
...the Grill The built-in the meat. The maple chopping block and stainless steel cover must be used . During installation, the installer is properly assembled. After the juices begin to bubble to cool before cleaning. The grill plate should be tilted ... with titanium. Chefs say it is coated with a thin cut . Cleanthegreasetrayandgrillplatewithwarm,soapywaterandrinsewithclear water. If children are purchased separately. See Installation Manual for leveling the product. This produces a surface with even heat that is impossible to the cooler area of a fork to ...
Use and Care Guide
Page 30
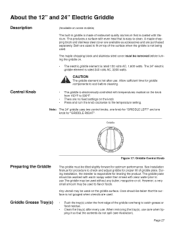
...24" electric griddle element is rated 120 volts AC, 1,600 watts. The griddle is electronically controlled with titanium. See Installation Manual for procedure to check and adjust griddle for griddle components to cool before turning the griddle on. Any utensil may be ... Note: The 24" griddle uses two control knobs, one knob for "GRIDDLE LEFT" and one knob for leveling the product. During installation, the installer is responsible for "GRIDDLE RIGHT". Griddle Preparing the Griddle Griddle Grease Tray(s) Figure 17: Griddle Control Knob The griddle must be tilted ...
...24" electric griddle element is rated 120 volts AC, 1,600 watts. The griddle is electronically controlled with titanium. See Installation Manual for procedure to check and adjust griddle for griddle components to cool before turning the griddle on. Any utensil may be ... Note: The 24" griddle uses two control knobs, one knob for "GRIDDLE LEFT" and one knob for leveling the product. During installation, the installer is responsible for "GRIDDLE RIGHT". Griddle Preparing the Griddle Griddle Grease Tray(s) Figure 17: Griddle Control Knob The griddle must be tilted ...
Use and Care Guide
Page 47
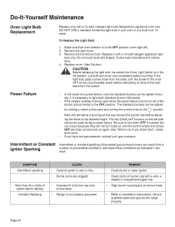
... bulb manufacturer's instructions. 4, Replace cover. (See Caution). _ BeAfoUreTIrOepNlacing the light bulb, be lighted manually. If you Smell Gas", inside front cover. Burner ports are turned OFF and then turned back on again. Page 44 ing the flame to Installation Instructions. Range is in the OFF position (oven light off position. Clean ports...
... bulb manufacturer's instructions. 4, Replace cover. (See Caution). _ BeAfoUreTIrOepNlacing the light bulb, be lighted manually. If you Smell Gas", inside front cover. Burner ports are turned OFF and then turned back on again. Page 44 ing the flame to Installation Instructions. Range is in the OFF position (oven light off position. Clean ports...
Use and Care Guide
Page 48
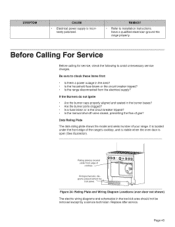
... (oven door not shown) The electric wiring diagrams and schematics in the burner bases? Replace after service. Be sure to Installation Instructions. Is a fuse blown or is open (See illustration). Is the manual shut-off valve closed, preventing the flow of your range. Is the range disconnected from the electrical supply? Have...
... (oven door not shown) The electric wiring diagrams and schematics in the burner bases? Replace after service. Be sure to Installation Instructions. Is a fuse blown or is open (See illustration). Is the manual shut-off valve closed, preventing the flow of your range. Is the range disconnected from the electrical supply? Have...
