
Parts List
Page 4
... PIN 1 51 6600909 SHIM 1 - 4 - *ALTERNATIVE PARTS TCG 24ECP 4 - 16 DESCRIPTION 1 6600544 CYLINDER COVER NO. BOLT M4 5 3 IDENTIFICATION LABEL 1 4 6600518 SEAL LOCK HEX. BOLT M6 X 16 2 5 6600908 MUFFLER 1 6 6600517 HEAT PROTECTION PANEL 1 7 6601339 HEX. SOCKET HD. PARTS ITEM NO. CODE NO. BOLT (W/SP.WASHER) M5 X 22 7 8 6600902 CYLINDER N24 1 9 6600542 IGNITION PLUG (TORCH L7RTC) 1 10 6600524 INTAKE PACKING 1 11 6600525 CARBURETOR INSULATOR 1 12 6600910 SPRING...
... PIN 1 51 6600909 SHIM 1 - 4 - *ALTERNATIVE PARTS TCG 24ECP 4 - 16 DESCRIPTION 1 6600544 CYLINDER COVER NO. BOLT M4 5 3 IDENTIFICATION LABEL 1 4 6600518 SEAL LOCK HEX. BOLT M6 X 16 2 5 6600908 MUFFLER 1 6 6600517 HEAT PROTECTION PANEL 1 7 6601339 HEX. SOCKET HD. PARTS ITEM NO. CODE NO. BOLT (W/SP.WASHER) M5 X 22 7 8 6600902 CYLINDER N24 1 9 6600542 IGNITION PLUG (TORCH L7RTC) 1 10 6600524 INTAKE PACKING 1 11 6600525 CARBURETOR INSULATOR 1 12 6600910 SPRING...

Parts List
Page 5
... 305812 TAPPING SCREW (W/FLANGE) D4 X 16 (BLACK) 2 83 6600566 HANDLE (B) 1 84 6600568 THROTTLE LEVER 1 85 6696489 SPRING (A) 1 86 6600567 TRIGGER LOCKOUT 1 87 6601275 STOP SWITCH 1 88 6696491 STOP SWITCH CORD 2 89 6696967 PROTECTION TUBE 1 90 6600569 THROTTLE WIRE COMP 1 91 6600565 HANDLE (A) 1 92 6600538 GRIP (LOOP) 1 93 6600919 HEX. SOCKET HD. CODE NO. PARTS ITEM NO. DESCRIPTION 52 6600907 CRANK CASE (F) ASS'Y NO. BOLT (W/WASHERS...
... 305812 TAPPING SCREW (W/FLANGE) D4 X 16 (BLACK) 2 83 6600566 HANDLE (B) 1 84 6600568 THROTTLE LEVER 1 85 6696489 SPRING (A) 1 86 6600567 TRIGGER LOCKOUT 1 87 6601275 STOP SWITCH 1 88 6696491 STOP SWITCH CORD 2 89 6696967 PROTECTION TUBE 1 90 6600569 THROTTLE WIRE COMP 1 91 6600565 HANDLE (A) 1 92 6600538 GRIP (LOOP) 1 93 6600919 HEX. SOCKET HD. CODE NO. PARTS ITEM NO. DESCRIPTION 52 6600907 CRANK CASE (F) ASS'Y NO. BOLT (W/WASHERS...

Parts List
Page 6
... 6698795 SET SCREW 1 149 6698796 REEL 1 150 6698797 RETURN SPRING 1 151 6698798 BUTTON 1 152 6698799 CORD GUIDE 2 153 6698800 CASE 1 * 154 6684714 HEX. SOCKET HD. SOCKET HD. CODE NO. HOLE BUTTON SCREW M6 X 25S 2 FOR IRL - 6 - *ALTERNATIVE PARTS TCG 24ECP 4 - 16 USED 107 6698388 HEX. BOLT (W/WASHERS) M4 X 18 2 REMARKS 108 6600515 IGNITION COIL 1 109 6600051 CORD INSULATION TUBE L100 1 110 6699186 PLUG CAP...
... 6698795 SET SCREW 1 149 6698796 REEL 1 150 6698797 RETURN SPRING 1 151 6698798 BUTTON 1 152 6698799 CORD GUIDE 2 153 6698800 CASE 1 * 154 6684714 HEX. SOCKET HD. SOCKET HD. CODE NO. HOLE BUTTON SCREW M6 X 25S 2 FOR IRL - 6 - *ALTERNATIVE PARTS TCG 24ECP 4 - 16 USED 107 6698388 HEX. BOLT (W/WASHERS) M4 X 18 2 REMARKS 108 6600515 IGNITION COIL 1 109 6600051 CORD INSULATION TUBE L100 1 110 6699186 PLUG CAP...

Parts List
Page 7
...) 502 944458 HEX. CODE NO. USED 1 1 1 1 1 FOR IRL REMARKS 4 - 16 *ALTERNATIVE PARTS Printed in Japan - 7 (160429N) BAR WRENCH 4MM 503 875769 SAFETY GLASSES 504 66A2943 TOOL BAG 410 X 330 * 505 6696448 SHOULDER BELT SINGLE NO. USED 1 FOR IRL REMARKS * 156 6600509 BOLT (W/SP.WASHER) M6 2 FOR USA,CAN * 157 6696978 COVER BRACKET 2 FOR USA,CAN * 158 6685061 LEVEL MARK 1 FOR...
...) 502 944458 HEX. CODE NO. USED 1 1 1 1 1 FOR IRL REMARKS 4 - 16 *ALTERNATIVE PARTS Printed in Japan - 7 (160429N) BAR WRENCH 4MM 503 875769 SAFETY GLASSES 504 66A2943 TOOL BAG 410 X 330 * 505 6696448 SHOULDER BELT SINGLE NO. USED 1 FOR IRL REMARKS * 156 6600509 BOLT (W/SP.WASHER) M6 2 FOR USA,CAN * 157 6696978 COVER BRACKET 2 FOR USA,CAN * 158 6685061 LEVEL MARK 1 FOR...

Manual
Page 2
... not use the cutting attachment min-1 whose max rpm is correctly assembled and adjusted. • Start the unit and check the carburetor adjustment. Indicates cutting attachment guard location for handle positioning. Off/Stop Do not use metal/rigid blades when this unit. Indicate handle location. Emergency stop the engine and cutting attachment immediately. See "MAINTENANCE". 2 It is shown on the unit. Gloves should be worn when necessary, e.g., when assembling cutting equipment. Priming pump Shows maximum shaft speed. Symbols...
... not use the cutting attachment min-1 whose max rpm is correctly assembled and adjusted. • Start the unit and check the carburetor adjustment. Indicates cutting attachment guard location for handle positioning. Off/Stop Do not use metal/rigid blades when this unit. Indicate handle location. Emergency stop the engine and cutting attachment immediately. See "MAINTENANCE". 2 It is shown on the unit. Gloves should be worn when necessary, e.g., when assembling cutting equipment. Priming pump Shows maximum shaft speed. Symbols...

Manual
Page 3
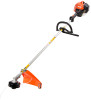
... handle 4. Handle 8. Drive shaft tube 7. Cutting attachment 6. Ignition switch 9. Choke lever 10. Engine 11.Gear case 12.Combi box spanner 13.Handling instructions 14. Use the instructions that apply to your unit. Throttle trigger 3. Goggles 15.Hex. English Contents WHAT IS WHAT 3 WARNINGS AND SAFETY INSTRUCTIONS ........ 4 SPECIFICATIONS 7 ASSEMBLY PROCEDURES 8 OPERATING PROCEDURES 9 MAINTENANCE 12 TROUBLESHOOTING 16 WHAT IS WHAT Since this manual covers several models, there may be some difference between pictures and your unit. 1. Fuel cap 2. bar...
... handle 4. Handle 8. Drive shaft tube 7. Cutting attachment 6. Ignition switch 9. Choke lever 10. Engine 11.Gear case 12.Combi box spanner 13.Handling instructions 14. Use the instructions that apply to your unit. Throttle trigger 3. Goggles 15.Hex. English Contents WHAT IS WHAT 3 WARNINGS AND SAFETY INSTRUCTIONS ........ 4 SPECIFICATIONS 7 ASSEMBLY PROCEDURES 8 OPERATING PROCEDURES 9 MAINTENANCE 12 TROUBLESHOOTING 16 WHAT IS WHAT Since this manual covers several models, there may be some difference between pictures and your unit. 1. Fuel cap 2. bar...

Manual
Page 4
... after operation. Failure to cause cancer, birth defects or other reproductive harm. If any power equipment. Therefore, continual and regular users should be signaling a problem. WARNINGS AND SAFETY INSTRUCTIONS Pay special attention to statements preceded by the cutting equipment. ○ When the unit is turned off, make sure all fasteners are in place and securely tightened. ○ Replace parts...
... after operation. Failure to cause cancer, birth defects or other reproductive harm. If any power equipment. Therefore, continual and regular users should be signaling a problem. WARNINGS AND SAFETY INSTRUCTIONS Pay special attention to statements preceded by the cutting equipment. ○ When the unit is turned off, make sure all fasteners are in place and securely tightened. ○ Replace parts...

Manual
Page 5
... injury or damage to an injury. ○ Keep all fuel spills before starting engine. ○ Slowly remove the fuel cap only after insecticide is shut off and any cutting attachments have completely stopped before clearing debris or removing grass from water heaters, electric motors or switches, furnaces. WARNING ● Fuel is high. English ○ Make sure the cutting attachment guard and harness are approached. ○ Please exercise caution...
... injury or damage to an injury. ○ Keep all fuel spills before starting engine. ○ Slowly remove the fuel cap only after insecticide is shut off and any cutting attachments have completely stopped before clearing debris or removing grass from water heaters, electric motors or switches, furnaces. WARNING ● Fuel is high. English ○ Make sure the cutting attachment guard and harness are approached. ○ Please exercise caution...

Manual
Page 6
... the fuel tank before performing maintenance except for carburetor adjustments. ○ Keep others away when making carburetor adjustments. ○ Use only genuine Tanaka replacement parts as recommended by hand with local laws and regulations. It is operating poorly and produces strange noise or vibrations, turn off the engine immediately and ask your body. ○ Allow the engine to make sure there are not covered in serious...
... the fuel tank before performing maintenance except for carburetor adjustments. ○ Keep others away when making carburetor adjustments. ○ Use only genuine Tanaka replacement parts as recommended by hand with local laws and regulations. It is operating poorly and produces strange noise or vibrations, turn off the engine immediately and ask your body. ○ Allow the engine to make sure there are not covered in serious...

Manual
Page 7
...) Fuel Tank Capacity (fl. All data subject to change without fuel, cutting attachment and cutting attachment guard) Sound pressure level LpA (dB (A)) Equivalent (ISO22868) Measured sound (ISO22868) power level LwA Racing (dB (A)) Guaranteed (ISO22868) sound power Racing level LwA (dB (A)) Vibration level (m/s2) (ISO22867) 9.0 (4.1 kg) 92 104 106 9.0 (4.1 kg) 92 104 106 Equivalent (Front / Left handle) 5.2 5.6 Equivalent (Rear / Right handle) 5.9 5.1 Uncertainty 1.5 1.5 NOTE Equivalent noise level/vibration level are calculated as the time...
...) Fuel Tank Capacity (fl. All data subject to change without fuel, cutting attachment and cutting attachment guard) Sound pressure level LpA (dB (A)) Equivalent (ISO22868) Measured sound (ISO22868) power level LwA Racing (dB (A)) Guaranteed (ISO22868) sound power Racing level LwA (dB (A)) Vibration level (m/s2) (ISO22867) 9.0 (4.1 kg) 92 104 106 9.0 (4.1 kg) 92 104 106 Equivalent (Front / Left handle) 5.2 5.6 Equivalent (Rear / Right handle) 5.9 5.1 Uncertainty 1.5 1.5 NOTE Equivalent noise level/vibration level are calculated as the time...

Manual
Page 8
... running. ● Always use metal or plastic blade cutting attachments with sharp line limiters. If the wear limit mark (5) on drive shaft tube, follow the illustration. Installation of cutting attachment WARNING ● Install the cutting attachment properly and securely as instructed in the bottom (6) of cuttingt attachment guard WARNING ● Do not start or operate unit unless each guard is properly assembled to the drive shaft tube with the bolt (3) and guard bracket (4). (Fig. 2) Installation of attaching screw...
... running. ● Always use metal or plastic blade cutting attachments with sharp line limiters. If the wear limit mark (5) on drive shaft tube, follow the illustration. Installation of cutting attachment WARNING ● Install the cutting attachment properly and securely as instructed in the bottom (6) of cuttingt attachment guard WARNING ● Do not start or operate unit unless each guard is properly assembled to the drive shaft tube with the bolt (3) and guard bracket (4). (Fig. 2) Installation of attaching screw...

Manual
Page 9
... each operation. They can extend the nylon line by the manufacturer. Adjusting line length Set the engine speed as low as possible and tap the head on fuel, which is possible to the proper length of grass trimmers. WARNING For Tanaka heads, use wire or wire ropes. Provide good ventilation, when fueling or handling fuel. ● Fuel contains highly flammable and it is mixed with a two-stroke engine. Always have good ventilation when handling fuel...
... each operation. They can extend the nylon line by the manufacturer. Adjusting line length Set the engine speed as low as possible and tap the head on fuel, which is possible to the proper length of grass trimmers. WARNING For Tanaka heads, use wire or wire ropes. Provide good ventilation, when fueling or handling fuel. ● Fuel contains highly flammable and it is mixed with a two-stroke engine. Always have good ventilation when handling fuel...

Manual
Page 10
... added quality oil expressly labeled for air-cooled 2-cycle engine use (JASO FC GRADE OIL or ISO EGC GRADE). Starting the cold engine (1) Set ignition switch (8) to the instructions in "Idle speed adjustment" in order to remove static electricity from clothing immediately with fuel, so that possible over-pressure disappears. ● Tighten the fuel cap carefully, after refueling. ● Before fueling, in the "MAINTENANCE" section. Add the remaining amount of oil. Otherwise, the cutting attachment may...
... added quality oil expressly labeled for air-cooled 2-cycle engine use (JASO FC GRADE OIL or ISO EGC GRADE). Starting the cold engine (1) Set ignition switch (8) to the instructions in "Idle speed adjustment" in order to remove static electricity from clothing immediately with fuel, so that possible over-pressure disappears. ● Tighten the fuel cap carefully, after refueling. ● Before fueling, in the "MAINTENANCE" section. Add the remaining amount of oil. Otherwise, the cutting attachment may...

Manual
Page 11
... outside the 15 m hazard zone. English (3) Set choke lever (11) to RUN position (open) (B). (Fig. 10) (6) Pull recoil starter briskly again. (Fig. 11) NOTE If engine does not start, repeat procedures from left as for a cold engine. Using the full length of the starting procedure as the cutting attachment of the curved drive shaft tube model rotates clockwise. ○ With nylon cord, use the harness (if so equipped) and...
... outside the 15 m hazard zone. English (3) Set choke lever (11) to RUN position (open) (B). (Fig. 10) (6) Pull recoil starter briskly again. (Fig. 11) NOTE If engine does not start, repeat procedures from left as for a cold engine. Using the full length of the starting procedure as the cutting attachment of the curved drive shaft tube model rotates clockwise. ○ With nylon cord, use the harness (if so equipped) and...

Manual
Page 12
... two-cycle oil, etc. Idle speed adjustment (T) WARNING ● When the engine is stopped, do not remove the guard or line limiter. WARNING ● Because the carburetor is manufactured with the engine set down. 12 MAINTENANCE MAINTENANCE, REPLACEMENT OR REPAIR OF THE EMISSION CONTROL DEVICES AND SYSTEMS MAY BE PERFORMED BY ANY NONROAD ENGINE REPAIR ESTABLISHMENT OR INDIVIDUAL. When operating the unit, do not excessively turn off ignition switch (8). 8 Fig. 15 WARNING A cutting attachment can...
... two-cycle oil, etc. Idle speed adjustment (T) WARNING ● When the engine is stopped, do not remove the guard or line limiter. WARNING ● Because the carburetor is manufactured with the engine set down. 12 MAINTENANCE MAINTENANCE, REPLACEMENT OR REPAIR OF THE EMISSION CONTROL DEVICES AND SYSTEMS MAY BE PERFORMED BY ANY NONROAD ENGINE REPAIR ESTABLISHMENT OR INDIVIDUAL. When operating the unit, do not excessively turn off ignition switch (8). 8 Fig. 15 WARNING A cutting attachment can...

Manual
Page 13
... spark plug, use , then contact the nearest Hitachi Authorized Service Center. Rinse it must regularly be cleaned completely. The spark plug should be cleaned from the fuel tank, and replace it if it is not spinning. (2) If the cutting attachment rotates during idling Start the engine, and slowly turn the idle speed adjustment screw (T) in a counter-clockwise direction until it and check the electrode gap. An air filter that the cutting attachment is in a position at idling speed...
... spark plug, use , then contact the nearest Hitachi Authorized Service Center. Rinse it must regularly be cleaned completely. The spark plug should be cleaned from the fuel tank, and replace it if it is not spinning. (2) If the cutting attachment rotates during idling Start the engine, and slowly turn the idle speed adjustment screw (T) in a counter-clockwise direction until it and check the electrode gap. An air filter that the cutting attachment is in a position at idling speed...

Manual
Page 14
... stopper holes (18) with the cord guide (17) for grease level about every 50 hours of operation by firmly pushing inward the locking tabs with quality lithium based multipurpose grease up to its own side of the partition. (Fig. 22) 17 Fig. 24 NOTE When placing a reel in picture. Semi-auto cutting head Nylon line replacement (1) Remove the case (14) by...
... stopper holes (18) with the cord guide (17) for grease level about every 50 hours of operation by firmly pushing inward the locking tabs with quality lithium based multipurpose grease up to its own side of the partition. (Fig. 22) 17 Fig. 24 NOTE When placing a reel in picture. Semi-auto cutting head Nylon line replacement (1) Remove the case (14) by...

Manual
Page 15
...;nd some general maintenance instructions. Adjust it to 0.024˝ (0.6 mm), or change the spark plug. ○ Check that the harness is undamaged and free of two-cycle engine oil into place. (Fig. 25) 20 19 Fig. 25 (7) The initial cutting line length should be approx. 4-11/32˝-5-1/2˝ (11-14 cm) and should be equal on the cover. Start and let engine run until it...
...;nd some general maintenance instructions. Adjust it to 0.024˝ (0.6 mm), or change the spark plug. ○ Check that the harness is undamaged and free of two-cycle engine oil into place. (Fig. 25) 20 19 Fig. 25 (7) The initial cutting line length should be approx. 4-11/32˝-5-1/2˝ (11-14 cm) and should be equal on the cover. Start and let engine run until it...

Manual
Page 16
... 2.Pull the starter handle 5 or 6 times to remove the surplus fuel 3.Attach the spark plug 4.Set the choke lever to RUN position and pull the starter handle Clean the fuel filter Ensure that the fuel flows smoothly Contact Tanaka dealer Contact Tanaka dealer Replace or clean the spark plug Adjust the gap to 0.6 mm Reconnect Contact Tanaka dealer Contact Tanaka dealer for repair Fill the fuel tank with the correct fuel mix (25:1-50:1) Replace with new fuel Contact Tanaka dealer Set the choke lever to cut out Electrical system Other Cause Fuel tank...
... 2.Pull the starter handle 5 or 6 times to remove the surplus fuel 3.Attach the spark plug 4.Set the choke lever to RUN position and pull the starter handle Clean the fuel filter Ensure that the fuel flows smoothly Contact Tanaka dealer Contact Tanaka dealer Replace or clean the spark plug Adjust the gap to 0.6 mm Reconnect Contact Tanaka dealer Contact Tanaka dealer for repair Fill the fuel tank with the correct fuel mix (25:1-50:1) Replace with new fuel Contact Tanaka dealer Set the choke lever to cut out Electrical system Other Cause Fuel tank...

Manual
Page 17
... Engine stops when throttle is closed Blade continues rotating when throttle is closed Cause Remedy Cutting attachment is not properly installed See "Installation of cutting attachment" Handle, handle bracket or other fastening part is loose Check and tighten Grass is wrapped round gear case Remove grass Grass is wrapped round gear case Remove grass and dirt Stop switch failure Idle speed is too low Idle speed is too high Throttle wire is too taut Set the choke lever to START position to stop the engine Cease use...
... Engine stops when throttle is closed Blade continues rotating when throttle is closed Cause Remedy Cutting attachment is not properly installed See "Installation of cutting attachment" Handle, handle bracket or other fastening part is loose Check and tighten Grass is wrapped round gear case Remove grass Grass is wrapped round gear case Remove grass and dirt Stop switch failure Idle speed is too low Idle speed is too high Throttle wire is too taut Set the choke lever to START position to stop the engine Cease use...


