
User Guide
Page 3
...92 Connecting an External Display ...93 Selecting Display Modes...101 Using the Multiple Monitors Function ...102 Connecting an External Microphone ...104 Connecting a Universal Serial Bus (USB) Device...105 Connecting a Printer ...108 Connecting an i.LINK Device ...109 Customizing Your VAIO Computer ...111 Setting the Password ...112 Using Fingerprint Authentication ...124 Using the Trusted Platform Module (TPM)...132 Setting Up Your Computer with the VAIO Control Center 142 Using the Power Saving Modes ...143 Managing Power with the VAIO Power Management 148 Protecting the Hard Disk ...150
...92 Connecting an External Display ...93 Selecting Display Modes...101 Using the Multiple Monitors Function ...102 Connecting an External Microphone ...104 Connecting a Universal Serial Bus (USB) Device...105 Connecting a Printer ...108 Connecting an i.LINK Device ...109 Customizing Your VAIO Computer ...111 Setting the Password ...112 Using Fingerprint Authentication ...124 Using the Trusted Platform Module (TPM)...132 Setting Up Your Computer with the VAIO Control Center 142 Using the Power Saving Modes ...143 Managing Power with the VAIO Power Management 148 Protecting the Hard Disk ...150
User Guide
Page 9
...-in storage device to the original factory settings. To access this manual) - It also includes information on -screen guide: 1 Click Start and Help and Support. 2 Click Use my VAIO. 3 Click VAIO Recovery Center User Guide. The online specifications describe the hardware and software configurations of your VAIO computer. Provides information about restoring individual software programs, hardware drivers, and drive partition(s) or your computer must be connected to web sites described in Brazil ❑ VAIO Recovery Center User Guide - n9 N Before Use Non...
...-in storage device to the original factory settings. To access this manual) - It also includes information on -screen guide: 1 Click Start and Help and Support. 2 Click Use my VAIO. 3 Click VAIO Recovery Center User Guide. The online specifications describe the hardware and software configurations of your VAIO computer. Provides information about restoring individual software programs, hardware drivers, and drive partition(s) or your computer must be connected to web sites described in Brazil ❑ VAIO Recovery Center User Guide - n9 N Before Use Non...
User Guide
Page 10
Provides information about setting up Bluetooth®*, wireless LAN, GPS*, and wireless WAN* functions. Provides information about using RAID systems. To access this on-screen guide: 1 Click Start, All Programs, and SmartWi Connection Utility. 2 Click SmartWi Connection Utility Help. * Available on -screen guide: 1 Click Start and Help and Support. 2 Click Use my VAIO. 3 Click Other Documents. See the online specifications to find out whether your model supports the Bluetooth and wireless WAN functions. ❑ RAID Guide (Selected models only) - n 10...
Provides information about setting up Bluetooth®*, wireless LAN, GPS*, and wireless WAN* functions. Provides information about using RAID systems. To access this on-screen guide: 1 Click Start, All Programs, and SmartWi Connection Utility. 2 Click SmartWi Connection Utility Help. * Available on -screen guide: 1 Click Start and Help and Support. 2 Click Use my VAIO. 3 Click Other Documents. See the online specifications to find out whether your model supports the Bluetooth and wireless WAN functions. ❑ RAID Guide (Selected models only) - n 10...

User Guide
Page 22
... Lk keys to change how you press the Shift key while the indicator is unlit. Letters appear in use. Do not place the computer into Sleep mode or turn it off when this indicator is lit.) When the indicator is unlit, the memory card is reading or writing data. Charge Illuminates while the battery pack is unlit. Normal scrolling resumes when the Scroll lock indicator is charging. Optical disc drive*1 Illuminates...
... Lk keys to change how you press the Shift key while the indicator is unlit. Letters appear in use. Do not place the computer into Sleep mode or turn it off when this indicator is lit.) When the indicator is unlit, the memory card is reading or writing data. Charge Illuminates while the battery pack is unlit. Normal scrolling resumes when the Scroll lock indicator is charging. Optical disc drive*1 Illuminates...

User Guide
Page 34
... keyboard functions can be used only after the operating system is finished launching. For details on some software. Toggles among your computer screen. n 34 N Using Your VAIO Computer Using the Keyboard Your keyboard is very similar to turn on the power. To return the system to its original state, use the power button to a desktop computer keyboard, but has additional keys that perform model-specific tasks. Combinations and Functions with the VAIO Control...
... keyboard functions can be used only after the operating system is finished launching. For details on some software. Toggles among your computer screen. n 34 N Using Your VAIO Computer Using the Keyboard Your keyboard is very similar to turn on the power. To return the system to its original state, use the power button to a desktop computer keyboard, but has additional keys that perform model-specific tasks. Combinations and Functions with the VAIO Control...
User Guide
Page 36
To change the Presentation mode settings, click Start, Control Panel, Mobile PC, and Adjust settings before giving a presentation under Windows Mobility Center, and change the settings in the Presentation Settings window. *1 On models with the VAIO Control Center for the S1 button assignment. By default, the S1 button launches the VAIO Power Management Viewer. ✍ The default button assignment may disturb a presentation are disabled, such as a screen saver, the power saving modes, and system message generation. If this button once...
To change the Presentation mode settings, click Start, Control Panel, Mobile PC, and Adjust settings before giving a presentation under Windows Mobility Center, and change the settings in the Presentation Settings window. *1 On models with the VAIO Control Center for the S1 button assignment. By default, the S1 button launches the VAIO Power Management Viewer. ✍ The default button assignment may disturb a presentation are disabled, such as a screen saver, the power saving modes, and system message generation. If this button once...
User Guide
Page 45
... play DVDs created with the DVD+R DL, DVD-R DL, DVD+R, DVD+RW, DVD-R, DVD-RW, or DVD-RAM media. ❑ You may not be connected to play such contents normally, download and install the latest updates for the WinDVD BD using the VAIO Update. To play some of your optical disc drive, and then Reading and Writing Optical Discs (page 42) to the Internet, see Using the Internet (page 63). ! The Blu-ray Disc playback function...
... play DVDs created with the DVD+R DL, DVD-R DL, DVD+R, DVD+RW, DVD-R, DVD-RW, or DVD-RAM media. ❑ You may not be connected to play such contents normally, download and install the latest updates for the WinDVD BD using the VAIO Update. To play some of your optical disc drive, and then Reading and Writing Optical Discs (page 42) to the Internet, see Using the Internet (page 63). ! The Blu-ray Disc playback function...

User Guide
Page 53
... slot protector into the slot. n 53 N Using Your VAIO Computer Removing an ExpressCard Module ! Before moving your computer, be sure to remove the ExpressCard module while your system may not work properly. To remove an ExpressCard module ✍ To remove an ExpressCard module when your computer is not removed properly, your computer is on -screen instructions to block any particles from entering the slot when not using an ExpressCard module...
... slot protector into the slot. n 53 N Using Your VAIO Computer Removing an ExpressCard Module ! Before moving your computer, be sure to remove the ExpressCard module while your system may not work properly. To remove an ExpressCard module ✍ To remove an ExpressCard module when your computer is not removed properly, your computer is on -screen instructions to block any particles from entering the slot when not using an ExpressCard module...
User Guide
Page 98
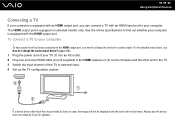
.... 3 Switch the input channel of the TV to external input. 4 Set up the TV configuration system. ! For the detailed instructions, see How do I change the device for updates. To hear sound from the device connected to the HDMI output port, you need to your TV (1) into an AC outlet. 2 Plug one provided by Sony for sound output. Always use the device driver provided by Sony is equipped with an HDMI output port...
.... 3 Switch the input channel of the TV to external input. 4 Set up the TV configuration system. ! For the detailed instructions, see How do I change the device for updates. To hear sound from the device connected to the HDMI output port, you need to your TV (1) into an AC outlet. 2 Plug one provided by Sony for sound output. Always use the device driver provided by Sony is equipped with an HDMI output port...

User Guide
Page 111
... your Sony software and utilities. ❑ Setting the Password (page 112) ❑ Using Fingerprint Authentication (page 124) ❑ Using the Trusted Platform Module (TPM) (page 132) ❑ Setting Up Your Computer with the VAIO Control Center (page 142) ❑ Using the Power Saving Modes (page 143) ❑ Managing Power with the VAIO Power Management (page 148) ❑ Protecting the Hard Disk (page 150) Among other things, you will learn how to change...
... your Sony software and utilities. ❑ Setting the Password (page 112) ❑ Using Fingerprint Authentication (page 124) ❑ Using the Trusted Platform Module (TPM) (page 132) ❑ Setting Up Your Computer with the VAIO Control Center (page 142) ❑ Using the Power Saving Modes (page 143) ❑ Managing Power with the VAIO Power Management (page 148) ❑ Protecting the Hard Disk (page 150) Among other things, you will learn how to change...

User Guide
Page 112
... not be prompted to enter the password after the VAIO logo appears to start your computer. The power-on models with two built-in storage devices in storage device. If you can use BIOS functions to set two types of passwords to protect your computer: the power-on your storage device configuration. See the online specifications to find out about your built-in RAID configuration. The hard disk password provides additional security...
... not be prompted to enter the password after the VAIO logo appears to start your computer. The power-on models with two built-in storage devices in storage device. If you can use BIOS functions to set two types of passwords to protect your computer: the power-on your storage device configuration. See the online specifications to find out about your built-in RAID configuration. The hard disk password provides additional security...

User Guide
Page 113
... the BIOS setup screen, as well as starting the computer. For more information, see Using Fingerprint Authentication (page 124). Once you have set the machine password. ! The user password is provided for the standard users to reset the password. ✍ If your computer is provided for changing some of the power-on your computer without entering the password. If you forget the power-on the computer to change...
... the BIOS setup screen, as well as starting the computer. For more information, see Using Fingerprint Authentication (page 124). Once you have set the machine password. ! The user password is provided for the standard users to reset the password. ✍ If your computer is provided for changing some of the power-on your computer without entering the password. If you forget the power-on the computer to change...

User Guide
Page 132
TPMs are defined by Trusted Computing Group (TCG) and also called security chips. n 132 N Customizing Your VAIO Computer Using the Trusted Platform Module (TPM) The Trusted Platform Module (TPM) is embedded in selected models only and provides your computer with the TPM, you can encrypt and decrypt your data to find out whether your model is equipped with the TPM. In combination with basic security functions. See the online specifications to strengthen computer security against inappropriate access.
TPMs are defined by Trusted Computing Group (TCG) and also called security chips. n 132 N Customizing Your VAIO Computer Using the Trusted Platform Module (TPM) The Trusted Platform Module (TPM) is embedded in selected models only and provides your computer with the TPM, you can encrypt and decrypt your data to find out whether your model is equipped with the TPM. In combination with basic security functions. See the online specifications to strengthen computer security against inappropriate access.
User Guide
Page 138
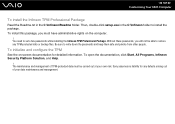
... passwords and keep them safe and private from other people. You need to restore any defects arising out of TPM-protected data must have administrative rights on -screen documentation for any TPM-protected data or backup files. To initialize and configure the TPM See the on the computer. ! Without these passwords, you must be able to set a few passwords while installing...
... passwords and keep them safe and private from other people. You need to restore any defects arising out of TPM-protected data must have administrative rights on -screen documentation for any TPM-protected data or backup files. To initialize and configure the TPM See the on the computer. ! Without these passwords, you must be able to set a few passwords while installing...

User Guide
Page 140
... in Windows Help and Support to enable BitLocker Drive Encryption. 11 Save the recovery password to the USB flash memory device in the BIOS setup screen: 1 Turn on -screen instructions. Follow these steps to change the boot device order so that Internal Hard Disk is listed higher than External Device. ! The BIOS setup screen appears. The encryption process will start. n 140 N Customizing Your VAIO Computer To unlock the encrypted data with a recovery key stored on a USB flash memory device To unlock the encrypted data with a recovery key stored on a USB flash memory device, your...
... in Windows Help and Support to enable BitLocker Drive Encryption. 11 Save the recovery password to the USB flash memory device in the BIOS setup screen: 1 Turn on -screen instructions. Follow these steps to change the boot device order so that Internal Hard Disk is listed higher than External Device. ! The BIOS setup screen appears. The encryption process will start. n 140 N Customizing Your VAIO Computer To unlock the encrypted data with a recovery key stored on a USB flash memory device To unlock the encrypted data with a recovery key stored on a USB flash memory device, your...
User Guide
Page 150
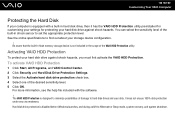
... device configuration. ! The VAIO HDD Protection is not included in shock sensor to find out about your hard disk drive against shock hazards, you must first activate the VAIO HDD Protection. See the online specifications to set the appropriate protection level. You can select the sensitivity level of damage to Hibernate or Sleep mode, system recovery, and system shutdown. Be aware that the built-in flash memory...
... device configuration. ! The VAIO HDD Protection is not included in shock sensor to find out about your hard disk drive against shock hazards, you must first activate the VAIO HDD Protection. See the online specifications to set the appropriate protection level. You can select the sensitivity level of damage to Hibernate or Sleep mode, system recovery, and system shutdown. Be aware that the built-in flash memory...
User Guide
Page 180
... BIOS functions to download. ❑ Make sure you have installed the latest video driver. ❑ On some VAIO models, the graphics memory is not guaranteed. The BIOS setup screen appears. To find the nearest center or agent, see Sony Support Information (page 222). What should I do if I change the boot device order. A reset fee will be charged. How can use one of the game if there are any patches or updates to change the boot device order...
... BIOS functions to download. ❑ Make sure you have installed the latest video driver. ❑ On some VAIO models, the graphics memory is not guaranteed. The BIOS setup screen appears. To find the nearest center or agent, see Sony Support Information (page 222). What should I do if I change the boot device order. A reset fee will be charged. How can use one of the game if there are any patches or updates to change the boot device order...
User Guide
Page 201
... to the Internet, see Using the Internet (page 63). To download and install the updates on the computer, it with one with no affixed adhesive label. For information on your optical disc drive, and then Reading and Writing Optical Discs (page 42) to find out the type of your computer, or the computer may not be connected to the Internet. n 201 N Troubleshooting What...
... to the Internet, see Using the Internet (page 63). To download and install the updates on the computer, it with one with no affixed adhesive label. For information on your optical disc drive, and then Reading and Writing Optical Discs (page 42) to find out the type of your computer, or the computer may not be connected to the Internet. n 201 N Troubleshooting What...
User Guide
Page 202
n 202 N Troubleshooting What should I do not work. You cannot add or erase data to selected models only. Why can't I cannot write data to DVD media? ❑ Make sure you are using the correct DVD recordable media. ❑ Check which DVD recordable format is compatible with your optical disc drive supports the Blu-ray Disc writing function. ❑ BD-R Disc media are not rewritable. Some brands of your optical disc drive, and...
n 202 N Troubleshooting What should I do not work. You cannot add or erase data to selected models only. Why can't I cannot write data to DVD media? ❑ Make sure you are using the correct DVD recordable media. ❑ Check which DVD recordable format is compatible with your optical disc drive supports the Blu-ray Disc writing function. ❑ BD-R Disc media are not rewritable. Some brands of your optical disc drive, and...
User Guide
Page 207
... is connected to cancel the Enable bidirectional support check box. 6 Click OK. This disables the bidirectional communication functions of the printer, such as data transfer, status monitoring, and remote panel. Follow these steps: 1 Click Start and Control Panel. 2 Click Printer under Hardware and Sound. 3 Right-click the printer icon and select Properties. 4 Click the Ports tab. 5 Click to an AC power source. See the manual...
... is connected to cancel the Enable bidirectional support check box. 6 Click OK. This disables the bidirectional communication functions of the printer, such as data transfer, status monitoring, and remote panel. Follow these steps: 1 Click Start and Control Panel. 2 Click Printer under Hardware and Sound. 3 Right-click the printer icon and select Properties. 4 Click the Ports tab. 5 Click to an AC power source. See the manual...


