Sony SUFL300M - SU Stand Research
Related Manual Pages


Similar Questions

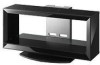
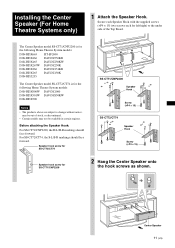
Glass Shelves
Do you sell the glass shelves for this tv stand? If not, do you know where I can buy them?
Do you sell the glass shelves for this tv stand? If not, do you know where I can buy them?
(Posted by tomr01603 6 years ago)

What Size Of Metric Bolt Needed For Mount Bracket On Back Of Sony Lcd Tv
(Posted by agnwinkle 9 years ago)

What Size Of Screw I Can Use To Mount My Sony Bravia
(Posted by Anonymous-22534 13 years ago)