Warranty Card
Page 1
...available from the date of the Product, including the antenna. For a period of 90 days from your convenience, Sony Electronics Inc. This warranty does not cover customer instruction, installation, set up adjustments or signal reception problems. This warranty does not cover cosmetic damage or damage due ...limitations on how long an implied warranty lasts, so the above limitations or exclusions may have other than a facility authorized by Sony to state. SONY SHALL NOT BE LIABLE FOR ANY INCIDENTAL OR CONSEQUENTIAL DAMAGES FOR BREACH OF ANY EXPRESS OR IMPLIED WARRANTY ON THIS PRODUCT. ...
...available from the date of the Product, including the antenna. For a period of 90 days from your convenience, Sony Electronics Inc. This warranty does not cover customer instruction, installation, set up adjustments or signal reception problems. This warranty does not cover cosmetic damage or damage due ...limitations on how long an implied warranty lasts, so the above limitations or exclusions may have other than a facility authorized by Sony to state. SONY SHALL NOT BE LIABLE FOR ANY INCIDENTAL OR CONSEQUENTIAL DAMAGES FOR BREACH OF ANY EXPRESS OR IMPLIED WARRANTY ON THIS PRODUCT. ...
Operating Instructions
Page 1
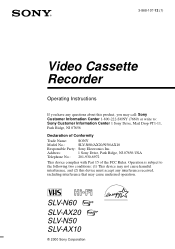
... USA Telephone No.: 201-930-6972 This device complies with Part 15 of Conformity Trade Name: SONY Model No.: SLV-N60/AX20/N50/AX10 Responsible Party: Sony Electronics Inc. Operation is subject to the following two conditions: (1) This device may not cause ...call: Sony Customer Information Center 1-800-222-SONY (7669) or write to: Sony Customer Information Center 1 Sony Drive, Mail Drop #T1-11, Park Ridge, NJ 07656 Declaration of the FCC Rules. SLV-N60 SLV-AX20 SLV-N50 SLV-AX10 © 2000 Sony Corporation 3-868-107-12 (1) Video Cassette Recorder Operating Instructions If...
... USA Telephone No.: 201-930-6972 This device complies with Part 15 of Conformity Trade Name: SONY Model No.: SLV-N60/AX20/N50/AX10 Responsible Party: Sony Electronics Inc. Operation is subject to the following two conditions: (1) This device may not cause ...call: Sony Customer Information Center 1-800-222-SONY (7669) or write to: Sony Customer Information Center 1 Sony Drive, Mail Drop #T1-11, Park Ridge, NJ 07656 Declaration of the FCC Rules. SLV-N60 SLV-AX20 SLV-N50 SLV-AX10 © 2000 Sony Corporation 3-868-107-12 (1) Video Cassette Recorder Operating Instructions If...
Operating Instructions
Page 2
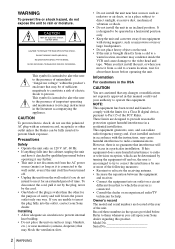
... It is designed to be operated in a horizontal position only. • Keep the unit and cassettes away from equipment with an extension cord, receptacle or other for a Class B digital device, pursuant...is intended to alert the user to the presence of important operating and maintenance (servicing) instructions in accordance with the limits for the purpose of the unit. Precautions Safety • ...condense inside the VCR and cause damage to the video head and tape. If you call upon your Sony dealer regarding this product. Owner's record The model and serial numbers are unable to insert ...
... It is designed to be operated in a horizontal position only. • Keep the unit and cassettes away from equipment with an extension cord, receptacle or other for a Class B digital device, pursuant...is intended to alert the user to the presence of important operating and maintenance (servicing) instructions in accordance with the limits for the purpose of the unit. Precautions Safety • ...condense inside the VCR and cause damage to the video head and tape. If you call upon your Sony dealer regarding this product. Owner's record The model and serial numbers are unable to insert ...
Operating Instructions
Page 4
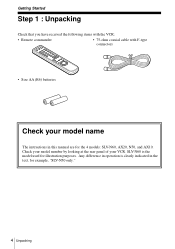
Any difference in operation is the model used for illustration purposes. SLV-N60 is clearly indicated in this manual are for example, "SLV-N50 only." 4 Unpacking Check your model number by looking at the rear panel of your model name The instructions in the text, for the 4 models: SLV-N60, AX20, N50, and AX10. Getting Started Step 1 : Unpacking Check that you have received the following items with the VCR: • Remote commander • 75-ohm coaxial cable with F-type connectors • Size AA (R6) batteries Check your VCR.
Any difference in operation is the model used for illustration purposes. SLV-N60 is clearly indicated in this manual are for example, "SLV-N50 only." 4 Unpacking Check your model number by looking at the rear panel of your model name The instructions in the text, for the 4 models: SLV-N60, AX20, N50, and AX10. Getting Started Step 1 : Unpacking Check that you have received the following items with the VCR: • Remote commander • 75-ohm coaxial cable with F-type connectors • Size AA (R6) batteries Check your VCR.
Operating Instructions
Page 7
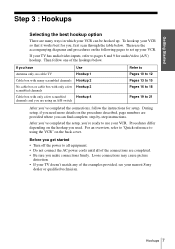
... one of the hookups below . During setup, if you need more details on the following pages to set up your TV has audio/video inputs, refer to use the accompanying diagrams and procedures on the procedure described, page numbers are provided where you make connections firmly. Before you... box with only a few Hookup 3 scrambled channels Cable box with many ways in which your VCR can find complete, step-by-step instructions. Then use your nearest Sony dealer or qualified technician. To hook up . After you've completed the setup, you , first scan through the table below . Loose...
... one of the hookups below . During setup, if you need more details on the following pages to set up your TV has audio/video inputs, refer to use the accompanying diagrams and procedures on the procedure described, page numbers are provided where you make connections firmly. Before you... box with only a few Hookup 3 scrambled channels Cable box with many ways in which your VCR can find complete, step-by-step instructions. Then use your nearest Sony dealer or qualified technician. To hook up . After you've completed the setup, you , first scan through the table below . Loose...
Operating Instructions
Page 9
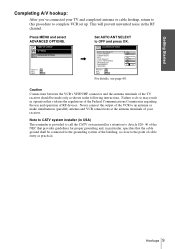
... ON ON L H For details, see page 68. Getting Started Completing A/V hookup: After you've connected your receiver. This will prevent unwanted noise in the following instructions. Never connect the output of the VCR to OFF and press OK. TIMER SET/CHECK SETTINGS ADVANCED OPTIONS SELECT : SET : OK QUIT : MENU , Set AUTO...
... ON ON L H For details, see page 68. Getting Started Completing A/V hookup: After you've connected your receiver. This will prevent unwanted noise in the following instructions. Never connect the output of the VCR to OFF and press OK. TIMER SET/CHECK SETTINGS ADVANCED OPTIONS SELECT : SET : OK QUIT : MENU , Set AUTO...