
Operating Instructions
Page 7
...the operating instructions of this flash unit, visit the Sony website in locations subject to a malfunction. • Placing this flash unit in your area, or consult your Sony dealer or local authorized Sony service facility. See the operating instructions of your camera... vibration • Locations with strong electromagnetism • Locations with Sony Interchangeable Lens Digital Cameras, Sony Interchangeable Lens Digital HD Video Camera Recorders, and Sony Digital Still Cameras that have a conventional Multi Interface Shoe. Before use or in storage, do not place it may ...
...the operating instructions of this flash unit, visit the Sony website in locations subject to a malfunction. • Placing this flash unit in your area, or consult your Sony dealer or local authorized Sony service facility. See the operating instructions of your camera... vibration • Locations with strong electromagnetism • Locations with Sony Interchangeable Lens Digital Cameras, Sony Interchangeable Lens Digital HD Video Camera Recorders, and Sony Digital Still Cameras that have a conventional Multi Interface Shoe. Before use or in storage, do not place it may ...

Operating Instructions
Page 14
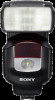
...secure the flash unit. • This flash unit is suitable for a Multi Interface Shoe. GB 14 Attachment and removal of the flash unit Attaching the flash unit to the ... remove the protective cap from the terminal of the Multi Interface foot of the flash unit and remove the shoe cap from the camera. • When not using the flash unit, reattach the protective cap to the terminal... pressing the release button. 2 Firmly insert the Multi Interface foot all the way into the Multi Interface Shoe of the camera in the direction of the arrow. 3 Firmly rotate the lock lever towards [LOCK] to a...
...secure the flash unit. • This flash unit is suitable for a Multi Interface Shoe. GB 14 Attachment and removal of the flash unit Attaching the flash unit to the ... remove the protective cap from the terminal of the Multi Interface foot of the flash unit and remove the shoe cap from the camera. • When not using the flash unit, reattach the protective cap to the terminal... pressing the release button. 2 Firmly insert the Multi Interface foot all the way into the Multi Interface Shoe of the camera in the direction of the arrow. 3 Firmly rotate the lock lever towards [LOCK] to a...

Operating Instructions
Page 33
... with the camera is restarted the flash compensation indicator disappears and flash compensation is shown when communication with a camera that has an Auto-lock Accessory Shoe. For the setting method, see "Changing the custom settings" (page 69) and "C09 To Change the power level interval" (page 72). • Does not work...
... with the camera is restarted the flash compensation indicator disappears and flash compensation is shown when communication with a camera that has an Auto-lock Accessory Shoe. For the setting method, see "Changing the custom settings" (page 69) and "C09 To Change the power level interval" (page 72). • Does not work...

Operating Instructions
Page 79
Trademark "Multi Interface Shoe" is a trademark of printed documentation Functions in .) (w/h/d) 355 g (12 1/2 oz) (excluding the batteries) DC 6 V Four LR6 (AA-size) alkaline batteries Four AA-size rechargeable nickel-metal hydride batteries Flash unit (1), Connector protect cap (1), Mini-stand (1), Carrying case (1), Set of Sony Corporation. 79 GB Additional Information Continuous flash performance AF...
Trademark "Multi Interface Shoe" is a trademark of printed documentation Functions in .) (w/h/d) 355 g (12 1/2 oz) (excluding the batteries) DC 6 V Four LR6 (AA-size) alkaline batteries Four AA-size rechargeable nickel-metal hydride batteries Flash unit (1), Connector protect cap (1), Mini-stand (1), Carrying case (1), Set of Sony Corporation. 79 GB Additional Information Continuous flash performance AF...


