Smeg CPF36UGMR Support and Manuals
Get Help and Manuals for this Smeg item
View All Support Options Below
Free Smeg CPF36UGMR manuals!
Problems with Smeg CPF36UGMR?
Ask a Question
Free Smeg CPF36UGMR manuals!
Problems with Smeg CPF36UGMR?
Ask a Question
Smeg CPF36UGMR Videos

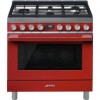
Smeg CPF36UGMR Range
Duration: :44
Total Views: 2
Duration: :44
Total Views: 2
Smeg CPF36UGMR Cuisinière
Duration: :44
Total Views: 1
Duration: :44
Total Views: 1
Popular Smeg CPF36UGMR Manual Pages
Instruction Manual 1 - Page 5

... other servicing should be hot enough to repair or replace any part of this appliance unless specifically recommended in compliance with the National Electrical Code ANSI / NFPA 70 Electrical Code - The...pans with a perfectly smooth, flat bottom on the range surface burners. EN
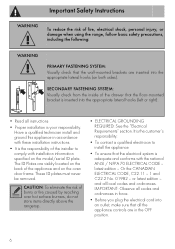
Important Safety Instructions
• DO NOT TOUCH SURFACE BURNERS OR THE INSIDE OF THE APPLIANCE: Heating elements...
Instruction Manual 1 - Page 6
... damaged or encrusted with the instructions supplied by the manufacturer.
• DO NOT HEAT UNOPENED FOOD CONTAINERS: A buildup of glass, thermally resistant glass-ceramic, ceramic, earthenware, or other reproductive harm. Replace the oven door gasket if it . Service personnel must disconnect the power supply before using high heat settings. For more information go to...
Instruction Manual 1 - Page 7

... of time.
The Model and Serial numbers are visibly located on the use instruction. Use instruction sequence. • Single use of this user manual, on Page 2 of the appliance and its accessories. EN
Important Safety Instructions
• Make sure that your range is properly secured and the anti-tip device is correctly installed. Refer to read...
Instruction Manual 1 - Page 10
...the bottom upwards (see 1.1 General Description).
After selecting the required function, set programmed cooking operations and program the timer.
5 Function knob
The oven's various...settings.
4 Programming clock Useful for displaying the current time, set the cooking temperature using the temperature knob.
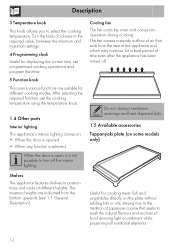
1.4 Other parts
Interior lighting The appliance's interior lighting comes on some models...
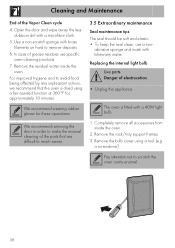
Instruction Manual 1 - Page 34
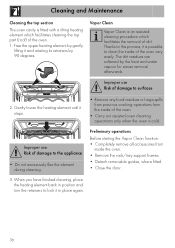
... cleaning operations only when the oven is an assisted cleaning procedure which facilitates cleaning the top part (roof) of dirt. Thanks to clean the inside the oven. • Remove the rack/tray support frames. • Detach removable guides, where fitted. • Close the door.
3.
Improper use Risk of damage to surfaces
2. Free the...
Instruction Manual 1 - Page 36
...
2.
Replacing the internal light bulb
Live parts Danger...; To keep the seal clean, use specific oven cleaning products.
7. In case of the parts that the oven is fitted with a ...microfibre cloth.
5. We recommend removing the door in order to remove deposits.
6. abrasive sponge and wash with brass filaments on hard to make the manual...support frames. 3.
Instruction Manual 1 - Page 37

... within a short time: • Defective thermostat: contact an
Authorised Service Centre
The door glass mists up : • Defective fuse: check and replace the
switch if necessary.
• The function knob has not been set: set the function knob. Refit the cover. Ensure the moulded part of the glass (A) is in the igniters:
light the gas...
Instruction Manual 1 - Page 38

... been completed, replace the seal on the cooktop.
40 Clean them internally and relubricate. Refit the knob and verify that the burner flame is achieved.
Follow the instructions given in the case of other ERRx error messages are indicated:
Note down the error message, function and set temperature and contact your local technical support centre.
For...
Instruction Manual 2 - Page 1
....
3
Follow the
gas supplier's instructions. • If you cannot reach your gas supplier from a neighbor's phone. EN
Table of this manual is not followed exactly, a fire or explosion may result causing property damage, personal injury or death.
- Any technical procedures must be installed solely and exclusively by a qualified installer, service agency or gas supplier. WHAT...
Instruction Manual 2 - Page 4
... inserted into the appropriate lateral hooks (on the model/serial ID plate. IMPORTANT: Observe all codes and ordinances in force.
• Before you plug the electrical cord into the appropriate lateral hooks (left or right).
• Read all instructions
• Proper installation is adequate and conforms with installation information specified on both sides). or latest...
Instruction Manual 2 - Page 5
...
Advice
1.
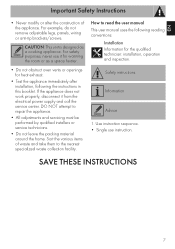
How to read the user manual This user manual uses the following the instructions in this booklet. SAVE THESE INSTRUCTIONS
7 EN
Important Safety Instructions
• Never modify or alter the construction of waste and take them to repair the appliance.
• All adjustments and servicing must be performed by qualified installers or service technicians.
• Do not leave...
Instruction Manual 2 - Page 8
...mounting brackets from the range.
• Due to any undue strain. The weight must be supported uniformly across the bottom.
• The floor under the legs should be protected (wood, ... ignition and combustion problems with the gas cooking appliance resulting in personal injury or unintended operation.
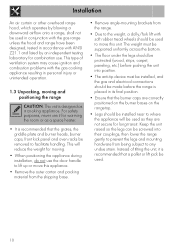
1.3 Unpacking, moving .
• When positioning the appliance during installation, do not use...
Instruction Manual 3 - Page 1
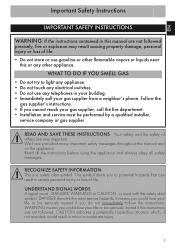
... near this manual and on the appliance. WHAT TO DO IF YOU SMELL GAS
• Do not try to moderate injury.
3 We have provided many important safety messages throughout this or any telephones in your building. • Immediately call the fire department. • Installation and service must be seriously injured if the instructions are...
Instruction Manual 3 - Page 2
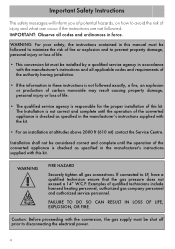
... appliance is responsible for the proper installation of this manual must be followed to minimize the risk of fire or explosion and to prevent property damage, personal injury or loss of life.
• This conversion kit must be installed by a qualified service agency in accordance with the manufacturer's instructions and all gas connections. lf connected...
Instruction Manual 3 - Page 4
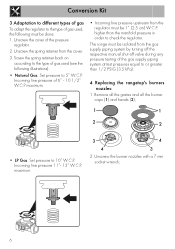
...1/2 PSIG (3.5 kPa).
4 Replacing the rangetop's burners nozzles:
1. Unscrew the spring retainer from the gas supply piping system by turning off the respective manual shut-off valve during any ...and heads (2);
• LP Gas: Set pressure to 10" W.C.P. maximum.
2. Unscrew the cover of gas used , the following illustrations).
• Natural Gas: Set pressure to 5" W.C.P. Conversion Kit
3 ...
Smeg CPF36UGMR Reviews
We have not received any reviews for Smeg yet.