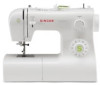
User Manual
Page 2
... not operating properly. 18. Switch the sewing machine off the machine or unplug when the machine is damaged, it to persons: 1. Please turn all moving parts. Never operate the appliance with same type rated 10 watts (110-120V area) or 15 watts (220-240V area). Return the appliance to break. 7. GB...
... not operating properly. 18. Switch the sewing machine off the machine or unplug when the machine is damaged, it to persons: 1. Please turn all moving parts. Never operate the appliance with same type rated 10 watts (110-120V area) or 15 watts (220-240V area). Return the appliance to break. 7. GB...

User Manual
Page 6
GB List of contents Machine Basics Principle Parts of the Machine...2/4 Connecting Machine to Power Source ...6 Two Step Presser Foot Lifter...8 Accessories ...9 Threading the Machine Winding the Bobbin ...11 Inserting the Bobbin ...13 ...
GB List of contents Machine Basics Principle Parts of the Machine...2/4 Connecting Machine to Power Source ...6 Two Step Presser Foot Lifter...8 Accessories ...9 Threading the Machine Winding the Bobbin ...11 Inserting the Bobbin ...13 ...

User Manual
Page 9
Thread cutter 4. Removable extension table/ accessory storage 7. Pattern selector dial 12. One step buttonhole lever 13. Bobbin stopper 9. Automatic threader 1 7 8 9 2 10 3 PUSH 4 11 5 6 12 PUSH 13 2 Stitch width dial 10. Presser foot 5. Reverse sewing lever 8. Stitch length dial 11. Thread take-up lever 3. Needle plate 6. GB Principal Parts of the Machine 1. Thread tension dial 2.
Thread cutter 4. Removable extension table/ accessory storage 7. Pattern selector dial 12. One step buttonhole lever 13. Bobbin stopper 9. Automatic threader 1 7 8 9 2 10 3 PUSH 4 11 5 6 12 PUSH 13 2 Stitch width dial 10. Presser foot 5. Reverse sewing lever 8. Stitch length dial 11. Thread take-up lever 3. Needle plate 6. GB Principal Parts of the Machine 1. Thread tension dial 2.

User Manual
Page 11
Handwheel 15 18. Handle 24. Presser foot lifter 25. Hole for second spool pin 14 20 17. Bobbin thread guide 17 23 21. Power cord 18 19 25 26 4 Main plug socket 16 22 20. Foot speed control 26. Power and light switch 21 19. Bobbin winding spindle 16. GB Principal Parts of the Machine 14. Face plate 23. Upper thread guide 24 22. Horizontal spool pin 15.
Handwheel 15 18. Handle 24. Presser foot lifter 25. Hole for second spool pin 14 20 17. Bobbin thread guide 17 23 21. Power cord 18 19 25 26 4 Main plug socket 16 22 20. Foot speed control 26. Power and light switch 21 19. Bobbin winding spindle 16. GB Principal Parts of the Machine 14. Face plate 23. Upper thread guide 24 22. Horizontal spool pin 15.

User Manual
Page 40
... curtains, trousers, skirts, etc. Blind Hem: Turn up the hem to make blind hem sewing even easier, use a blind hem foot, available from your SINGER retailer. (See page 9 for the fabric. Start to sew slowly on the fold, making sure the needle touches slightly the folded top to the right... side of the page. Blind hems, however, are appropriate for part number) 33 Generally, a narrower stitch is used for the weight/type of fabric being sewn, within the range shown in Fig. 1) against the ...
... curtains, trousers, skirts, etc. Blind Hem: Turn up the hem to make blind hem sewing even easier, use a blind hem foot, available from your SINGER retailer. (See page 9 for the fabric. Start to sew slowly on the fold, making sure the needle touches slightly the folded top to the right... side of the page. Blind hems, however, are appropriate for part number) 33 Generally, a narrower stitch is used for the weight/type of fabric being sewn, within the range shown in Fig. 1) against the ...

User Manual
Page 53
For free-motion sewing it is recommended to use a darning/embroidery foot, available as illustrated. Install the darning plate as an optional accessory from SINGER® retailers. (See page 9 for part number of work, (e.g. For normal sewing, remove the darning plate. GB Darning Plate For certain types of darning/embroidery foot ) 46 darning or free-hand embroidery), the darning plate must be used.
For free-motion sewing it is recommended to use a darning/embroidery foot, available as illustrated. Install the darning plate as an optional accessory from SINGER® retailers. (See page 9 for part number of work, (e.g. For normal sewing, remove the darning plate. GB Darning Plate For certain types of darning/embroidery foot ) 46 darning or free-hand embroidery), the darning plate must be used.

2277 Stitch Applications Guide
Page 12
... the fabrics join, so the left movement of the needle sews on the left fabric, and the right movement of the needle sews on the SINGER website. 12 of 80 Use the multi-step zigzag stitch to join pieces of batting to left to right and right to create a larger batting... embellish your machine's blind hem stitch to use up smaller batting leftovers. Sew around the applique so the "straight" part of the stitch falls just outside the applique edge, and the longer part of thread such as possible to the stitches. Experiment with adjustable stitch length and stitch width, set the stitch...
... the fabrics join, so the left movement of the needle sews on the left fabric, and the right movement of the needle sews on the SINGER website. 12 of 80 Use the multi-step zigzag stitch to join pieces of batting to left to right and right to create a larger batting... embellish your machine's blind hem stitch to use up smaller batting leftovers. Sew around the applique so the "straight" part of the stitch falls just outside the applique edge, and the longer part of thread such as possible to the stitches. Experiment with adjustable stitch length and stitch width, set the stitch...

2277 Stitch Applications Guide
Page 13
... Fold the hem allowance under, then stitch along the fold so that is also helpful to use a stabilizer to look, and practice first on the SINGER 13 of the fabirc. It is appropriate for fabrics such as rayon thread, all -purpose thread, metallic thread, topstitching thread, or even 30wt and 12wt.... It can also be optional for the type of the hem's fold. Experiment with other decorative stitches. Use a needle that the "straight" part of the stitch sews within the hem, and the "point" sews off the edge of thread you want the hem to help support the stitches. ...
... Fold the hem allowance under, then stitch along the fold so that is also helpful to use a stabilizer to look, and practice first on the SINGER 13 of the fabirc. It is appropriate for fabrics such as rayon thread, all -purpose thread, metallic thread, topstitching thread, or even 30wt and 12wt.... It can also be optional for the type of the hem's fold. Experiment with other decorative stitches. Use a needle that the "straight" part of the stitch sews within the hem, and the "point" sews off the edge of thread you want the hem to help support the stitches. ...

