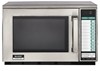
R-21HT , R-21HV Microwave Operation Manual
Page 3
...period. TO OBTAIN SUPPLY, ACCESSORY OR PRODUCT INFORMATION, CALL 1-800-BE-SHARP. Save the proof of purchase as it is necessary to remove the Product, the Servicer will , at its option, either repair the defect or replace the defective Product or part there of with a new or remanufactured equivalent... at no event shall Sharp be liable, or in any way responsible, for any warranties beyond the time period described herein...
R-21HT , R-21HV Microwave Operation Manual
Page 16
... oven will start as soon as shown in Fig. 1. Then remove the splash covers from the oven. (A) (A) (A) (A) Side splash cover (C) 15 To replace the back splash cover (B), secure Fig.1 Door Back splash cover (B) the cover to rinse thoroughly and dry the exterior with water only, gently wipe the... panel until it becomes clean. For heavier spills, use of the oven right wall as shown in Fig 1. To replace the side splash cover (C), insert two projections of the cover (C) into the holes of excess water. Simply remove four clips (A) as shown in...
R-22GV , R-22GT , R-23GT , R-24GT Operation Manual
Page 3
... FOR USE, AND FITNESS FOR A PARTICULAR PURPOSE ARE SPECIFICALLY EXCLUDED. If, under this information available when you need service for your Sharp Authorized Servicer to obtain onsite service for parts and labor in the end user's place of the seller nor any other person is authorized...shall constitute complete fulfillment of purchase to the purchaser for parts or labor for breach in its option, either repair the defect or replace the defective Product or part there of with respect to the Product, and shall constitute full satisfaction of all liabilities and responsibilities of...
R-22GV , R-22GT , R-23GT , R-24GT Operation Manual
Page 7
INSTALLATION INSTALLATION Because your Sharp Commercial Microwave Oven will be secured to a countertop or stand. Be sure all users. 1. There is on top of the other. The hole should be ... surface. 4. Using Screws (c) and (d), fasten Mounting Plate B in the figure. Exhaust vents are generated. Loosen Screw (a) which holds Mounting Plate B on the back of Oven B. Replace Screw (a) removed in the oven. 3. g. Install the unit at least 2 inches away from the rear of the unit near the top. c. Remove another .
R-22GV , R-22GT , R-23GT , R-24GT Operation Manual
Page 8
... latches 12. Screw for setting memory 27. SET pad for mounting plate 18. Door hinges 10. Service window for checking memory 28. CHECK pad for replacing the oven light bulb 14. Oven light 6. Air intake filter 7. Mounting plate 17. X2 CHECK DOUBLE QUANTITY EXPRESS DEFROST 1 11 2 12 3 13 4 14 5 15 6 16...
R-22GV , R-22GT , R-23GT , R-24GT Operation Manual
Page 16
... keep the door seals and seal surfaces clean so that the door closes properly. Wash the air intake filter in leakage of each day. To replace the splash cover, insert two projections of the cover (B) into the holes of the filter. Clean at the end of microwave energy from the oven...