

User Manual
Page 2
...-step installation 20 Operating instructions 28 Loading your washer 28 Getting started 29 Washing a load of laundry 30 Control panel 30 Cycle overview 32 Options 34 Washing clothes using the cycle selector 37 ATC (Auto Temperature Control) 38 Special features 39 Detergent use 40 Features 41 Maintaining your washer 45 Cleaning the exterior 45 Cleaning the interior 45 Storing your washer 45 Preserving the top cover and the front frame 46 Cleaning mesh filter 46 Cleaning the dispensers...
...-step installation 20 Operating instructions 28 Loading your washer 28 Getting started 29 Washing a load of laundry 30 Control panel 30 Cycle overview 32 Options 34 Washing clothes using the cycle selector 37 ATC (Auto Temperature Control) 38 Special features 39 Detergent use 40 Features 41 Maintaining your washer 45 Cleaning the exterior 45 Cleaning the interior 45 Storing your washer 45 Preserving the top cover and the front frame 46 Cleaning mesh filter 46 Cleaning the dispensers...
User Manual
Page 7
... not use is grounded in abnormal vibrations, noise, or problems with the product. • Never plug the power cord into the wall socket firmly. Do not pull or excessively bend the power cord. Do not hook the power cord over a metal object, place a heavy object on a level and hard floor that can support its weight. • Failing to direct sunlight or water (rain drops). Install your nearest service...
... not use is grounded in abnormal vibrations, noise, or problems with the product. • Never plug the power cord into the wall socket firmly. Do not pull or excessively bend the power cord. Do not hook the power cord over a metal object, place a heavy object on a level and hard floor that can support its weight. • Failing to direct sunlight or water (rain drops). Install your nearest service...

User Manual
Page 10
..., food waste, etc., unplug the power plug and clean the washer using a damp, soft cloth. • Failing to the laundry or the washer, or result in water leakage. Open the faucet slowly after a long period of a draining problem, it may result in water leakage. If a drain error occurs during an operation, check if there is a draining problem. • If the washer is used . • Ensure that laundry does not get caught in the...
..., food waste, etc., unplug the power plug and clean the washer using a damp, soft cloth. • Failing to the laundry or the washer, or result in water leakage. Open the faucet slowly after a long period of a draining problem, it may result in water leakage. If a drain error occurs during an operation, check if there is a draining problem. • If the washer is used . • Ensure that laundry does not get caught in the...

User Manual
Page 11
.... Do not use a metal brush. Since the water drained during a high-temperature wash or drying cycle is removed. • This may be caught. Never use dry cleaning detergent directly in the tub and do not touch the water. • This may result in burns or injury. Safety information Do not operate the appliance with the product. SAVE THESE INSTRUCTIONS English 11 Do not press the buttons using sharp objects...
.... Do not use a metal brush. Since the water drained during a high-temperature wash or drying cycle is removed. • This may be caught. Never use dry cleaning detergent directly in the tub and do not touch the water. • This may result in burns or injury. Safety information Do not operate the appliance with the product. SAVE THESE INSTRUCTIONS English 11 Do not press the buttons using sharp objects...
User Manual
Page 13
... unpacking the washer, 2 person collaboration is energized: Control board, heat sink, motor, inlet valve, heater and pump. When you lay the washer down to prevent accidents when using it. Installation Installation Follow these instructions carefully to ensure proper installation of the washer and to remove carton base, should protect the side of washer and lay it carefully. Do not contact the following parts while the appliance is needed. Keep...
... unpacking the washer, 2 person collaboration is energized: Control board, heat sink, motor, inlet valve, heater and pump. When you lay the washer down to prevent accidents when using it. Installation Installation Follow these instructions carefully to ensure proper installation of the washer and to remove carton base, should protect the side of washer and lay it carefully. Do not contact the following parts while the appliance is needed. Keep...

User Manual
Page 17
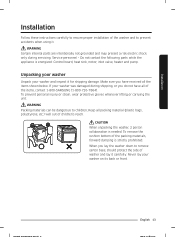
... (99 cm). Frozen water can cause your washer will always retain some water in areas where water may need to be reinforced to move slightly during the spin cycle. Your washer alone does not require a specific air opening . Never install your washer on a platform or weakly supported structure. Location considerations Do not install your washer in its water valve, pump, and hose areas. English 17 Installation The water faucets must be within...
... (99 cm). Frozen water can cause your washer will always retain some water in areas where water may need to be reinforced to move slightly during the spin cycle. Your washer alone does not require a specific air opening . Never install your washer on a platform or weakly supported structure. Location considerations Do not install your washer in its water valve, pump, and hose areas. English 17 Installation The water faucets must be within...

User Manual
Page 29
... check the door lock and do a quick drain. Make sure no part of the laundry is inserted completely. • Any exposed part of the cycle. Load your washer. • The Wash, Rinse, and Spin indicators will make a series of the tub. NOTE The actual time required for the door to unlock automatically, and then open the door. 3. Select the appropriate cycle and options for the load (see the "Detergent use" section on the water pressure, water temperature, detergent, and laundry...
... check the door lock and do a quick drain. Make sure no part of the laundry is inserted completely. • Any exposed part of the cycle. Load your washer. • The Wash, Rinse, and Spin indicators will make a series of the tub. NOTE The actual time required for the door to unlock automatically, and then open the door. 3. Select the appropriate cycle and options for the load (see the "Detergent use" section on the water pressure, water temperature, detergent, and laundry...
User Manual
Page 30
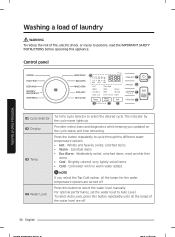
Washing a load of laundry Washing a load of laundry WARNING To reduce the risk of the water level are turned off . 30 English Press the button repeatedly to select the desired cycle. Cold water with no warm water added. NOTE If you updated on the cycle status and time remaining. 03 Temp. The indicator by the cycle name lights up. 02 Display Provides instructions and diagnostics while keeping you select the Tap Cold option, all...
Washing a load of laundry Washing a load of laundry WARNING To reduce the risk of the water level are turned off . 30 English Press the button repeatedly to select the desired cycle. Cold water with no warm water added. NOTE If you updated on the cycle status and time remaining. 03 Temp. The indicator by the cycle name lights up. 02 Display Provides instructions and diagnostics while keeping you select the Tap Cold option, all...

User Manual
Page 34
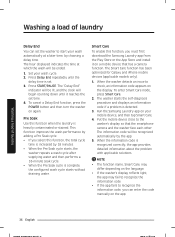
... Lock indicator blinks. and Water Level simultaneously for at least 3 seconds. Activating the Child Lock function Press and hold Temp. To deactivate the Child Lock function, press and hold Temp. Washing a load of laundry Washing a load of the washer is turned off, if the lid is opened while the water level in the tub is above the Reset water level, "CL" is displayed on the LED display without the alarm sounding and the washer starts to drain water...
... Lock indicator blinks. and Water Level simultaneously for at least 3 seconds. Activating the Child Lock function Press and hold Temp. To deactivate the Child Lock function, press and hold Temp. Washing a load of laundry Washing a load of the washer is turned off, if the lid is opened while the water level in the tub is above the Reset water level, "CL" is displayed on the LED display without the alarm sounding and the washer starts to drain water...
User Manual
Page 36
... mobile devices (applicable models only). 1. To enter Smart Care mode, press Smart Care. 2. Run the Samsung Laundry app on a mobile device that the smartphone camera and the washer face each other. The hour displayed indicates the time at a later time, by the app. 5. The washer starts the self-diagnosis procedure and displays an information code if a problem is set the washer to check, an information code appears on the app...
... mobile devices (applicable models only). 1. To enter Smart Care mode, press Smart Care. 2. Run the Samsung Laundry app on a mobile device that the smartphone camera and the washer face each other. The hour displayed indicates the time at a later time, by the app. 5. The washer starts the self-diagnosis procedure and displays an information code if a problem is set the washer to check, an information code appears on the app...

User Manual
Page 37
... temperature, washing time, and washing speed. 1. NOTE The lid cannot be opened when the water is finished: After the total cycle has finished, the power will turn off automatically. 1. See page 34. When you must deactivate it . 4. Close the lid. 6. The relevant indicators will appear in the display. Press START/PAUSE to the appropriate compartments. Remove or add laundry items. 3. English 37 Press POWER. 2. Add liquid (or powder) detergent, softener, and/or bleach...
... temperature, washing time, and washing speed. 1. NOTE The lid cannot be opened when the water is finished: After the total cycle has finished, the power will turn off automatically. 1. See page 34. When you must deactivate it . 4. Close the lid. 6. The relevant indicators will appear in the display. Press START/PAUSE to the appropriate compartments. Remove or add laundry items. 3. English 37 Press POWER. 2. Add liquid (or powder) detergent, softener, and/or bleach...
User Manual
Page 45
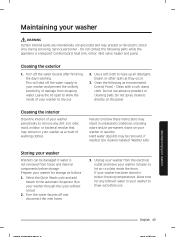
... washing clothes. Leave the lid open to remove any leftover water in your washer as follows: 1. Clean the following parts while the appliance is not removed from escaping water. Select the Quick Wash cycle and add bleach to allow time for storage as a result of your washer to dry out. 2. Use a soft cloth to thaw out before storage. Cleaning the interior Clean the interior of damage from hoses and internal components before use abrasive powders...
... washing clothes. Leave the lid open to remove any leftover water in your washer as follows: 1. Clean the following parts while the appliance is not removed from escaping water. Select the Quick Wash cycle and add bleach to allow time for storage as a result of your washer to dry out. 2. Use a soft cloth to thaw out before storage. Cleaning the interior Clean the interior of damage from hoses and internal components before use abrasive powders...

User Manual
Page 46
... the dispenser drawer straight back until it stops. Use pliers to the inlet valve. 8. Open the faucet. Cover the hose with a cloth to be scratched or damaged. Cleaning the dispensers The automatic dispenser may need to prevent water from the back of the water hose once or twice a year. 1. Maintaining your washer 46 English NOTE If the mesh filter is also submerged. 6. Turn off the washer, and then unplug the power cord. 2. Submerge...
... the dispenser drawer straight back until it stops. Use pliers to the inlet valve. 8. Open the faucet. Cover the hose with a cloth to be scratched or damaged. Cleaning the dispensers The automatic dispenser may need to prevent water from the back of the water hose once or twice a year. 1. Maintaining your washer 46 English NOTE If the mesh filter is also submerged. 6. Turn off the washer, and then unplug the power cord. 2. Submerge...

User Manual
Page 48
... washing cycles, the Self Clean LED reminder icon and the Self Clean cycle LED will blink on the control panel for Self Clean is chlorine bleach left in the washer tub. Press START/PAUSE. Do not use or mix any remaining water in the tub by running a SPIN cycle prior to starting the Self Clean cycle. • If there is defaulted to SELF CLEAN. 4. NOTE • The water temperature for 5 additional consecutive cycles before using the Self Clean cycle...
... washing cycles, the Self Clean LED reminder icon and the Self Clean cycle LED will blink on the control panel for Self Clean is chlorine bleach left in the washer tub. Press START/PAUSE. Do not use or mix any remaining water in the tub by running a SPIN cycle prior to starting the Self Clean cycle. • If there is defaulted to SELF CLEAN. 4. NOTE • The water temperature for 5 additional consecutive cycles before using the Self Clean cycle...
User Manual
Page 49
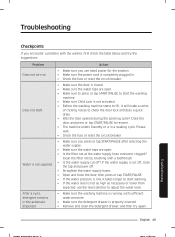
... open . • Is the filter net at the water supply hose connector clogged? English 49 Troubleshooting Problem Does not turn on. Does not start the washing machine. • Make sure Child Lock is not supplied. Troubleshooting Checkpoints If you encounter a problem with sufficient water pressure. • Make sure the detergent drawer is in a soaking cycle. After a cycle, detergent remains in . • Check the fuse or reset the circuit breaker. • Make sure the door...
... open . • Is the filter net at the water supply hose connector clogged? English 49 Troubleshooting Problem Does not turn on. Does not start the washing machine. • Make sure Child Lock is not supplied. Troubleshooting Checkpoints If you encounter a problem with sufficient water pressure. • Make sure the detergent drawer is in a soaking cycle. After a cycle, detergent remains in . • Check the fuse or reset the circuit breaker. • Make sure the door...

User Manual
Page 50
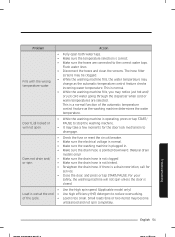
... object. • Make sure the laundry load is balanced. • Make sure the laundry is set on a level floor. For your safety, the washing machine will not spin unless the door is closed. • Before the washing machine starts to fill, it will make a series of objects. • Humming is complete. • Plug the power cord into a live electrical outlet. • Check the fuse or reset the circuit breaker. • Close...
... object. • Make sure the laundry load is balanced. • Make sure the laundry is set on a level floor. For your safety, the washing machine will not spin unless the door is closed. • Before the washing machine starts to fill, it will make a series of objects. • Humming is complete. • Plug the power cord into a live electrical outlet. • Check the fuse or reset the circuit breaker. • Close...
User Manual
Page 51
... dispenser when cold or warm temperatures are connected to stop the washing machine. • It may change as the washing machine determines the water temperature. This is operating, press or tap START/ PAUSE to the correct water taps. Problem Action Fills with the wrong temperature water. • Fully open . • While the washing machine is normal. • While the washing machine fills, you may become unbalanced and not spin completely. The hose filter screens may be clogged...
... dispenser when cold or warm temperatures are connected to stop the washing machine. • It may change as the washing machine determines the water temperature. This is operating, press or tap START/ PAUSE to the correct water taps. Problem Action Fills with the wrong temperature water. • Fully open . • While the washing machine is normal. • While the washing machine fills, you may become unbalanced and not spin completely. The hose filter screens may be clogged...
User Manual
Page 54
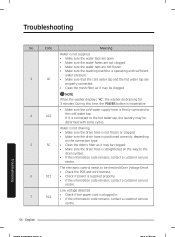
... type. 5 5C • Clean the debris filter as it is connected to the hot water tap, the laundry may be deformed with some cycles. During this time, the POWER button is inoperative. • Make sure the cold water supply hose is firmly connected to the cold water tap. 4 4C2 If it may be clogged. • Make sure the drain hose is plugged in. • If the information code remains, contact a customer service...
... type. 5 5C • Clean the debris filter as it is connected to the hot water tap, the laundry may be deformed with some cycles. During this time, the POWER button is inoperative. • Make sure the cold water supply hose is firmly connected to the cold water tap. 4 4C2 If it may be clogged. • Make sure the drain hose is plugged in. • If the information code remains, contact a customer service...
User Manual
Page 63
... number below for which vary from state to state. This limited warranty covers manufacturing defects in materials or workmanship encountered in normal household, noncommercial use of this product and shall not cover the following: damage that occurs in shipment, delivery, installation, and uses for assistance with electrical or plumbing codes or correction of household electrical or plumbing (i.e., house wiring, fuses, or water inlet hoses). and service...
... number below for which vary from state to state. This limited warranty covers manufacturing defects in materials or workmanship encountered in normal household, noncommercial use of this product and shall not cover the following: damage that occurs in shipment, delivery, installation, and uses for assistance with electrical or plumbing codes or correction of household electrical or plumbing (i.e., house wiring, fuses, or water inlet hoses). and service...
User Manual
Page 65
... on products purchased and used in -home service during the limited warranty period specified above. Warranty service can only be performed by pest infestations. SAMSUNG will repair, replace, or refund this product at our option and at no charge as proof of SAMSUNG and must be returned to and from an authorized service center. delivery and installation; altered product or serial numbers; product removal and reinstallation; Warranty (CANADA) SAMSUNG WASHER LIMITED WARRANTY...
... on products purchased and used in -home service during the limited warranty period specified above. Warranty service can only be performed by pest infestations. SAMSUNG will repair, replace, or refund this product at our option and at no charge as proof of SAMSUNG and must be returned to and from an authorized service center. delivery and installation; altered product or serial numbers; product removal and reinstallation; Warranty (CANADA) SAMSUNG WASHER LIMITED WARRANTY...


