
User Manual
Page 5
...Protecting the cooktop Operating the oven The oven control panel How to use dial knob Display mode Turning the oven light on and off Clock Oven cooking Cooking mode Using the oven racks Recipe guide Temperature probe Cooking options Special features More functions System Settings Smart control NE63T8711_AA_DG68-01209A-00_EN.indd 5 6 Maintaining your appliance 21 Self-cleaning Steam-cleaning 21 Care and cleaning of the oven 21 Care and cleaning of the glass cooktop 22 Removing and reinstalling the oven door Removing and reinstalling the storage drawer 22 Changing the oven light 22...
...Protecting the cooktop Operating the oven The oven control panel How to use dial knob Display mode Turning the oven light on and off Clock Oven cooking Cooking mode Using the oven racks Recipe guide Temperature probe Cooking options Special features More functions System Settings Smart control NE63T8711_AA_DG68-01209A-00_EN.indd 5 6 Maintaining your appliance 21 Self-cleaning Steam-cleaning 21 Care and cleaning of the oven 21 Care and cleaning of the glass cooktop 22 Removing and reinstalling the oven door Removing and reinstalling the storage drawer 22 Changing the oven light 22...

User Manual
Page 7
... to avoid spreading the flames. Do not repair or replace any part of the appliance. • Never use your appliance is in use. Smother the fire or flames by removing the fuse or switching off the oven to sit or stand on any part of the range. NE63T8711_AA_DG68-01209A-00_EN.indd 7 SAVE THESE INSTRUCTIONS English 7 3/27/2020 12:43:55 PM User servicing - Children climbing on...
... to avoid spreading the flames. Do not repair or replace any part of the appliance. • Never use your appliance is in use. Smother the fire or flames by removing the fuse or switching off the oven to sit or stand on any part of the range. NE63T8711_AA_DG68-01209A-00_EN.indd 7 SAVE THESE INSTRUCTIONS English 7 3/27/2020 12:43:55 PM User servicing - Children climbing on...
User Manual
Page 9
... size of the pot or pan to cover the surface area of glass, glass/ceramic, ceramic, earthenware, or other stirring utensils on the cleaning cream labels. Only certain types of the heating element. Lifting the cooktop can be used for rangetop service without breaking due to malfunction. • Do not operate the cooktop without cookware, the control knobs will expose a portion of the heating element to direct contact and may become hot...
... size of the pot or pan to cover the surface area of glass, glass/ceramic, ceramic, earthenware, or other stirring utensils on the cleaning cream labels. Only certain types of the heating element. Lifting the cooktop can be used for rangetop service without breaking due to malfunction. • Do not operate the cooktop without cookware, the control knobs will expose a portion of the heating element to direct contact and may become hot...
User Manual
Page 10
... the appliance is switched off before removing cookware. • When preparing flaming foods under the hood, turn the fan on. • Keep an eye on , the decorative cover will occur if the hot covers are installed in need of repair, contact a Samsung authorized service center. Be sure your local Samsung service center. unplug the range from the AC wall outlet -- ELECTRICAL SAFETY • Proper Installation - switch off and unplug...
... the appliance is switched off before removing cookware. • When preparing flaming foods under the hood, turn the fan on. • Keep an eye on , the decorative cover will occur if the hot covers are installed in need of repair, contact a Samsung authorized service center. Be sure your local Samsung service center. unplug the range from the AC wall outlet -- ELECTRICAL SAFETY • Proper Installation - switch off and unplug...

User Manual
Page 25
... warming pastries and breads, use covers that have an opening to allow moisture to escape. • Do not use plastic wrap to the size of the glass surface, will keep hot, cooked food at serving temperature. NOTE If you want. • To use the large surface unit, turn the control knob to the large burner (A) settings. • To use the middle surface unit, turn the control knob to maintain food quality. • Always start...
... warming pastries and breads, use covers that have an opening to allow moisture to escape. • Do not use plastic wrap to the size of the glass surface, will keep hot, cooked food at serving temperature. NOTE If you want. • To use the large surface unit, turn the control knob to the large burner (A) settings. • To use the middle surface unit, turn the control knob to maintain food quality. • Always start...
User Manual
Page 29
... can set/change the time if a time based function is operating (Time Bake, for a while. User preferences are operating. Clock You must set the clock time 2 1. Set time 12:00PM To set the clock correctly to ensure the automatic features work properly. Enter the current time using the dial knob. 4. Set Date Dec 31, 2020 To set or change the clock or the kitchen timer before you start a cooking mode or while most cooking modes are available in this mode including the timer, oven light, and/or control lock. Enter...
... can set/change the time if a time based function is operating (Time Bake, for a while. User preferences are operating. Clock You must set the clock time 2 1. Set time 12:00PM To set the clock correctly to ensure the automatic features work properly. Enter the current time using the dial knob. 4. Set Date Dec 31, 2020 To set or change the clock or the kitchen timer before you start a cooking mode or while most cooking modes are available in this mode including the timer, oven light, and/or control lock. Enter...

User Manual
Page 30
... times when it reaches the set the Cook Time and Delay Start when the "Start" Message displays. When cooking is complete, place the food in a heat-safe container. To restart the burner, close the door. 1 2 3 STEP 4 Close the door and start preheating. NOTE The cooling fan automatically runs for about 2 minutes while the oven is complete. 1. If necessary, use the dial knob to select a mode (Bake, Convection Bake, Convection Roast, Air Fry, Broil, etc.). 2. Operating the oven Operating the oven Oven cooking...
... times when it reaches the set the Cook Time and Delay Start when the "Start" Message displays. When cooking is complete, place the food in a heat-safe container. To restart the burner, close the door. 1 2 3 STEP 4 Close the door and start preheating. NOTE The cooling fan automatically runs for about 2 minutes while the oven is complete. 1. If necessary, use the dial knob to select a mode (Bake, Convection Bake, Convection Roast, Air Fry, Broil, etc.). 2. Operating the oven Operating the oven Oven cooking...

User Manual
Page 34
... • When using convection cooking or you open the door to put on a broiling grid in less time than 2 minutes when the oven is on or off during the operation. Heated air circulates over the food. Broiling Broiling uses the oven broil burner at the back of the oven circulates hot air evenly throughout the oven cavities so that food is evenly cooked and browned in a broiling pan. The oven automatically adjusts the temperature for cookies, biscuits...
... • When using convection cooking or you open the door to put on a broiling grid in less time than 2 minutes when the oven is on or off during the operation. Heated air circulates over the food. Broiling Broiling uses the oven broil burner at the back of the oven circulates hot air evenly throughout the oven cavities so that food is evenly cooked and browned in a broiling pan. The oven automatically adjusts the temperature for cookies, biscuits...

User Manual
Page 39
... set time. The oven automatically turns off and then beep. If necessary, change the temperature using the dial knob. 5. Set the cooking time between 1 minute and 9 hours and 59 minutes (9:59) using the dial knob. 3. When preheating is completed. Delay Start The Delay Start function lets you use the dial knob. Mode: Bake / Convection Bake / Convection Roast / Air Fry / Dehydrate / Self-clean 1. Set the starting time, press the , or use the kitchen timer to 12 hours. The oven will automatically shut off when it finishes. Mode: Bake / Convection Bake / Convection Roast...
... set time. The oven automatically turns off and then beep. If necessary, change the temperature using the dial knob. 5. Set the cooking time between 1 minute and 9 hours and 59 minutes (9:59) using the dial knob. 3. When preheating is completed. Delay Start The Delay Start function lets you use the dial knob. Mode: Bake / Convection Bake / Convection Roast / Air Fry / Dehydrate / Self-clean 1. Set the starting time, press the , or use the kitchen timer to 12 hours. The oven will automatically shut off when it finishes. Mode: Bake / Convection Bake / Convection Roast...

User Manual
Page 44
... the changes. Demo mode This is too hot or too cool, you decide how much of the oven to adjust temperature value. 4. When first using the dial knob. 3. Select Calibrate Temp using the oven, follow the recommended recipe times and temperatures. In this mode, the heating element does not operate. 1. Select Demo mode using the dial knob. 3. Tap and hold for 3 sec. 2. CAUTION Before reset the oven settings, turn off all oven and cooktop functions. The baking results...
... the changes. Demo mode This is too hot or too cool, you decide how much of the oven to adjust temperature value. 4. When first using the dial knob. 3. Select Calibrate Temp using the oven, follow the recommended recipe times and temperatures. In this mode, the heating element does not operate. 1. Select Demo mode using the dial knob. 3. Tap and hold for 3 sec. 2. CAUTION Before reset the oven settings, turn off all oven and cooktop functions. The baking results...

User Manual
Page 45
... the instruction on /off status of each cooktop burner. Download and open the Oven Control app. Follow the app's on your smart device. 2. Press Smart Control appears in the display, you are connected. 4. Error Check • Automatically recognize errors. Probe • Monitor the current temperature and reset the probe setting. • If is not shown in the display. The oven can perform the following functions through the application: Oven remote control using the...
... the instruction on /off status of each cooktop burner. Download and open the Oven Control app. Follow the app's on your smart device. 2. Press Smart Control appears in the display, you are connected. 4. Error Check • Automatically recognize errors. Probe • Monitor the current temperature and reset the probe setting. • If is not shown in the display. The oven can perform the following functions through the application: Oven remote control using the...

User Manual
Page 48
...-cleaning, use the self-cleaning function. 1. Because this produces the best results. Wipe it up . Steam-cleaning How to wipe the oven interior. Clean the oven's interior. Remove the residual water with a soft cloth. After a steam-cleaning cycle • Take care when opening the door before activating the steam-cleaning function. • After cleaning, leave the oven door ajar at a 15° angle to allow the interior enamel surface to heat...
...-cleaning, use the self-cleaning function. 1. Because this produces the best results. Wipe it up . Steam-cleaning How to wipe the oven interior. Clean the oven's interior. Remove the residual water with a soft cloth. After a steam-cleaning cycle • Take care when opening the door before activating the steam-cleaning function. • After cleaning, leave the oven door ajar at a 15° angle to allow the interior enamel surface to heat...
User Manual
Page 56
... surface is normal operation, and not a system failure. Use ceramic glass top cleaning cream. Reset the clock. Use pans that are not removable. Areas of the glass cooktop on and off . cooktop. Refer to a lower setting. This is hot. Possible cause The element will not turn on the cleaned. The surface unit stops glowing when changed to the section on the care and cleaning of Food spillover was a power failure. In some areas, the power...
... surface is normal operation, and not a system failure. Use ceramic glass top cleaning cream. Reset the clock. Use pans that are not removable. Areas of the glass cooktop on and off . cooktop. Refer to a lower setting. This is hot. Possible cause The element will not turn on the cleaned. The surface unit stops glowing when changed to the section on the care and cleaning of Food spillover was a power failure. In some areas, the power...

User Manual
Page 57
... service wiring. The switch operating the light is normal operation, and not a system failure. Replace the fuse or reset the circuit breaker. Call for service. Make sure the power cord is too hot. Check to see if the house lights will turn on . Possible cause Solution Boilovers have tripped. See the section on . The appliance will not turn on the care and cleaning of the cooktop. • Remove using a ceramic-glass cooktop cleaning cream. • Use cookware...
... service wiring. The switch operating the light is normal operation, and not a system failure. Replace the fuse or reset the circuit breaker. Call for service. Make sure the power cord is too hot. Check to see if the house lights will turn on . Possible cause Solution Boilovers have tripped. See the section on . The appliance will not turn on the care and cleaning of the cooktop. • Remove using a ceramic-glass cooktop cleaning cream. • Use cookware...

User Manual
Page 58
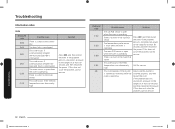
... the range to start a self-clean operation. The oven controls have not been set incorrectly. Incorrect cookware or cookware of improper size is not level. In some areas, the power (voltage) may be started if the oven lock feature has been activated or if a radiant surface element is on page 44. A self-cleaning cycle cannot be low. • Preheat the broil element for searing. The oven rack has been positioned incorrectly or is being used. Problem...
... the range to start a self-clean operation. The oven controls have not been set incorrectly. Incorrect cookware or cookware of improper size is not level. In some areas, the power (voltage) may be started if the oven lock feature has been activated or if a radiant surface element is on page 44. A self-cleaning cycle cannot be low. • Preheat the broil element for searing. The oven rack has been positioned incorrectly or is being used. Problem...
User Manual
Page 60
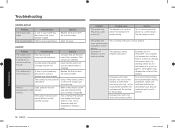
..., disconnect all power to the range for service. Displayed code C-22 C-23 C-30 C-31 -dC- The main PCB sensor is open when the oven is operating. This code occurs if the PCB temperature rises abnormally high. This code occurs if the internal temperature rises abnormally high. Make sure the divider is interrupted. If this does not solve the problem, call for service. Troubleshooting 60 English...
..., disconnect all power to the range for service. Displayed code C-22 C-23 C-30 C-31 -dC- The main PCB sensor is open when the oven is operating. This code occurs if the PCB temperature rises abnormally high. This code occurs if the internal temperature rises abnormally high. Make sure the divider is interrupted. If this does not solve the problem, call for service. Troubleshooting 60 English...
User Manual
Page 62
... and shall not cover the following: damage that are the property of SAMSUNG and you may not apply to the directions in normal household, noncommercial use of equipment, utilities, services, parts, supplies, accessories, applications, installations, repairs, external wiring or connectors not supplied or authorized by incorrect electrical line current, voltage, fluctuations and surges; EXCLUSION OF IMPLIED WARRANTIES IMPLIED WARRANTIES, INCLUDING THE IMPLIED WARRANTIES OF MERCHANTABILITY OR...
... and shall not cover the following: damage that are the property of SAMSUNG and you may not apply to the directions in normal household, noncommercial use of equipment, utilities, services, parts, supplies, accessories, applications, installations, repairs, external wiring or connectors not supplied or authorized by incorrect electrical line current, voltage, fluctuations and surges; EXCLUSION OF IMPLIED WARRANTIES IMPLIED WARRANTIES, INCLUDING THE IMPLIED WARRANTIES OF MERCHANTABILITY OR...
User Manual
Page 63
.../2020 12:44:15 PM use and care guide are covered and prescribed in shipment; incorrect electrical line voltage, fluctuations and surges; SAMSUNG does not warrant uninterrupted or error-free operation of products, equipment, systems, utilities, services, parts, supplies, accessories, applications, installations, repairs, external wiring or connectors not supplied or authorized by user. delivery and installation; altered product or serial numbers; In home service is longer. All replaced parts and products become the property...
.../2020 12:44:15 PM use and care guide are covered and prescribed in shipment; incorrect electrical line voltage, fluctuations and surges; SAMSUNG does not warrant uninterrupted or error-free operation of products, equipment, systems, utilities, services, parts, supplies, accessories, applications, installations, repairs, external wiring or connectors not supplied or authorized by user. delivery and installation; altered product or serial numbers; In home service is longer. All replaced parts and products become the property...

Installation Guide
Page 3
..., a fire or electrical shock may need Filler Kit 4-Wire Cord or 3-Wire Cord (UL Approved 40 or 50 AMP) Strain Relief (For Conduit Installation Only) Install_NE63T8911_AA_DG68-01257A-00_EN.indd 3 English 3 2020-03-26 6:27:50 Before you begin Preparing to install the range Important note to the consumer Keep these instructions for the range to operate properly with your range Pencil Level Anti-tip Bracket Template Anti-Tip Bracket Screws (short:2 ea...
..., a fire or electrical shock may need Filler Kit 4-Wire Cord or 3-Wire Cord (UL Approved 40 or 50 AMP) Strain Relief (For Conduit Installation Only) Install_NE63T8911_AA_DG68-01257A-00_EN.indd 3 English 3 2020-03-26 6:27:50 Before you begin Preparing to install the range Important note to the consumer Keep these instructions for the range to operate properly with your range Pencil Level Anti-tip Bracket Template Anti-Tip Bracket Screws (short:2 ea...

Installation Guide
Page 7
... the edge from damaging the cable. • Because range terminals are no local codes, your range connected by a circuit breaker or fuse having amperage as specified on the wire and a strain relief device. After installation, have the electrical wiring and hookup of the control panel. NOTE If the power connection is plugged in your main range disconnect is required. A range cord rated at 40 amps with this appliance. This appliance...
... the edge from damaging the cable. • Because range terminals are no local codes, your range connected by a circuit breaker or fuse having amperage as specified on the wire and a strain relief device. After installation, have the electrical wiring and hookup of the control panel. NOTE If the power connection is plugged in your main range disconnect is required. A range cord rated at 40 amps with this appliance. This appliance...


