

User Manual (ENGLISH)
Page 100
... a risk of plug to other intellectual property rights.Use of a DVD disc does not correspond to the Region Management Information. NO USER-SERVICEABLE PARTS ARE INSIDE. CAUTION : DVD RECORDERS USE AN INVISIBLE LASER BEAM WHICH CAN CAUSE HAZARDOUS RADIATION EXPOSURE IF DIRECTED...819,098;4,907, 093; This symbol indicates "dangerous voltage" inside the product that any unauthorized changes or modifications to this DVD Recorder, the DVD Recorder cannot play the disc. To prevent electromagnetic interference with electric appliances, such as a bookcase or similar unit. Attention: ...
... a risk of plug to other intellectual property rights.Use of a DVD disc does not correspond to the Region Management Information. NO USER-SERVICEABLE PARTS ARE INSIDE. CAUTION : DVD RECORDERS USE AN INVISIBLE LASER BEAM WHICH CAN CAUSE HAZARDOUS RADIATION EXPOSURE IF DIRECTED...819,098;4,907, 093; This symbol indicates "dangerous voltage" inside the product that any unauthorized changes or modifications to this DVD Recorder, the DVD Recorder cannot play the disc. To prevent electromagnetic interference with electric appliances, such as a bookcase or similar unit. Attention: ...

User Manual (ENGLISH)
Page 101
...with regular shapes. A polarized plug has two blades with a ball-point pen or pencil. Handling Cautions • Before connecting other . If this DVD Recorder may be damaged. • Do not put your safety. Holding discs • Avoid touching the surface of the disc. English - 3 Getting... power cord to avoid injury from tip-over. 13) Unplug this recorder. Maintenance of the polarized or grounding- DVD-RAM, DVD-RW and DVD-R • Clean with a soft cloth. DVD-Video, CD • Wipe off the recorder after use. • Disconnect the AC power cord from the AC...
...with regular shapes. A polarized plug has two blades with a ball-point pen or pencil. Handling Cautions • Before connecting other . If this DVD Recorder may be damaged. • Do not put your safety. Holding discs • Avoid touching the surface of the disc. English - 3 Getting... power cord to avoid injury from tip-over. 13) Unplug this recorder. Maintenance of the polarized or grounding- DVD-RAM, DVD-RW and DVD-R • Clean with a soft cloth. DVD-Video, CD • Wipe off the recorder after use. • Disconnect the AC power cord from the AC...

User Manual (ENGLISH)
Page 102
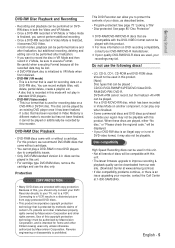
... used . • The unit can contain up to the power outlet. Optimizing is finalized, it becomes DVD-Video. • You can be impossible in the comfort of your personal use discs printed with a Samsung DVD video recorder. Wait for two hours, then insert the disc and try to discs. (Do not use discs fixed...
... used . • The unit can contain up to the power outlet. Optimizing is finalized, it becomes DVD-Video. • You can be impossible in the comfort of your personal use discs printed with a Samsung DVD video recorder. Wait for two hours, then insert the disc and try to discs. (Do not use discs fixed...
User Manual (ENGLISH)
Page 103
...playlist, etc. - For this product, we recommend DVD-RAM discs that is recorded in this recorder. DVD+R/+RW cannot record, but the finalized +R/+RW can be played by this mode will be displayed. • If your recorder, contact the Call Center at www.samsung.com/ca) • If disc compatibility problems continue...our web site. (Download Center at 1-800-SAMSUNG. This DVD Recorder can allow you to protect the contents of this unit. • Not all the recorded data may also not be playable. This is a format that has been recorded in Video Mode by methods claims of discs will...
...playlist, etc. - For this product, we recommend DVD-RAM discs that is recorded in this recorder. DVD+R/+RW cannot record, but the finalized +R/+RW can be played by this mode will be displayed. • If your recorder, contact the Call Center at www.samsung.com/ca) • If disc compatibility problems continue...our web site. (Download Center at 1-800-SAMSUNG. This DVD Recorder can allow you to protect the contents of this unit. • Not all the recorded data may also not be playable. This is a format that has been recorded in Video Mode by methods claims of discs will...

User Manual (ENGLISH)
Page 104
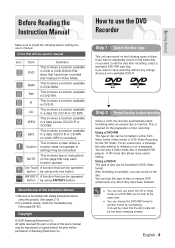
...Cabinet 3 Disc Handling 3 Disc Storage 4 Disc Specifications 4 General Features 8 Before Reading the Instruction Manual 9 How to use the DVD Recorder 9 Description 11 Front Panel 11 Front Panel Display 11 Rear Panel 12 Unpacking 12 Accessories 12 Tour of the Remote Control 13 Connecting... UP Quick Overview 14 Step 1 : Connecting the Antenna cable 15 Antenna + DVD Recorder + TV : No Cable box . . . . . .15 Antenna + Cable box + DVD Recorder + TV : Cable box with many scrambled channels 16 Antenna + DVD Recorder + Cable box +TV : Cable box with a few scrambled channels 17 Step...
...Cabinet 3 Disc Handling 3 Disc Storage 4 Disc Specifications 4 General Features 8 Before Reading the Instruction Manual 9 How to use the DVD Recorder 9 Description 11 Front Panel 11 Front Panel Display 11 Rear Panel 12 Unpacking 12 Accessories 12 Tour of the Remote Control 13 Connecting... UP Quick Overview 14 Step 1 : Connecting the Antenna cable 15 Antenna + DVD Recorder + TV : No Cable box . . . . . .15 Antenna + Cable box + DVD Recorder + TV : Cable box with many scrambled channels 16 Antenna + DVD Recorder + Cable box +TV : Cable box with a few scrambled channels 17 Step...

User Manual (ENGLISH)
Page 105
... External Equipment 47 Copying from a Camcorder 48 Making a One Touch Recording (OTR 49 Setting a Timer Recording 50 Flexible Recording (for Timer Recording only) . . . .51 Editing the Scheduled Record List 51 Deleting the Scheduled Record List 52 Recording the Scheduled Record List 53 Playback Before Playing 54 Region code (DVD-Video only 54 Disc types that can be played 54...
... External Equipment 47 Copying from a Camcorder 48 Making a One Touch Recording (OTR 49 Setting a Timer Recording 50 Flexible Recording (for Timer Recording only) . . . .51 Editing the Scheduled Record List 51 Deleting the Scheduled Record List 52 Recording the Scheduled Record List 53 Playback Before Playing 54 Region code (DVD-Video only 54 Disc types that can be played 54...

User Manual (ENGLISH)
Page 106
... free video. Copying data from a digital camcorder using a DV input jack Record digital camcorder video onto DVD-RW, DVD-R discs using a DVD-RW/DVD-R disc With the DVD-R130, you can set your recorder to one of functions with the best picture quality possible for Timer Recording If FR mode is selected, the video quality is adjusted automatically so...
... free video. Copying data from a digital camcorder using a DV input jack Record digital camcorder video onto DVD-RW, DVD-R discs using a DVD-RW/DVD-R disc With the DVD-R130, you can set your recorder to one of functions with the best picture quality possible for Timer Recording If FR mode is selected, the video quality is adjusted automatically so...
User Manual (ENGLISH)
Page 107
..., check the Troubleshooting. (See pages 89~92) Copyright © 2006 Samsung Electronics Co. Using a DVD-R This type of Samsung Electronics Co. s You can record on which MP3 is recorded). JPEG This involves a function available in DVD Video format. Step 1 Select the disc type This unit can record on the same disc or you want to another format...
..., check the Troubleshooting. (See pages 89~92) Copyright © 2006 Samsung Electronics Co. Using a DVD-R This type of Samsung Electronics Co. s You can record on which MP3 is recorded). JPEG This involves a function available in DVD Video format. Step 1 Select the disc type This unit can record on the same disc or you want to another format...

User Manual (ENGLISH)
Page 108
... as a Date : Once(mm/dd), MON-FRI, Every SAT, etc. English Timer recording is recorded with DVDs. When recording is set in a displayed menu and then immediately start and stop recording. A DVD consists of sections called titles, and sub sections called chapters. Chapters will be created automatically ...when you can be necessary. First, finish all editing and recording operations, then finalize the disc. When using a DVD-RW disc in Video mode. When using a DVD-RW disc in VR Mode Although finalizing is generally unnecessary when playing the disc ...
... as a Date : Once(mm/dd), MON-FRI, Every SAT, etc. English Timer recording is recorded with DVDs. When recording is set in a displayed menu and then immediately start and stop recording. A DVD consists of sections called titles, and sub sections called chapters. Chapters will be created automatically ...when you can be necessary. First, finish all editing and recording operations, then finalize the disc. When using a DVD-RW disc in Video mode. When using a DVD-RW disc in VR Mode Although finalizing is generally unnecessary when playing the disc ...

User Manual (ENGLISH)
Page 109
... digital equipment with a DV jack. (such as a camcorder) 4. SEARCH Go to the next title/chapter/track, or goes back to indicate the timer record mode. 4. P.SCAN Selects the progressive scan mode. 11. CH ( ) Select TV channels. Lights to the previous title/chapter/track. 8. English - ...11 Lights when a disc is loaded. 5. Lights when a DVD-R/-RW/-RAM disc is loaded. 2. DISC TRAY Opens to accept a disc. 5. OPEN/CLOSE Opens and closes the disc tray. 6. DISPLAY Displays the playing ...
... digital equipment with a DV jack. (such as a camcorder) 4. SEARCH Go to the next title/chapter/track, or goes back to indicate the timer record mode. 4. P.SCAN Selects the progressive scan mode. 11. CH ( ) Select TV channels. Lights to the previous title/chapter/track. 8. English - ...11 Lights when a disc is loaded. 5. Lights when a DVD-R/-RW/-RAM disc is loaded. 2. DISC TRAY Opens to accept a disc. 5. OPEN/CLOSE Opens and closes the disc tray. 6. DISPLAY Displays the playing ...

User Manual (ENGLISH)
Page 111
... the disc that is being played. 14. OPEN/CLOSE Button To open and close the disc tray. 18. REPEAT Button Allows you to stop the recording. 8. REVERSE/FORWARD STEP Buttons Press to automatically skip a portion of the program during playback of the Remote Control 28 29 27 30 1 16 17 2 3 18.... Button Selects line input signal in external input mode. (Tuner, AV1, AV2 or DV) English - 13 Getting Started POWER Button 2. MENU Button Brings up the DVD recorder's setup menu. 11. ANGLE Button 19. PLAY LIST/TITLE MENU Button Use this to access various audio functions on...
... the disc that is being played. 14. OPEN/CLOSE Button To open and close the disc tray. 18. REPEAT Button Allows you to stop the recording. 8. REVERSE/FORWARD STEP Buttons Press to automatically skip a portion of the program during playback of the Remote Control 28 29 27 30 1 16 17 2 3 18.... Button Selects line input signal in external input mode. (Tuner, AV1, AV2 or DV) English - 13 Getting Started POWER Button 2. MENU Button Brings up the DVD recorder's setup menu. 11. ANGLE Button 19. PLAY LIST/TITLE MENU Button Use this to access various audio functions on...

User Manual (ENGLISH)
Page 112
..., specifies that the cable ground shall be connected to the grounding system of the building as close to the point of connecting the DVD Recorder to start using the recorder. English • Note to CATV system installer: : This reminder is provided to call CATV system installer's attention to Article 820-40 of the...
..., specifies that the cable ground shall be connected to the grounding system of the building as close to the point of connecting the DVD Recorder to start using the recorder. English • Note to CATV system installer: : This reminder is provided to call CATV system installer's attention to Article 820-40 of the...

User Manual (ENGLISH)
Page 113
...Video signals. Step 1: Connecting the Antenna Cable There are several ways to view Video from the unit. (i.e. Antenna + DVD Recorder + TV : No Cable box You can record non-scrambled channels by selecting the channel on the following pages. Connecting & Setting Up s The VHF/UHF ANT (RF)... OUT jack of the Antenna connections on the DVD Recorder. DVD playback) English - 15 You must connect Audio/Video cables to connect your DVD Recorder. Also use this product sends only signals received through NOTE the antenna.
...Video signals. Step 1: Connecting the Antenna Cable There are several ways to view Video from the unit. (i.e. Antenna + DVD Recorder + TV : No Cable box You can record non-scrambled channels by selecting the channel on the following pages. Connecting & Setting Up s The VHF/UHF ANT (RF)... OUT jack of the Antenna connections on the DVD Recorder. DVD playback) English - 15 You must connect Audio/Video cables to connect your DVD Recorder. Also use this product sends only signals received through NOTE the antenna.

User Manual (ENGLISH)
Page 114
English s The VHF/UHF ANT (RF) OUT jack of this product sends only signals received through NOTE the antenna. Connecting & Setting Up Antenna + Cable box + DVD Recorder + TV : Cable box with many scrambled channels You can record channels by selecting the channel on . 16 - You cannot record one channel while watching another channel. You must connect Audio/Video cables to view Video from the unit. (i.e. DVD playback) Be sure that the cable box is turned on the cable box. It does not output Audio/Video signals.
English s The VHF/UHF ANT (RF) OUT jack of this product sends only signals received through NOTE the antenna. Connecting & Setting Up Antenna + Cable box + DVD Recorder + TV : Cable box with many scrambled channels You can record channels by selecting the channel on . 16 - You cannot record one channel while watching another channel. You must connect Audio/Video cables to view Video from the unit. (i.e. DVD playback) Be sure that the cable box is turned on the cable box. It does not output Audio/Video signals.

User Manual (ENGLISH)
Page 115
It does not output Audio/Video signals. Connecting & Setting Up Antenna + DVD Recorder + Cable box + TV : Cable box with a few scrambled channels You can record non-scrambled channels by selecting the channel on the DVD Recorder. You must connect Audio/Video cables to view Video from the unit. (i.e. s The VHF/UHF ANT (RF) OUT jack of this product sends only signals received through NOTE the antenna. DVD playback) English - 17 You cannot record scrambled channels that require a cable box.
It does not output Audio/Video signals. Connecting & Setting Up Antenna + DVD Recorder + Cable box + TV : Cable box with a few scrambled channels You can record non-scrambled channels by selecting the channel on the DVD Recorder. You must connect Audio/Video cables to view Video from the unit. (i.e. s The VHF/UHF ANT (RF) OUT jack of this product sends only signals received through NOTE the antenna. DVD playback) English - 17 You cannot record scrambled channels that require a cable box.

User Manual (ENGLISH)
Page 116
.... It does not output audio/video signals. The VHF/UHF RF OUT jack of the video connections on the following audio/video connections on your DVD Recorder. Connecting to connect your TV(or AV amplifier). (See pages 21 ~ 23) 18 - You must use one of this unit. Connecting & Setting Up ... : Connecting the Video Cable There are several ways to a Video input jack Connect a video(yellow) cable between the VIDEO(yellow) OUT jack on DVD Recorder and VIDEO(yellow) IN jack on the TV (or AV amplifier). • You will enjoy normal quality images. • Connect audio cables(white and...
.... It does not output audio/video signals. The VHF/UHF RF OUT jack of the video connections on the following audio/video connections on your DVD Recorder. Connecting to connect your TV(or AV amplifier). (See pages 21 ~ 23) 18 - You must use one of this unit. Connecting & Setting Up ... : Connecting the Video Cable There are several ways to a Video input jack Connect a video(yellow) cable between the VIDEO(yellow) OUT jack on DVD Recorder and VIDEO(yellow) IN jack on the TV (or AV amplifier). • You will enjoy normal quality images. • Connect audio cables(white and...

User Manual (ENGLISH)
Page 117
... white (Y) and color (C) signals to an S-Video input jack Connect an S-Video cable(not supplied) between the AUDIO OUT jacks on the DVD Recorder and AUDIO IN jacks on your TV supports S-Video NOTE input or Component video input, respectively. Connecting & Setting Up Connecting to present clearer ...images than regular video input mode. • Connect audio cables(white and red) between the S-VIDEO OUT jack on DVD Recorder and S-VIDEO IN jack on TV(or AV amplifier). (See pages 21 ~ 23) s S-Video or Component video outputs are available only if ...
... white (Y) and color (C) signals to an S-Video input jack Connect an S-Video cable(not supplied) between the AUDIO OUT jacks on the DVD Recorder and AUDIO IN jacks on your TV supports S-Video NOTE input or Component video input, respectively. Connecting & Setting Up Connecting to present clearer ...images than regular video input mode. • Connect audio cables(white and red) between the S-VIDEO OUT jack on DVD Recorder and S-VIDEO IN jack on TV(or AV amplifier). (See pages 21 ~ 23) s S-Video or Component video outputs are available only if ...

User Manual (ENGLISH)
Page 118
... TV(or AV amplifier). (See pages 21 ~ 23) s Compared to standard interlaced video, progressive NOTE scan doubles the amount of the DVD Recorder to your TV (or AV amplifier). 2. s Progressive Scan Output (480p). Not all high definition television sets are questions regarding TV set compatibility... available with this model, please contact our customer service center at 1-800-SAMSUNG. 20 - Connecting to the Interlace mode. Connect Component video cables(not supplied) between the AUDIO OUT jacks on the DVD Recorder and AUDIO IN jacks on the front of video lines fed to enjoy...
... TV(or AV amplifier). (See pages 21 ~ 23) s Compared to standard interlaced video, progressive NOTE scan doubles the amount of the DVD Recorder to your TV (or AV amplifier). 2. s Progressive Scan Output (480p). Not all high definition television sets are questions regarding TV set compatibility... available with this model, please contact our customer service center at 1-800-SAMSUNG. 20 - Connecting to the Interlace mode. Connect Component video cables(not supplied) between the AUDIO OUT jacks on the DVD Recorder and AUDIO IN jacks on the front of video lines fed to enjoy...

User Manual (ENGLISH)
Page 119
Select one of the audio connections on the following pages. Connecting to connect your TV's speakers. Connecting & Setting Up Step 3 : Connecting the Audio Cable There are several ways to your TV This connection will use your DVD Recorder. English - 21
Select one of the audio connections on the following pages. Connecting to connect your TV's speakers. Connecting & Setting Up Step 3 : Connecting the Audio Cable There are several ways to your TV This connection will use your DVD Recorder. English - 21

User Manual (ENGLISH)
Page 122
Connecting & Setting Up Step 4 : Connecting External Devices This allows you to connect your DVD Recorder to the AV 1 IN jacks of the DVD Recorder. English You can record from connected equipment (VCR, STB or DVD Player). 24 - Connecting a VCR, Set-Top Box(STB) or DVD Player to the AV 1 IN jacks Connecting a VCR or external device to other external devices and view or record their outputs.
Connecting & Setting Up Step 4 : Connecting External Devices This allows you to connect your DVD Recorder to the AV 1 IN jacks of the DVD Recorder. English You can record from connected equipment (VCR, STB or DVD Player). 24 - Connecting a VCR, Set-Top Box(STB) or DVD Player to the AV 1 IN jacks Connecting a VCR or external device to other external devices and view or record their outputs.