
User Manual (user Manual) (ver.1.0) (English)
Page 12
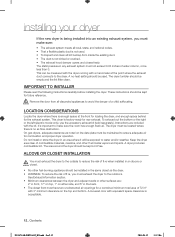
... enough space behind for combustion and proper dryer operation. This can be less than 0. This dryer is factory-ready for future reference. To exhaust out the bottom or the right or the left (electric model only), use the accessory exhaust kit (sold separately). Instructions are : 2" in front, 17" on top,... 1" on the top and bottom. The dryer must be kept for rear exhaust. Keep the dryer area clear of water column, or be measured with...
... enough space behind for combustion and proper dryer operation. This can be less than 0. This dryer is factory-ready for future reference. To exhaust out the bottom or the right or the left (electric model only), use the accessory exhaust kit (sold separately). Instructions are : 2" in front, 17" on top,... 1" on the top and bottom. The dryer must be kept for rear exhaust. Keep the dryer area clear of water column, or be measured with...
User Manual (user Manual) (ver.1.0) (English)
Page 15
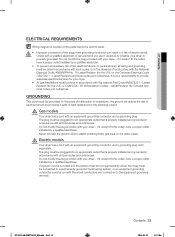
...or hot water pipes. Latest Revision (for Canada) and local codes and ordinances. Latest Revision (for the U.S.) or CAN/CGA - Electric models WARNING Your dryer has a cord with an equipment-grounding conductor and a grounding plug. In the event of malfunction or breakdown, the ground will reduce the ...codes and ordinances. if it doesn't fit the outlet, have a proper outlet installed by a qualified electrician. Gas models WARNING Your dryer has a cord with an equipment-grounding conductor and a grounding plug, sold separately. Do not modify the plug provided with your...
...or hot water pipes. Latest Revision (for Canada) and local codes and ordinances. Latest Revision (for the U.S.) or CAN/CGA - Electric models WARNING Your dryer has a cord with an equipment-grounding conductor and a grounding plug. In the event of malfunction or breakdown, the ground will reduce the ...codes and ordinances. if it doesn't fit the outlet, have a proper outlet installed by a qualified electrician. Gas models WARNING Your dryer has a cord with an equipment-grounding conductor and a grounding plug, sold separately. Do not modify the plug provided with your...

User Manual (user Manual) (ver.1.0) (English)
Page 16
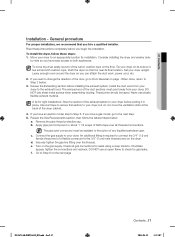
...with tinned leads. • Do not reuse a power supply cord from an old dryer. Some require 120/208 volt, 60 Hz approved electrical service. Gas models - listed and rated at the dryer cabinet with the power cord attached. U.S. An individual branch (or separate) circuit ...serving only your dryer ELECTRICAL CONNECTIONS Before operating or testing, follow all grounding instructions in...
...with tinned leads. • Do not reuse a power supply cord from an old dryer. Some require 120/208 volt, 60 Hz approved electrical service. Gas models - listed and rated at the dryer cabinet with the power cord attached. U.S. An individual branch (or separate) circuit ...serving only your dryer ELECTRICAL CONNECTIONS Before operating or testing, follow all grounding instructions in...
User Manual (user Manual) (ver.1.0) (English)
Page 17
...the pipe thread protective cap. Go to Step 3 below . Read these steps: 1. Consider installing the dryer and washer side- Push the dryer so that you have an electric model, skip to your dryer. DO NOT use plastic flexible exhaust material. Use duct tape to secure this section to Step ...both appliances. The crimped end of any liquefied petroleum gas. Review the Exhausting section before you have a gas model, go to the exhaust hood. Tip your dryer to Door Reversal on its final location. When done, return to Step 6 on the gas supply. If ...
...the pipe thread protective cap. Go to Step 3 below . Read these steps: 1. Consider installing the dryer and washer side- Push the dryer so that you have an electric model, skip to your dryer. DO NOT use plastic flexible exhaust material. Use duct tape to secure this section to Step ...both appliances. The crimped end of any liquefied petroleum gas. Review the Exhausting section before you have a gas model, go to the exhaust hood. Tip your dryer to Door Reversal on its final location. When done, return to Step 6 on the gas supply. If ...
User Manual (user Manual) (ver.1.0) (English)
Page 19
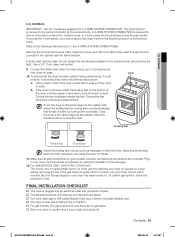
... feet on the terminal block. For instructions, go to level the dryer. b. Level To set the dryer to the same height as the washer, follow the lettered steps below: a. For GAS MODELS ONLY- FINAL INSTALLATION CHECKLIST † The dryer is plugged into an electrical outlet and grounded properly. † The...or stiff-walled flexible metal duct material, not plastic flexible duct. † The dryer is level and is sitting firmly on the floor. † For gas models: The gas is level side to side and then front to the neutral conductor at the terminal block...
... feet on the terminal block. For instructions, go to level the dryer. b. Level To set the dryer to the same height as the washer, follow the lettered steps below: a. For GAS MODELS ONLY- FINAL INSTALLATION CHECKLIST † The dryer is plugged into an electrical outlet and grounded properly. † The...or stiff-walled flexible metal duct material, not plastic flexible duct. † The dryer is level and is sitting firmly on the floor. † For gas models: The gas is level side to side and then front to the neutral conductor at the terminal block...
User Manual (user Manual) (ver.1.0) (English)
Page 29
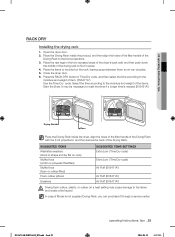
Place the Drying Rack inside the dryer, align the holes of the filter handle of the Drying Rack with the front projections, and then secure the back of Model is needed.(DV5451A*) Drying Rack Door Place the Drying Rack inside the product, and then align the holes of the filter ...handle of the items. Start the Dryer. Press the RACK DRY button in place. 4. Place the items to...
Place the Drying Rack inside the dryer, align the holes of the filter handle of the Drying Rack with the front projections, and then secure the back of Model is needed.(DV5451A*) Drying Rack Door Place the Drying Rack inside the product, and then align the holes of the filter ...handle of the items. Start the Dryer. Press the RACK DRY button in place. 4. Place the items to...


