User Manual (ENGLISH)
Page 16
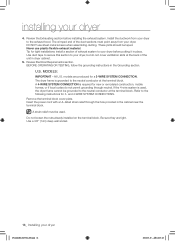
...ducting. All U.S. installing your dryer DV448AEG-02555A_EN.indd 16 2008-03-25 ¿ÀÈÄ 6:25:48 Use a 3/8" (1cm) deep well socket. 16_ Installing your dryer 4. A strain relief must point away from your dryer. Review the Exhausting section before putting it... in the Grounding section. Review Electrical Requirements section. If the 4-wire system is required for tight installations: ...
...ducting. All U.S. installing your dryer DV448AEG-02555A_EN.indd 16 2008-03-25 ¿ÀÈÄ 6:25:48 Use a 3/8" (1cm) deep well socket. 16_ Installing your dryer 4. A strain relief must point away from your dryer. Review the Exhausting section before putting it... in the Grounding section. Review Electrical Requirements section. If the 4-wire system is required for tight installations: ...
User Manual (ENGLISH)
Page 17
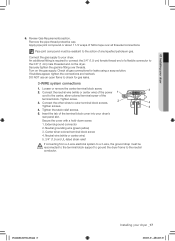
... bubbles appear, tighten the connections and recheck. Tighten screw. 3. Center silver-colored terminal block screw 4. 01 Installing your dryer. Connect the gas supply to your dryer 6. DO NOT use an open flame to outer terminal block screws. Connect the other wires to check for leaks using ...wire (green/yellow) 3. Apply pipe joint compound or about 1 1/2 wraps of the terminal block cover into your dryer _17 2008-03-25 ¿ÀÈÄ 6:25:49 Insert the tab of Teflon tape over threads. Review Gas Requirements section. Remove the pipe thread protective cap.
... bubbles appear, tighten the connections and recheck. Tighten screw. 3. Center silver-colored terminal block screw 4. 01 Installing your dryer. Connect the gas supply to your dryer 6. DO NOT use an open flame to outer terminal block screws. Connect the other wires to check for leaks using ...wire (green/yellow) 3. Apply pipe joint compound or about 1 1/2 wraps of the terminal block cover into your dryer _17 2008-03-25 ¿ÀÈÄ 6:25:49 Insert the tab of Teflon tape over threads. Review Gas Requirements section. Remove the pipe thread protective cap.


