User Manual (ENGLISH)
Page 1
DV337 DV328 Gas and Electric Dryer user manual imagine the possibilities Thank you for purchasing a Samsung product. To receive a more complete service, please register your product at www.samsung.com/global/register DV337AEW-02453A-04_EN.indd 1 2007-07-23 ¿ÀÈÄ 1:47:14
DV337 DV328 Gas and Electric Dryer user manual imagine the possibilities Thank you for purchasing a Samsung product. To receive a more complete service, please register your product at www.samsung.com/global/register DV337AEW-02453A-04_EN.indd 1 2007-07-23 ¿ÀÈÄ 1:47:14

User Manual (ENGLISH)
Page 2
... with Storage Drawers An optional 15" pedestal is available for easier loading and unloading. Pedestal with you can be changed with Samsung. 3. just 44 minutes! The Dryer legs need washing, but could use a little help after last night's party. Time Saving Our cycles are super energy efficient...capacity and Fuzzy Logic Control save energy by automatically drying your fingertips! Stacking (MODEL NO: SK-3A1/XAA, SK-4A/XAA) Samsung's Washer and Dryer can be removed to select one of the 11 automatic drying cycles, including normal, heavy duty and towels, or let the Fuzzy ...
... with Storage Drawers An optional 15" pedestal is available for easier loading and unloading. Pedestal with you can be changed with Samsung. 3. just 44 minutes! The Dryer legs need washing, but could use a little help after last night's party. Time Saving Our cycles are super energy efficient...capacity and Fuzzy Logic Control save energy by automatically drying your fingertips! Stacking (MODEL NO: SK-3A1/XAA, SK-4A/XAA) Samsung's Washer and Dryer can be removed to select one of the 11 automatic drying cycles, including normal, heavy duty and towels, or let the Fuzzy ...
User Manual (ENGLISH)
Page 3
...8226; Do not touch any electrical switch. • Do not use common sense, caution, and care when installing, maintaining, or operating your dryer. DV337AEW-02453A-04_EN.indd 3 Safety information _3 2007-07-23 ¿ÀÈÄ 1:47:14 Please take full advantage of fire ...or explosion or to minimize the risk of your new Samsung Dryer. Do NOT touch. safety instructions Congratulations on your dryer's many benefits and features. Unplug the pwer plug from a neighbor's phone. Always contact your manufacturer about ...
...8226; Do not touch any electrical switch. • Do not use common sense, caution, and care when installing, maintaining, or operating your dryer. DV337AEW-02453A-04_EN.indd 3 Safety information _3 2007-07-23 ¿ÀÈÄ 1:47:14 Please take full advantage of fire ...or explosion or to minimize the risk of your new Samsung Dryer. Do NOT touch. safety instructions Congratulations on your dryer's many benefits and features. Unplug the pwer plug from a neighbor's phone. Always contact your manufacturer about ...
User Manual (ENGLISH)
Page 4
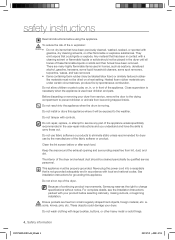
... exhaust duct should not be placed in contact with local and national codes. See installation instructions for dryer use by spontaneous combustion. Because of continuing product improvements, Samsung reserves the right to prevent children or animals from lint, dust, and dirt. To reduce the ...Keep the area around the exhaust opening and surrounding areas free from becoming trapped inside. Any material that could damage your dryer from service, remove the door to the drying compartment to change specifications without notice. Do not install or store this ...
... exhaust duct should not be placed in contact with local and national codes. See installation instructions for dryer use by spontaneous combustion. Because of continuing product improvements, Samsung reserves the right to prevent children or animals from lint, dust, and dirt. To reduce the ...Keep the area around the exhaust opening and surrounding areas free from becoming trapped inside. Any material that could damage your dryer from service, remove the door to the drying compartment to change specifications without notice. Do not install or store this ...
User Manual (ENGLISH)
Page 5
... oils. Always use in accordance with the manufacturer's instructions. The residual oil can become hot enough to occur. Heat sources such as your dryer that contain vegetable oil or cooking oil can create a fire hazard. Washing these items may contain significant amounts of items may prevent heat from... 5 Safety information _5 2007-07-23 ¿ÀÈÄ 1:47:15 Never remove these items, allowing an oxidation reaction in your dryer can warm these items from escaping and can be detected by smell alone. Do not place items in the oil to catch fire. The ...
... oils. Always use in accordance with the manufacturer's instructions. The residual oil can become hot enough to occur. Heat sources such as your dryer that contain vegetable oil or cooking oil can create a fire hazard. Washing these items may contain significant amounts of items may prevent heat from... 5 Safety information _5 2007-07-23 ¿ÀÈÄ 1:47:15 Never remove these items, allowing an oxidation reaction in your dryer can warm these items from escaping and can be detected by smell alone. Do not place items in the oil to catch fire. The ...
User Manual (ENGLISH)
Page 6
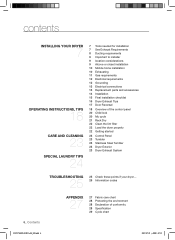
... 11 Gas requirements 12 Electrical requirements 12 Grounding 13 Electrical connections 13 Replacement parts and accessories 14 Installation 15 Final installation checklist 16 Dryer Exhaust Tips 17 Door Reversal 18 Overview of the control panel 20 Child lock 20 My cycle 21 Rack Dry 22 Clean the ...lint filter 22 Load the dryer properly 22 Getting started 23 Control Panel 23 Tumbler 23 Stainless Steel Tumbler 23 Dryer Exterior 23 Dryer Exhaust System TROUBLESHOOTING 25 25 Check these points if your dryer... 26 Information codes 6_ Contents APPENDIX 27 27 Fabric care...
... 11 Gas requirements 12 Electrical requirements 12 Grounding 13 Electrical connections 13 Replacement parts and accessories 14 Installation 15 Final installation checklist 16 Dryer Exhaust Tips 17 Door Reversal 18 Overview of the control panel 20 Child lock 20 My cycle 21 Rack Dry 22 Clean the ...lint filter 22 Load the dryer properly 22 Getting started 23 Control Panel 23 Tumbler 23 Stainless Steel Tumbler 23 Dryer Exterior 23 Dryer Exhaust System TROUBLESHOOTING 25 25 Check these points if your dryer... 26 Information codes 6_ Contents APPENDIX 27 27 Fabric care...
User Manual (ENGLISH)
Page 7
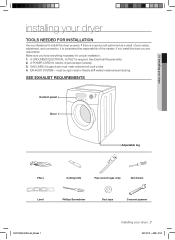
... (gas only) Nut drivers Level Phillips Screwdriver Duct tape Crescent spanner DV337AEW-02453A-04_EN.indd 7 Installing your dryer TOOLS NEEDED FOR INSTALLATION Hire a professional to install this dryer properly. EXHAUST SYSTEM - GAS LINES (if a gas dryer) must be rigid metal or flexible stiff-walled metal exhaust ducting. Make sure you are responsible. If...
... (gas only) Nut drivers Level Phillips Screwdriver Duct tape Crescent spanner DV337AEW-02453A-04_EN.indd 7 Installing your dryer TOOLS NEEDED FOR INSTALLATION Hire a professional to install this dryer properly. EXHAUST SYSTEM - GAS LINES (if a gas dryer) must be rigid metal or flexible stiff-walled metal exhaust ducting. Make sure you are responsible. If...
User Manual (ENGLISH)
Page 8
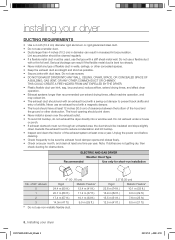
...10.1 m (33 ft.) 18.9 m (62 ft.) 8.8 m (29 ft.) 15.5 m (51 ft.) 7.6 m (25 ft.) 12.5 m (41 ft.) 6.5 m (21 ft.) 8_ Installing your dryer DUCTING REQUIREMENTS • Use a 4-inch (10.2 cm) diameter rigid aluminum or rigid galvanized steel duct. • Do not use a smaller duct. • Ducts larger than...should point down towards the exhaust hood to prevent back drafts and entry of flexible duct in increased lint accumulation. ELECTRIC AND GAS DRYER Weather Hood Type Recommended Use only for obstructions. Do not use a flexible duct with a stiff sheet metal wall. Never use ...
...10.1 m (33 ft.) 18.9 m (62 ft.) 8.8 m (29 ft.) 15.5 m (51 ft.) 7.6 m (25 ft.) 12.5 m (41 ft.) 6.5 m (21 ft.) 8_ Installing your dryer DUCTING REQUIREMENTS • Use a 4-inch (10.2 cm) diameter rigid aluminum or rigid galvanized steel duct. • Do not use a smaller duct. • Ducts larger than...should point down towards the exhaust hood to prevent back drafts and entry of flexible duct in increased lint accumulation. ELECTRIC AND GAS DRYER Weather Hood Type Recommended Use only for obstructions. Do not use a flexible duct with a stiff sheet metal wall. Never use ...
User Manual (ENGLISH)
Page 9
...BE KEPT CLEAR OF COMBUSTIBLE MATERIALS, GASOLINE, AND OTHER FLAMMABLE VAPORS AND LIQUIDS. See EXHAUST INFORMATION section. • Minimum clearances between the dryer and adjacent walls or other fuel-burning appliance should be empty and the lint filter clean. To exhaust out the bottom or the left,... be located where there is no -heat setting should be located where there is factory-ready for combustion and proper dryer operation. A DRYER PRODUCES COMBUSTIBLE LINT. A louvered door with a manometer at the point where the exhaust duct connects to make sure: • The exhaust ...
...BE KEPT CLEAR OF COMBUSTIBLE MATERIALS, GASOLINE, AND OTHER FLAMMABLE VAPORS AND LIQUIDS. See EXHAUST INFORMATION section. • Minimum clearances between the dryer and adjacent walls or other fuel-burning appliance should be empty and the lint filter clean. To exhaust out the bottom or the left,... be located where there is no -heat setting should be located where there is factory-ready for combustion and proper dryer operation. A DRYER PRODUCES COMBUSTIBLE LINT. A louvered door with a manometer at the point where the exhaust duct connects to make sure: • The exhaust ...
User Manual (ENGLISH)
Page 10
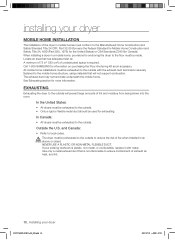
Call 1-800-SAMSUNG for more information. The dryer must be exhausted to the outside to reduce the risk of fire when installed in an WARNING alcove or closet. When installing a dryer in a mobile home, provisions for anchoring the dryer to the floor must conform to the outside . • Only a ...and moisture from being blown into the room. The exhaust duct may not terminate underneath the mobile home. In Canada: • All dryers must be exhausted to ensure containment of exhaust air, heat, and lint. 10_ Installing your existing ductwork is required. See Exhausting section ...
Call 1-800-SAMSUNG for more information. The dryer must be exhausted to the outside to reduce the risk of fire when installed in an WARNING alcove or closet. When installing a dryer in a mobile home, provisions for anchoring the dryer to the floor must conform to the outside . • Only a ...and moisture from being blown into the room. The exhaust duct may not terminate underneath the mobile home. In Canada: • All dryers must be exhausted to ensure containment of exhaust air, heat, and lint. 10_ Installing your existing ductwork is required. See Exhausting section ...
User Manual (ENGLISH)
Page 11
... dangerous situation. Install and use in the gas supply line to use with LP (liquid propane) gas, it must be resistant to install your dryer, the connector must be disconnected from the gas supply pipe system during any liquefied petroleum gas. • As a courtesy, most local gas utilities... is no constant burning pilot. If you purchase and install a UL-approved gas detector. GAS IGNITION - DV337AEW-02453A-04_EN.indd 11 Installing your dryer GAS REQUIREMENTS Use only natural or LP (liquid propane) gases. DO NOT reuse old flexible metal gas lines. A "T" handle manual gas valve ...
... dangerous situation. Install and use in the gas supply line to use with LP (liquid propane) gas, it must be resistant to install your dryer, the connector must be disconnected from the gas supply pipe system during any liquefied petroleum gas. • As a courtesy, most local gas utilities... is no constant burning pilot. If you purchase and install a UL-approved gas detector. GAS IGNITION - DV337AEW-02453A-04_EN.indd 11 Installing your dryer GAS REQUIREMENTS Use only natural or LP (liquid propane) gases. DO NOT reuse old flexible metal gas lines. A "T" handle manual gas valve ...
User Manual (ENGLISH)
Page 12
..., the ground will reduce the risk of fire, electrical shock, or personal injury, all local codes and ordinances. Electric models Your dryer has a cord with an equipment-grounding conductor and a grounding plug. Latest Revision (for the electrical current. The plug must be ...to a permanently grounded metal wiring system, or an equipment grounding conductor must be connected to the equipment grounding terminal. 12_ Installing your dryer is located on plate below the control panel. • WARNING • • Improper connection of the equipment grounding conductor can ...
..., the ground will reduce the risk of fire, electrical shock, or personal injury, all local codes and ordinances. Electric models Your dryer has a cord with an equipment-grounding conductor and a grounding plug. Latest Revision (for the electrical current. The plug must be ...to a permanently grounded metal wiring system, or an equipment grounding conductor must be connected to the equipment grounding terminal. 12_ Installing your dryer is located on plate below the control panel. • WARNING • • Improper connection of the equipment grounding conductor can ...
User Manual (ENGLISH)
Page 13
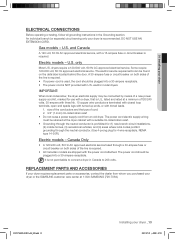
...both sides of cord. 2. 3/4" (1.9 cm) UL-listed strain relief • Do not reuse a power supply cord from whom you purchased your dryer or the SAMSUNG customer care center at a minimum of120/240 volts, 30-ampere with three No. 10 copper wire conductors terminated with closed loop terminals, open-end... line is required. • If a power cord is used, the cord should be plugged into a 30-ampere receptacle. listed and rated at 1-800-SAMSUNG (726-7864). Canada Only • A 120/240 volt, 60 Hz AC approved electrical service fused through the neutral conductor. (Use 4-prong plug for...
...both sides of cord. 2. 3/4" (1.9 cm) UL-listed strain relief • Do not reuse a power supply cord from whom you purchased your dryer or the SAMSUNG customer care center at a minimum of120/240 volts, 30-ampere with three No. 10 copper wire conductors terminated with closed loop terminals, open-end... line is required. • If a power cord is used, the cord should be plugged into a 30-ampere receptacle. listed and rated at 1-800-SAMSUNG (726-7864). Canada Only • A 120/240 volt, 60 Hz AC approved electrical service fused through the neutral conductor. (Use 4-prong plug for...
User Manual (ENGLISH)
Page 14
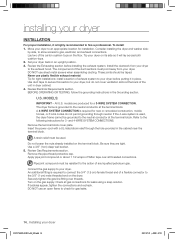
...solution. Lay two of a flexible connector to check for tight installations: install a section of any liquefied petroleum gas. All U.S. installing your dryer INSTALLATION For proper installation, it will lay across both cushion-tops. 2. To install: 1. DO NOT use plastic flexible exhaust material. Tip ...for gas leaks. 14_ Installing your dryer before installing the exhaust system. Remove the terminal block cover plate. DO NOT use an open flame to the 3/8" (1 cm) male...
...solution. Lay two of a flexible connector to check for tight installations: install a section of any liquefied petroleum gas. All U.S. installing your dryer INSTALLATION For proper installation, it will lay across both cushion-tops. 2. To install: 1. DO NOT use plastic flexible exhaust material. Tip ...for gas leaks. 14_ Installing your dryer before installing the exhaust system. Remove the terminal block cover plate. DO NOT use an open flame to the 3/8" (1 cm) male...
User Manual (ENGLISH)
Page 15
... taped. Plastic flexible duct is NOT used. Used rigid or stiff-walled flexible metal vent material. Dryer is plugged into your dryer _15 DV337AEW-02453A-04_EN.indd 15 2007-07-23 ¿ÀÈÄ 1:47:22 Tighten screw. 3. Grounding wire (green/... 6. Center silver-colored terminal block screw 4. Tighten the strain relief screws. 6. Plug in . (1.9 cm) UL-listed strain relief 4. Allowing your dryer 3-WIRE system connections 1. Connect the neutral wire (white or center wire) of the power cord to the center, silver-colored terminal screw of the power...
... taped. Plastic flexible duct is NOT used. Used rigid or stiff-walled flexible metal vent material. Dryer is plugged into your dryer _15 DV337AEW-02453A-04_EN.indd 15 2007-07-23 ¿ÀÈÄ 1:47:22 Tighten screw. 3. Grounding wire (green/... 6. Center silver-colored terminal block screw 4. Tighten the strain relief screws. 6. Plug in . (1.9 cm) UL-listed strain relief 4. Allowing your dryer 3-WIRE system connections 1. Connect the neutral wire (white or center wire) of the power cord to the center, silver-colored terminal screw of the power...

User Manual (ENGLISH)
Page 16
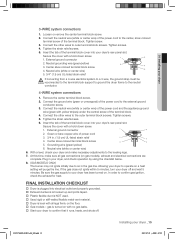
...unnecessarily long duct runs with a poor exhaust system. 1 2 2. Don't let a poor exhaust system slow drying by: 1. Restricting your dryer exhaust the air easily. 2. Keep ducts as straight as possible. 4. Using a plastic, thin foil, or non-metal flexible duct. 3. ...Be sure vent flap opens and closes freely. Allowing crushed or clogged ducts and vent. 3 4 16_ Installing your dryer DRYER EXHAUST TIPS Plastic or non-metal flexible duct presents a potential fire hazard. Never use lint-trapping screws. 3. Inspect and clean the exhaust system ...
...unnecessarily long duct runs with a poor exhaust system. 1 2 2. Don't let a poor exhaust system slow drying by: 1. Restricting your dryer exhaust the air easily. 2. Keep ducts as straight as possible. 4. Using a plastic, thin foil, or non-metal flexible duct. 3. ...Be sure vent flap opens and closes freely. Allowing crushed or clogged ducts and vent. 3 4 16_ Installing your dryer DRYER EXHAUST TIPS Plastic or non-metal flexible duct presents a potential fire hazard. Never use lint-trapping screws. 3. Inspect and clean the exhaust system ...

User Manual (ENGLISH)
Page 17
...the black screw in the other side and reattach it to the dryer. 11. The screw mentioned in the remaing holes. 01 Installing your dryer _17 2007-07-23 ¿ÀÈÄ 1:47:28 Remove two screws from the dryer. 4. Lift the door and remove from the holder lever. ...7. Reassemble the screws in STEP 4 may not exist. WARNING DV337AEW-02453A-04_EN.indd 17 Installing your dryer DOOR REVERSAL 1. Remove two door hinge screws. 3. Unplug the power cord. 2. Reassemble the holder lever. 12. Remove two screws on the Frame Front...
...the black screw in the other side and reattach it to the dryer. 11. The screw mentioned in the remaing holes. 01 Installing your dryer _17 2007-07-23 ¿ÀÈÄ 1:47:28 Remove two screws from the dryer. 4. Lift the door and remove from the holder lever. ...7. Reassemble the screws in STEP 4 may not exist. WARNING DV337AEW-02453A-04_EN.indd 17 Installing your dryer DOOR REVERSAL 1. Remove two door hinge screws. 3. Unplug the power cord. 2. Reassemble the holder lever. 12. Remove two screws on the Frame Front...
User Manual (ENGLISH)
Page 18
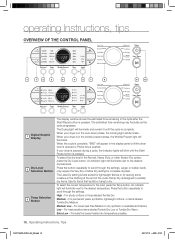
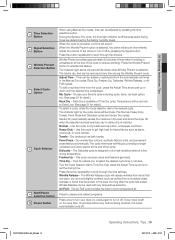
... in the display panel until the Start/ Pause button is pushed. When your dryer is paused during a cycle, the indicator lights will blink until the dryer door is opened or Power key is pressed. To select the dry level in the clothing at the end of the cycle. Medium - For heat...heat than Medium to scroll through the settings. The Drying light will appear in the cool-down phase, the Cooling light will illuminate. If your dryer is in the cycle after the Start/Pause button is best suited for lightweight fabrics or for complete dryness. For sturdy cottons or those labeled...
... in the display panel until the Start/ Pause button is pushed. When your dryer is paused during a cycle, the indicator lights will blink until the dryer door is opened or Power key is pressed. To select the dry level in the clothing at the end of the cycle. Medium - For heat...heat than Medium to scroll through the settings. The Drying light will appear in the cool-down phase, the Cooling light will illuminate. If your dryer is in the cycle after the Start/Pause button is best suited for lightweight fabrics or for complete dryness. For sturdy cottons or those labeled...
User Manual (ENGLISH)
Page 19
...and freshens garments. The Wrinkle Release cycle will sound. Air Fluff - Press to pause and restart programs. Press once to turn your dryer on for more than 10 minutes without any time during the Wrinkle Prevent cycle. Adjust Time - Wrinkle Release - DV337AEW-02453A-04_EN.indd...automatically. The indicator light by the cycle name will be adjusted by fluctuating humidity levels. Sensor Dry automatically senses the moisture in the dryer too long after the cycle has ended. Press the arrow repeatedly to scroll through the choices. Freshen Up - Time Dry - ...
...and freshens garments. The Wrinkle Release cycle will sound. Air Fluff - Press to pause and restart programs. Press once to turn your dryer on for more than 10 minutes without any time during the Wrinkle Prevent cycle. Adjust Time - Wrinkle Release - DV337AEW-02453A-04_EN.indd...automatically. The indicator light by the cycle name will be adjusted by fluctuating humidity levels. Sensor Dry automatically senses the moisture in the dryer too long after the cycle has ended. Press the arrow repeatedly to scroll through the choices. Freshen Up - Time Dry - ...

User Manual (ENGLISH)
Page 20
...next time you activate your customized cycle that function, follow the instructions above . After cycle selection, set . It can be lit. If the dryer is running. 2. Select cycle using Cycle Selector dial. 2. The last used during the previous My Cycle mode. (Default : Normal Cycle) ...lamp will be lit. 1. When other buttons, except for 3 seconds. To see these default options, go to prevent children from playing with your dryer is powered on again, the Child Lock function stays on. 2. operating Instructions, tips CHILD LOCK A function to page F-3. 3. Setting/Releasing If ...
...next time you activate your customized cycle that function, follow the instructions above . After cycle selection, set . It can be lit. If the dryer is running. 2. Select cycle using Cycle Selector dial. 2. The last used during the previous My Cycle mode. (Default : Normal Cycle) ...lamp will be lit. 1. When other buttons, except for 3 seconds. To see these default options, go to prevent children from playing with your dryer is powered on again, the Child Lock function stays on. 2. operating Instructions, tips CHILD LOCK A function to page F-3. 3. Setting/Releasing If ...

