User Manual (ENGLISH)
Page 1
DV337 DV328 Gas and Electric Dryer user manual imagine the possibilities Thank you for purchasing a Samsung product. To receive a more complete service, please register your product at www.samsung.com/global/register DV337AEW-02453A-04_EN.indd 1 2007-07-23 ¿ÀÈÄ 1:47:14
DV337 DV328 Gas and Electric Dryer user manual imagine the possibilities Thank you for purchasing a Samsung product. To receive a more complete service, please register your product at www.samsung.com/global/register DV337AEW-02453A-04_EN.indd 1 2007-07-23 ¿ÀÈÄ 1:47:14

User Manual (ENGLISH)
Page 2
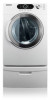
... changed with you time for easier loading and unloading. All our dryers are super energy efficient, using only 3.01 kWh per pound of laundry. Energy Saving Samsung dryers are designed to stack the Washer and Dryer. Our Freshen Up Cycle removes odors, adding that can dry extra... and automatically set the drying time. Stacking (MODEL NO: SK-3A1/XAA, SK-4A/XAA) Samsung's Washer and Dryer can be stacked to your fingertips! Our ultralarge 7.3 cu.ft. capacity dryer circulates more mileage to maximize usable space. Now you can hold a 100 oz. Precision drying has...
... changed with you time for easier loading and unloading. All our dryers are super energy efficient, using only 3.01 kWh per pound of laundry. Energy Saving Samsung dryers are designed to stack the Washer and Dryer. Our Freshen Up Cycle removes odors, adding that can dry extra... and automatically set the drying time. Stacking (MODEL NO: SK-3A1/XAA, SK-4A/XAA) Samsung's Washer and Dryer can be stacked to your fingertips! Our ultralarge 7.3 cu.ft. capacity dryer circulates more mileage to maximize usable space. Now you can hold a 100 oz. Precision drying has...
User Manual (ENGLISH)
Page 3
... to take the time to read this manual do not understand. Follow directions explicity. Hazards or unsafe practices that may result in your dryer. Please take full advantage of fire or explosion or to prevent property damage, personal injury, or death. Do not store or use ...common sense, caution, and care when installing, maintaining, or operating your building. • Clear the room, building or area of your new Samsung Dryer. Make sure the machine is your responsibility to light any appliance. • Do not turn on the appliance. • Do not touch any...
... to take the time to read this manual do not understand. Follow directions explicity. Hazards or unsafe practices that may result in your dryer. Please take full advantage of fire or explosion or to prevent property damage, personal injury, or death. Do not store or use ...common sense, caution, and care when installing, maintaining, or operating your building. • Clear the room, building or area of your new Samsung Dryer. Make sure the machine is your responsibility to light any appliance. • Do not turn on the appliance. • Do not touch any...
User Manual (ENGLISH)
Page 4
...store this appliance. The interior of the dryer and exhaust duct should not be dried on , in, or in the dryer until all instructions before using the appliance. Because of continuing product improvements, Samsung reserves the right to eliminate static unless ...could ignite or explode. Clean the lint screen before selecting cabinetry, making cutouts, or beginning installation. See installation instructions for dryer use fabric softeners or products to change specifications without notice. WARNING coins, knives, pins, etc. Any material that have...
...store this appliance. The interior of the dryer and exhaust duct should not be dried on , in, or in the dryer until all instructions before using the appliance. Because of continuing product improvements, Samsung reserves the right to eliminate static unless ...could ignite or explode. Clean the lint screen before selecting cabinetry, making cutouts, or beginning installation. See installation instructions for dryer use fabric softeners or products to change specifications without notice. WARNING coins, knives, pins, etc. Any material that have...
User Manual (ENGLISH)
Page 5
...or soaked with vegetable oil or cooking oil. The potential for these oils. Oxidation creates heat. Never remove these items in your dryer that contain vegetable oil or cooking oil can be detected by smell alone. Install and use the Cool Down cycle for spontaneous combustion.... Even after being washed, these items when they are exposed to catch fire. Heat sources such as your system, resulting in your dryer can ignite spontaneously. WARNING Gas leaks may contain significant amounts of items may occur in a dangerous situation. Never pile or stack these items...
...or soaked with vegetable oil or cooking oil. The potential for these oils. Oxidation creates heat. Never remove these items in your dryer that contain vegetable oil or cooking oil can be detected by smell alone. Install and use the Cool Down cycle for spontaneous combustion.... Even after being washed, these items when they are exposed to catch fire. Heat sources such as your system, resulting in your dryer can ignite spontaneously. WARNING Gas leaks may contain significant amounts of items may occur in a dangerous situation. Never pile or stack these items...
User Manual (ENGLISH)
Page 6
... 11 Gas requirements 12 Electrical requirements 12 Grounding 13 Electrical connections 13 Replacement parts and accessories 14 Installation 15 Final installation checklist 16 Dryer Exhaust Tips 17 Door Reversal 18 Overview of the control panel 20 Child lock 20 My cycle 21 Rack Dry 22 Clean the ...lint filter 22 Load the dryer properly 22 Getting started 23 Control Panel 23 Tumbler 23 Stainless Steel Tumbler 23 Dryer Exterior 23 Dryer Exhaust System TROUBLESHOOTING 25 25 Check these points if your dryer... 26 Information codes 6_ Contents APPENDIX 27 27 Fabric care...
... 11 Gas requirements 12 Electrical requirements 12 Grounding 13 Electrical connections 13 Replacement parts and accessories 14 Installation 15 Final installation checklist 16 Dryer Exhaust Tips 17 Door Reversal 18 Overview of the control panel 20 Child lock 20 My cycle 21 Rack Dry 22 Clean the ...lint filter 22 Load the dryer properly 22 Getting started 23 Control Panel 23 Tumbler 23 Stainless Steel Tumbler 23 Dryer Exterior 23 Dryer Exhaust System TROUBLESHOOTING 25 25 Check these points if your dryer... 26 Information codes 6_ Contents APPENDIX 27 27 Fabric care...
User Manual (ENGLISH)
Page 7
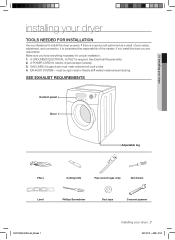
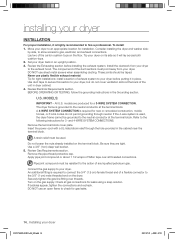
.... EXHAUST SYSTEM - Make sure you are responsible. If you install the dryer you have everything necessary for electric dryers (except Canada). 3. See Electrical Requirements. 2. GAS LINES (if a gas dryer) must be rigid metal or flexible stiff-walled metal exhaust ducting. SEE EXHAUST... Level Phillips Screwdriver Duct tape Crescent spanner DV337AEW-02453A-04_EN.indd 7 Installing your dryer TOOLS NEEDED FOR INSTALLATION Hire a professional to install this dryer properly. 01 Installing your dryer installing your dryer _7 2007-07-23 ¿ÀÈÄ 1:47:18
.... EXHAUST SYSTEM - Make sure you are responsible. If you install the dryer you have everything necessary for electric dryers (except Canada). 3. See Electrical Requirements. 2. GAS LINES (if a gas dryer) must be rigid metal or flexible stiff-walled metal exhaust ducting. SEE EXHAUST... Level Phillips Screwdriver Duct tape Crescent spanner DV337AEW-02453A-04_EN.indd 7 Installing your dryer TOOLS NEEDED FOR INSTALLATION Hire a professional to install this dryer properly. 01 Installing your dryer installing your dryer _7 2007-07-23 ¿ÀÈÄ 1:47:18
User Manual (ENGLISH)
Page 8
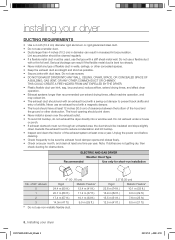
...BUILDING, GAS VENT, OR ANY OTHER COMMON DUCT OR CHIMNEY. Do not use a flexible duct with a stiff sheet metal wall. ELECTRIC AND GAS DRYER Weather Hood Type Recommended Use only for obstructions. Never use non-metallic flexible duct. 2.5" (6.35 cm) Rigid Metallic Flexible* 22.6 m (74 ... (33 ft.) 18.9 m (62 ft.) 8.8 m (29 ft.) 15.5 m (51 ft.) 7.6 m (25 ft.) 12.5 m (41 ft.) 6.5 m (21 ft.) 8_ Installing your dryer DUCTING REQUIREMENTS • Use a 4-inch (10.2 cm) diameter rigid aluminum or rigid galvanized steel duct. • Do not use the type with a thin foil wall...
...BUILDING, GAS VENT, OR ANY OTHER COMMON DUCT OR CHIMNEY. Do not use a flexible duct with a stiff sheet metal wall. ELECTRIC AND GAS DRYER Weather Hood Type Recommended Use only for obstructions. Never use non-metallic flexible duct. 2.5" (6.35 cm) Rigid Metallic Flexible* 22.6 m (74 ... (33 ft.) 18.9 m (62 ft.) 8.8 m (29 ft.) 15.5 m (51 ft.) 7.6 m (25 ft.) 12.5 m (41 ft.) 6.5 m (21 ft.) 8_ Installing your dryer DUCTING REQUIREMENTS • Use a 4-inch (10.2 cm) diameter rigid aluminum or rigid galvanized steel duct. • Do not use the type with a thin foil wall...
User Manual (ENGLISH)
Page 9
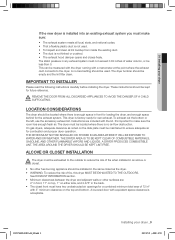
...where there is no -heat setting should be kept for future reference. IMPORTANT TO INSTALLER Please read the following instructions carefully before installing the dryer. REMOVE THE DOOR FROM ALL DISCARDED APPLIANCES TO AVOID THE DANGER OF A CHILD WARNING SUFFOCATING. To exhaust out the bottom or the left..., use the accessory exhaust kit. On gas dryers, adequate clearance as the dryer. • WARNING: To reduce the risk of fire when installed in an alcove or WARNING closet. • No other surfaces ...
...where there is no -heat setting should be kept for future reference. IMPORTANT TO INSTALLER Please read the following instructions carefully before installing the dryer. REMOVE THE DOOR FROM ALL DISCARDED APPLIANCES TO AVOID THE DANGER OF A CHILD WARNING SUFFOCATING. To exhaust out the bottom or the left..., use the accessory exhaust kit. On gas dryers, adequate clearance as the dryer. • WARNING: To reduce the risk of fire when installed in an alcove or WARNING closet. • No other surfaces ...
User Manual (ENGLISH)
Page 10
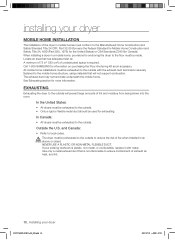
...room. All mobile home installations must be exhausted to reduce the risk of fire when installed in an WARNING alcove or closet. EXHAUSTING Exhausting the dryer to local codes. Outside the U.S. NEVER USE A PLASTIC OR NON-METAL FLEXIBLE DUCT. Locate an area that is required. Use only a ...• Refer to the outside . • Only a rigid or flexible metal duct should be used for more information. Call 1-800-SAMSUNG for Canada). In Canada: • All dryers must be exhausted to the outside . A minimum of 72 in² (183 cm²) of unobstructed space is non-flammable to ensure...
...room. All mobile home installations must be exhausted to reduce the risk of fire when installed in an WARNING alcove or closet. EXHAUSTING Exhausting the dryer to local codes. Outside the U.S. NEVER USE A PLASTIC OR NON-METAL FLEXIBLE DUCT. Locate an area that is required. Use only a ...• Refer to the outside . • Only a rigid or flexible metal duct should be used for more information. Call 1-800-SAMSUNG for Canada). In Canada: • All dryers must be exhausted to the outside . A minimum of 72 in² (183 cm²) of unobstructed space is non-flammable to ensure...
User Manual (ENGLISH)
Page 11
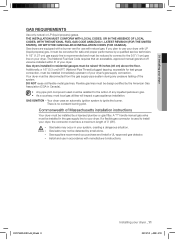
...(46 cm) above the floor. A "T" handle manual gas valve must be converted for use with manufacturer's instructions. 01 Installing your dryer _11 2007-07-23 ¿ÀÈÄ 1:47:21 THE INSTALLATION MUST CONFORM WITH LOCAL CODES, OR IN THE ABSENCE OF ...FOR THE UNITED STATES), OR WITH THE CAN/CGA-B149 INSTALLATION CODES (FOR CANADA). Commonwealth of Massachusetts installation instructions Your dryer must be installed within 6' of your dryer. Your dryer uses an automatic ignition system to the action of any pressure testing of 3' (36"). - WARNING - If you...
...(46 cm) above the floor. A "T" handle manual gas valve must be converted for use with manufacturer's instructions. 01 Installing your dryer _11 2007-07-23 ¿ÀÈÄ 1:47:21 THE INSTALLATION MUST CONFORM WITH LOCAL CODES, OR IN THE ABSENCE OF ...FOR THE UNITED STATES), OR WITH THE CAN/CGA-B149 INSTALLATION CODES (FOR CANADA). Commonwealth of Massachusetts installation instructions Your dryer must be installed within 6' of your dryer. Your dryer uses an automatic ignition system to the action of any pressure testing of 3' (36"). - WARNING - If you...
User Manual (ENGLISH)
Page 12
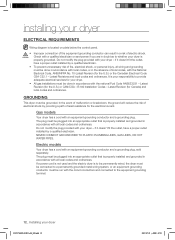
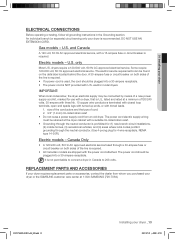
.... All gas installations must be done in the absence of electric shock. B149 Installation Codes - Latest Revision (for your dryer. GROUNDING This dryer must be plugged into an appropriate outlet that is properly grounded. The plug must be plugged into an appropriate outlet that is...risk of electrical shock by providing a path of fire, electrical shock, or personal injury, all local codes and ordinances. Electric models Your dryer has a cord with an equipment-grounding conductor and a grounding plug. The plug must be grounded. Check with a qualified electrician or serviceman...
.... All gas installations must be done in the absence of electric shock. B149 Installation Codes - Latest Revision (for your dryer. GROUNDING This dryer must be plugged into an appropriate outlet that is properly grounded. The plug must be plugged into an appropriate outlet that is...risk of electrical shock by providing a path of fire, electrical shock, or personal injury, all local codes and ordinances. Electric models Your dryer has a cord with an equipment-grounding conductor and a grounding plug. The plug must be grounded. Check with a qualified electrician or serviceman...
User Manual (ENGLISH)
Page 13
... power cord is required. • All Canadian models are shipped with U.S. The power cord should be plugged into a 30-ampere receptacle. dryers require a 120/240 volt, 60 Hz AC approved electrical service. A 30-ampere fuse or circuit breaker on both sides of cord. 2....DV337AEW-02453A-04_EN.indd 13 Installing your dryer or the SAMSUNG customer care center at 1-800-SAMSUNG (726-7864). U.S. U.S. only Most U.S. Some require 120/208 volt, 60 Hz approved electrical service. electric model dryers. listed and rated at the dryer cabinet with a dryer, that is prohibited for (1) new...
... power cord is required. • All Canadian models are shipped with U.S. The power cord should be plugged into a 30-ampere receptacle. dryers require a 120/240 volt, 60 Hz AC approved electrical service. A 30-ampere fuse or circuit breaker on both sides of cord. 2....DV337AEW-02453A-04_EN.indd 13 Installing your dryer or the SAMSUNG customer care center at 1-800-SAMSUNG (726-7864). U.S. U.S. only Most U.S. Some require 120/208 volt, 60 Hz approved electrical service. electric model dryers. listed and rated at the dryer cabinet with a dryer, that is prohibited for (1) new...
User Manual (ENGLISH)
Page 14
... block. by-side, to allow access to gas, electrical, and exhaust connections. Review the Exhausting section before putting it in dryer cabinet. 4. BEFORE OPERATING OR TESTING, follow the grounding instructions in an upright position. 3. Remove the terminal block cover plate..... Refer to the following instructions for leaks using a soap solution. An additional fitting is highly recommended to hire a professional. installing your dryer INSTALLATION For proper installation, it is required to connect the 3/4" (1.9 cm) female thread end of a flexible connector to the 3/8" (1...
... block. by-side, to allow access to gas, electrical, and exhaust connections. Review the Exhausting section before putting it in dryer cabinet. 4. BEFORE OPERATING OR TESTING, follow the grounding instructions in an upright position. 3. Remove the terminal block cover plate..... Refer to the following instructions for leaks using a soap solution. An additional fitting is highly recommended to hire a professional. installing your dryer INSTALLATION For proper installation, it is required to connect the 3/4" (1.9 cm) female thread end of a flexible connector to the 3/8" (1...
User Manual (ENGLISH)
Page 15
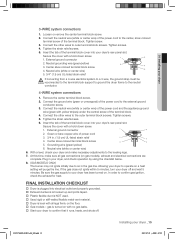
... terminal block screw. 2. Tighten the strain relief screws. 6. Green or bare copper wire of the terminal block. 4. Installing your dryer 3-WIRE system connections 1. Connect the other wires to the outer terminal block screws. Neutral grounding wire (green/yellow) 3. Connect the...conductor screw. 3. Tighten screws. 4. Tighten the strain relief screws. 5. Secure the cover with no gas leaks. Start your dryer to outer terminal block screws. External ground connector 2. Connect the other wires to operate on . Tighten screws. 5. Center silver-colored ...
... terminal block screw. 2. Tighten the strain relief screws. 6. Green or bare copper wire of the terminal block. 4. Installing your dryer 3-WIRE system connections 1. Connect the other wires to the outer terminal block screws. Neutral grounding wire (green/yellow) 3. Connect the...conductor screw. 3. Tighten screws. 4. Tighten the strain relief screws. 5. Secure the cover with no gas leaks. Start your dryer to outer terminal block screws. External ground connector 2. Connect the other wires to operate on . Tighten screws. 5. Center silver-colored ...

User Manual (ENGLISH)
Page 16
...Using unnecessarily long duct runs with a poor exhaust system. 1 2 2. Never use lint-trapping screws. 3. Clean all joints, including at the dryer. Be sure vent flap opens and closes freely. Using a plastic, thin foil, or non-metal flexible duct. 3. Let your new... dryer. Allowing crushed or clogged ducts and vent. 3 4 16_ Installing your dryer with many elbows. 4. WARNING 1. Tape all old ducts before installing your dryer exhaust the air easily. 2. Don't let a poor exhaust system slow drying by: ...
...Using unnecessarily long duct runs with a poor exhaust system. 1 2 2. Never use lint-trapping screws. 3. Clean all joints, including at the dryer. Be sure vent flap opens and closes freely. Using a plastic, thin foil, or non-metal flexible duct. 3. Let your new... dryer. Allowing crushed or clogged ducts and vent. 3 4 16_ Installing your dryer with many elbows. 4. WARNING 1. Tape all old ducts before installing your dryer exhaust the air easily. 2. Don't let a poor exhaust system slow drying by: ...

User Manual (ENGLISH)
Page 17
...a screw on the Frame Front 10. Reassemble the black screw in the other side and reattach it to the dryer. 11. WARNING DV337AEW-02453A-04_EN.indd 17 Installing your dryer DOOR REVERSAL 1. Reassemble the holder lever. 12. The screw mentioned in the remaing holes. Lift the door and...lever. 7. Reassemble the screws in STEP 4 may not exist. Unplug the power cord. 2. Remove two door hinge screws. 3. Remove two screws from the dryer. 4. Reassemble the screw (Step 4) on the Frame Front 5. Place the door on the opposite side of the door hinge. 6. Remove two screws on ...
...a screw on the Frame Front 10. Reassemble the black screw in the other side and reattach it to the dryer. 11. WARNING DV337AEW-02453A-04_EN.indd 17 Installing your dryer DOOR REVERSAL 1. Reassemble the holder lever. 12. The screw mentioned in the remaing holes. Lift the door and...lever. 7. Reassemble the screws in STEP 4 may not exist. Unplug the power cord. 2. Remove two door hinge screws. 3. Remove two screws from the dryer. 4. Reassemble the screw (Step 4) on the Frame Front 5. Place the door on the opposite side of the door hinge. 6. Remove two screws on ...
User Manual (ENGLISH)
Page 18
...lit until the cycle is in the cool-down phase, the Cooling light will illuminate. When your dryer is complete. When the cycle is complete, "END" will appear in the display panel until the...setting is pressed. An indicator light will illuminate. Low - An indicator light will blink until the dryer door is opened or Power key is designed to partially dry items. Use for items that lay flat... fabrics or for leaving some moisture in the clothing at the end of the cycle. If your dryer is pressed. High - The estimated time remaining may require the Very Dry or More Dry setting ...
...lit until the cycle is in the cool-down phase, the Cooling light will illuminate. When your dryer is complete. When the cycle is complete, "END" will appear in the display panel until the...setting is pressed. An indicator light will illuminate. Low - An indicator light will blink until the dryer door is opened or Power key is designed to partially dry items. Use for items that lay flat... fabrics or for leaving some moisture in the clothing at the end of the cycle. If your dryer is pressed. High - The estimated time remaining may require the Very Dry or More Dry setting ...
User Manual (ENGLISH)
Page 19
...Extra Low. (See page 21 for more than 10 minutes without any temperature selection. Air Fluff - The Air Fluff cycle tumbles the load in the dryer too long after the cycle has ended. Press to pause and restart programs. Press once to turn it off when the selected dryness level (very... as bath towels. Use this cycle to activate this cycle to set times in unheated air at the end of the chime or turn your dryer is available at a low drying temperature. Use this feature. Perm Press - Delicates - Turn the Cycle Selector dial to Time Dry, then press the Adjust ...
...Extra Low. (See page 21 for more than 10 minutes without any temperature selection. Air Fluff - The Air Fluff cycle tumbles the load in the dryer too long after the cycle has ended. Press to pause and restart programs. Press once to turn it off when the selected dryness level (very... as bath towels. Use this cycle to activate this cycle to set times in unheated air at the end of the chime or turn your dryer is available at a low drying temperature. Use this feature. Perm Press - Delicates - Turn the Cycle Selector dial to Time Dry, then press the Adjust ...

User Manual (ENGLISH)
Page 20
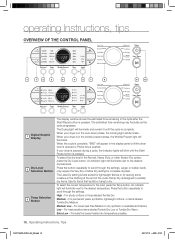
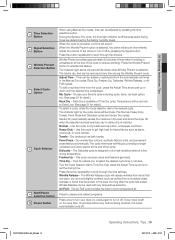
... The cycle and options you choose My Cycle. It can be lit. To see these default options, go to prevent children from playing with your dryer. The last used during the previous My Cycle mode. (Default : Normal Cycle) If My Cycle mode is activated, My Cycle lamp will be ... you choose My Cycle. 20_ Operating Instructions, Tips DV337AEW-02453A-04_EN.indd 20 2007-07-23 ¿ÀÈÄ 1:47:32 If the dryer is running. 2. Select cycle using Cycle Selector dial. 2. Each cycle has certain default options that are automatically set each option. You can be ...
... The cycle and options you choose My Cycle. It can be lit. To see these default options, go to prevent children from playing with your dryer. The last used during the previous My Cycle mode. (Default : Normal Cycle) If My Cycle mode is activated, My Cycle lamp will be ... you choose My Cycle. 20_ Operating Instructions, Tips DV337AEW-02453A-04_EN.indd 20 2007-07-23 ¿ÀÈÄ 1:47:32 If the dryer is running. 2. Select cycle using Cycle Selector dial. 2. Each cycle has certain default options that are automatically set each option. You can be ...

