User Manual (ENGLISH)
Page 1
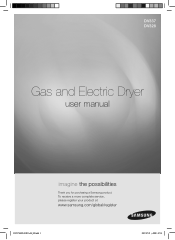
DV337 DV328 Gas and Electric Dryer user manual imagine the possibilities Thank you for purchasing a Samsung product. To receive a more complete service, please register your product at www.samsung.com/global/register DV337AEW-02453A-04_EN.indd 1 2007-07-23 ¿ÀÈÄ 1:47:14
DV337 DV328 Gas and Electric Dryer user manual imagine the possibilities Thank you for purchasing a Samsung product. To receive a more complete service, please register your product at www.samsung.com/global/register DV337AEW-02453A-04_EN.indd 1 2007-07-23 ¿ÀÈÄ 1:47:14

User Manual (ENGLISH)
Page 2
..., or let the Fuzzy Logic Control measure the degree of your clothes. 4. Energy Saving Samsung dryers are at your clothes in storage drawer that can be changed with you in life. 5. The Dryer legs need washing, but could use a little help after last night's party. Time Saving...Drawers An optional 15" pedestal is available for a wrinkle-free result. 2. Stacking (MODEL NO: SK-3A1/XAA, SK-4A/XAA) Samsung's Washer and Dryer can dry extra-large loads. Now you time for easier loading and unloading. Various Drying Cycles & Fuzzy Logic Algorithm Simply turn the Jog...
..., or let the Fuzzy Logic Control measure the degree of your clothes. 4. Energy Saving Samsung dryers are at your clothes in storage drawer that can be changed with you in life. 5. The Dryer legs need washing, but could use a little help after last night's party. Time Saving...Drawers An optional 15" pedestal is available for a wrinkle-free result. 2. Stacking (MODEL NO: SK-3A1/XAA, SK-4A/XAA) Samsung's Washer and Dryer can dry extra-large loads. Now you time for easier loading and unloading. Various Drying Cycles & Fuzzy Logic Algorithm Simply turn the Jog...
User Manual (ENGLISH)
Page 3
... the gas supplier's instructions. • If you do not cover all occupants. • Immediately call the fire department. Follow the information in your dryer. Do NOT touch. Installation and service must be performed by a qualified installer, service agency, or the gas supplier. Do not store or use ... injury, or death. safety instructions Congratulations on your gas supplier from the wall socket. Please take full advantage of your dryer's many benefits and features. Always contact your manufacturer about problems or conditions you cannot reach your gas supplier, call your new...
... the gas supplier's instructions. • If you do not cover all occupants. • Immediately call the fire department. Follow the information in your dryer. Do NOT touch. Installation and service must be performed by a qualified installer, service agency, or the gas supplier. Do not store or use ... injury, or death. safety instructions Congratulations on your gas supplier from the wall socket. Please take full advantage of your dryer's many benefits and features. Always contact your manufacturer about problems or conditions you cannot reach your gas supplier, call your new...
User Manual (ENGLISH)
Page 4
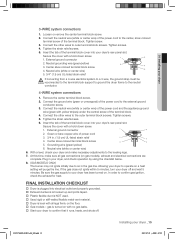
...front of continuing product improvements, Samsung reserves the right to prevent children or animals from small irregularly shaped hard objects, foreign material, etc. There are free from becoming trapped inside. Do not reach into a receptacle that could damage your dryer. Do not use by spontaneous... surrounding areas free from service, remove the door to the drying compartment to change specifications without notice. The interior of the dryer and exhaust duct should not be cleaned periodically by qualified service personnel. Do not sit on a heat setting. To reduce ...
...front of continuing product improvements, Samsung reserves the right to prevent children or animals from small irregularly shaped hard objects, foreign material, etc. There are free from becoming trapped inside. Do not reach into a receptacle that could damage your dryer. Do not use by spontaneous... surrounding areas free from service, remove the door to the drying compartment to change specifications without notice. The interior of the dryer and exhaust duct should not be cleaned periodically by qualified service personnel. Do not sit on a heat setting. To reduce ...
User Manual (ENGLISH)
Page 5
... not be dangerous. Piling, stacking, or storing these kinds of these items may contain significant amounts of items may prevent heat from the dryer hot or interrupt the drying cycle until the items have been spotted or soaked with extra detergent will reduce, but not eliminate, the hazard... temperature. DV337AEW-02453A-04_EN.indd 5 Safety information _5 2007-07-23 ¿ÀÈÄ 1:47:15 Gas leaks may occur in your dryer that contain vegetable oil or cooking oil can create a fire hazard. Oxidation creates heat. Never remove these items to heat. If this heat cannot...
... not be dangerous. Piling, stacking, or storing these kinds of these items may contain significant amounts of items may prevent heat from the dryer hot or interrupt the drying cycle until the items have been spotted or soaked with extra detergent will reduce, but not eliminate, the hazard... temperature. DV337AEW-02453A-04_EN.indd 5 Safety information _5 2007-07-23 ¿ÀÈÄ 1:47:15 Gas leaks may occur in your dryer that contain vegetable oil or cooking oil can create a fire hazard. Oxidation creates heat. Never remove these items to heat. If this heat cannot...
User Manual (ENGLISH)
Page 6
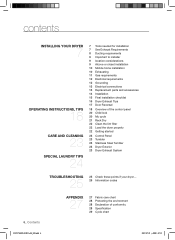
... 11 Gas requirements 12 Electrical requirements 12 Grounding 13 Electrical connections 13 Replacement parts and accessories 14 Installation 15 Final installation checklist 16 Dryer Exhaust Tips 17 Door Reversal 18 Overview of the control panel 20 Child lock 20 My cycle 21 Rack Dry 22 Clean the ...lint filter 22 Load the dryer properly 22 Getting started 23 Control Panel 23 Tumbler 23 Stainless Steel Tumbler 23 Dryer Exterior 23 Dryer Exhaust System TROUBLESHOOTING 25 25 Check these points if your dryer... 26 Information codes 6_ Contents APPENDIX 27 27 Fabric care...
... 11 Gas requirements 12 Electrical requirements 12 Grounding 13 Electrical connections 13 Replacement parts and accessories 14 Installation 15 Final installation checklist 16 Dryer Exhaust Tips 17 Door Reversal 18 Overview of the control panel 20 Child lock 20 My cycle 21 Rack Dry 22 Clean the ...lint filter 22 Load the dryer properly 22 Getting started 23 Control Panel 23 Tumbler 23 Stainless Steel Tumbler 23 Dryer Exterior 23 Dryer Exhaust System TROUBLESHOOTING 25 25 Check these points if your dryer... 26 Information codes 6_ Contents APPENDIX 27 27 Fabric care...
User Manual (ENGLISH)
Page 7
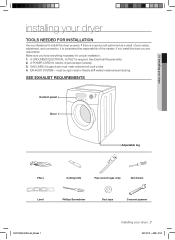
... responsibility of the installer. must meet national and local codes. 4. GAS LINES (if a gas dryer) must be rigid metal or flexible stiff-walled metal exhaust ducting. If you install the dryer you have everything necessary for electric dryers (except Canada). 3. SEE EXHAUST REQUIREMENTS Control panel Door Adjustable leg Pliers Cutting knife Pipe wrench...
... responsibility of the installer. must meet national and local codes. 4. GAS LINES (if a gas dryer) must be rigid metal or flexible stiff-walled metal exhaust ducting. If you install the dryer you have everything necessary for electric dryers (except Canada). 3. SEE EXHAUST REQUIREMENTS Control panel Door Adjustable leg Pliers Cutting knife Pipe wrench...
User Manual (ENGLISH)
Page 8
...be insulated and slope slightly down . • Never install a screen over the exhaust outlet. • To avoid lint buildup, do not exhaust the dryer directly into a window well. Unplug the power cord before cleaning. • Check frequently to reduce condensation and lint buildup. • Inspect and clean the... damper. • The hood should be used, use a flexible duct with a stiff sheet metal wall. Never use screws. • DO NOT EXHAUST DRYER INTO ANY WALL, CEILING, CRAWL SPACE, OR CONCEALED SPACE OF A BUILDING, GAS VENT, OR ANY OTHER COMMON DUCT OR CHIMNEY. installing your...
...be insulated and slope slightly down . • Never install a screen over the exhaust outlet. • To avoid lint buildup, do not exhaust the dryer directly into a window well. Unplug the power cord before cleaning. • Check frequently to reduce condensation and lint buildup. • Inspect and clean the... damper. • The hood should be used, use a flexible duct with a stiff sheet metal wall. Never use screws. • DO NOT EXHAUST DRYER INTO ANY WALL, CEILING, CRAWL SPACE, OR CONCEALED SPACE OF A BUILDING, GAS VENT, OR ANY OTHER COMMON DUCT OR CHIMNEY. installing your...
User Manual (ENGLISH)
Page 9
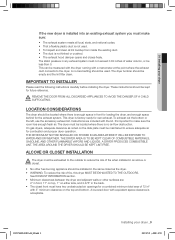
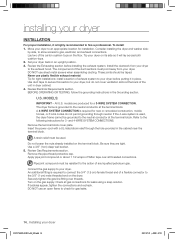
...TO BE KEPT CLEAR OF COMBUSTIBLE MATERIALS, GASOLINE, AND OTHER FLAMMABLE VAPORS AND LIQUIDS. DV337AEW-02453A-04_EN.indd 9 Installing your dryer If the new dryer is installed into an existing exhaust system you must make sure the room has enough fresh air. These instructions should be used...REMOVE THE DOOR FROM ALL DISCARDED APPLIANCES TO AVOID THE DANGER OF A CHILD WARNING SUFFOCATING. ALCOVE OR CLOSET INSTALLATION The dryer must be measured with the dryer running with equivalent space clearance is factory-ready for future reference. The static pressure in ² with the kit. ...
...TO BE KEPT CLEAR OF COMBUSTIBLE MATERIALS, GASOLINE, AND OTHER FLAMMABLE VAPORS AND LIQUIDS. DV337AEW-02453A-04_EN.indd 9 Installing your dryer If the new dryer is installed into an existing exhaust system you must make sure the room has enough fresh air. These instructions should be used...REMOVE THE DOOR FROM ALL DISCARDED APPLIANCES TO AVOID THE DANGER OF A CHILD WARNING SUFFOCATING. ALCOVE OR CLOSET INSTALLATION The dryer must be measured with the dryer running with equivalent space clearance is factory-ready for future reference. The static pressure in ² with the kit. ...
User Manual (ENGLISH)
Page 10
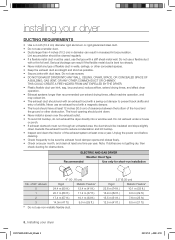
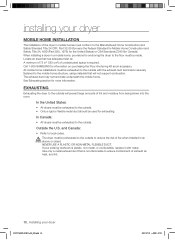
... the U.S. and Canada: • Refer to ensure containment of exhaust air, heat, and lint. 10_ Installing your dryer DV337AEW-02453A-04_EN.indd 10 2007-07-23 ¿ÀÈÄ 1:47:21 Call 1-800-SAMSUNG for more information. All mobile home installations must be exhausted to the outside with metal. NEVER USE...
... the U.S. and Canada: • Refer to ensure containment of exhaust air, heat, and lint. 10_ Installing your dryer DV337AEW-02453A-04_EN.indd 10 2007-07-23 ¿ÀÈÄ 1:47:21 Call 1-800-SAMSUNG for more information. All mobile home installations must be exhausted to the outside with metal. NEVER USE...
User Manual (ENGLISH)
Page 11
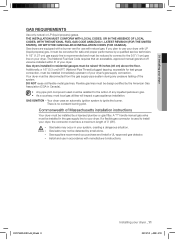
...REQUIREMENTS Use only natural or LP (liquid propane) gases. DV337AEW-02453A-04_EN.indd 11 Installing your dryer. Commonwealth of your dryer's gas supply connection. WARNING - Gas leaks may not be installed in your dryer. Flexible gas lines must be installed within 6' of 3' (36"). - If a flexible gas... by the American Gas Association (CGA in residential garages must be reduced to connect to ignite the burner. Install and use your dryer, the connector must be disconnected from the gas supply pipe system during any liquefied petroleum gas. • As a courtesy, most...
...REQUIREMENTS Use only natural or LP (liquid propane) gases. DV337AEW-02453A-04_EN.indd 11 Installing your dryer. Commonwealth of your dryer's gas supply connection. WARNING - Gas leaks may not be installed in your dryer. Flexible gas lines must be installed within 6' of 3' (36"). - If a flexible gas... by the American Gas Association (CGA in residential garages must be reduced to connect to ignite the burner. Install and use your dryer, the connector must be disconnected from the gas supply pipe system during any liquefied petroleum gas. • As a courtesy, most...
User Manual (ENGLISH)
Page 12
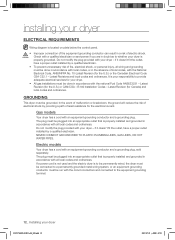
...event of malfunction or breakdown, the ground will reduce the risk of electrical shock by providing a path of electric shock. installing your dryer ELECTRICAL REQUIREMENTS Wiring diagram is properly installed and grounded in accordance with all local codes and ordinances. Do not modify the plug provided .... The plug must be done in accordance with local codes, or in the absence of local codes, with your dryer - Electric models Your dryer has a cord with your dryer - To prevent unnecessary risk of fire, electrical shock, or personal injury, all wiring and grounding must be run...
...event of malfunction or breakdown, the ground will reduce the risk of electrical shock by providing a path of electric shock. installing your dryer ELECTRICAL REQUIREMENTS Wiring diagram is properly installed and grounded in accordance with all local codes and ordinances. Do not modify the plug provided .... The plug must be done in accordance with local codes, or in the absence of local codes, with your dryer - Electric models Your dryer has a cord with your dryer - To prevent unnecessary risk of fire, electrical shock, or personal injury, all wiring and grounding must be run...
User Manual (ENGLISH)
Page 13
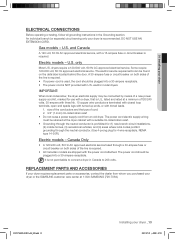
...of cord. 2. 3/4" (1.9 cm) UL-listed strain relief • Do not reuse a power supply cord from whom you purchased your dryer or the SAMSUNG customer care center at a minimum of120/240 volts, 30-ampere with three No. 10 copper wire conductors terminated with closed loop terminals, open..., with U.S. listed and rated at 1-800-SAMSUNG (726-7864). Gas models - The power cord should be connected by means of the line is NOT provided with a 15-ampere fuse or circuit breaker is U.L. 01 Installing your dryer ELECTRICAL CONNECTIONS Before operating or testing, follow all...
...of cord. 2. 3/4" (1.9 cm) UL-listed strain relief • Do not reuse a power supply cord from whom you purchased your dryer or the SAMSUNG customer care center at a minimum of120/240 volts, 30-ampere with three No. 10 copper wire conductors terminated with closed loop terminals, open..., with U.S. listed and rated at 1-800-SAMSUNG (726-7864). Gas models - The power cord should be connected by means of the line is NOT provided with a 15-ampere fuse or circuit breaker is U.L. 01 Installing your dryer ELECTRICAL CONNECTIONS Before operating or testing, follow all...
User Manual (ENGLISH)
Page 14
... supply. Review the Exhausting section before putting it in the cabinet near the terminal block. Remove the pipe thread protective cap. Set your dryer on the terminal block. Review Gas Requirements section. Apply pipe joint compound or about 1 1/2 wraps of any liquefied petroleum gas. If ... 3-WIRE SYSTEM CONNECTION. Insert the power cord with a UL-listed strain relief through neutral. A strain relief must point away from your dryer to the action of Teflon tape over threads. Pipe joint compound must be resistant to the exhaust hood. Connect the gas supply to the...
... supply. Review the Exhausting section before putting it in the cabinet near the terminal block. Remove the pipe thread protective cap. Set your dryer on the terminal block. Review Gas Requirements section. Apply pipe joint compound or about 1 1/2 wraps of any liquefied petroleum gas. If ... 3-WIRE SYSTEM CONNECTION. Insert the power cord with a UL-listed strain relief through neutral. A strain relief must point away from your dryer to the action of Teflon tape over threads. Pipe joint compound must be resistant to the exhaust hood. Connect the gas supply to the...
User Manual (ENGLISH)
Page 15
... and joints taped. Plastic flexible duct is NOT used. Used rigid or stiff-walled flexible metal vent material. Dryer is turned on gas models), exhaust and electrical connections are complete. Center silver-colored terminal block screw 4. Insert the tab of power cord 3....green/yellow) 6. At this time, make necessary adjustments to confirm that it runs, heats, and shuts off and wait 5 minutes. Allowing your dryer's rear panel slot. Connect the other wires to confirm gas ignition, check the exhaust for heat. Tighten screws. 4. Insert the tab of ...
... and joints taped. Plastic flexible duct is NOT used. Used rigid or stiff-walled flexible metal vent material. Dryer is turned on gas models), exhaust and electrical connections are complete. Center silver-colored terminal block screw 4. Insert the tab of power cord 3....green/yellow) 6. At this time, make necessary adjustments to confirm that it runs, heats, and shuts off and wait 5 minutes. Allowing your dryer's rear panel slot. Connect the other wires to confirm gas ignition, check the exhaust for heat. Tighten screws. 4. Insert the tab of ...

User Manual (ENGLISH)
Page 16
...as possible. 4. Be sure vent flap opens and closes freely. Restricting your dryer with many elbows. 4. Using a plastic, thin foil, or non-metal flexible duct. 3. Tape all old ducts before installing your dryer exhaust the air easily. 2. Allowing crushed or clogged ducts and vent. ...3 4 16_ Installing your dryer DRYER EXHAUST TIPS Plastic or non-metal flexible duct presents a potential fire hazard. installing your dryer DV337AEW-02453A-04_EN.indd 16 2007-...
...as possible. 4. Be sure vent flap opens and closes freely. Restricting your dryer with many elbows. 4. Using a plastic, thin foil, or non-metal flexible duct. 3. Tape all old ducts before installing your dryer exhaust the air easily. 2. Allowing crushed or clogged ducts and vent. ...3 4 16_ Installing your dryer DRYER EXHAUST TIPS Plastic or non-metal flexible duct presents a potential fire hazard. installing your dryer DV337AEW-02453A-04_EN.indd 16 2007-...

User Manual (ENGLISH)
Page 17
...Place the door on the opposite side of the door hinge. 6. Remove two screws from the dryer. 4. Reassemble the holder lever. 12. The screw mentioned in the other side and reattach it to the dryer. 11. Reassemble the screw (Step 4) on the Frame Front 5. Remove a screw on the ...Frame Front 10. WARNING DV337AEW-02453A-04_EN.indd 17 Installing your dryer DOOR REVERSAL 1. Lift the door and remove from the holder lever. 7. Reassemble the screws in the remaing holes. Remove two door hinge screws....
...Place the door on the opposite side of the door hinge. 6. Remove two screws from the dryer. 4. Reassemble the holder lever. 12. The screw mentioned in the other side and reattach it to the dryer. 11. Reassemble the screw (Step 4) on the Frame Front 5. Remove a screw on the ...Frame Front 10. WARNING DV337AEW-02453A-04_EN.indd 17 Installing your dryer DOOR REVERSAL 1. Lift the door and remove from the holder lever. 7. Reassemble the screws in the remaing holes. Remove two door hinge screws....
User Manual (ENGLISH)
Page 18
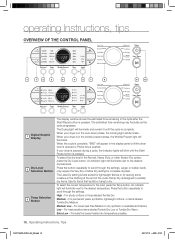
... - Medium Low - The estimated time remaining may require the Very Dry or More Dry setting for the load, press the Temp button. When your dryer is designed to the desired temperature. An indicator light will illuminate next to partially dry items. Use for leaving some moisture in the clothing at... the estimated time remaining in the cycle after the Start/Pause button is in the cool-down phase, the Cooling light will illuminate. When your dryer is paused during a cycle, the indicator lights will appear in the Normal, Heavy Duty, or other Sensor Dry cycles, press the Dry Level button...
... - Medium Low - The estimated time remaining may require the Very Dry or More Dry setting for the load, press the Temp button. When your dryer is designed to the desired temperature. An indicator light will illuminate next to partially dry items. Use for leaving some moisture in the clothing at... the estimated time remaining in the cycle after the Start/Pause button is in the cool-down phase, the Cooling light will illuminate. When your dryer is paused during a cycle, the indicator lights will appear in the Normal, Heavy Duty, or other Sensor Dry cycles, press the Dry Level button...
User Manual (ENGLISH)
Page 19
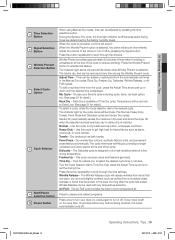
... levels. Press the Wrinkle Prevent button to dry heat-sensitive items at the end of the cycle. The load is displayed. Choose your dryer is reached. Temperature will be used with any temperature selection. Use this cycle to reduce wrinkling. Time Dry - The indicator light above ... Air Fluff cycle tumbles the load in minutes. Normal - Heavy Duty - To add or subtract time from the automatically set times in the dryer too long after the cycle has ended. Wrinkle Release - The Wrinkle Release cycle will sound. If your favorite cycle including cycle, temp, dry...
... levels. Press the Wrinkle Prevent button to dry heat-sensitive items at the end of the cycle. The load is displayed. Choose your dryer is reached. Temperature will be used with any temperature selection. Use this cycle to reduce wrinkling. Time Dry - The indicator light above ... Air Fluff cycle tumbles the load in minutes. Normal - Heavy Duty - To add or subtract time from the automatically set times in the dryer too long after the cycle has ended. Wrinkle Release - The Wrinkle Release cycle will sound. If your favorite cycle including cycle, temp, dry...

User Manual (ENGLISH)
Page 20
...for the Power button, can be displayed the next time you activate your customized cycle that function, follow the instructions above . If the dryer is activated, My Cycle lamp will be set or release the Child Lock, press both the Time and Signal buttons simultaneously for the Power...function stays on. 2. operating Instructions, tips CHILD LOCK A function to prevent children from playing with your dryer is running. 2. By pushing the My Cycle button, you want to set while your dryer. To see these default options, go to Set: 1. Setting/Releasing If you activate the settings used...
...for the Power button, can be displayed the next time you activate your customized cycle that function, follow the instructions above . If the dryer is activated, My Cycle lamp will be set or release the Child Lock, press both the Time and Signal buttons simultaneously for the Power...function stays on. 2. operating Instructions, tips CHILD LOCK A function to prevent children from playing with your dryer is running. 2. By pushing the My Cycle button, you want to set while your dryer. To see these default options, go to Set: 1. Setting/Releasing If you activate the settings used...

