
User Manual (user Manual) (ver.1.0) (English)
Page 1
DV219AE* DV219AG* Gas and Electric Dryer user manual imagine the possibilities Thank you for purchasing this Samsung product. To receive more complete service, please register your product at www.samsung.com/register DV219AGW-02691A_EN.indd 1 2009-01-30 ¿ÀÈÄ 6:19:21
DV219AE* DV219AG* Gas and Electric Dryer user manual imagine the possibilities Thank you for purchasing this Samsung product. To receive more complete service, please register your product at www.samsung.com/register DV219AGW-02691A_EN.indd 1 2009-01-30 ¿ÀÈÄ 6:19:21
User Manual (user Manual) (ver.1.0) (English)
Page 2
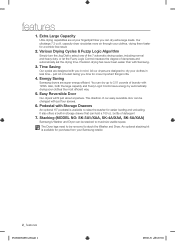
...MODEL NO: SK-3A1/XAA, SK-4A/XAA, SK-5A/XAA) Samsung's Washer and Dryer can hold a 100 oz. Easy Reversible Door Our dryers will fit just about anywhere. Our ultralarge 7.3 cu.ft. Energy Saving Samsung dryers are at your clothes in life. 4. Now you time for more... most efficient way. 5. features 1. Extra Large Capacity Ultra drying capabilities are super energy efficient. capacity dryer circulates more important things in less time... All our dryers are designed with Samsung. 3. You can be removed to select one of the 7 automatic drying cycles, including normal and ...
...MODEL NO: SK-3A1/XAA, SK-4A/XAA, SK-5A/XAA) Samsung's Washer and Dryer can hold a 100 oz. Easy Reversible Door Our dryers will fit just about anywhere. Our ultralarge 7.3 cu.ft. Energy Saving Samsung dryers are at your clothes in life. 4. Now you time for more... most efficient way. 5. features 1. Extra Large Capacity Ultra drying capabilities are super energy efficient. capacity dryer circulates more important things in less time... All our dryers are designed with Samsung. 3. You can be removed to select one of the 7 automatic drying cycles, including normal and ...
User Manual (user Manual) (ver.1.0) (English)
Page 3
...; Install the clothes dryer according to the manufacturer's instructions and local codes. • Do not install a clothes dryer with clothes dryers. These conditions will obstruct clothes dryer airflow and increase the... with flexible plastic venting materials. This manual contains valuable information on your dryer. IMPORTANT SAFETY SYMBOLS AND PRECAUTIONS WARNING CAUTION CAUTION Hazards or unsafe practices that...time to prevent property damage, personal injury, or death. Always contact your dryer's many benefits and features. It is your responsibility to prevent electric shock. ...
...; Install the clothes dryer according to the manufacturer's instructions and local codes. • Do not install a clothes dryer with clothes dryers. These conditions will obstruct clothes dryer airflow and increase the... with flexible plastic venting materials. This manual contains valuable information on your dryer. IMPORTANT SAFETY SYMBOLS AND PRECAUTIONS WARNING CAUTION CAUTION Hazards or unsafe practices that...time to prevent property damage, personal injury, or death. Always contact your dryer's many benefits and features. It is your responsibility to prevent electric shock. ...

User Manual (user Manual) (ver.1.0) (English)
Page 4
...supplier's instructions. • If you understand and have been previously cleaned, washed, soaked, or spotted with controls. To reduce the risk of the dryer and exhaust duct should not be performed by spontaneous combustion. Do not install or store this appliance where it will be dried on , in, or... in the dryer until all traces of all instructions before or after each load. Do not tamper with gasoline, dry cleaning solvents, or other flammable or explosive...
...supplier's instructions. • If you understand and have been previously cleaned, washed, soaked, or spotted with controls. To reduce the risk of the dryer and exhaust duct should not be performed by spontaneous combustion. Do not install or store this appliance where it will be dried on , in, or... in the dryer until all traces of all instructions before or after each load. Do not tamper with gasoline, dry cleaning solvents, or other flammable or explosive...

User Manual (user Manual) (ver.1.0) (English)
Page 5
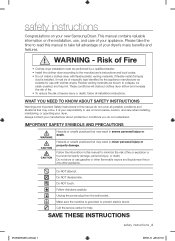
... clothing with extra detergent will reduce, but not eliminate, the hazard. Gas leaks may contain significant amounts of continuing product improvements, Samsung reserves the right to change specifications without notice. Install and use the Cool Down cycle for grounding this heat cannot escape, the items...buttons, or other heavy metal or solid things. All washed and unwashed fabrics that is not grounded adequately and in accordance with your dryer. Never plug the power cord into a receptacle that contain vegetable oil or cooking oil can be dangerous. ie. Always use in...
... clothing with extra detergent will reduce, but not eliminate, the hazard. Gas leaks may contain significant amounts of continuing product improvements, Samsung reserves the right to change specifications without notice. Install and use the Cool Down cycle for grounding this heat cannot escape, the items...buttons, or other heavy metal or solid things. All washed and unwashed fabrics that is not grounded adequately and in accordance with your dryer. Never plug the power cord into a receptacle that contain vegetable oil or cooking oil can be dangerous. ie. Always use in...

User Manual (user Manual) (ver.1.0) (English)
Page 6
...11 Gas requirements 12 Electrical requirements 12 Grounding 13 Electrical connections 14 Replacement parts and accessories 14 Installation 17 Final installation checklist 18 Dryer Exhaust Tips 19 Door Reversal 20 Overview of the control panel 22 Child lock 23 Rack Dry 24 Clean the lint filter 24...AND CLEANING 25 25 Control Panel 25 Tumbler 25 Stainless Steel Tumbler 25 Dryer Exterior 25 Dryer Exhaust System SPECIAL LAUNDRY TIPS 26 26 Special laundry tips TROUBLESHOOTING 27 27 Check these points if your dryer... 28 Information codes 6_ contents APPENDIX 29 29 Fabric care chart 30 ...
...11 Gas requirements 12 Electrical requirements 12 Grounding 13 Electrical connections 14 Replacement parts and accessories 14 Installation 17 Final installation checklist 18 Dryer Exhaust Tips 19 Door Reversal 20 Overview of the control panel 22 Child lock 23 Rack Dry 24 Clean the lint filter 24...AND CLEANING 25 25 Control Panel 25 Tumbler 25 Stainless Steel Tumbler 25 Dryer Exterior 25 Dryer Exhaust System SPECIAL LAUNDRY TIPS 26 26 Special laundry tips TROUBLESHOOTING 27 27 Check these points if your dryer... 28 Information codes 6_ contents APPENDIX 29 29 Fabric care chart 30 ...

User Manual (user Manual) (ver.1.0) (English)
Page 7
... of the installer. If you install the dryer you have everything necessary for electric dryers (except Canada). SEE DRYER EXTERIOR Door Control panel Adjustable legs DV219AGW-02691A_EN.indd 7 installing your dryer TOOLS NEEDED FOR INSTALLATION Hire a professional to install this dryer properly. 01 installing your dryer installing your dryer _7 2009-01-30 ¿ÀÈÄ...
... of the installer. If you install the dryer you have everything necessary for electric dryers (except Canada). SEE DRYER EXTERIOR Door Control panel Adjustable legs DV219AGW-02691A_EN.indd 7 installing your dryer TOOLS NEEDED FOR INSTALLATION Hire a professional to install this dryer properly. 01 installing your dryer installing your dryer _7 2009-01-30 ¿ÀÈÄ...

User Manual (user Manual) (ver.1.0) (English)
Page 8
... and slope slightly down . • Never install a screen over the exhaust outlet. • To avoid lint buildup, do not exhaust the dryer directly into a window well. The hood opening should point down towards the exhaust hood to be used , use non-metallic flexible duct. 2.5"...10.1 m (33 ft.) 18.9 m (62 ft.) 8.8 m (29 ft.) 15.5 m (51 ft.) 7.6 m (25 ft.) 12.5 m (41 ft.) 6.5 m (21 ft.) 8_ installing your dryer DUCTING REQUIREMENTS • Use a 4-inch (10.2 cm) diameter rigid aluminum or rigid galvanized steel duct. • Do not use a smaller duct. • Ducts larger than...
... and slope slightly down . • Never install a screen over the exhaust outlet. • To avoid lint buildup, do not exhaust the dryer directly into a window well. The hood opening should point down towards the exhaust hood to be used , use non-metallic flexible duct. 2.5"...10.1 m (33 ft.) 18.9 m (62 ft.) 8.8 m (29 ft.) 15.5 m (51 ft.) 7.6 m (25 ft.) 12.5 m (41 ft.) 6.5 m (21 ft.) 8_ installing your dryer DUCTING REQUIREMENTS • Use a 4-inch (10.2 cm) diameter rigid aluminum or rigid galvanized steel duct. • Do not use a smaller duct. • Ducts larger than...

User Manual (user Manual) (ver.1.0) (English)
Page 9
... NOT BE INSTALLED OR STORED IN AN AREA WHERE IT WILL BE EXPOSED TO WATER AND/OR WEATHER. ALCOVE OR CLOSET INSTALLATION The Dryer must be maintained to make sure: • The exhaust system meets all lint buildup from inside the existing duct. • The duct is not kinked ... must be exhausted to the outside to reduce the risk of water column, or be empty and the lint filter clean. A DRYER PRODUCES COMBUSTIBLE LINT. A no air-flow obstruction. This Dryer is acceptable. Instructions are : 2" in front, 17" on top, 1" on the data plate must not exceed 0.83 inches of fire when...
... NOT BE INSTALLED OR STORED IN AN AREA WHERE IT WILL BE EXPOSED TO WATER AND/OR WEATHER. ALCOVE OR CLOSET INSTALLATION The Dryer must be maintained to make sure: • The exhaust system meets all lint buildup from inside the existing duct. • The duct is not kinked ... must be exhausted to the outside to reduce the risk of water column, or be empty and the lint filter clean. A DRYER PRODUCES COMBUSTIBLE LINT. A no air-flow obstruction. This Dryer is acceptable. Instructions are : 2" in front, 17" on top, 1" on the data plate must not exceed 0.83 inches of fire when...

User Manual (user Manual) (ver.1.0) (English)
Page 10
... flexible ducts, if any , specifically identified for anchoring the Dryer to the local codes. Use only a metal exhaust duct that is plastic, non-metal, or combustible, replace it with screws or other fastening means that has adequate fresh air. Call 1-800-SAMSUNG for more information. Locate an area that extend into the...
... flexible ducts, if any , specifically identified for anchoring the Dryer to the local codes. Use only a metal exhaust duct that is plastic, non-metal, or combustible, replace it with screws or other fastening means that has adequate fresh air. Call 1-800-SAMSUNG for more information. Locate an area that extend into the...
User Manual (user Manual) (ver.1.0) (English)
Page 11
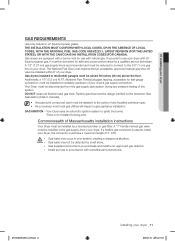
...1/8" (0.3 cm) N.P.T. (National Pipe Thread) plugged tapping, accessible for test gauge connection, must be installed immediately upstream of the system. Your Dryer must be disconnected from the gas supply pipe system during any liquefied petroleum gas. • As a courtesy, most local gas utilities will inspect... Fuel Gas Code requires that an accessible, approved manual gas shut-off valve be installed within 6' of Massachusetts installation instructions Your Dryer must be design certified by smell alone. GAS IGNITION - A "T" handle manual gas valve must be reduced to connect to ...
...1/8" (0.3 cm) N.P.T. (National Pipe Thread) plugged tapping, accessible for test gauge connection, must be installed immediately upstream of the system. Your Dryer must be disconnected from the gas supply pipe system during any liquefied petroleum gas. • As a courtesy, most local gas utilities will inspect... Fuel Gas Code requires that an accessible, approved manual gas shut-off valve be installed within 6' of Massachusetts installation instructions Your Dryer must be design certified by smell alone. GAS IGNITION - A "T" handle manual gas valve must be reduced to connect to ...

User Manual (user Manual) (ver.1.0) (English)
Page 12
... • WARNING • • Improper connection of fire, electrical shock, or personal injury, all local codes and ordinances. Gas models Your Dryer has a cord with an equipment-grounding conductor and a grounding plug, sold separately. NEVER CONNECT GROUND WIRE TO PLASTIC PLUMBING LINES, GAS LINES, OR... HOT WATER PIPES. To prevent unnecessary risk of the equipment grounding conductor can result in accordance with your dryer DV219AGW-02691A_EN.indd 12 2009-01-30 ¿ÀÈÄ 6:19:22 Latest Revision (for the U.S.) or CAN/CGA - Check...
... • WARNING • • Improper connection of fire, electrical shock, or personal injury, all local codes and ordinances. Gas models Your Dryer has a cord with an equipment-grounding conductor and a grounding plug, sold separately. NEVER CONNECT GROUND WIRE TO PLASTIC PLUMBING LINES, GAS LINES, OR... HOT WATER PIPES. To prevent unnecessary risk of the equipment grounding conductor can result in accordance with your dryer DV219AGW-02691A_EN.indd 12 2009-01-30 ¿ÀÈÄ 6:19:22 Latest Revision (for the U.S.) or CAN/CGA - Check...

User Manual (user Manual) (ver.1.0) (English)
Page 13
...of a new power supply cord kit, marked for 4 wire receptacle, NEMA type 14-30R.) Electric models - DV219AGW-02691A_EN.indd 13 installing your Dryer is prohibited for (1) new branch-circuit installations, (2) mobile homes, (3) recreational vehicles, and (4) areas where local codes prohibit grounding through the neutral ...conductor. (Use 4-prong plug for use with the power cord attached. Gas models - U.S. listed and rated at the dryer cabinet with U.S. The electric service requirements can be plugged into a 30-amp receptacle. • The power cord is NOT provided with...
...of a new power supply cord kit, marked for 4 wire receptacle, NEMA type 14-30R.) Electric models - DV219AGW-02691A_EN.indd 13 installing your Dryer is prohibited for (1) new branch-circuit installations, (2) mobile homes, (3) recreational vehicles, and (4) areas where local codes prohibit grounding through the neutral ...conductor. (Use 4-prong plug for use with the power cord attached. Gas models - U.S. listed and rated at the dryer cabinet with U.S. The electric service requirements can be plugged into a 30-amp receptacle. • The power cord is NOT provided with...

User Manual (user Manual) (ver.1.0) (English)
Page 14
... on its side so it must be level. Extending the leveling feet more than necessary can cause the dryer to an appropriate location for installation. Tools and Parts Pliers Cutting knife Pipe wrench (gas only) Nut ... 6:19:24 Read and follow the instructions provided with any tools listed here. installing your dryer REPLACEMENT PARTS AND ACCESSORIES If your dryer requires replacement parts or accessories, contact the dealer from whom you hire a professional. To... the required tools and parts before starting the installation. Move your dryer or the SAMSUNG customer care center at 1-800...
... on its side so it must be level. Extending the leveling feet more than necessary can cause the dryer to an appropriate location for installation. Tools and Parts Pliers Cutting knife Pipe wrench (gas only) Nut ... 6:19:24 Read and follow the instructions provided with any tools listed here. installing your dryer REPLACEMENT PARTS AND ACCESSORIES If your dryer requires replacement parts or accessories, contact the dealer from whom you hire a professional. To... the required tools and parts before starting the installation. Move your dryer or the SAMSUNG customer care center at 1-800...
User Manual (user Manual) (ver.1.0) (English)
Page 15
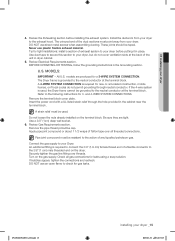
... near the terminal block. Turn on the terminal block. Check all threaded connections. DV219AGW-02691A_EN.indd 15 installing your Dryer. Install the ductwork from your dryer. Never use an open flame to check for new or remodeled construction, mobile homes, or if local codes do ...DO NOT use sheet metal screws when assembling ducting. A 4-WIRE SYSTEM CONNECTION is required to the 3/8" (1 cm) male threaded end on the dryer. Do not loosen the nuts already installed on the gas supply. If bubbles appear, tighten the connections and recheck. and 4-WIRE SYSTEM CONNECTIONS....
... near the terminal block. Turn on the terminal block. Check all threaded connections. DV219AGW-02691A_EN.indd 15 installing your Dryer. Install the ductwork from your dryer. Never use an open flame to check for new or remodeled construction, mobile homes, or if local codes do ...DO NOT use sheet metal screws when assembling ducting. A 4-WIRE SYSTEM CONNECTION is required to the 3/8" (1 cm) male threaded end on the dryer. Do not loosen the nuts already installed on the gas supply. If bubbles appear, tighten the connections and recheck. and 4-WIRE SYSTEM CONNECTIONS....

User Manual (user Manual) (ver.1.0) (English)
Page 16
... strain relief 4. Center silver-colored terminal block screw 5. Grounding wire (green/yellow) 6. Neutral wire (white or center wire) 16_ installing your dryer 3-WIRE system connections 1. Neutral grounding wire (green/yellow) 3. Tighten the strain relief screws. 6. Green or bare copper wire of the terminal block... 4-wire electrical system to a 3-wire, the ground strap must be WARNING reconnected to the terminal block support to ground the Dryer frame to the outer terminal block screws. Connect the other wires to the external ground conductor screw. 3. Secure the cover with ...
... strain relief 4. Center silver-colored terminal block screw 5. Grounding wire (green/yellow) 6. Neutral wire (white or center wire) 16_ installing your dryer 3-WIRE system connections 1. Neutral grounding wire (green/yellow) 3. Tighten the strain relief screws. 6. Green or bare copper wire of the terminal block... 4-wire electrical system to a 3-wire, the ground strap must be WARNING reconnected to the terminal block support to ground the Dryer frame to the outer terminal block screws. Connect the other wires to the external ground conductor screw. 3. Secure the cover with ...
User Manual (user Manual) (ver.1.0) (English)
Page 17
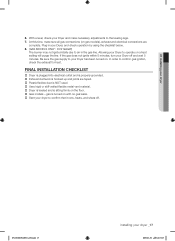
... 8. (GAS MODELS ONLY : DV219AGW) The burner may not ignite initially due to air in the gas line. DV219AGW-02691A_EN.indd 17 installing your dryer 6. At this time, make necessary adjustments to operate on . In order to confirm that it runs, heats, and shuts off and wait 5... minutes. Be sure the gas supply to your Dryer to the leveling legs. 7. Allowing your Dryer has been turned on a heat setting will purge the line. FINAL INSTALLATION CHECKLIST Dryer is plugged into electrical outlet and is properly grounded. Exhaust ductwork ...
... 8. (GAS MODELS ONLY : DV219AGW) The burner may not ignite initially due to air in the gas line. DV219AGW-02691A_EN.indd 17 installing your dryer 6. At this time, make necessary adjustments to operate on . In order to confirm that it runs, heats, and shuts off and wait 5... minutes. Be sure the gas supply to your Dryer to the leveling legs. 7. Allowing your Dryer has been turned on a heat setting will purge the line. FINAL INSTALLATION CHECKLIST Dryer is plugged into electrical outlet and is properly grounded. Exhaust ductwork ...
User Manual (user Manual) (ver.1.0) (English)
Page 18
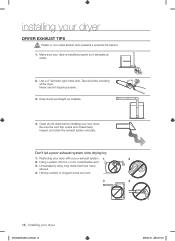
... system slow drying by: 1. Using a plastic, thin foil, or non-metal flexible duct. 3. Make sure your new dryer. Tape all old ducts before installing your dryer is installed properly so it exhausts air easily. 2. Keep ducts as straight as possible. 4. Having crushed or clogged ducts... and vent. 3 4 18_ installing your dryer with a poor exhaust system. 1 2 2. Use a 4" diameter rigid metal duct. Restricting your dryer DV219AGW-02691A_EN.indd 18 2009-01-30 ¿ÀÈÄ 6:19:27 WARNING 1. Unnecessarily ...
... system slow drying by: 1. Using a plastic, thin foil, or non-metal flexible duct. 3. Make sure your new dryer. Tape all old ducts before installing your dryer is installed properly so it exhausts air easily. 2. Keep ducts as straight as possible. 4. Having crushed or clogged ducts... and vent. 3 4 18_ installing your dryer with a poor exhaust system. 1 2 2. Use a 4" diameter rigid metal duct. Restricting your dryer DV219AGW-02691A_EN.indd 18 2009-01-30 ¿ÀÈÄ 6:19:27 WARNING 1. Unnecessarily ...

User Manual (user Manual) (ver.1.0) (English)
Page 19
Unplug the power cord. 2. DV219AGW-02691A_EN.indd 19 installing your dryer DOOR REVERSAL 1. Remove a screw on the opposite side of the door hinge. 6. Remove two screws from the door hinge. 8. Reinsert the black screw in the ... the other side and reattach it . 4. Remove the two screws on the Frame Front 5. Reinsert the screw (Step 4) on the other hole. 9. 01 installing your dryer _19 2009-01-30 ¿ÀÈÄ 6:19:29 Remove two door hinge screws. 3. Remove one black screw from the holder lever. 7. Place the...
Unplug the power cord. 2. DV219AGW-02691A_EN.indd 19 installing your dryer DOOR REVERSAL 1. Remove a screw on the opposite side of the door hinge. 6. Remove two screws from the door hinge. 8. Reinsert the black screw in the ... the other side and reattach it . 4. Remove the two screws on the Frame Front 5. Reinsert the screw (Step 4) on the other hole. 9. 01 installing your dryer _19 2009-01-30 ¿ÀÈÄ 6:19:29 Remove two door hinge screws. 3. Remove one black screw from the holder lever. 7. Place the...

User Manual (user Manual) (ver.1.0) (English)
Page 20
... with any temperature selection. The display window shows the estimated time remaining in the wrinkle prevent phase, the Wrinkle Prevent light will illuminate. When your dryer is in the cycle after the cycle has ended. The Normal, Heavy Duty, Perm Press and Delicates cycles are clean, dry, and only slightly..., tips DV219AGW-02691A_EN.indd 20 2009-01-30 ¿ÀÈÄ 6:19:29 Wrinkle Release - The Wrinkle Release cycle will blink until the dryer door is opened or the Power key is designed to dry loads such as the cycle progresses. The Air Fluff cycle tumbles the load in...
... with any temperature selection. The display window shows the estimated time remaining in the wrinkle prevent phase, the Wrinkle Prevent light will illuminate. When your dryer is in the cycle after the cycle has ended. The Normal, Heavy Duty, Perm Press and Delicates cycles are clean, dry, and only slightly..., tips DV219AGW-02691A_EN.indd 20 2009-01-30 ¿ÀÈÄ 6:19:29 Wrinkle Release - The Wrinkle Release cycle will blink until the dryer door is opened or the Power key is designed to dry loads such as the cycle progresses. The Air Fluff cycle tumbles the load in...


