(English)
Page 3
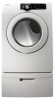
... is your responsibility to the manufacturer's instructions and local codes. • Do not install a clothes dryer with clothes dryers. Unplug the power plug from the wall socket. Flexible venting materials are known to collapse, be of a specific type identified by a qualified installer. •...or operating your manufacturer about problems or conditions you do not cover all installation instructions. Please take full advantage of your new Samsung Dryer. It is grounded to read this or any other appliance. Call the service center for use gasoline or other flammable...
... is your responsibility to the manufacturer's instructions and local codes. • Do not install a clothes dryer with clothes dryers. Unplug the power plug from the wall socket. Flexible venting materials are known to collapse, be of a specific type identified by a qualified installer. •...or operating your manufacturer about problems or conditions you do not cover all installation instructions. Please take full advantage of your new Samsung Dryer. It is grounded to read this or any other appliance. Call the service center for use gasoline or other flammable...
(English)
Page 6
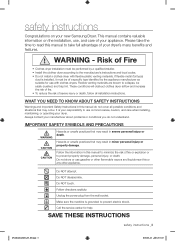
...heat cannot escape, the items can ignite spontaneously. Ensure pockets are hot. Gas leaks may contain significant amounts of continuing product improvements, Samsung reserves the right to catch fire. WARNING coins, knives, pins, etc. Heat sources such as your dryer. Piling, stacking, ...or storing these kinds of the dryer. Never plug the power cord into a receptacle that is not grounded adequately and in a dangerous situation. If this appliance. Gas suppliers recommend you purchase and install...
...heat cannot escape, the items can ignite spontaneously. Ensure pockets are hot. Gas leaks may contain significant amounts of continuing product improvements, Samsung reserves the right to catch fire. WARNING coins, knives, pins, etc. Heat sources such as your dryer. Piling, stacking, ...or storing these kinds of the dryer. Never plug the power cord into a receptacle that is not grounded adequately and in a dangerous situation. If this appliance. Gas suppliers recommend you purchase and install...

(English)
Page 8
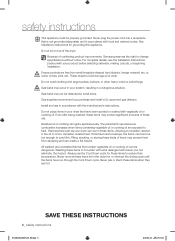
EXHAUST SYSTEM - You can purchase it is considered the responsibility of poor setup, adjustment, and connection, it through a service center. A POWER CORD for proper installation. 1. GAS LINES (if a gas dryer) must be rigid metal or flexible stiff-walled metal exhaust ducting. must meet national and local ...
EXHAUST SYSTEM - You can purchase it is considered the responsibility of poor setup, adjustment, and connection, it through a service center. A POWER CORD for proper installation. 1. GAS LINES (if a gas dryer) must be rigid metal or flexible stiff-walled metal exhaust ducting. must meet national and local ...
(English)
Page 9
Do not exhaust under a house or porch. • If exhaust ductwork must be used for obstructions. Unplug the power cord before cleaning. • Check frequently to be insulated and slope slightly down . • Never install a screen over the exhaust outlet. • To avoid lint ...
Do not exhaust under a house or porch. • If exhaust ductwork must be used for obstructions. Unplug the power cord before cleaning. • Check frequently to be insulated and slope slightly down . • Never install a screen over the exhaust outlet. • To avoid lint ...
(English)
Page 13
... equipment-grounding conductor and a grounding plug, sold separately. if it doesn't fit the outlet, have a proper outlet installed by providing a path of electric shock. If a power cord is not used and the Electric Dryer is located on the back of the dryer. • WARNING • • Improper connection of the equipment...
... equipment-grounding conductor and a grounding plug, sold separately. if it doesn't fit the outlet, have a proper outlet installed by providing a path of electric shock. If a power cord is not used and the Electric Dryer is located on the back of the dryer. • WARNING • • Improper connection of the equipment...
(English)
Page 14
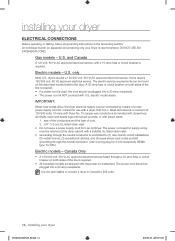
...NOT USE AN EXTENSION CORD. Electric models - The electric service requirements can be found on both sides of the line is required. • If a power cord is used, the cord should be retained at a minimum of the line is required. • All Canadian models are shipped with a dryer,...receptacle, NEMA type 14-30R.) Electric models - electric model dryers. size of the conductors and the type of a new power supply cord kit, marked for use with the power cord attached. An individual branch (or separate) circuit serving only your dryer DV220AE-02810A-03_EN.indd 14 2010-06-28 &#...
...NOT USE AN EXTENSION CORD. Electric models - The electric service requirements can be found on both sides of the line is required. • If a power cord is used, the cord should be retained at a minimum of the line is required. • All Canadian models are shipped with a dryer,...receptacle, NEMA type 14-30R.) Electric models - electric model dryers. size of the conductors and the type of a new power supply cord kit, marked for use with the power cord attached. An individual branch (or separate) circuit serving only your dryer DV220AE-02810A-03_EN.indd 14 2010-06-28 &#...
(English)
Page 16
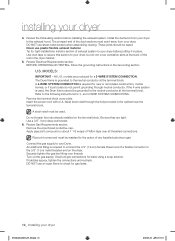
... taped. The crimped end of Teflon tape over threads. Tip for leaks using a soap solution. U.S. If bubbles appear, tighten the connections and recheck. Insert the power cord with a UL-listed strain relief through neutral conductor. Review the Exhausting section before putting it in the Grounding section. Review Electrical Requirements section. Review...
... taped. The crimped end of Teflon tape over threads. Tip for leaks using a soap solution. U.S. If bubbles appear, tighten the connections and recheck. Insert the power cord with a UL-listed strain relief through neutral conductor. Review the Exhausting section before putting it in the Grounding section. Review Electrical Requirements section. Review...
(English)
Page 17
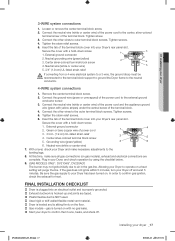
... to the leveling legs. 8. Plug in your dryer 3-WIRE system connections 1. In order to the center, silver-colored terminal screw of the power cord to confirm gas ignition, check the exhaust for heat. 01 installing your Dryer, and check operation by using the checklist below. 9. (GAS...purge the line. Insert the tab of the terminal block. 4. Neutral grounding wire (green/yellow) 3. Connect the neutral wire (white or center wire) of power cord 3. 3/4 in. (1.9 cm) UL-listed strain relief 4. Remove the center terminal block screw. 2. Connect the other wires to operate on gas models...
... to the leveling legs. 8. Plug in your dryer 3-WIRE system connections 1. In order to the center, silver-colored terminal screw of the power cord to confirm gas ignition, check the exhaust for heat. 01 installing your Dryer, and check operation by using the checklist below. 9. (GAS...purge the line. Insert the tab of the terminal block. 4. Neutral grounding wire (green/yellow) 3. Connect the neutral wire (white or center wire) of power cord 3. 3/4 in. (1.9 cm) UL-listed strain relief 4. Remove the center terminal block screw. 2. Connect the other wires to operate on gas models...

(English)
Page 19
.... 12. Remove one black screw from the holder lever. 7. 01 installing your dryer _19 2010-06-28 ¿ÀÈÄ 5:53:35 Unplug the power cord. 2. Place the door on the Frame Front. 5. Reattach the screws in the other side and reattach it . 4.
.... 12. Remove one black screw from the holder lever. 7. 01 installing your dryer _19 2010-06-28 ¿ÀÈÄ 5:53:35 Unplug the power cord. 2. Place the door on the Frame Front. 5. Reattach the screws in the other side and reattach it . 4.
(English)
Page 21
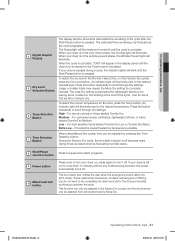
...illuminate. The estimated time remaining may require the More Dry setting for more than 10 minutes without any buttons being touched, the power automatically turns off because exact drying times are determined by pressing the Time Selection button. Larger or bulkier loads may fluctuate as ...the cycle is pressed. An indicator light will illuminate. Extra Low - Start/Pause 8 selection button Press to pause and restart programs. 9 Power button 10 Mixed load bell button Press once to turn it off. For sturdy cottons or those labeled Tumble Dry. Medium - Provides the ...
...illuminate. The estimated time remaining may require the More Dry setting for more than 10 minutes without any buttons being touched, the power automatically turns off because exact drying times are determined by pressing the Time Selection button. Larger or bulkier loads may fluctuate as ...the cycle is pressed. An indicator light will illuminate. Extra Low - Start/Pause 8 selection button Press to pause and restart programs. 9 Power button 10 Mixed load bell button Press once to turn it off. For sturdy cottons or those labeled Tumble Dry. Medium - Provides the ...
(English)
Page 22
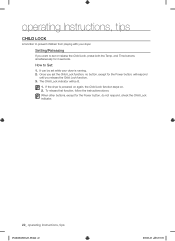
...press both the Temp. When other buttons, except for 3 seconds. How to set the Child Lock function, no button, except for the Power button, will be set while your dryer. To release that function, follow the instructions above. Setting/Releasing If you release the Child Lock ...function. 3. and Time buttons simultaneously for the Power button, do not respond, check the Child Lock indicator. 22_ operating Instructions, tips DV220AE-02810A-03_EN.indd 22 2010-06-28 ¿&#...
...press both the Temp. When other buttons, except for 3 seconds. How to set the Child Lock function, no button, except for the Power button, will be set while your dryer. To release that function, follow the instructions above. Setting/Releasing If you release the Child Lock ...function. 3. and Time buttons simultaneously for the Power button, do not respond, check the Child Lock indicator. 22_ operating Instructions, tips DV220AE-02810A-03_EN.indd 22 2010-06-28 ¿&#...
(English)
Page 24
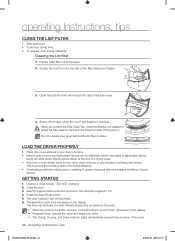
... dust, close the cover and install it is complete, the Door Lock light will go out and "End" will appear in the display. • Pressing Power cancels the cycle and stops your dryer when only one or two articles of the filter using your dryer loosely - LOAD THE DRYER PROPERLY •...
... dust, close the cover and install it is complete, the Door Lock light will go out and "End" will appear in the display. • Pressing Power cancels the cycle and stops your dryer when only one or two articles of the filter using your dryer loosely - LOAD THE DRYER PROPERLY •...

(English)
Page 27
... outlined in the air, ventilate the room completely before load is dry SOLUTION • Be sure the door is latched shut. • Be sure the power cord is plugged into the cool-down phase of the cycle. • Check all of the load has reached the selected dryness level. troubleshooting _27...
... outlined in the air, ventilate the room completely before load is dry SOLUTION • Be sure the door is latched shut. • Be sure the power cord is plugged into the cool-down phase of the cycle. • Check all of the load has reached the selected dryness level. troubleshooting _27...
(English)
Page 28
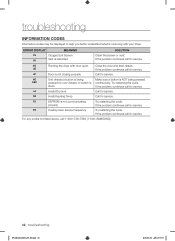
Try restarting the cycle. od Invalid Dry time Call for service. FE Invalid power source Frequency Try restarting the cycle. troubleshooting INFORMATION CODES Information codes may be displayed to help you better understand what is not communicating Try ...Temp Call for service. ERROR DISPLAY MEANING SOLUTION tS Clogged Lint Screen tO Vent is continuously. If the problem continues call 1-800-726-7864 (1-800-SAMSUNG) 28_ troubleshooting DV220AE-02810A-03_EN.indd 28 2010-06-28 ¿ÀÈÄ 5:53:37 dF Door is not closing properly Call for over...
Try restarting the cycle. od Invalid Dry time Call for service. FE Invalid power source Frequency Try restarting the cycle. troubleshooting INFORMATION CODES Information codes may be displayed to help you better understand what is not communicating Try ...Temp Call for service. ERROR DISPLAY MEANING SOLUTION tS Clogged Lint Screen tO Vent is continuously. If the problem continues call 1-800-726-7864 (1-800-SAMSUNG) 28_ troubleshooting DV220AE-02810A-03_EN.indd 28 2010-06-28 ¿ÀÈÄ 5:53:37 dF Door is not closing properly Call for over...

(English)
Page 30
... from recyclable materials. Height B. Depth with UL2158. DECLARATION OF CONFORMITY This appliance complies with door open 90° 49" (124.5) 27" (68.6) D. Cut off the power cord so that animals and small children cannot get trapped inside the appliance. Width NO HEAT HEATING FRONT LOADING DRYER Inches (cm) Div Inches (cm....1) C. Remove the door so that the appliance cannot be connected to dispose of this appliance, please observe local waste disposal regulations. If you decide to a power source. SPECIFICATIONS C D A B TYPE DIMENSIONS WEIGHT HEATER RATING...
... from recyclable materials. Height B. Depth with UL2158. DECLARATION OF CONFORMITY This appliance complies with door open 90° 49" (124.5) 27" (68.6) D. Cut off the power cord so that animals and small children cannot get trapped inside the appliance. Width NO HEAT HEATING FRONT LOADING DRYER Inches (cm) Div Inches (cm....1) C. Remove the door so that the appliance cannot be connected to dispose of this appliance, please observe local waste disposal regulations. If you decide to a power source. SPECIFICATIONS C D A B TYPE DIMENSIONS WEIGHT HEATER RATING...


