Samsung 2333HD Tv - SyncMaster 23 LCD Monitor
Samsung 2333HD Tv
Related Manual Pages


Related Videos

Samsung SyncMaster 2333HD - HD TV
Duration: 1:00
Total Views: 7,762
Duration: 1:00
Total Views: 7,762
Samsung 2333HD - Kursor TV
Duration: 2:17
Total Views: 12,685
Duration: 2:17
Total Views: 12,685
Samsung SyncMaster 2333HD
Duration: 9:32
Total Views: 7,942
Duration: 9:32
Total Views: 7,942
Samsung SyncMaster 2333HD
Duration: 2:04
Total Views: 20,472
Duration: 2:04
Total Views: 20,472
Samsung SyncMaster 2333HD LCD Full 1080p tv Review
Duration: 6:00
Total Views: 2,038
Duration: 6:00
Total Views: 2,038
Similar Questions

Tv Samsung P2770hd Backligh Burned
Hi, in my Samsung TV P2770HD no display , the Backligh tube and connected wire burned, where to buy ...
Hi, in my Samsung TV P2770HD no display , the Backligh tube and connected wire burned, where to buy ...
(Posted by massiramdan 2 years ago)
A Remote Control For A Tv Monitor Syncmaster 170 Mp I own a TV monitor
I own a TV monitor SyncMaster 170 mp but still do not know if any remote control of the brand Samsun...
I own a TV monitor SyncMaster 170 mp but still do not know if any remote control of the brand Samsun...
(Posted by advip7 9 years ago)

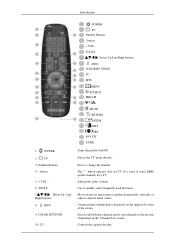
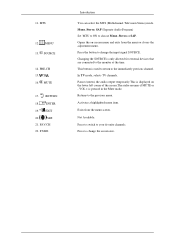
What Is Best Replacement For A Lost Remote Control For Samsung 2333hd Tv?
(Posted by maritesdiola 10 years ago)

Lost The Remote- Replacement?
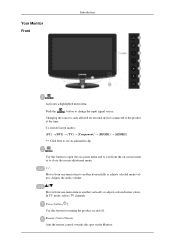
Samsung 2333hd Syncmaster Lcd Tv Monitor
Where can I get one?
Where can I get one?
(Posted by jackmiller 11 years ago)

Tv Firmware Update For This Model
How to do firmware update on this model, because there aren't any USB connectors on this model. Only...
How to do firmware update on this model, because there aren't any USB connectors on this model. Only...
(Posted by jukkaluotonen 12 years ago)