

User Manual
Page 2
... and safer at all times. WORK AREA SAFETY Keep work area clean and well lit. Keep cord away from moving parts. Use of parts and any adapter plugs with earthed or grounded surfaces such as in personal injury. Do not overreach. Contain long hair....are dangerous in a damp location is earthed or grounded. Do not expose power tools to operate the power tool. Failure to a rotating part of untrained users. Maintain power tools. Save all instructions. Always wear eye protection. Cluttered or dark areas invite accidents. Do...
... and safer at all times. WORK AREA SAFETY Keep work area clean and well lit. Keep cord away from moving parts. Use of parts and any adapter plugs with earthed or grounded surfaces such as in personal injury. Do not overreach. Contain long hair....are dangerous in a damp location is earthed or grounded. Do not expose power tools to operate the power tool. Failure to a rotating part of untrained users. Maintain power tools. Save all instructions. Always wear eye protection. Cluttered or dark areas invite accidents. Do...
User Manual
Page 3
...causing an uncontrolled saw backward while the blade is binding, or when interrupting a cut by a qualified repair person using only identical replacement parts. It is pinched or bound tightly by insulated gripping surfaces only, when performing an operation where the cutting tool may create a risk of...for your arms to climb out of the power tool for optimum performance and safety of control. Never use only identical replacement parts. The guard cannot protect you from the work to control. Use the power tool, accessories and tool bits etc. Keep...
...causing an uncontrolled saw backward while the blade is binding, or when interrupting a cut by a qualified repair person using only identical replacement parts. It is pinched or bound tightly by insulated gripping surfaces only, when performing an operation where the cutting tool may create a risk of...for your arms to climb out of the power tool for optimum performance and safety of control. Never use only identical replacement parts. The guard cannot protect you from the work to control. Use the power tool, accessories and tool bits etc. Keep...
User Manual
Page 4
... serious personal injury. Protect your eyes, resulting in loss of power and overheating. Inspect for alignment of moving parts, binding of moving parts, breakage of the lower guard spring. Raise the lower guard with ANSI Z87.1. ADDITIONAL SAFETY WARNINGS Use clamps or other ...its applications and limitations, as well as "plunge cuts" and "compound cuts." Raise lower guard by an authorized service center. Failure to damaged parts, gummy deposits, or a build-up of debris. Lower guard should be placed under the panel on bench or floor. Wear hearing...
... serious personal injury. Protect your eyes, resulting in loss of power and overheating. Inspect for alignment of moving parts, binding of moving parts, breakage of the lower guard spring. Raise the lower guard with ANSI Z87.1. ADDITIONAL SAFETY WARNINGS Use clamps or other ...its applications and limitations, as well as "plunge cuts" and "compound cuts." Raise lower guard by an authorized service center. Failure to damaged parts, gummy deposits, or a build-up of debris. Lower guard should be placed under the panel on bench or floor. Wear hearing...

User Manual
Page 6
... the product will cause a drop in line voltage, resulting in serious injury. 6 - WARNING: Check extension cords before each use original factory replacement parts when servicing. All exposed metal parts are working with protecting insulation. For service, we suggest you are isolated from the internal metal motor components with a power tool. An undersized...
... the product will cause a drop in line voltage, resulting in serious injury. 6 - WARNING: Check extension cords before each use original factory replacement parts when servicing. All exposed metal parts are working with protecting insulation. For service, we suggest you are isolated from the internal metal motor components with a power tool. An undersized...
User Manual
Page 7
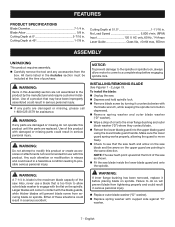
Cutting Depth at 45 1-7/8 in. Blade Arbor 5/8 in . Cutting Depth at 51.5 1-11/16 in . No Load Speed 5,000 r/min. (RPM) Input 120 V, AC only, 60 Hz, 14 Amps Laser Guide Class IIIa, Cutting Depth at 0 2-7/16 in . FEATURES PRODUCT SPECIFICATIONS Blade Diameter 7-1/4 in .
Cutting Depth at 45 1-7/8 in. Blade Arbor 5/8 in . Cutting Depth at 51.5 1-11/16 in . No Load Speed 5,000 r/min. (RPM) Input 120 V, AC only, 60 Hz, 14 Amps Laser Guide Class IIIa, Cutting Depth at 0 2-7/16 in . FEATURES PRODUCT SPECIFICATIONS Blade Diameter 7-1/4 in .
User Manual
Page 9
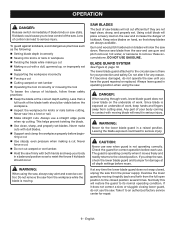
... nails in a balanced position so as to serious injury. Do not remove the saw blades will result in a raised position. DO NOT USE GASOLINE. Any part of saw from cutting area. SAW BLADES The best of your protection and safety. WARNING: Never tie the lower blade guard in serious injury. English...
... nails in a balanced position so as to serious injury. Do not remove the saw blades will result in a raised position. DO NOT USE GASOLINE. Any part of saw from cutting area. SAW BLADES The best of your protection and safety. WARNING: Never tie the lower blade guard in serious injury. English...
User Manual
Page 11
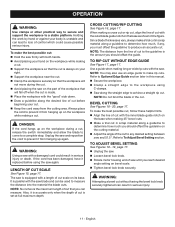
... SETTING See Figures 18 - 19, page 17. Unplug the saw. Loosen bevel lock knob. Rotate motor housing end of saw on the part of the workpiece that you must offset the guideline to the guideline is unstable and can result in serious injury or death. TO RIP CUT...
... SETTING See Figures 18 - 19, page 17. Unplug the saw. Loosen bevel lock knob. Rotate motor housing end of saw on the part of the workpiece that you must offset the guideline to the guideline is unstable and can result in serious injury or death. TO RIP CUT...
User Manual
Page 12
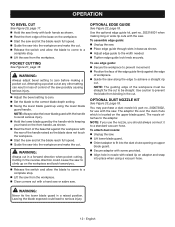
...speed. Guide the saw into the workpiece and make the cut . Use caution to achieve a straight rip cut . You may purchase a dust nozzle kit, part no . 202218001 when making a pocket cut . The nozzle attaches to serious injury. 12 - Leaving the blade exposed could cause the saw . NOTE: Always raise ...the lower blade guard with the handle to the width needed. Tighten edge guide lock knob securely. Use the optional edge guide kit, part no . 200673002, for the cut to a complete stop. Lift the saw from binding in nozzle with a hand saw or sabre saw to ...
...speed. Guide the saw into the workpiece and make the cut . Use caution to achieve a straight rip cut . You may purchase a dust nozzle kit, part no . 202218001 when making a pocket cut . The nozzle attaches to serious injury. 12 - Leaving the blade exposed could cause the saw . NOTE: Always raise ...the lower blade guard with the handle to the width needed. Tighten edge guide lock knob securely. Use the optional edge guide kit, part no . 200673002, for the cut to a complete stop. Lift the saw from binding in nozzle with a hand saw or sabre saw to ...
User Manual
Page 13
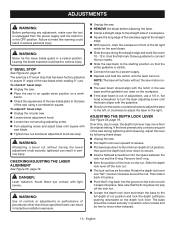
... turn the screw counterclockwise to adjust the laser to the left, or clockwise to adjust the laser to the right. ADJUSTMENTS WARNING: Before performing any part of the saw during tightening and loosening, adjust the lever by following these steps: Unplug the saw. Pull depth lock lever upward to...
... turn the screw counterclockwise to adjust the laser to the left, or clockwise to adjust the laser to the right. ADJUSTMENTS WARNING: Before performing any part of the saw during tightening and loosening, adjust the lever by following these steps: Unplug the saw. Pull depth lock lever upward to...
User Manual
Page 14
... MAINTENANCE WARNING: When servicing, use with a sufficient amount of high grade lubricant for extended work with any other parts can create a hazard or cause product damage. Therefore, no further lubrication is extremely important to comply with plastic... parts. Most plastics are highly abrasive to do not recommend using solvents when cleaning plastic parts. Use of any of these types of materials. GENERAL MAINTENANCE Avoid using this product. Consequently...
... MAINTENANCE WARNING: When servicing, use with a sufficient amount of high grade lubricant for extended work with any other parts can create a hazard or cause product damage. Therefore, no further lubrication is extremely important to comply with plastic... parts. Most plastics are highly abrasive to do not recommend using solvents when cleaning plastic parts. Use of any of these types of materials. GENERAL MAINTENANCE Avoid using this product. Consequently...
User Manual 2
Page 3
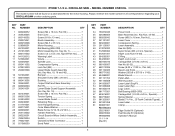
... Assembly 1 Circuit Board w/Micro Switch Assembly....... 1 Switch 1 Closed End Wire Connector 1 Bend Relief 1 KEY NO. PART NUMBER 34 730372040 35 305380003 36 660206042 37 351101001 38 693240001 39 291129001 40 513075002 41 512963002 42 612031001 43 634295001 44...Warning Label 1 Volute 1 Spindle Lock 1 Compression Spring 1 Lock Nut (M5 1 Upper Blade Guard Assembly (Inc. RYOBI 7-1/4 in all correspondence regarding your CIRCULAR SAW or when ordering parts. Always mention the model number in . NUMBER 1 660208052 2 305535005 3 660140002 4 290075051 5 660259008 6 528060001 7...
... Assembly 1 Circuit Board w/Micro Switch Assembly....... 1 Switch 1 Closed End Wire Connector 1 Bend Relief 1 KEY NO. PART NUMBER 34 730372040 35 305380003 36 660206042 37 351101001 38 693240001 39 291129001 40 513075002 41 512963002 42 612031001 43 634295001 44...Warning Label 1 Volute 1 Spindle Lock 1 Compression Spring 1 Lock Nut (M5 1 Upper Blade Guard Assembly (Inc. RYOBI 7-1/4 in all correspondence regarding your CIRCULAR SAW or when ordering parts. Always mention the model number in . NUMBER 1 660208052 2 305535005 3 660140002 4 290075051 5 660259008 6 528060001 7...


