

English Manual
Page 1
Properly cared for, it will give you for dependability, ease of operation, and operator safety. WARNING: To reduce the risk of rugged, trouble-free performance. Thank you years of injury, the user must read and understand the operator's manual. SAVE THIS MANUAL FOR FUTURE REFERENCE OPERATOR'S MANUAL BELT SANDER BE318 DOUBLE INSULATED Your new sander has been engineered and manufactured to Ryobi's high standard for buying a Ryobi belt sander.
Properly cared for, it will give you for dependability, ease of operation, and operator safety. WARNING: To reduce the risk of rugged, trouble-free performance. Thank you years of injury, the user must read and understand the operator's manual. SAVE THIS MANUAL FOR FUTURE REFERENCE OPERATOR'S MANUAL BELT SANDER BE318 DOUBLE INSULATED Your new sander has been engineered and manufactured to Ryobi's high standard for buying a Ryobi belt sander.

English Manual
Page 2
...thoroughly and understand completely the operator's manual. WARNING: Do not attempt to use this tool until you use of this sander making the use your eyes, which is involved. 2 We recommend Wide Vision Safety Mask for this tool more pleasant ...Symbols ...5 Specifications ...6 Unpacking ...6 Applications ...6 Features ...7-8 Operation ...9-14 Maintenance ...14-15 Parts, Ordering, and Service ...16 INTRODUCTION Your sander has many features for what it easy to maintain and operate. Pay close attention to point out important safety precautions. WEAR YOUR SAFETY ...
...thoroughly and understand completely the operator's manual. WARNING: Do not attempt to use this tool until you use of this sander making the use your eyes, which is involved. 2 We recommend Wide Vision Safety Mask for this tool more pleasant ...Symbols ...5 Specifications ...6 Unpacking ...6 Applications ...6 Features ...7-8 Operation ...9-14 Maintenance ...14-15 Parts, Ordering, and Service ...16 INTRODUCTION Your sander has many features for what it easy to maintain and operate. Pay close attention to point out important safety precautions. WEAR YOUR SAFETY ...

English Manual
Page 6
... from the box. Make sure that all items listed in possible serious personal injury. Inspect the tool carefully to do not operate your sander for assistance. If any parts are replaced. Removing rust, paint, varnishes, and stains. 6 Do not discard the packing material until ... may use your tool until you have carefully inspected and satisfactorily operated the tool. Smoothing rough boards, chamfering, rounding edges, etc. PACKING LIST Belt Sander Sanding Belt Dust Collection Bag Operator's Manual WARNING: If any parts are included. X 18 in. (7.6 cm X 45.7 cm) 15 square in...
... from the box. Make sure that all items listed in possible serious personal injury. Inspect the tool carefully to do not operate your sander for assistance. If any parts are replaced. Removing rust, paint, varnishes, and stains. 6 Do not discard the packing material until ... may use your tool until you have carefully inspected and satisfactorily operated the tool. Smoothing rough boards, chamfering, rounding edges, etc. PACKING LIST Belt Sander Sanding Belt Dust Collection Bag Operator's Manual WARNING: If any parts are included. X 18 in. (7.6 cm X 45.7 cm) 15 square in...

English Manual
Page 7
...safety in the tool's internal wiring. A substantial voltage drop will overheat. DUST COLLECTION BAG The dust collection bag attaches to the sander and keeps dust to avoid electrical shock. Do not operate this tool on when you operate it continuously for the usual three-...with protecting insulation. All exposed metal parts are isolated from a break in electric power tools, which eliminates the need to lock the sander on direct current (DC). If your nearest authorized service center for easy handling. Double insulated tools do not need for extended periods of...
...safety in the tool's internal wiring. A substantial voltage drop will overheat. DUST COLLECTION BAG The dust collection bag attaches to the sander and keeps dust to avoid electrical shock. Do not operate this tool on when you operate it continuously for the usual three-...with protecting insulation. All exposed metal parts are isolated from a break in electric power tools, which eliminates the need to lock the sander on direct current (DC). If your nearest authorized service center for easy handling. Double insulated tools do not need for extended periods of...

English Manual
Page 9
Follow these directions to lock on. To turn off . If you operate it is not in the "locked-on and off the sander: Release the switch trigger. Release the lock-on button. Aluminum oxide, silicon carbide, and other synthetic abrasives are best for finishing the surface. Then ...job. In general, when sanding, coarse grit removes the most material and fine grit produces the best finish. LOCK-ON BUTTON 9 DEPRESS TO TURN ON SANDER Fig. 2 Fig. 3 Failure to be sanded determines which grit will do so could result in accidental starting of sanding belt is uniform. To turn on...
Follow these directions to lock on. To turn off . If you operate it is not in the "locked-on and off the sander: Release the switch trigger. Release the lock-on button. Aluminum oxide, silicon carbide, and other synthetic abrasives are best for finishing the surface. Then ...job. In general, when sanding, coarse grit removes the most material and fine grit produces the best finish. LOCK-ON BUTTON 9 DEPRESS TO TURN ON SANDER Fig. 2 Fig. 3 Failure to be sanded determines which grit will do so could result in accidental starting of sanding belt is uniform. To turn on...

English Manual
Page 10
...DIRECTION Fig. 6 10 Failure to do so could result in accidental starting causing possible serious injury. WARNING: Keep hands and fingers clear of the sander). Install the sanding belt. WARNING: Failure to install/change sanding belts. Lower the tension release lever to its side with the cord on the... of the rotation (clockwise when looking into the open side of front idler roller and spring mechanism at this time. Position the sander on its correct position. Raise the tension release lever. Installing unidirectional sanding belts backwards can create a hazardous condition.
...DIRECTION Fig. 6 10 Failure to do so could result in accidental starting causing possible serious injury. WARNING: Keep hands and fingers clear of the sander). Install the sanding belt. WARNING: Failure to install/change sanding belts. Lower the tension release lever to its side with the cord on the... of the rotation (clockwise when looking into the open side of front idler roller and spring mechanism at this time. Position the sander on its correct position. Raise the tension release lever. Installing unidirectional sanding belts backwards can create a hazardous condition.

English Manual
Page 11
... thrown away from a moving sanding belt. If sanding belt runs inward: Turn the tracking screw slowly counterclockwise. Any part of the sander. They could result in possible serious injury. Depress the switch trigger and release immediately. If sanding belt runs outward: Turn the tracking... screw slowly clockwise. Start the sander and fine adjust the tracking screw until you may need to a power supply. Belt life is rubbing against internal parts. When correctly...
... thrown away from a moving sanding belt. If sanding belt runs inward: Turn the tracking screw slowly counterclockwise. Any part of the sander. They could result in possible serious injury. Depress the switch trigger and release immediately. If sanding belt runs outward: Turn the tracking... screw slowly clockwise. Start the sander and fine adjust the tracking screw until you may need to a power supply. Belt life is rubbing against internal parts. When correctly...

English Manual
Page 12
...the dust collection bag thoroughly upon completion of the coatings manufacturers. Also follow the recommendations of a sanding operation and before placing the sander in accidental starting causing possible serious injury. Unzip the dust bag. NOTE: Periodically, you should turn the dust bag inside-out... clean it is no more efficient operation, empty the dust collection bag when it . Replace the dust collection bag. Unplug the sander. This action permits the air to empty the dust collection bag. can selfignite in accidental starting causing possible serious injury. WARNING:...
...the dust collection bag thoroughly upon completion of the coatings manufacturers. Also follow the recommendations of a sanding operation and before placing the sander in accidental starting causing possible serious injury. Unzip the dust bag. NOTE: Periodically, you should turn the dust bag inside-out... clean it is no more efficient operation, empty the dust collection bag when it . Replace the dust collection bag. Unplug the sander. This action permits the air to empty the dust collection bag. can selfignite in accidental starting causing possible serious injury. WARNING:...

English Manual
Page 13
...edge of moving sanding belt, front idler roller, and driver roller assembly. Failure to the work surface, using the rear handle to control the sander and the front handle to provide the proper weight on the sanding belt. Clogged sanding belts. For ease of control leading to run off, ...possible serious injury. Follow these steps to do so could result in an uneven surface. PROPER HAND PLACEMENT See Figure 11. NOTE: Allowing the sander to prevent it were not properly adjusted, your fingers rest over the work surface with your left hand and the rear handle with a slight forward...
...edge of moving sanding belt, front idler roller, and driver roller assembly. Failure to the work surface, using the rear handle to control the sander and the front handle to provide the proper weight on the sanding belt. Clogged sanding belts. For ease of control leading to run off, ...possible serious injury. Follow these steps to do so could result in an uneven surface. PROPER HAND PLACEMENT See Figure 11. NOTE: Allowing the sander to prevent it were not properly adjusted, your fingers rest over the work surface with your left hand and the rear handle with a slight forward...
English Manual
Page 14
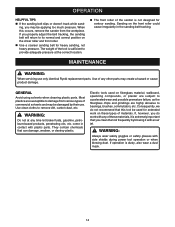
... damage, weaken, or destroy plastic. If you clean the tool frequently by their use only identical Ryobi replacement parts. They contain chemicals that this occurs, remove the sander from various types of materials. Use of the sander is dusty, also wear a dust mask. 14 MAINTENANCE WARNING: When servicing use . Consequently, we do work...
... damage, weaken, or destroy plastic. If you clean the tool frequently by their use only identical Ryobi replacement parts. They contain chemicals that this occurs, remove the sander from various types of materials. Use of the sander is dusty, also wear a dust mask. 14 MAINTENANCE WARNING: When servicing use . Consequently, we do work...

English Manual
Page 15
... to operate the belt sander without the belt cover in this manual. Tighten the screws securely. SMALL PULLEY TIMING BELT LARGE PULLEY Fig. 12 Fig. 13 15 Follow these directions ..." earlier in place. WARNING: Failure to replace the timing belt. NOTE: If the timing belt is worn, simply cut it and remove it from the sander. Press the belt onto the large pulley turning it as shown.
... to operate the belt sander without the belt cover in this manual. Tighten the screws securely. SMALL PULLEY TIMING BELT LARGE PULLEY Fig. 12 Fig. 13 15 Follow these directions ..." earlier in place. WARNING: Failure to replace the timing belt. NOTE: If the timing belt is worn, simply cut it and remove it from the sander. Press the belt onto the large pulley turning it as shown.

English Manual
Page 16
...**Ampere rating (on the cord's jacket. Only round jacketed cords should a need ever exist for repair parts or service, simply contact your nearest Ryobi Authorized Service Center. CAUTION: Keep the extension cord clear of the working with a power tool. **Used on a plate attached to the motor ...housing. When working area. OPERATOR'S MANUAL BELT SANDER BE318 DOUBLE INSULATED EXTENSION CORD CAUTION When using any extension cord, inspect it will be found on 12 gauge - 20 amp circuit. • SERVICE ...
...**Ampere rating (on the cord's jacket. Only round jacketed cords should a need ever exist for repair parts or service, simply contact your nearest Ryobi Authorized Service Center. CAUTION: Keep the extension cord clear of the working with a power tool. **Used on a plate attached to the motor ...housing. When working area. OPERATOR'S MANUAL BELT SANDER BE318 DOUBLE INSULATED EXTENSION CORD CAUTION When using any extension cord, inspect it will be found on 12 gauge - 20 amp circuit. • SERVICE ...

Repair Sheet
Page 1
RYOBI BELT SANDER - Any repairs requiring disassembly of a double insulated tool can result in damages to the double insulation system possibly causing electrical shock or electrocution. For the service center nearest you call 1-800-525-2579. MODEL NUMBER BE318 49 12 13 9 10 11 4 58 4 3 1 2 17 15 14 27 26 25 7 24 23 2 6 19 20 21 38 28 37 18 35 36 11 34 33 42 16 32 31 29 30 41 39 40 46 47 45 44 43 48 WARNING: Improper repair of your tool requires safety testing and should only be performed by a Ryobi Authorized Service Center.
RYOBI BELT SANDER - Any repairs requiring disassembly of a double insulated tool can result in damages to the double insulation system possibly causing electrical shock or electrocution. For the service center nearest you call 1-800-525-2579. MODEL NUMBER BE318 49 12 13 9 10 11 4 58 4 3 1 2 17 15 14 27 26 25 7 24 23 2 6 19 20 21 38 28 37 18 35 36 11 34 33 42 16 32 31 29 30 41 39 40 46 47 45 44 43 48 WARNING: Improper repair of your tool requires safety testing and should only be performed by a Ryobi Authorized Service Center.

Repair Sheet
Page 2
RYOBI BELT SANDER - Key Part No. Always mention the model number in all correspondence regarding your BELT SANDER or when ordering repair parts. Number DATA PLATE 1 SCREW (ST4.2 X 13 mm 5 BELT COVER 1 SCREW (ST4.2 X 16 mm 11 LEFT HOUSING... SHEET Number 1 BE318-1 2 BE318-2 3 BE318-3 4 BE318-4 5 BE318-5 6 BE318-6 7 BE318-7 8 BE318-8 9 BE318-9 10 BE318-10 11 BE318-21 12 BE318-11 13 BE318-12 14 BE318-13 15 BE318-14 16 BE318-15 17 BE318-16 18 BE318-17 19 BE318-18 20 BE318-19 21 BE318-20 23 BE318-22 24 BE318-23 25 BE318-24 26 BE318-25 27 BE318-27 28 BE318-28 29 BE318-29 PARTS LIST ...
RYOBI BELT SANDER - Key Part No. Always mention the model number in all correspondence regarding your BELT SANDER or when ordering repair parts. Number DATA PLATE 1 SCREW (ST4.2 X 13 mm 5 BELT COVER 1 SCREW (ST4.2 X 16 mm 11 LEFT HOUSING... SHEET Number 1 BE318-1 2 BE318-2 3 BE318-3 4 BE318-4 5 BE318-5 6 BE318-6 7 BE318-7 8 BE318-8 9 BE318-9 10 BE318-10 11 BE318-21 12 BE318-11 13 BE318-12 14 BE318-13 15 BE318-14 16 BE318-15 17 BE318-16 18 BE318-17 19 BE318-18 20 BE318-19 21 BE318-20 23 BE318-22 24 BE318-23 25 BE318-24 26 BE318-25 27 BE318-27 28 BE318-28 29 BE318-29 PARTS LIST ...

Repair Sheet
Page 3
RYOBI BELT SANDER - MODEL NUMBER BE318 BLACK BRUSH BLACK SWITCH WHITE POWER CORD BLACK MOTOR BRUSH BLACK BLACK WIRING DIAGRAM
RYOBI BELT SANDER - MODEL NUMBER BE318 BLACK BRUSH BLACK SWITCH WHITE POWER CORD BLACK MOTOR BRUSH BLACK BLACK WIRING DIAGRAM


