

Owners Manual
Page 3
... use the power tool if the switch does not turn it was designed. Do not use . Such preventive safety measures reduce the risk of inattention while operating power tools may result in personal injury. Do not overreach. If damaged, have the switch on invites accidents. Remove any adjustments, changing accessories, or storing power tools. Many accidents are tired or under the influence of electric...
... use the power tool if the switch does not turn it was designed. Do not use . Such preventive safety measures reduce the risk of inattention while operating power tools may result in personal injury. Do not overreach. If damaged, have the switch on invites accidents. Remove any adjustments, changing accessories, or storing power tools. Many accidents are tired or under the influence of electric...

Owners Manual
Page 4
... the power tool for and remove all nails from those dust masks that is damaged should be properly repaired or replaced by power sanding, sawing, grinding, drilling, and other construction activities contains chemicals known to filter out microscopic particles. 4 - When using an extension cord, be performed. Following this tool, loan them to determine that the safety of control. Know your exposure to a stable platform. A wire gauge size...
... the power tool for and remove all nails from those dust masks that is damaged should be properly repaired or replaced by power sanding, sawing, grinding, drilling, and other construction activities contains chemicals known to filter out microscopic particles. 4 - When using an extension cord, be performed. Following this tool, loan them to determine that the safety of control. Know your exposure to a stable platform. A wire gauge size...

Owners Manual
Page 5
.... Voltage Current Frequency (cycles per second) Time Type of current Rotational speed, at no .../min Safety Alert Read Operator's Manual Eye Protection No Hands Symbol Wet Conditions Alert Volts Amperes Hertz Minutes Alternating Current No Load Speed Class II Tool Per Minute Indicates a potential personal injury hazard. ... levels of the following signal words and meanings are intended to operate the product better and safer. Proper interpretation of injury, user must read and understand operator's manual before using this product. To reduce the risk of these symbols will result...
.... Voltage Current Frequency (cycles per second) Time Type of current Rotational speed, at no .../min Safety Alert Read Operator's Manual Eye Protection No Hands Symbol Wet Conditions Alert Volts Amperes Hertz Minutes Alternating Current No Load Speed Class II Tool Per Minute Indicates a potential personal injury hazard. ... levels of the following signal words and meanings are intended to operate the product better and safer. Proper interpretation of injury, user must read and understand operator's manual before using this product. To reduce the risk of these symbols will result...
Owners Manual
Page 6
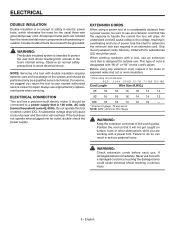
... amp circuit. Before using a power tool at a considerable distance from the internal metal motor components with a damaged cord since touching the damaged area could cause electrical shock resulting in the tool's internal wiring. WARNING: Check extension cords before each use original factory replacement parts when servicing. For service, we suggest you are isolated from a power source, be sure to use an extension cord that has the capacity to handle...
... amp circuit. Before using a power tool at a considerable distance from the internal metal motor components with a damaged cord since touching the damaged area could cause electrical shock resulting in the tool's internal wiring. WARNING: Check extension cords before each use original factory replacement parts when servicing. For service, we suggest you are isolated from a power source, be sure to use an extension cord that has the capacity to handle...
Owners Manual
Page 7
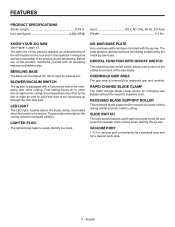
... a standard hose size for increased visibility. No Load Speed 3,000 (SPM) Input 120 V, AC Only, 60 Hz, 3.0 Amp Weight 4.4 lbs. SLIDE SWITCH The slide switch features a soft start to easily identify live tools. LED LIGHT The LED light, located above the blade clamp, illuminates when the switch is turned on the tool and in the cutting area for a cleaner work area. 7 - RAPID CHANGE BLADE CLAMP The rapid change blade clamp allows for managing dust while cutting. BEVELING BASE The base can...
... a standard hose size for increased visibility. No Load Speed 3,000 (SPM) Input 120 V, AC Only, 60 Hz, 3.0 Amp Weight 4.4 lbs. SLIDE SWITCH The slide switch features a soft start to easily identify live tools. LED LIGHT The LED light, located above the blade clamp, illuminates when the switch is turned on the tool and in the cutting area for a cleaner work area. 7 - RAPID CHANGE BLADE CLAMP The rapid change blade clamp allows for managing dust while cutting. BEVELING BASE The base can...
Owners Manual
Page 8
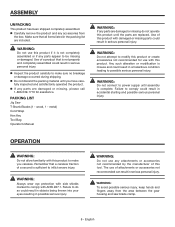
... injury. The use any attachments or accessories not recommended by the manufacturer of a second is complete. ASSEMBLY UNPACKING This product has been shipped completely assembled. Carefully remove the product and any parts appear to be missing or damaged. metal) Cord Wrap Hex Key Tool Bag Operator's Manual WARNING: If any parts are replaced. WARNING: Do not connect to power supply until assembly is sufficient...
... injury. The use any attachments or accessories not recommended by the manufacturer of a second is complete. ASSEMBLY UNPACKING This product has been shipped completely assembled. Carefully remove the product and any parts appear to be missing or damaged. metal) Cord Wrap Hex Key Tool Bag Operator's Manual WARNING: If any parts are replaced. WARNING: Do not connect to power supply until assembly is sufficient...
Owners Manual
Page 9
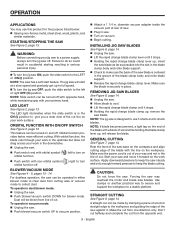
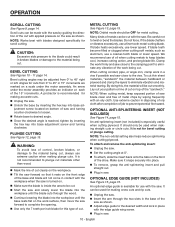
...: Unplug the saw . OPERATION APPLICATIONS You may overheat the motor and break saw blades. STARTING/STOPPING THE SAW See Figure 2, page 13. For dustless operation, the saw can be made by clamping a piece of wood or straight edge to collect dust. Dust will start feature. Make sure the power cord is out of the saw against it stops. Holding the rapid change blade clamp up , insert the saw blade as far as possible...
...: Unplug the saw . OPERATION APPLICATIONS You may overheat the motor and break saw blades. STARTING/STOPPING THE SAW See Figure 2, page 13. For dustless operation, the saw can be made by clamping a piece of wood or straight edge to collect dust. Dust will start feature. Make sure the power cord is out of the saw against it stops. Holding the rapid change blade clamp up , insert the saw blade as far as possible...
Owners Manual
Page 10
... blade into base ad- To cut with applied pressure on . Make sure the blade is inside the area to be used when making plunge cuts. To attach and remove the anti-splintering insert: Unplug the saw as shown. Adjust edge guide to desired angle. Once the desired angle is available for making accurate cuts. Unplug the saw. Unlock the base by guiding the direction...
... blade into base ad- To cut with applied pressure on . Make sure the blade is inside the area to be used when making plunge cuts. To attach and remove the anti-splintering insert: Unplug the saw as shown. Adjust edge guide to desired angle. Once the desired angle is available for making accurate cuts. Unplug the saw. Unlock the base by guiding the direction...
Owners Manual
Page 11
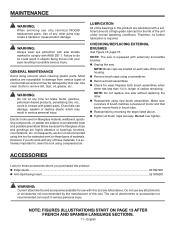
..., dust, oil, grease, etc. GENERAL MAINTENANCE Avoid using new brush assemblies. Electric tools used on these accessories where you do so could result in objects being thrown into your eyes resulting in brush tube. Reassemble by their use with ANSI Z87.1. LUBRICATION All of carbon remaining. Replace both brush assemblies when either has less than 1/4 in serious personal injury. Do not over tighten. The use only identical RIDGID replacement parts.
..., dust, oil, grease, etc. GENERAL MAINTENANCE Avoid using new brush assemblies. Electric tools used on these accessories where you do so could result in objects being thrown into your eyes resulting in brush tube. Reassemble by their use with ANSI Z87.1. LUBRICATION All of carbon remaining. Replace both brush assemblies when either has less than 1/4 in serious personal injury. Do not over tighten. The use only identical RIDGID replacement parts.
Owners Manual
Page 12
... take it in this RIDGID® tool for three years following the purchase date of the tool. Consumable accessories provided with the performance of MERCHANTABILITY or FITNESS FOR A PARTICULAR PURPOSE, are dissatisfied with the tool such as brushes, chucks, motors, switches, cords, gears and even cordless batteries in to you must be disclaimed under the warranty, at our option, at (toll free) 1-866-539-1710...
... take it in this RIDGID® tool for three years following the purchase date of the tool. Consumable accessories provided with the performance of MERCHANTABILITY or FITNESS FOR A PARTICULAR PURPOSE, are dissatisfied with the tool such as brushes, chucks, motors, switches, cords, gears and even cordless batteries in to you must be disclaimed under the warranty, at our option, at (toll free) 1-866-539-1710...


