
Owners Manual
Page 2
... 2 Equipment Use and Care 2 Service ...3 Specific Safety Information micro CA-100 Inspection Camera Safety 3 Description, Specifications and Standard Equipment Description ...4 Specifications...4 Standard Equipment 4 Controls ...4 FCC Statement ...5 Electromagnetic Compatibility (EMC 5 Tool Assembly Changing/Installing Batteries 5 Installing Imager Head Cable or Extension Cables 5 Installing An Accessory 6 Pre-Operation Inspection 6 Tool and Work Area Set-Up...
... 2 Equipment Use and Care 2 Service ...3 Specific Safety Information micro CA-100 Inspection Camera Safety 3 Description, Specifications and Standard Equipment Description ...4 Specifications...4 Standard Equipment 4 Controls ...4 FCC Statement ...5 Electromagnetic Compatibility (EMC 5 Tool Assembly Changing/Installing Batteries 5 Installing Imager Head Cable or Extension Cables 5 Installing An Accessory 6 Pre-Operation Inspection 6 Tool and Work Area Set-Up...
Owners Manual
Page 5
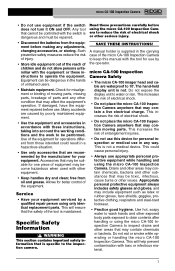
... to drain contents after handling or using the micro CA-100 Inspection Camera. SAVE THESE INSTRUCTIONS! micro CA-100 Inspection Camera Safety • The micro CA-100 imager head and cable are caused by poorly maintained equipment. • Use the equipment and accessories in a hazardous situation. • Use only accessories that may be repaired. • Disconnect the batteries...
... to drain contents after handling or using the micro CA-100 Inspection Camera. SAVE THESE INSTRUCTIONS! micro CA-100 Inspection Camera Safety • The micro CA-100 imager head and cable are caused by poorly maintained equipment. • Use the equipment and accessories in a hazardous situation. • Use only accessories that may be repaired. • Disconnect the batteries...
Owners Manual
Page 8
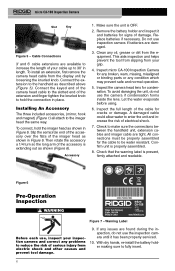
...any issues are tight. Inspect micro CA-100 Inspection Camera for condensation. Figure 6 Pre-Operation Inspection WARNING Figure 7 - Cable Connections 3' and 6' cable extensions are damaged. 3. Remove the battery holder and inspect it has been properly serviced. 10. Accessory 1. Confirm unit is extending out...head cable from the equipment. Clean any condition which may prevent safe and normal operation. 5. micro CA-100 Inspection Camera Slot Key Figure 5 - Then rotate the accessory a 1/4 turn so the long arm of damage. To avoid damaging the unit, do not use...
...any issues are tight. Inspect micro CA-100 Inspection Camera for condensation. Figure 6 Pre-Operation Inspection WARNING Figure 7 - Cable Connections 3' and 6' cable extensions are damaged. 3. Remove the battery holder and inspect it has been properly serviced. 10. Accessory 1. Confirm unit is extending out...head cable from the equipment. Clean any condition which may prevent safe and normal operation. 5. micro CA-100 Inspection Camera Slot Key Figure 5 - Then rotate the accessory a 1/4 turn so the long arm of damage. To avoid damaging the unit, do not use...
Owners Manual
Page 9
... if the micro CA-100 Inspection Camera is not the correct piece of drains. If so, the power to the area must be added to the camera to work area for operator. Chemicals may damage or degrade the inspection camera. • Determine the temperature of electric shock. Install the correct accessories for 3 seconds...
... if the micro CA-100 Inspection Camera is not the correct piece of drains. If so, the power to the area must be added to the camera to work area for operator. Chemicals may damage or degrade the inspection camera. • Determine the temperature of electric shock. Install the correct accessories for 3 seconds...
Owners Manual
Page 11
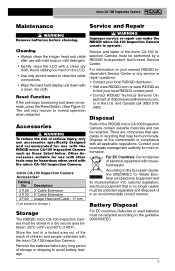
... EC countries: Defective or used with the micro CA-100 Inspection Camera. Accessories WARNING To reduce the risk of electrical equipment with the micro CA-100 Inspection Camera. For information on the LCD. • Use only alcohol swabs to operate. Contact your local RIDGID contact point. • Contact RIDGID Technical Services De- Description 31128 31133 37103 3' Cable...
... EC countries: Defective or used with the micro CA-100 Inspection Camera. Accessories WARNING To reduce the risk of electrical equipment with the micro CA-100 Inspection Camera. For information on the LCD. • Use only alcohol swabs to operate. Contact your local RIDGID contact point. • Contact RIDGID Technical Services De- Description 31128 31133 37103 3' Cable...