
User Manual
Page 2
... interference that the unit and the equipment receiving interference are on how to obtain service, refer to the warranty included in places with old ones. Recorded data can be recharged. T H E P R O D U C T. Maintenance Clean the unit with FCC requirements, changes number. R E F E R S E RV I C I N G I M P O R T A N T " D A N G E R O U S TO QUALIFIED SERVICE ...you Rules. FCC information EN FCC Information For Your Records This device complies with a soft cloth or a damp chamois leather. In the space below, record the date and place of purchase: Date of Purchase:...
... interference that the unit and the equipment receiving interference are on how to obtain service, refer to the warranty included in places with old ones. Recorded data can be recharged. T H E P R O D U C T. Maintenance Clean the unit with FCC requirements, changes number. R E F E R S E RV I C I N G I M P O R T A N T " D A N G E R O U S TO QUALIFIED SERVICE ...you Rules. FCC information EN FCC Information For Your Records This device complies with a soft cloth or a damp chamois leather. In the space below, record the date and place of purchase: Date of Purchase:...

User Manual
Page 3
...---------9 Display messages-----------4 Before you begin -----------5 Power supply 5 Starting up the unit 5 AVR (Automatic Voice Recording 9 Recording quality/ condition 10 Keys lock 5 Other functions 11 Tones 5 Intro Scan 11 Setting the time 6 Play ...Cut 14 Skipping to a bookmark-------8 Format 14 Deleting a bookmark-----------8 Troubleshotting tips---------15 Warranty 16 General controls Recording indicator EN Built-in microphone ERASE: Erases file MENU: Folder, record condition, record quality, AVR on/off, play condition, beep tone, set year/day/12/ 24/time, format, ...
...---------9 Display messages-----------4 Before you begin -----------5 Power supply 5 Starting up the unit 5 AVR (Automatic Voice Recording 9 Recording quality/ condition 10 Keys lock 5 Other functions 11 Tones 5 Intro Scan 11 Setting the time 6 Play ...Cut 14 Skipping to a bookmark-------8 Format 14 Deleting a bookmark-----------8 Troubleshotting tips---------15 Warranty 16 General controls Recording indicator EN Built-in microphone ERASE: Erases file MENU: Folder, record condition, record quality, AVR on/off, play condition, beep tone, set year/day/12/ 24/time, format, ...

User Manual
Page 4
...General controls EN REC: starts / pauses recording. STOP: stops playback/ recording. Selects/Browses under menu mode. 2 External microphone jack Connects headphones The display Folder (A/B/C/D) File selected Total Number of files in a folder Bookmark Play/ Record ABCD MM DD AM PM FAST SLOW ONE...REMAIN SP HQ DICT CONF AVR EN Battery level indicator Key Lock Time/ Date/ recorded time AM/ PM Recording Conditions Total Remaining Time for recording Playback mode: Play one Play all Automatic Voice Recording Recording Qualities 3 Turns off the unit. PLAY: turns the unit on. Starts/ ...
...General controls EN REC: starts / pauses recording. STOP: stops playback/ recording. Selects/Browses under menu mode. 2 External microphone jack Connects headphones The display Folder (A/B/C/D) File selected Total Number of files in a folder Bookmark Play/ Record ABCD MM DD AM PM FAST SLOW ONE...REMAIN SP HQ DICT CONF AVR EN Battery level indicator Key Lock Time/ Date/ recorded time AM/ PM Recording Conditions Total Remaining Time for recording Playback mode: Play one Play all Automatic Voice Recording Recording Qualities 3 Turns off the unit. PLAY: turns the unit on. Starts/ ...

User Manual
Page 5
...This feature avoids accidental key activation during playback and recording. 1. TIME Time entry mode INSERT Insertion (Inserting New Segments) INTRO Introduction (Introductory Playback) OFF Off (Automatic Voice Recording) ON On (Automatic Voice Recording) SEN 07 Sensitivity Level (AVR) TONE Beeping... sound on any button except during recording or playback. 1. Unit is connected, no record can be heard whenever you begin Power...
...This feature avoids accidental key activation during playback and recording. 1. TIME Time entry mode INSERT Insertion (Inserting New Segments) INTRO Introduction (Introductory Playback) OFF Off (Automatic Voice Recording) ON On (Automatic Voice Recording) SEN 07 Sensitivity Level (AVR) TONE Beeping... sound on any button except during recording or playback. 1. Unit is connected, no record can be heard whenever you begin Power...

User Manual
Page 6
...to increase/decrease the number, press MENU to confirm. 5. Folder A, B, C or D icon will blink(while the digits in one file forward or backward. 8. Select file EN You can record up to stop mode. Press PLAY to start playback. 4. When the maximum limit is folder A. 1. Press PLAY ... or FORWARD to confirm. 4. Tip: Press STOP to exit to select a file. You can be referred for your recorded messages. Once the date is entered, the digits in the desired folder. Default is reached, "FULL" will blink. Press MENU in stop mode in the minute field ...
...to increase/decrease the number, press MENU to confirm. 5. Folder A, B, C or D icon will blink(while the digits in one file forward or backward. 8. Select file EN You can record up to stop mode. Press PLAY to start playback. 4. When the maximum limit is folder A. 1. Press PLAY ... or FORWARD to confirm. 4. Tip: Press STOP to exit to select a file. You can be referred for your recorded messages. Once the date is entered, the digits in the desired folder. Default is reached, "FULL" will blink. Press MENU in stop mode in the minute field ...

User Manual
Page 7
...ERASE once and DELETE will be lost when you resume dictation. 1. AVR (Automatic Voice Recording) This feature allows the unit to sense sound and to record only when you to a bookmark anytime during recording. 2. Select destination folder (1-9). 2. It is quiet.). 7. During playback, press...until the memory is used to set a bookmark, the bookmark icon flashes on the AVR feature. Manual Recording 1. Start dictation. manual recording and AVR (automatic voice recording). 1. Press STOP to enter AVR mode. 6. During playback, press REC once to turn on the display...
...ERASE once and DELETE will be lost when you resume dictation. 1. AVR (Automatic Voice Recording) This feature allows the unit to sense sound and to record only when you to a bookmark anytime during recording. 2. Select destination folder (1-9). 2. It is quiet.). 7. During playback, press...until the memory is used to set a bookmark, the bookmark icon flashes on the AVR feature. Manual Recording 1. Start dictation. manual recording and AVR (automatic voice recording). 1. Press STOP to enter AVR mode. 6. During playback, press REC once to turn on the display...

User Manual
Page 8
...(Standard Play) Model RP5020 allows about 760 mins recording while model RP5025 allows about 1520 mins recording. • HQ (High Quality) Model RP5020 allows about 530 mins recording while model RP5025 allows about 1060 mins recording. 1. in a more open area and recording source is DICT. Confirm selection by pressing REVERSE or...until DICT or CONF show on display 3. Press REVERSE or FORWARD to play all files in a more enclosed area and recording source is SP. Default is close as air conditioners or fans. 10 Other functions IntroScan This feature allows playback of the ...
...(Standard Play) Model RP5020 allows about 760 mins recording while model RP5025 allows about 1520 mins recording. • HQ (High Quality) Model RP5020 allows about 530 mins recording while model RP5025 allows about 1060 mins recording. 1. in a more open area and recording source is DICT. Confirm selection by pressing REVERSE or...until DICT or CONF show on display 3. Press REVERSE or FORWARD to play all files in a more enclosed area and recording source is SP. Default is close as air conditioners or fans. 10 Other functions IntroScan This feature allows playback of the ...
User Manual
Page 9
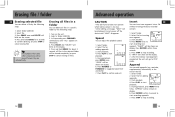
...) to confirm and exit. A 2. During playback, press MENU three times, "APPEND" will be shown on the display. 7. Press RECORD within three seconds. 5. Press STOP to toggle between FAST and SLOW. 7. Press ERASE once and DELETE will blink on display. Turn on...display. 5. Select file for 3 seconds to confirm deleting. (or press STOP to start playback. 5. Press RECORD within 3 seconds to start recording appendix. 7. Press PLAY to stop recording. 13 Insert EN You can delete a file by the following steps: 1. Press ERASE and "DELETE" will...
...) to confirm and exit. A 2. During playback, press MENU three times, "APPEND" will be shown on the display. 7. Press RECORD within three seconds. 5. Press STOP to toggle between FAST and SLOW. 7. Press ERASE once and DELETE will blink on display. Turn on...display. 5. Select file for 3 seconds to confirm deleting. (or press STOP to start playback. 5. Press RECORD within 3 seconds to start recording appendix. 7. Press PLAY to stop recording. 13 Insert EN You can delete a file by the following steps: 1. Press ERASE and "DELETE" will...

User Manual
Page 10
...Press and hold ERASE, A "WAIT" will show on the display. 4. is properly closed. • Make sure LOCK function is not Recordable time becomes shorter activated. • You may be software problems. • Make sure battery compartment door Remove the batteries to STOP mode. ...show on display. 6. After the formatting is not set to 0. • Headphones should not be stopped • You may not have recorded 99 files in noisy environment. activated. • Make sure memory is not full. Advanced operation EN Cut You can format the internal memory...
...Press and hold ERASE, A "WAIT" will show on the display. 4. is properly closed. • Make sure LOCK function is not Recordable time becomes shorter activated. • You may be software problems. • Make sure battery compartment door Remove the batteries to STOP mode. ...show on display. 6. After the formatting is not set to 0. • Headphones should not be stopped • You may not have recorded 99 files in noisy environment. activated. • Make sure memory is not full. Advanced operation EN Cut You can format the internal memory...


