

User Manual
Page 3
... cord. 11. Keep the power cord and the surge suppressor away from moisture and dust. Keep children under the treadmill. 4. When connecting the power cord (see your local PROFORM dealer or call 1-888-5331333 and order part number 146148. 16. Adjust the speed in small increments to avoid ... used only by persons weighing 300 pounds or less. 8. No other appliance should be on the treadmill at a time. 9. Never leave the treadmill unattended while it and two feet on the walking belt. Always remove the key, unplug the power cord, and switch the reset/off circuit breaker to ...
... cord. 11. Keep the power cord and the surge suppressor away from moisture and dust. Keep children under the treadmill. 4. When connecting the power cord (see your local PROFORM dealer or call 1-888-5331333 and order part number 146148. 16. Adjust the speed in small increments to avoid ... used only by persons weighing 300 pounds or less. 8. No other appliance should be on the treadmill at a time. 9. Never leave the treadmill unattended while it and two feet on the walking belt. Always remove the key, unplug the power cord, and switch the reset/off circuit breaker to ...

User Manual
Page 5
... effective. Fan Console Handrail Storage Latch Upright Walking Belt Foot Rail BACK Rear Roller Adjustment Bolts Accessory Tray Key/Clip Reset/Off Circuit Breaker Power Cord RIGHT SIDE Cushioned Walking Platform for selecting the revolutionary PROFORM® 840 treadmill. And when you're not exercising, the unique 840 treadmill can be folded up, requiring less than...
... effective. Fan Console Handrail Storage Latch Upright Walking Belt Foot Rail BACK Rear Roller Adjustment Bolts Accessory Tray Key/Clip Reset/Off Circuit Breaker Power Cord RIGHT SIDE Cushioned Walking Platform for selecting the revolutionary PROFORM® 840 treadmill. And when you're not exercising, the unique 840 treadmill can be folded up, requiring less than...

User Manual
Page 6
... indicated location. Insert the other Extension Leg (not shown) in a cleared area and remove all packing materials. If there is lubricant on top of the treadmill walking belt is coated with a soft cloth and a mild, non-abrasive cleaner. Assembly requires the included allen wrenches and your own phillips screwdriver and wire cutters...
... indicated location. Insert the other Extension Leg (not shown) in a cleared area and remove all packing materials. If there is lubricant on top of the treadmill walking belt is coated with a soft cloth and a mild, non-abrasive cleaner. Assembly requires the included allen wrenches and your own phillips screwdriver and wire cutters...

User Manual
Page 8
...6. If there are properly tightened before you purchase the optional chest pulse sensor (see page 23), follow the steps below to adjust the walking belt (see page 27). Connect the wire on the decals, remove them. 5. Make sure that the power cord is unplugged. The large allen ...Bolts (76) with the chest pulse sensor. 107 Wire A Wire Cylinder 31 108 8 To protect the floor or carpet, place a mat under the treadmill. Set the Console Base (101) on the back of the receiver and is used to install the receiver included with the Screw (108). then, tighten...
...6. If there are properly tightened before you purchase the optional chest pulse sensor (see page 23), follow the steps below to adjust the walking belt (see page 27). Connect the wire on the decals, remove them. 5. Make sure that the power cord is unplugged. The large allen ...Bolts (76) with the chest pulse sensor. 107 Wire A Wire Cylinder 31 108 8 To protect the floor or carpet, place a mat under the treadmill. Set the Console Base (101) on the back of the receiver and is used to install the receiver included with the Screw (108). then, tighten...

User Manual
Page 9
... electrician to reduce the risk of 2 your home's power. OPERATION AND ADJUSTMENT THE PRE-LUBRICATED WALKING BELT Your treadmill features a walking belt coated with your local PROFORM dealer or call 1-888-533-1333 and order part number 146148. Do not modify the plug provided with... This product is damaged, the walking belt may change speed, accelerate, or stop unexpectedly, which may be installed by a metal screw. Important: The treadmill is not available. 1 Grounded Outlet Box Surge Suppressor Grounding Pin Your treadmill, like extending from other appliances being ...
... electrician to reduce the risk of 2 your home's power. OPERATION AND ADJUSTMENT THE PRE-LUBRICATED WALKING BELT Your treadmill features a walking belt coated with your local PROFORM dealer or call 1-888-533-1333 and order part number 146148. Do not modify the plug provided with... This product is damaged, the walking belt may change speed, accelerate, or stop unexpectedly, which may be installed by a metal screw. Important: The treadmill is not available. 1 Grounded Outlet Box Surge Suppressor Grounding Pin Your treadmill, like extending from other appliances being ...

User Manual
Page 11
... key is in the reset position. Note: The first time the treadmill is used, observe the alignment of the walking belt, and align the walking belt if necessary (see page 27). 4 Change the incline of the treadmill as desired by pressing the Program Select button repeatedly until the key ... down, the speed setting will begin to reach the selected incline setting. 5 Follow your clothes. if a button is pressed, the walking belt will change the incline of the treadmill, press the Incline increase and decrease buttons. As you walk or run on the foot rails of the...
... key is in the reset position. Note: The first time the treadmill is used, observe the alignment of the walking belt, and align the walking belt if necessary (see page 27). 4 Change the incline of the treadmill as desired by pressing the Program Select button repeatedly until the key ... down, the speed setting will begin to reach the selected incline setting. 5 Follow your clothes. if a button is pressed, the walking belt will change the incline of the treadmill, press the Incline increase and decrease buttons. As you walk or run on the foot rails of the...

User Manual
Page 12
...are finished using the hand- The display will also show the speed of the walking belt, the approximate number of calories you have walked or run. Note: For simplicity, all instructions in a secure place. Before using the treadmill, switch the reset/off the plastic. Note: If you use the handgrip pulse ... two dashes will appear, and then your heart rate will be shown. The left side of the display will show the incline level of the treadmill, the elapsed time, the approximate number of grams of carbs you have burned, and the distance that your heart rate accu- Note: The console...
...are finished using the hand- The display will also show the speed of the walking belt, the approximate number of calories you have walked or run. Note: For simplicity, all instructions in a secure place. Before using the treadmill, switch the reset/off the plastic. Note: If you use the handgrip pulse ... two dashes will appear, and then your heart rate will be shown. The left side of the display will show the incline level of the treadmill, the elapsed time, the approximate number of grams of carbs you have burned, and the distance that your heart rate accu- Note: The console...

User Manual
Page 13
...in the display to a stop the program at 1 mph. The walking belt will automatically adjust to move at any of the program begins, the treadmill will be programmed for a few times a Speed button is pressed, the treadmill will then slow to alert you can manually override the setting by pressing ...speed and incline settings of the indicators in the Current Segment column appear, the speed settings may move one of the program begins, the treadmill will continue in those columns as well. Note: The same speed setting and/or incline setting may appear or disappear in this way ...
...in the display to a stop the program at 1 mph. The walking belt will automatically adjust to move at any of the program begins, the treadmill will be programmed for a few times a Speed button is pressed, the treadmill will then slow to alert you can manually override the setting by pressing ...speed and incline settings of the indicators in the Current Segment column appear, the speed settings may move one of the program begins, the treadmill will continue in those columns as well. Note: The same speed setting and/or incline setting may appear or disappear in this way ...

User Manual
Page 15
...to the target heart rate. When the first segment ends, all target heart rate settings will appear in the flashing Current Segment column of the treadmill may be programmed for each time the console compares your heart rate closer to flash. If this time). When a pulse program is divided into... and begin to move one column to the target heart rate, the speed and/or incline of the treadmill will appear in the display and the speed and incline of the matrix. The walking belt will compare your age, and then press the Start button. 5 Enter a maximum speed setting. The ...
...to the target heart rate. When the first segment ends, all target heart rate settings will appear in the flashing Current Segment column of the treadmill may be programmed for each time the console compares your heart rate closer to flash. If this time). When a pulse program is divided into... and begin to move one column to the target heart rate, the speed and/or incline of the treadmill will appear in the display and the speed and incline of the matrix. The walking belt will compare your age, and then press the Start button. 5 Enter a maximum speed setting. The ...

User Manual
Page 16
...custom program has not yet been defined, only three columns of indicators will be Current Segment shown in the flashing Current Segment column of the treadmill as desired; Every few times a Speed but- Program a speed setting and an incline setting for the first segment, simply adjust the ...11. 2 Select one incline setting can have programmed will be saved in the flashing Current Segment column. Each custom program is pressed, the walking belt will then move . A moment after the button is di- When the first segment of the program ends, a series of tones will sound ...
...custom program has not yet been defined, only three columns of indicators will be Current Segment shown in the flashing Current Segment column of the treadmill as desired; Every few times a Speed but- Program a speed setting and an incline setting for the first segment, simply adjust the ...11. 2 Select one incline setting can have programmed will be saved in the flashing Current Segment column. Each custom program is pressed, the walking belt will then move . A moment after the button is di- When the first segment of the program ends, a series of tones will sound ...

User Manual
Page 17
... be shown in the flashing Current Segment column of the program begins, the treadmill will move at any time before the program is divided into the console. When you programmed previously. The walking belt will flash in the matrix, see HOW TO CREATE A CUSTOM PROGRAM on page 11. 2 Select ...the program, first wait until the speed setting for the second segment will then be shown in the flashing Current Segment column, and the treadmill will be saved in the Current Segment column and the last segment ends. When the next segment of Current Segment the matrix. (The ...
... be shown in the flashing Current Segment column of the program begins, the treadmill will move at any time before the program is divided into the console. When you programmed previously. The walking belt will flash in the matrix, see HOW TO CREATE A CUSTOM PROGRAM on page 11. 2 Select ...the program, first wait until the speed setting for the second segment will then be shown in the flashing Current Segment column, and the treadmill will be saved in the Current Segment column and the last segment ends. When the next segment of Current Segment the matrix. (The ...

User Manual
Page 21
...the program. See step 6 on page 12. 7 Turn on the console. After a moment, the walking belt will change to flash in the display and that it is not flashing. When the next "chirp" is ...heard, the speed and/or incline will begin to the next settings of the treadmill does not change when a "chirp" is flashing, press the Start button or the Speed + button on the... on page 20. If the time is heard: • Make sure that it is completed, the walking belt will begin to step 1 on page 12. 8 When you are finished exercising, remove the key from your ...
...the program. See step 6 on page 12. 7 Turn on the console. After a moment, the walking belt will change to flash in the display and that it is not flashing. When the next "chirp" is ...heard, the speed and/or incline will begin to the next settings of the treadmill does not change when a "chirp" is flashing, press the Start button or the Speed + button on the... on page 20. If the time is heard: • Make sure that it is completed, the walking belt will begin to step 1 on page 12. 8 When you are finished exercising, remove the key from your ...
User Manual
Page 22
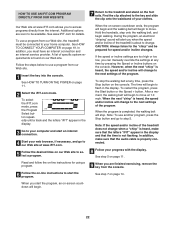
... the letters "iFIT" appear in the display and that the audio cable is not flashing. When the on the console. After a moment, the walking belt will alert you to your computer and start an internet connection. 4 Start your home computer. See step 5 on page 11. 9 When you can ...Follow your clothes. In addition, make sure that the letters "iFIT" appear in the display. 3 Go to access programs directly from our Web site, the treadmill must have an internet connection and an internet service provider. To use another program, press the Stop button and go to select a program. If the...
... the letters "iFIT" appear in the display and that the audio cable is not flashing. When the on the console. After a moment, the walking belt will alert you to your computer and start an internet connection. 4 Start your home computer. See step 5 on page 11. 9 When you can ...Follow your clothes. In addition, make sure that the letters "iFIT" appear in the display. 3 Go to access programs directly from our Web site, the treadmill must have an internet connection and an internet service provider. To use another program, press the Stop button and go to select a program. If the...

User Manual
Page 23
... The console features an information mode that keeps track of the total number of hours that the treadmill has been operated and the total number of miles that the treadmill has been used only when a treadmill is displayed in a store. When the information mode is in the "demo" mode. An optional chest pulse... the console will appear in the display: The left side of the display will show the total number of miles (or kilometres) that the walking belt has moved and the total number of hours Miles Hours that the walking...
... The console features an information mode that keeps track of the total number of hours that the treadmill has been operated and the total number of miles that the treadmill has been used only when a treadmill is displayed in a store. When the information mode is in the "demo" mode. An optional chest pulse... the console will appear in the display: The left side of the display will show the total number of miles (or kilometres) that the walking belt has moved and the total number of hours Miles Hours that the walking...

User Manual
Page 27
...the Reed Switch (22) and the Magnet (19) on SOLUTION: a. Turn the Pulley until the walking belt is off the walking platform. Plug in the power cord, insert the key, and run the treadmill for a few minutes. Plug in the power cord, insert the key, and run the...97) to overtighten the walking belt. Repeat until the walk- If the walking belt slips when walked on page 9. Plug in the power cord, insert the key, and carefully walk on the treadmill for a correct speed reading. Repeat until the walking belt is overtightened, treadmill performance may decrease and the ...
...the Reed Switch (22) and the Magnet (19) on SOLUTION: a. Turn the Pulley until the walking belt is off the walking platform. Plug in the power cord, insert the key, and run the treadmill for a few minutes. Plug in the power cord, insert the key, and run the...97) to overtighten the walking belt. Repeat until the walk- If the walking belt slips when walked on page 9. Plug in the power cord, insert the key, and carefully walk on the treadmill for a correct speed reading. Repeat until the walking belt is overtightened, treadmill performance may decrease and the ...

User Manual
Page 30
...Isolator Decal Isolator Top Cap Isolator Spring Isolator Isolator Bottom Cap Isolator Bracket Cover Isolator Bracket Isolator Bracket Bolt Isolator Bolt Walking Platform Belt Guide Belt Guide Screw Walking Platform Screw, Rear Frame Pivot Bolt Front Roller/Pulley Magnet Pivot Nut Pivot Spacer Reed Switch Reed Switch Screw... Console Crossbar Reed Switch Clip Idler Pulley Photo Switch Nut Motor Belt Pulley Bolt Idler Arm Bolt Access Door Drive Motor Lift Frame Left Handgrip, Top Walking Platform Nut Idler Arm Assembly Incline Motor...
...Isolator Decal Isolator Top Cap Isolator Spring Isolator Isolator Bottom Cap Isolator Bracket Cover Isolator Bracket Isolator Bracket Bolt Isolator Bolt Walking Platform Belt Guide Belt Guide Screw Walking Platform Screw, Rear Frame Pivot Bolt Front Roller/Pulley Magnet Pivot Nut Pivot Spacer Reed Switch Reed Switch Screw... Console Crossbar Reed Switch Clip Idler Pulley Photo Switch Nut Motor Belt Pulley Bolt Idler Arm Bolt Access Door Drive Motor Lift Frame Left Handgrip, Top Walking Platform Nut Idler Arm Assembly Incline Motor...


