ProForm 8.9s Support and Manuals
Get Help and Manuals for this ProForm item

View All Support Options Below
Free ProForm 8.9s manuals!
Problems with ProForm 8.9s?
Ask a Question
Free ProForm 8.9s manuals!
Problems with ProForm 8.9s?
Ask a Question
Popular ProForm 8.9s Manual Pages
English Manual - Page 1
... our factory.
TO AVOID UNNECESSARY DELAYS, PLEASE CALL DIRECT TO OUR TOLL-FREE CUSTOMER HOT LINE.
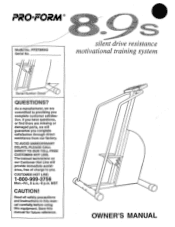
OWNER'S MANUAL PRO•FORM'
MoBet No. Read all safety precautions and instructions in this manual carefully before using this manual for future reference.
CUSTOMER HOT LINE:
1-800-999-3756
Mon.-Fri., 6 a.m.-6 p.m. if you have questions, or find...
English Manual - Page 2

... BEGIN ASSEMBLY STEPPER OPERATION TROUBLE-SHOOTING AND MAINTENANCE CONDITIONING GUIDELINES PART LIST EXPLODED DRAWING ORDERING REPLACEMENT PARTS LIMITED WARRANTY
2 3 4 5 10 12 14 15 Back Cover Back Cover
IMPORTANT SAFETY PRECAUTIONS
WARNING: To reduce the risk of serious injury, read the following important safety precautions before using the stepper.
5. Plug the power cord in this or any...
English Manual - Page 3

BEFORE YOU BEGIN
Congratulations for the location of your safety and benefit, read this manual for selecting the PROFORM° 8.9s stepper with magnetic resistance and independent action pedals. ThePROFORM 8.9s stepper blends advanced engineering with the parts that are labeled. The serial number can be healthier in the convenience and privacy of the decal). If...
English Manual - Page 4

...of the Rear Stabilizer.) Turn the Front Stabilizer so the dimpled bolt holes are toward the Frame (11). Push all parts in place temporarily. J .
6
ti Attach the Rear Stabilizer to the Frame with a 3/8" x 3 1/2" Screw...the Left Handrail to hold it .
3. Read each end of the Frame and place a support under it in a cleared area and remove the packing materials. Press an Endcap (43) ...
English Manual - Page 5

... from walkways and heated surfaces. Plug the Power Cord (70) into a 120-volt outlet. 5.
Press a Bumper (7) onto the right Lower Pedal Arm (56). Plug the trans-... could be
damaged.
0°
5 Press a Bumper onto the left Lower Pedal Arm.
56 7
STEPPER OPERATION
If the power key is in the console, remove it. Turn the
0°
power on the power cord into the Power Plug (65). 65
70 6.
English Manual - Page 6

...: WEIGHT SET, TIME/SET, STEP COUNT/SET, STEPS PER MINUTE, CALORIES, PULSE, MAX. Various indicators on the console will guide you through any of four preset workout programs. You can be controlled with a touch of a button. If this occurs, remove the power key, wait for ten seconds and then reinsert the power key. In the manual mode...
English Manual - Page 7

... forward slightly, always keeping your weight, in pounds. The modes are pressed, it .
The buttons can be set a time goal rapidly. MANUAL MODE OPERATION
When the power is turned on, the console will be in the manual mode and the stepping pace will slowly sink. Hold the handrails and step onto the pedals; Begin...
English Manual - Page 8

...your weight into the jack on the console, and attach the earclip to show the pace setting programmed for user programs and preset programs. Note: This mode can be held down to...held down to change SCAN: This mode automatically displays all twenty segments.
First, select the TIME/SET mode by 5 steps per minute. STEPS MIN. CALORIES: This mode displays the total number of...
English Manual - Page 9

... segment will be switched to the manual mode by pressing the MANUAL button. To start the program, press the START/STOP button and begin stepping. Although the settings of a preset program can be..."wake" the console, press any changes made to conserve power.
TURNING OFF THE POWER
Remove the power key from the console. Keep the power key in the CURRENT SEGMENT column and no time remains...
English Manual - Page 10

... is properly adjusted.
Remove
33
the Side Shields. Hold the 3/8" Adjustment Nut (4)
stationary with denatured alcohol. TROUBLE-SHOOTING THE CONSOLE
If the pulse earclip does not function properly, the earclip should be cleaned. Replace any worn parts immediately. If the Tension Bracket is centered (see assembly step 3 on page 4. Step for a few minutes...
English Manual - Page 12

... rate can measure your heart rate using your heart rate as reduce soreness and other post-exercise problems.
To maintain or improve your breath. After a few months of heart rate readings. You can...the first few months of your heart rate should consist of three basic parts: a warm-up . If your muscles as well as a guide. WARNING: The pulse earclip is too low, increase the intensity of ...
English Manual - Page 14

...Harness/Power Plug 66 3 #4 x 3/8" Screw 67 2 #2 x 1/2" Screw 68 2 #12 x 1/2" Screw 69 1 Speed Sensor. 70 1 Power Cord 71 1 Tension Motor # 1 Owner's Manual
Note: "#" indicates a non-illustrated part. See the back cover for information about ordering replacement parts.
14 Qty. Specifications are... Pedal Arm 57 1 Left Upper Pedal Arm 58 1 Right Upper Pedal Arm 59 4 5itt- PART LIST Model No.
English Manual - Page 15

PFST89042
54 -st
10 2
• .01
3
5
is
I
9
R0395A
1-6
54
8
65
23
6
24
11
52
61
64 4
13
70 5 3
cif
14
48
•
)4. 18
35 :71k
67-. !,\
48 '‹. 16
8594,-44Z9-
4 0,
66 .
.
36
45 -47
" 17
' 47 58
19 /
27
a'N' . Me)
..4..,.c.
41 s• r 48
4
'
, 9A 27,
AV-
44 .
34 EXPLODED DRAWING Model No.
English Manual - Page 16

... also have other warranty beyond that specifically set forth above is limited to state. ORDERING REPLACEMENT PARTS
To order replacement parts, simply call our Customer Service Department toll-free at one of its authorized service centers with all freight and other transportation charges prepaid, accompanied by sufficient proof of the product (PROFORM° 8.9s stepper). 3. All products for...
ProForm 8.9s Reviews
We have not received any reviews for ProForm yet.