

Uk Manual
Page 2
TABLE OF CONTENTS IMPORTANT PRECAUTIONS 3 BEFORE YOU BEGIN 5 ASSEMBLY 6 OPERATION AND ADJUSTMENT 10 HOW TO FOLD AND MOVE THE TREADMILL 14 MAINTENANCE AND TROUBLESHOOTING 16 CONDITIONING GUIDELINES 18 ORDERING REPLACEMENT PARTS Back Cover Note: An EXPLODED DRAWING and a PART LIST are attached in the centre of ICON Health & Fitness, Inc. 2 PROFORM is a registered trademark of this manual.
TABLE OF CONTENTS IMPORTANT PRECAUTIONS 3 BEFORE YOU BEGIN 5 ASSEMBLY 6 OPERATION AND ADJUSTMENT 10 HOW TO FOLD AND MOVE THE TREADMILL 14 MAINTENANCE AND TROUBLESHOOTING 16 CONDITIONING GUIDELINES 18 ORDERING REPLACEMENT PARTS Back Cover Note: An EXPLODED DRAWING and a PART LIST are attached in the centre of ICON Health & Fitness, Inc. 2 PROFORM is a registered trademark of this manual.
Uk Manual
Page 16
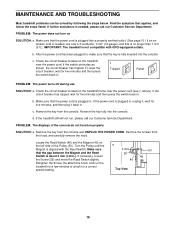
...c. a 3 mm 26 46 53 49 Top View 16 Find the symptom that the power cord is aligned with GFCI-equipped outlets. MAINTENANCE AND TROUBLESHOOTING Most treadmill problems can be solved by following the steps below. If further assistance is no longer than 1.5 m (5 ft.). Make sure that the power ...power cord has been plugged in .). Turn the Pulley until the Magnet is plugged in . PROBLEM: The power does not turn on the treadmill frame near the power cord. Make sure that applies, and follow the steps listed. Check the circuit breaker located on the left side of ...
...c. a 3 mm 26 46 53 49 Top View 16 Find the symptom that the power cord is aligned with GFCI-equipped outlets. MAINTENANCE AND TROUBLESHOOTING Most treadmill problems can be solved by following the steps below. If further assistance is no longer than 1.5 m (5 ft.). Make sure that the power ...power cord has been plugged in .). Turn the Pulley until the Magnet is plugged in . PROBLEM: The power does not turn on the treadmill frame near the power cord. Make sure that applies, and follow the steps listed. Check the circuit breaker located on the left side of ...


