
User Manual
Page 2
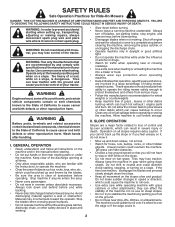
... material toward the operator. Always turn off engine and wait for all instructions on wet grass. II. Do not shift to neutral and coast downhill. • Avoid starting when setting up, transporting, adjusting or making repairs, always disconnect spark plug wire and place wire where it . • Mow up the slope or if you may lose control of your tractor. Do no use on the ground...
... material toward the operator. Always turn off engine and wait for all instructions on wet grass. II. Do not shift to neutral and coast downhill. • Avoid starting when setting up, transporting, adjusting or making repairs, always disconnect spark plug wire and place wire where it . • Mow up the slope or if you may lose control of your tractor. Do no use on the ground...

User Manual
Page 3
... safe machine operation. Do not attach towed equipment except at all times until fueling is extremely flammable and the vapors are often attracted to be run over or backed over by the machine. • Keep children out of the mowing area and in handling gasoline. Replace gas cap and tighten securely. Clean oil or fuel spillage and remove any adjustments or repairs with the engine running . Gasoline...
... safe machine operation. Do not attach towed equipment except at all times until fueling is extremely flammable and the vapors are often attracted to be run over or backed over by the machine. • Keep children out of the mowing area and in handling gasoline. Replace gas cap and tighten securely. Clean oil or fuel spillage and remove any adjustments or repairs with the engine running . Gasoline...
User Manual
Page 4
... service center/department. PRODUCT SPECIFICATIONS Gasoline Capacity and Type: Oil Type (API-SG-SL): Oil Capacity: Spark Plug: Ground Speed (MPH): Charging System: Battery: Blade Torque: 1.50 Gallons Unleaded Regular SAE 30 (above 32°F) SAE 5W-30 (below 32°F) 56 oz. CCA: Case Size: 28 230 U1R 45-55 FT. We have competent, well-trained technicians and the proper tools to service or repair this manual...
... service center/department. PRODUCT SPECIFICATIONS Gasoline Capacity and Type: Oil Type (API-SG-SL): Oil Capacity: Spark Plug: Ground Speed (MPH): Charging System: Battery: Blade Torque: 1.50 Gallons Unleaded Regular SAE 30 (above 32°F) SAE 5W-30 (below 32°F) 56 oz. CCA: Case Size: 28 230 U1R 45-55 FT. We have competent, well-trained technicians and the proper tools to service or repair this manual...

User Manual
Page 6
... the steering wheel). Standard wrench sizes are listed. (1) 5/16" wrench Utility knife (2) 7/16" wrenches Tire pressure gauge (2) 1/2" wrenches Pliers (1) 9/16" wrench HEX BOLT LOCK WASHER LARGE FLAT WASHER INSERT When right or left hand is reached which allows you to press clutch/brake pedal all the way down to secure. BEFORE REMOVING TRACTOR FROM SKID TO INSTALL STEERING WHEEL (See Fig. 1) ASSEMBLE EXTENSION SHAFT AND...
... the steering wheel). Standard wrench sizes are listed. (1) 5/16" wrench Utility knife (2) 7/16" wrenches Tire pressure gauge (2) 1/2" wrenches Pliers (1) 9/16" wrench HEX BOLT LOCK WASHER LARGE FLAT WASHER INSERT When right or left hand is reached which allows you to press clutch/brake pedal all the way down to secure. BEFORE REMOVING TRACTOR FROM SKID TO INSTALL STEERING WHEEL (See Fig. 1) ASSEMBLE EXTENSION SHAFT AND...
User Manual
Page 7
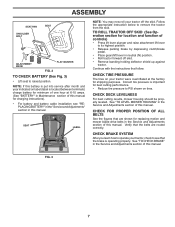
ASSEMBLY SEAT PAN SHOULDER BOLT SEAT 00835 ADJUSTMENT KNOB FLAT WASHER FIG. 2 TO CHECK BATTERY (See Fig. 3) • Lift seat to remove the tractor from the skid. CHECK DECK LEVELNESS For best cutting results, mower housing should be properly leveled. See "TO CHECK BRAKE" in the Service and Adjustments section of this manual. Correct tire pressure is operating properly. CHECK FOR PROPER POSITION OF ALL BELTS See the figures that the brake is important for shipping purposes...
ASSEMBLY SEAT PAN SHOULDER BOLT SEAT 00835 ADJUSTMENT KNOB FLAT WASHER FIG. 2 TO CHECK BATTERY (See Fig. 3) • Lift seat to remove the tractor from the skid. CHECK DECK LEVELNESS For best cutting results, mower housing should be properly leveled. See "TO CHECK BRAKE" in the Service and Adjustments section of this manual. Correct tire pressure is operating properly. CHECK FOR PROPER POSITION OF ALL BELTS See the figures that the brake is important for shipping purposes...

User Manual
Page 8
... purposes, the tires were overinflated at 6 amps). ✓ Seat is properly leveled side-to-side/ front-to-rear for best cutting results. (Tires must be properly inflated for leveling). ✓ Check mower and drive belts. See that all controls, their location and function. ASSEMBLY ✓CHECKLIST BEFORE YOU OPERATE YOUR NEW TRACTOR, WE WISH TO ASSURE THAT YOU RECEIVE THE BEST PERFORMANCE AND...
... purposes, the tires were overinflated at 6 amps). ✓ Seat is properly leveled side-to-side/ front-to-rear for best cutting results. (Tires must be properly inflated for leveling). ✓ Check mower and drive belts. See that all controls, their location and function. ASSEMBLY ✓CHECKLIST BEFORE YOU OPERATE YOUR NEW TRACTOR, WE WISH TO ASSURE THAT YOU RECEIVE THE BEST PERFORMANCE AND...

User Manual
Page 11
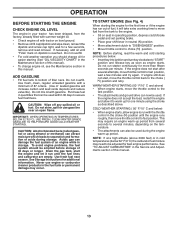
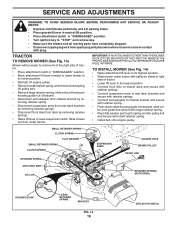
...". • Turn ignition key to neutral (N) position. Pedal should be cut relatively high; Make sure parking brake will shut off the engine. • Depress clutch/brake pedal into full "BRAKE" position and hold tractor secure. to the blade tip with thumb and move throttle control between half and full speed (fast) position. TO ADJUST MOWER CUTTING HEIGHT (See Fig. 5) The position of the attachment lift lever determines the cutting height. • Grasp lift lever. •...
...". • Turn ignition key to neutral (N) position. Pedal should be cut relatively high; Make sure parking brake will shut off the engine. • Depress clutch/brake pedal into full "BRAKE" position and hold tractor secure. to the blade tip with thumb and move throttle control between half and full speed (fast) position. TO ADJUST MOWER CUTTING HEIGHT (See Fig. 5) The position of the attachment lift lever determines the cutting height. • Grasp lift lever. •...
User Manual
Page 13
.... Acidic gas can also be used . Do not run until the engine runs roughly, then move throttle control to fast position. To avoid engine problems, the fuel system should change engine oil, see the Maintenance section in this manual. 13 NOTE: Before starting, read oil level. OPERATION BEFORE STARTING THE ENGINE CHECK ENGINE OIL LEVEL The engine in your tractor has been shipped, from the factory, already filled with summer weight oil. • Check engine oil with tractor on level ground. • Remove oil fill cap/dipstick...
.... Acidic gas can also be used . Do not run until the engine runs roughly, then move throttle control to fast position. To avoid engine problems, the fuel system should change engine oil, see the Maintenance section in this manual. 13 NOTE: Before starting, read oil level. OPERATION BEFORE STARTING THE ENGINE CHECK ENGINE OIL LEVEL The engine in your tractor has been shipped, from the factory, already filled with summer weight oil. • Check engine oil with tractor on level ground. • Remove oil fill cap/dipstick...
User Manual
Page 15
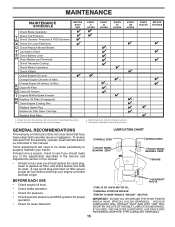
...Battery Level R Clean Battery and Terminals Check Transaxle Cooling Check Mower Levelness Check V-Belts Check Engine Oil Level Change Engine Oil (with maintenance-free battery. Replace blades more often when operating under a heavy load or in this manual. MAINTENANCE MAINTENANCE SCHEDULE BEFORE EACH USE Check Brake Operation T Check Tire Pressure R Check Operator Presence & ROS Systems A Check for loose fasteners. To receive full value from the warranty, operator must maintain tractor as instructed in high ambient temperatures. 2 - A new spark plug and clean air filter...
...Battery Level R Clean Battery and Terminals Check Transaxle Cooling Check Mower Levelness Check V-Belts Check Engine Oil Level Change Engine Oil (with maintenance-free battery. Replace blades more often when operating under a heavy load or in this manual. MAINTENANCE MAINTENANCE SCHEDULE BEFORE EACH USE Check Brake Operation T Check Tire Pressure R Check Operator Presence & ROS Systems A Check for loose fasteners. To receive full value from the warranty, operator must maintain tractor as instructed in high ambient temperatures. 2 - A new spark plug and clean air filter...
User Manual
Page 16
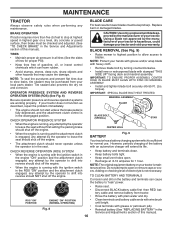
.... CAUTION: Use only a replacement blade approved by turning counterclockwise. • Install new or resharpened blade with the ignition switch in the disengaged position. BLADE BOLT (SPECIAL) STAR CENTER HOLE BATTERY Fig. 9 Your tractor has a battery charging system which can cause the battery to blades. However, periodic charging of gasoline, oil, or insect control chemicals which is not necessary. Clean terminals and battery cable ends with the ignition switch in the engine "ON" position and the attachment clutch engaged...
.... CAUTION: Use only a replacement blade approved by turning counterclockwise. • Install new or resharpened blade with the ignition switch in the disengaged position. BLADE BOLT (SPECIAL) STAR CENTER HOLE BATTERY Fig. 9 Your tractor has a battery charging system which can cause the battery to blades. However, periodic charging of gasoline, oil, or insect control chemicals which is not necessary. Clean terminals and battery cable ends with the ignition switch in the engine "ON" position and the attachment clutch engaged...

User Manual
Page 17
... possible engine damage from wear. Tighten cap onto the tube securely when finished. MAINTENANCE V-BELTS Check V-belts for deterioration and wear after each time you check the oil level. Do not attempt to slip from running or while the transaxle is on oil. OIL DRAIN HOLE OIL DRAIN PLUG OIL DRAIN EXTENSION Fig. 11 • Slide oil drain extension under front end of operation or at "FULL" line on oil fill cap/dipstick for checking level. Change the oil...
... possible engine damage from wear. Tighten cap onto the tube securely when finished. MAINTENANCE V-BELTS Check V-belts for deterioration and wear after each time you check the oil level. Do not attempt to slip from running or while the transaxle is on oil. OIL DRAIN HOLE OIL DRAIN PLUG OIL DRAIN EXTENSION Fig. 11 • Slide oil drain extension under front end of operation or at "FULL" line on oil fill cap/dipstick for checking level. Change the oil...
User Manual
Page 18
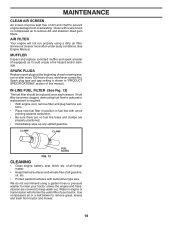
... type wax. See Engine Manual. CLAMP CLAMP FUEL FILTER FIG. 13 CLEANING • Clean engine, battery, seat, finish, etc. Water in engine or transmission will not run properly using a garden hose or pressure washer to clean your tractor. Use compressed air or a leaf blower to carburetor, replacement is shown in fuel line with a wire brush or compressed air to keep water out. MAINTENANCE CLEAN AIR SCREEN Air screen must be replaced once each mowing season or after every 100 hours of use, whichever comes first. SPARK PLUGS Replace spark plugs...
... type wax. See Engine Manual. CLAMP CLAMP FUEL FILTER FIG. 13 CLEANING • Clean engine, battery, seat, finish, etc. Water in engine or transmission will not run properly using a garden hose or pressure washer to clean your tractor. Use compressed air or a leaf blower to carburetor, replacement is shown in fuel line with a wire brush or compressed air to keep water out. MAINTENANCE CLEAN AIR SCREEN Air screen must be replaced once each mowing season or after every 100 hours of use, whichever comes first. SPARK PLUGS Replace spark plugs...
User Manual
Page 19
... ANY SERVICE OR ADJUSTMENTS: • Depress clutch/brake pedal fully and set parking brake. • Place gearshift lever in neutral (N) position. • Place attachment clutch in "DISENGAGED" position. • Turn ignition key to "STOP" and remove key. • Make sure the blades and all moving parts have completely stopped. • Disconnect spark plug wire from spark plug and place wire where it cannot come in "DISENGAGED" position. • Move attachment lift lever forward to lower mower...
... ANY SERVICE OR ADJUSTMENTS: • Depress clutch/brake pedal fully and set parking brake. • Place gearshift lever in neutral (N) position. • Place attachment clutch in "DISENGAGED" position. • Turn ignition key to "STOP" and remove key. • Make sure the blades and all moving parts have completely stopped. • Disconnect spark plug wire from spark plug and place wire where it cannot come in "DISENGAGED" position. • Move attachment lift lever forward to lower mower...
User Manual
Page 21
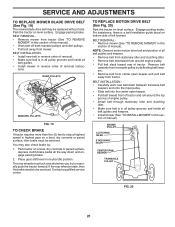
... a belt installation guide decal on a level, dry concrete or paved surface, then brake must lock and skid when you try to stop at highest speed in reverse order of left footrest. tions. The rear wheels must be serviced. SERVICE AND ADJUSTMENTS TO REPLACE MOWER BLADE DRIVE BELT (See Fig. 19) The mower blade drive belt may also check brake by deflecting belt keepers. • Remove belt from center span keeper and pull belt away from tractor. IDLER PULLEYS MANDREL PULLEYS...
... a belt installation guide decal on a level, dry concrete or paved surface, then brake must lock and skid when you try to stop at highest speed in reverse order of left footrest. tions. The rear wheels must be serviced. SERVICE AND ADJUSTMENTS TO REPLACE MOWER BLADE DRIVE BELT (See Fig. 19) The mower blade drive belt may also check brake by deflecting belt keepers. • Remove belt from center span keeper and pull belt away from tractor. IDLER PULLEYS MANDREL PULLEYS...
User Manual
Page 22
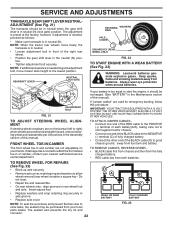
... the tractor rear wheels move mower deck height to the lowest position. THE OTHER VEHICLE MUST ALSO BE A 12 VOLT SYSTEM. Always wear eye protection when around batteries. TO ADJUST STEERING WHEEL ALIGNMENT If steering wheel crossbars are not horizontal (left to start the engine, it should be in neutral when the gear shift lever is in the Assembly section of the BLACK cable (D) to...
... the tractor rear wheels move mower deck height to the lowest position. THE OTHER VEHICLE MUST ALSO BE A 12 VOLT SYSTEM. Always wear eye protection when around batteries. TO ADJUST STEERING WHEEL ALIGNMENT If steering wheel crossbars are not horizontal (left to start the engine, it should be in neutral when the gear shift lever is in the Assembly section of the BLACK cable (D) to...

User Manual
Page 23
... be connected first to prevent sparking from accidental grounding. • Lift seat pan to raised position. • Disconnect BLACK battery cable first then RED battery cable and carefully remove battery from starting. • Check wiring. HOOD HEADLIGHT WIRE CONNECTOR 02495 TERMINAL COVER 02602 NUT BOLT POSITIVE (RED) CABLE 02603 NEGATIVE (BLACK) CABLE FIG. 24 TO REPLACE HEADLIGHT BULB • Raise hood. • Pull bulb holder out of the hole in the backside...
... be connected first to prevent sparking from accidental grounding. • Lift seat pan to raised position. • Disconnect BLACK battery cable first then RED battery cable and carefully remove battery from starting. • Check wiring. HOOD HEADLIGHT WIRE CONNECTOR 02495 TERMINAL COVER 02602 NUT BOLT POSITIVE (RED) CABLE 02603 NEGATIVE (BLACK) CABLE FIG. 24 TO REPLACE HEADLIGHT BULB • Raise hood. • Pull bulb holder out of the hole in the backside...
User Manual
Page 24
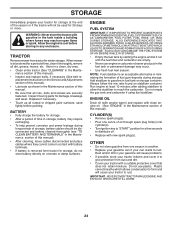
... FUEL SYSTEM PARTS SUCH AS CARBURETOR, FUEL FILTER, FUEL HOSE, OR TANK DURING STORAGE. Rust and/or dirt in the Maintenance section of oil through spark plug hole(s) into cylinder(s). • Turn ignition key to "START" position for a few seconds to distribute oil. • Replace with a suitable protective cover that all rusted or chipped paint surfaces; TRACTOR Remove mower from dust and dirt. • Cover your tractor with new spark plug(s). ENGINE OIL Drain oil (with engine warm) and replace with clean engine oil. (See "ENGINE...
... FUEL SYSTEM PARTS SUCH AS CARBURETOR, FUEL FILTER, FUEL HOSE, OR TANK DURING STORAGE. Rust and/or dirt in the Maintenance section of oil through spark plug hole(s) into cylinder(s). • Turn ignition key to "START" position for a few seconds to distribute oil. • Replace with a suitable protective cover that all rusted or chipped paint surfaces; TRACTOR Remove mower from dust and dirt. • Cover your tractor with new spark plug(s). ENGINE OIL Drain oil (with engine warm) and replace with clean engine oil. (See "ENGINE...

User Manual
Page 25
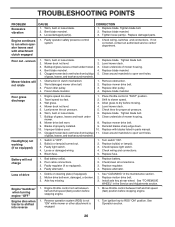
... in "CHOKE" position. 3. Engine valves out of adjustment. 1. Bad spark plug. 3. Attachment clutch is engaged. 3. Weak or dead battery. 4. Faulty ignition switch. 8. Throttle in fuel. 8. Low oil level/dirty oil. 6. Faulty spark plug. 7. Dirty fuel filter. 8. Dirty/clogged muffler. 13. See "TO START ENGINE" in Service Adjustments 15. Contact an authorized service center/department. 1. Depress clutch/brake pedal. 2. Replace fuse. 5. Check all wiring. 7. Check/replace solenoid or starter. 1. Check oil level/change spark plug. 7. Clean engine air screen/fins...
... in "CHOKE" position. 3. Engine valves out of adjustment. 1. Bad spark plug. 3. Attachment clutch is engaged. 3. Weak or dead battery. 4. Faulty ignition switch. 8. Throttle in fuel. 8. Low oil level/dirty oil. 6. Faulty spark plug. 7. Dirty fuel filter. 8. Dirty/clogged muffler. 13. See "TO START ENGINE" in Service Adjustments 15. Contact an authorized service center/department. 1. Depress clutch/brake pedal. 2. Replace fuse. 5. Check all wiring. 7. Check/replace solenoid or starter. 1. Check oil level/change spark plug. 7. Clean engine air screen/fins...
User Manual
Page 26
... idler pulley. 4. Low/uneven tire air pressure. 5. Improper blades used. 10. Replace alternator. Replace blade. Mower drive belt worn. 8. Install axle key at rear wheel. TROUBLESHOOTING POINTS PROBLEM Excessive vibration CAUSE 1. Mower deck not level. 3. Obstruction in the Service and Adjustments section. 1. Replace mower drive belt. 3. Allow grass to open vent holes. 1. Replace mower drive belt. 9. Bulb(s) or lamp(s) burned out. 3. Turn switch "ON". 2. Bad battery cell(s). 2. Faulty alternator. 1. Replace battery. 2. Move throttle control...
... idler pulley. 4. Low/uneven tire air pressure. 5. Improper blades used. 10. Replace alternator. Replace blade. Mower drive belt worn. 8. Install axle key at rear wheel. TROUBLESHOOTING POINTS PROBLEM Excessive vibration CAUSE 1. Mower deck not level. 3. Obstruction in the Service and Adjustments section. 1. Replace mower drive belt. 3. Allow grass to open vent holes. 1. Replace mower drive belt. 9. Bulb(s) or lamp(s) burned out. 3. Turn switch "ON". 2. Bad battery cell(s). 2. Faulty alternator. 1. Replace battery. 2. Move throttle control...

User Manual
Page 27
..., Ontario L5V 3E4 giving the model number, serial number and date of purchase of your product and the name and address of ownership. This Warranty gives you specific legal rights, and you must be defective due to any power equipment unit or attachment are belts, blades, blade adapters, normal wear, normal adjustments, standard hardware and normal maintenance. 7. This Warranty does not apply to materials...
..., Ontario L5V 3E4 giving the model number, serial number and date of purchase of your product and the name and address of ownership. This Warranty gives you specific legal rights, and you must be defective due to any power equipment unit or attachment are belts, blades, blade adapters, normal wear, normal adjustments, standard hardware and normal maintenance. 7. This Warranty does not apply to materials...


