
User Manual
Page 1
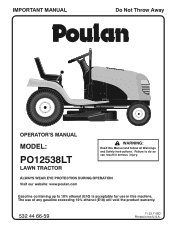
The use in the U.S.A. IMPORTANT MANUAL Do Not Throw Away OPERATOR'S MANUAL MODEL: PO12538LT LAWN TRACTOR WARNING: Read this machine. ALWAYS WEAR EYE PROTECTION DURING OPERATION Visit our website: www.poulan.com Gasoline containing up to do so can result in serious injury. Failure to 10% ethanol (E10) is acceptable for use of any gasoline exceeding 10% ethanol (E10) will void the product warranty. 532 44 66-59 11.23.11 BD Printed in this Manual and follow all Warnings and Safety Instructions.
The use in the U.S.A. IMPORTANT MANUAL Do Not Throw Away OPERATOR'S MANUAL MODEL: PO12538LT LAWN TRACTOR WARNING: Read this machine. ALWAYS WEAR EYE PROTECTION DURING OPERATION Visit our website: www.poulan.com Gasoline containing up to do so can result in serious injury. Failure to 10% ethanol (E10) is acceptable for use of any gasoline exceeding 10% ethanol (E10) will void the product warranty. 532 44 66-59 11.23.11 BD Printed in this Manual and follow all Warnings and Safety Instructions.
User Manual
Page 2
...WARNING: Do not coast down a hill in place and working. • Slow down slopes. Use common sense when towing. Too heavy of your tractor. Material may lose traction. Always turn off engine and wait for holes, ruts, bumps, rocks, or other safety devices in neutral, you to...mow in gear when going down before operating or storing the machine. SLOPE OPERATION WARNING: Tow only the attachments that are recommended by putting your tractor. Avoid discharging material against a wall or obstruction. Shut off blades, set parking brake, stop or shift while on the slope. •...
...WARNING: Do not coast down a hill in place and working. • Slow down slopes. Use common sense when towing. Too heavy of your tractor. Material may lose traction. Always turn off engine and wait for holes, ruts, bumps, rocks, or other safety devices in neutral, you to...mow in gear when going down before operating or storing the machine. SLOPE OPERATION WARNING: Tow only the attachments that are recommended by putting your tractor. Avoid discharging material against a wall or obstruction. Shut off blades, set parking brake, stop or shift while on the slope. •...
User Manual
Page 4
... well-trained technicians and the proper tools to service or repair this manual. Please read and retain this tractor. Always observe the "SAFETY RULES". WARNING: This tractor is available through your purchase of this manual. • Wear proper Personal Protective Equipment (PPE) while ...AND ADJUSTMENTS 18-22 STORAGE 23 TROUBLESHOOTING 24-25 WARRANTY 26 4 age" sections of a new tractor. It has been designed, engineered and manufactured to assemble and maintain your tractor. • Follow the instructions under "Maintenance" and "Stor- If a spark arrester is equipped...
... well-trained technicians and the proper tools to service or repair this manual. Please read and retain this tractor. Always observe the "SAFETY RULES". WARNING: This tractor is available through your purchase of this manual. • Wear proper Personal Protective Equipment (PPE) while ...AND ADJUSTMENTS 18-22 STORAGE 23 TROUBLESHOOTING 24-25 WARRANTY 26 4 age" sections of a new tractor. It has been designed, engineered and manufactured to assemble and maintain your tractor. • Follow the instructions under "Maintenance" and "Stor- If a spark arrester is equipped...
User Manual
Page 6
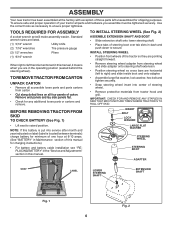
...ADAPTER SEAT LABEL LOWER STEERING SHAFT EXTENSION SHAFT 02819 02602 Fig. 1 Fig. 2 6 INSTALL STEERING WHEEL • Position front wheels of the tractor so they are pointing straight forward. • Remove steering wheel adapter from carton . • Cut along dotted lines on label (label is...into service after month and year indicated on all parts and hardware you are horizontal (left unassembled for shipping purposes. ASSEMBLY Your new tractor has been assembled at 6-10 amps. (See "BATTERY" in Maintenance section of this manual for charging instructions). • For ...
...ADAPTER SEAT LABEL LOWER STEERING SHAFT EXTENSION SHAFT 02819 02602 Fig. 1 Fig. 2 6 INSTALL STEERING WHEEL • Position front wheels of the tractor so they are pointing straight forward. • Remove steering wheel adapter from carton . • Cut along dotted lines on label (label is...into service after month and year indicated on all parts and hardware you are horizontal (left unassembled for shipping purposes. ASSEMBLY Your new tractor has been assembled at 6-10 amps. (See "BATTERY" in Maintenance section of this manual for charging instructions). • For ...
User Manual
Page 7
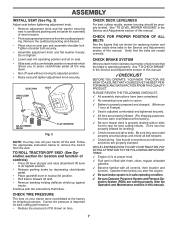
...parking brake by depressing clutch/brake pedal. • Place gearshift lever in this manual. ✓CHECKLIST BEFORE YOU OPERATE YOUR NEW TRACTOR, WE WISH TO ASSURE THAT YOU RECEIVE THE BEST PERFORMANCE AND SATISFACTION FROM THIS QUALITY PRODUCT. Follow the appropriate instruction below to...tires. Be sure they are properly clamped. ASSEMBLY INSTALL SEAT (See Fig. 3) Adjust seat before you learn how to operate your tractor were overinflated at the factory). ✓ Be sure mower deck is operating properly. Tighten shoulder bolt securely. • Assemble adjustment ...
...parking brake by depressing clutch/brake pedal. • Place gearshift lever in this manual. ✓CHECKLIST BEFORE YOU OPERATE YOUR NEW TRACTOR, WE WISH TO ASSURE THAT YOU RECEIVE THE BEST PERFORMANCE AND SATISFACTION FROM THIS QUALITY PRODUCT. Follow the appropriate instruction below to...tires. Be sure they are properly clamped. ASSEMBLY INSTALL SEAT (See Fig. 3) Adjust seat before you learn how to operate your tractor were overinflated at the factory). ✓ Be sure mower deck is operating properly. Tighten shoulder bolt securely. • Assemble adjustment ...

User Manual
Page 8
... in serious injury or death. The safety alert symbol is used without the alert symbol, indicates a situation that could result in damage to the tractor and/or engine. FIRE indicates a hazard which can result in death, serious injury and/or property damage. Learn and understand their meaning. REVERSE NEUTRAL HIGH ...
... in serious injury or death. The safety alert symbol is used without the alert symbol, indicates a situation that could result in damage to the tractor and/or engine. FIRE indicates a hazard which can result in death, serious injury and/or property damage. Learn and understand their meaning. REVERSE NEUTRAL HIGH ...

User Manual
Page 9
...the engine. IGNITION SWITCH - Used to raise, lower, and adjust the mower deck or other attachments mounted to your tractor to release attachment lift lever when changing its position. LIGHT SWITCH THROTTLE/CHOKE CONTROL CLUTCH/BRAKE PEDAL ATTACHMENT CLUTCH LEVER IGNITION ...HEIGHT ADJUSTMENT INDICATOR PARKING BRAKE GEAR SHIFT LEVER 02829 Fig. 4 Our tractors conform to your tractor. GEARSHIFT LEVER - Turns the headlights on and off. Used for future reference. Allows operation of the tractor. ATTACHMENT CLUTCH LEVER - Used to familiarize yourself with the locations ...
...the engine. IGNITION SWITCH - Used to raise, lower, and adjust the mower deck or other attachments mounted to your tractor to release attachment lift lever when changing its position. LIGHT SWITCH THROTTLE/CHOKE CONTROL CLUTCH/BRAKE PEDAL ATTACHMENT CLUTCH LEVER IGNITION ...HEIGHT ADJUSTMENT INDICATOR PARKING BRAKE GEAR SHIFT LEVER 02829 Fig. 4 Our tractors conform to your tractor. GEARSHIFT LEVER - Turns the headlights on and off. Used for future reference. Allows operation of the tractor. ATTACHMENT CLUTCH LEVER - Used to familiarize yourself with the locations ...
User Manual
Page 10
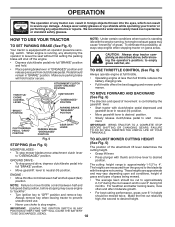
...See Fig. 5) The direction and speed of movement is controlled by the operator to "DISENGAGED" position. Always remove key when leaving tractor to prevent unauthorized use choke to stop engine. The cutting height range is equipped with clutch/brake pedal depressed and gearshift lever in...over 6" in height should remain in "BRAKE" position. Make the first cut to approximately 2-1/2" during hot months. OPERATION The operation of any tractor can result in severe eye damage. CAUTION: Always stop ground drive, depress clutch/brake pedal into full "BRAKE" position. • Move gearshift...
...See Fig. 5) The direction and speed of movement is controlled by the operator to "DISENGAGED" position. Always remove key when leaving tractor to prevent unauthorized use choke to stop engine. The cutting height range is equipped with clutch/brake pedal depressed and gearshift lever in...over 6" in height should remain in "BRAKE" position. Make the first cut to approximately 2-1/2" during hot months. OPERATION The operation of any tractor can result in severe eye damage. CAUTION: Always stop ground drive, depress clutch/brake pedal into full "BRAKE" position. • Move gearshift...

User Manual
Page 11
... throttle control lever to slower position. • If stopping is closed and secured to prevent the engine from damage when transporting your tractor. Use common sense when towing. Tires can lose traction with the ground and cause you restart movement. • To restart movement,...specifications of the manufacturer of cut. • Start mower blades by engaging attachment clutch control. TO TRANSPORT • Raise attachment lift to tractor (rope, cord, etc.). Too heavy of tying hood to highest position with attachment lift control. • When pushing or towing your ...
... throttle control lever to slower position. • If stopping is closed and secured to prevent the engine from damage when transporting your tractor. Use common sense when towing. Tires can lose traction with the ground and cause you restart movement. • To restart movement,...specifications of the manufacturer of cut. • Start mower blades by engaging attachment clutch control. TO TRANSPORT • Raise attachment lift to tractor (rope, cord, etc.). Too heavy of tying hood to highest position with attachment lift control. • When pushing or towing your ...

User Manual
Page 12
... and reduce valve life). OPERATION BEFORE STARTING THE ENGINE CHECK ENGINE OIL LEVEL The engine in your tractor has been shipped, from the factory, already filled with summer weight oil. • Check engine oil with tractor on level ground. • Remove oil fill cap/dipstick and wipe clean, reinsert the dipstick and...
... and reduce valve life). OPERATION BEFORE STARTING THE ENGINE CHECK ENGINE OIL LEVEL The engine in your tractor has been shipped, from the factory, already filled with summer weight oil. • Check engine oil with tractor on level ground. • Remove oil fill cap/dipstick and wipe clean, reinsert the dipstick and...

User Manual
Page 13
... clippings will discharge away from dried clippings. OPERATION MOWING TIPS • Tire chains cannot be used when the mower housing is attached to tractor. • Mower should be mowed twice to reduce load and possible fire hazard from shrubs, fences, driveways, etc. Have the cut relatively...undesirable clumps. This will result in a more uniform cutting. • When mowing large areas, start by turning to give best performance of the tractor. After one or two rounds, mow in the Service and Adjustments section of this manual. • The left hand turns until finished (See ...
... clippings will discharge away from dried clippings. OPERATION MOWING TIPS • Tire chains cannot be used when the mower housing is attached to tractor. • Mower should be mowed twice to reduce load and possible fire hazard from shrubs, fences, driveways, etc. Have the cut relatively...undesirable clumps. This will result in a more uniform cutting. • When mowing large areas, start by turning to give best performance of the tractor. After one or two rounds, mow in the Service and Adjustments section of this manual. • The left hand turns until finished (See ...
User Manual
Page 14
... abuse or negligence. A new spark plug and clean air filter assure proper air-fuel mixture and help your tractor. To receive full value from the warranty, operator must maintain tractor as instructed in this tractor does not cover items that have been subjected to properly maintain your engine run better and last longer...
... abuse or negligence. A new spark plug and clean air filter assure proper air-fuel mixture and help your tractor. To receive full value from the warranty, operator must maintain tractor as instructed in this tractor does not cover items that have been subjected to properly maintain your engine run better and last longer...
User Manual
Page 15
... When the engine is running with the ignition switch in highest gear on a level, dry concrete or paved surface, then brake must be purchased from tractor. • Rinse the battery with plain water and dry. • Clean terminals and battery cable ends with wire brush until bright. • Coat...bolt securely (45-55 Ft. Replace bent or damaged blades. Lbs./62- 75 Nm torque). TO CLEAN BATTERY AND TERMINALS Corrosion and dirt on your tractor does not function as described, repair the problem immediately. • The engine should NOT shut off the engine. • When the engine is ...
... When the engine is running with the ignition switch in highest gear on a level, dry concrete or paved surface, then brake must be purchased from tractor. • Rinse the battery with plain water and dry. • Clean terminals and battery cable ends with wire brush until bright. • Coat...bolt securely (45-55 Ft. Replace bent or damaged blades. Lbs./62- 75 Nm torque). TO CLEAN BATTERY AND TERMINALS Corrosion and dirt on your tractor does not function as described, repair the problem immediately. • The engine should NOT shut off the engine. • When the engine is ...
User Manual
Page 16
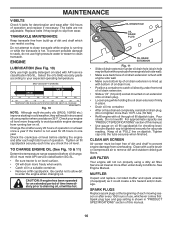
... Fig. 10 & 11) Determine temperature range expected before starting in "PRODUCT SPECIFICATIONS" section of operation or at least once a year if the tractor is on dipstick. For approximate capacity see "PRODUCT SPECIFICATIONS" section of oil drain extension. • Slide a 1/2" (12 point) socket mounted ...on oil. CLEAN AIR SCREEN Air screen must meet API service classification SG-SL. • Be sure tractor is not used above 32°F. SPARK PLUGS Replace spark plugs at "FULL" line on level surface. • Oil will result in a suitable...
... Fig. 10 & 11) Determine temperature range expected before starting in "PRODUCT SPECIFICATIONS" section of operation or at least once a year if the tractor is on dipstick. For approximate capacity see "PRODUCT SPECIFICATIONS" section of oil drain extension. • Slide a 1/2" (12 point) socket mounted ...on oil. CLEAN AIR SCREEN Air screen must meet API service classification SG-SL. • Be sure tractor is not used above 32°F. SPARK PLUGS Replace spark plugs at "FULL" line on level surface. • Oil will result in a suitable...

User Manual
Page 17
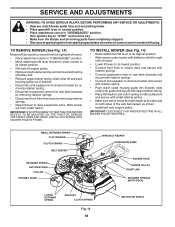
...wax. Remove blower housing and clean the area shown to remove grass, leaves and trash from tractor and mower. 17 If fuel filter becomes clogged, obstructing fuel flow to clean your tractor. We do not recommend using a garden hose or pressure washer to carburetor, replacement is required.... in engine or transmission will shorten the useful life of all foreign matter. • Keep finished surfaces and wheels free of your tractor unless the engine and transmission are properly positioned. • Immediately wipe up any spilled gasoline. AIR SCREEN CLEAN OUT CHAFF AND DEBRIS...
...wax. Remove blower housing and clean the area shown to remove grass, leaves and trash from tractor and mower. 17 If fuel filter becomes clogged, obstructing fuel flow to clean your tractor. We do not recommend using a garden hose or pressure washer to carburetor, replacement is required.... in engine or transmission will shorten the useful life of all foreign matter. • Keep finished surfaces and wheels free of your tractor unless the engine and transmission are properly positioned. • Immediately wipe up any spilled gasoline. AIR SCREEN CLEAN OUT CHAFF AND DEBRIS...
User Manual
Page 18
... housing guide into bracket, slide collar onto guide and secure with large retainer spring. • Place flat washer and clutch spring on both sides of tractor. • Place attachment clutch in contact with small retainer spring. • Make sure belt is inside the belt keeper at the idler and on ... SPRING BRACKET 02845 CLUTCH SPRING Fig. 14 18 DEFLECTOR SHIELD IMPORTANT: IF AN ATTACHMENT OTHER THAN THE MOWER DECK IS TO BE MOUNTED ON THE TRACTOR, REMOVE THE FRONT LINKS AND HOOK THE CLUTCH SPRING INTO SQUARE HOLE IN FRAME. TO INSTALL MOWER (See Fig. 14) • Raise attachment lift...
... housing guide into bracket, slide collar onto guide and secure with large retainer spring. • Place flat washer and clutch spring on both sides of tractor. • Place attachment clutch in contact with small retainer spring. • Make sure belt is inside the belt keeper at the idler and on ... SPRING BRACKET 02845 CLUTCH SPRING Fig. 14 18 DEFLECTOR SHIELD IMPORTANT: IF AN ATTACHMENT OTHER THAN THE MOWER DECK IS TO BE MOUNTED ON THE TRACTOR, REMOVE THE FRONT LINKS AND HOOK THE CLUTCH SPRING INTO SQUARE HOLE IN FRAME. TO INSTALL MOWER (See Fig. 14) • Raise attachment lift...

User Manual
Page 19
... obtain the best cutting results, the mower housing should be adjusted so that side. SERVICE AND ADJUSTMENTS TO LEVEL MOWER HOUSING Adjust the mower while tractor is parked on both front links. • To raise front of mower, loosen nut "F" from bottom edge of the tires for proper PSI). ...adjustment nut on that side. • To lower one side of mower, loosen lift link adjustment nut on both front links an equal number of tractor. If tires are properly inflated (See the sides of mower to 1/2" lower at front than rear, tighten nut "F" against trunnion on level ground or...
... obtain the best cutting results, the mower housing should be adjusted so that side. SERVICE AND ADJUSTMENTS TO LEVEL MOWER HOUSING Adjust the mower while tractor is parked on both front links. • To raise front of mower, loosen nut "F" from bottom edge of the tires for proper PSI). ...adjustment nut on that side. • To lower one side of mower, loosen lift link adjustment nut on both front links an equal number of tractor. If tires are properly inflated (See the sides of mower to 1/2" lower at front than rear, tighten nut "F" against trunnion on level ground or...
User Manual
Page 20
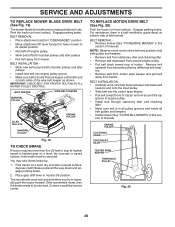
... blade drive belt may also check brake by deflecting belt keepers. • Remove belt from center span keeper and pull belt away from tractor. Engage parking brake. NOTE: Observe entire motion drive belt and position of all belt guides and keepers. • Remove belt from stationary...guide decal on level surface. IMPORTANT: CHECK BELT FOR PROPER ROUTING IN ALL MOWER PULLEY GROOVES. Remove belt upwards from mower. Park the tractor on bottom side of manual). BELT KEEPER WIRE BELT KEEPER MANDREL PULLEY IDLER PULLEYS ENGINE PULLEY MANDREL PULLEY 02844 Fig. 19 TO CHECK ...
... blade drive belt may also check brake by deflecting belt keepers. • Remove belt from center span keeper and pull belt away from tractor. Engage parking brake. NOTE: Observe entire motion drive belt and position of all belt guides and keepers. • Remove belt from stationary...guide decal on level surface. IMPORTANT: CHECK BELT FOR PROPER ROUTING IN ALL MOWER PULLEY GROOVES. Remove belt upwards from mower. Park the tractor on bottom side of manual). BELT KEEPER WIRE BELT KEEPER MANDREL PULLEY IDLER PULLEYS ENGINE PULLEY MANDREL PULLEY 02844 Fig. 19 TO CHECK ...
User Manual
Page 21
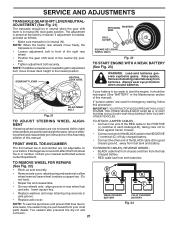
... TO START OTHER VEHICLES. The front wheel toe-in and camber are used for emergency starting, follow this procedure: IMPORTANT: YOUR TRACTOR IS EQUIPPED WITH A 12 VOLT SYSTEM. The adjustment is in neutral (N). GEARSHIFT LEVER NEUTRAL LOCK GATE RETAINING WASHERS RING AXLE COVER SQUARE KEY (... TO ATTACH JUMPER CABLES • Connect one end of the RED cable to the POSITIVE (+) terminal of each battery(A-B), taking care not to short against tractor chassis. • Connect one end of the BLACK cable to the NEGATIVE (-) terminal (C) of fully charged battery. • Connect the other end of ...
... TO START OTHER VEHICLES. The front wheel toe-in and camber are used for emergency starting, follow this procedure: IMPORTANT: YOUR TRACTOR IS EQUIPPED WITH A 12 VOLT SYSTEM. The adjustment is in neutral (N). GEARSHIFT LEVER NEUTRAL LOCK GATE RETAINING WASHERS RING AXLE COVER SQUARE KEY (... TO ATTACH JUMPER CABLES • Connect one end of the RED cable to the POSITIVE (+) terminal of each battery(A-B), taking care not to short against tractor chassis. • Connect one end of the BLACK cable to the NEGATIVE (-) terminal (C) of fully charged battery. • Connect the other end of ...

User Manual
Page 22
...from starting. • Check wiring. Grasp hood at the same time. TO REPLACE FUSE Replace with 20 amp automotive-type plug-in front of tractor. Tighten securely. • Lower seat pan. HOOD HEADLIGHT WIRE CONNECTOR 02495 TERMINAL COVER 02602 NUT BOLT POSITIVE (RED) CABLE 02603 NEGATIVE (BLACK) ...sides, tilt toward engine and lift off of the grill. • Close hood. INTERLOCKS AND RELAYS Loose or damaged wiring may cause your tractor to negative (-) terminal with remaining bolt and nut. The fuse holder is necessary, see engine manual. Fig. 25 ENGINE TO ADJUST THROTTLE ...
...from starting. • Check wiring. Grasp hood at the same time. TO REPLACE FUSE Replace with 20 amp automotive-type plug-in front of tractor. Tighten securely. • Lower seat pan. HOOD HEADLIGHT WIRE CONNECTOR 02495 TERMINAL COVER 02602 NUT BOLT POSITIVE (RED) CABLE 02603 NEGATIVE (BLACK) ...sides, tilt toward engine and lift off of the grill. • Close hood. INTERLOCKS AND RELAYS Loose or damaged wiring may cause your tractor to negative (-) terminal with remaining bolt and nut. The fuse holder is necessary, see engine manual. Fig. 25 ENGINE TO ADJUST THROTTLE ...

