
User Manual
Page 2
.... • Never run a machine inside where there is not alert to occur. If tires lose trac- • Check brake operation frequently. The mower could • Never make sudden changes in daylight or good artificial light. • Before and when backing, look down the slope. 2...or un- Never assume that children will • Grass catcher components are often attracted to improve stability. ways. • Never allow the mower deck to wear, dam- Do not allow children to operate the machine. • Use extra care when loading or unloading the machine &#...
.... • Never run a machine inside where there is not alert to occur. If tires lose trac- • Check brake operation frequently. The mower could • Never make sudden changes in daylight or good artificial light. • Before and when backing, look down the slope. 2...or un- Never assume that children will • Grass catcher components are often attracted to improve stability. ways. • Never allow the mower deck to wear, dam- Do not allow children to operate the machine. • Use extra care when loading or unloading the machine &#...

User Manual
Page 3
...,chemicals known to the State of California to cause cancer and birth defects or other reproductive harm. SAFETY RULES SAFE OPERATION PRACTICES FOR RIDE-ON MOWERS • Be sure the area is clear of a load, while on a slope, is dangerous. Too heavy of other people before and while backing. • Never...
...,chemicals known to the State of California to cause cancer and birth defects or other reproductive harm. SAFETY RULES SAFE OPERATION PRACTICES FOR RIDE-ON MOWERS • Be sure the area is clear of a load, while on a slope, is dangerous. Too heavy of other people before and while backing. • Never...
User Manual
Page 7
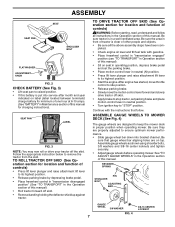
...position. • Start the engine.After engine has started, move throttle control to remove the tractor from the skid. ASSEMBLE GAUGE WHEELS TO MOWER DECK (See Fig. 4) The gauge wheels are on seat in operating position, depress brake pedal and set parking brake and place motion control... oil level and fill fuel tank with the instructions that gauge wheel bar aligning holes are designed to keep the mower deck in proper position when operating mower. Assemble gauge wheels as shown using shoulder bolts, 3/8 washers and 3/8-16 center locknuts and tighten securely. • Adjust...
...position. • Start the engine.After engine has started, move throttle control to remove the tractor from the skid. ASSEMBLE GAUGE WHEELS TO MOWER DECK (See Fig. 4) The gauge wheels are on seat in operating position, depress brake pedal and set parking brake and place motion control... oil level and fill fuel tank with the instructions that gauge wheel bar aligning holes are designed to keep the mower deck in proper position when operating mower. Assemble gauge wheels as shown using shoulder bolts, 3/8 washers and 3/8-16 center locknuts and tighten securely. • Adjust...
User Manual
Page 8
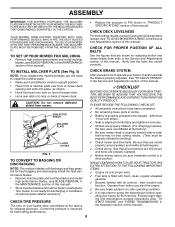
... • Reduce tire pressure to PSI shown in a safe place. ating your tractor for best cutting performance. TO SET UP YOUR MOWER FOR MULCHING • Remove high performance blades and install mulcher blades, (see BLADE REMOVAL in the MAINTENANCE section of this manual. See... wiring. Operate them before you learn how to purge the transmission before oper- ASSEMBLY IMPORTANT: FOR SHIPPING PURPOSES, THE MULCHER PLATEWAS PREATTACHEDTOYOUR MOWER.THE MULCHER PLATE MUST ONLY BE USED WITH THE MULCHING BLADES THAT CAME PACKED SEPARATELY IN THE CARTON. See "TO ADJUST BRAKE" in...
... • Reduce tire pressure to PSI shown in a safe place. ating your tractor for best cutting performance. TO SET UP YOUR MOWER FOR MULCHING • Remove high performance blades and install mulcher blades, (see BLADE REMOVAL in the MAINTENANCE section of this manual. See... wiring. Operate them before you learn how to purge the transmission before oper- ASSEMBLY IMPORTANT: FOR SHIPPING PURPOSES, THE MULCHER PLATEWAS PREATTACHEDTOYOUR MOWER.THE MULCHER PLATE MUST ONLY BE USED WITH THE MULCHING BLADES THAT CAME PACKED SEPARATELY IN THE CARTON. See "TO ADJUST BRAKE" in...

User Manual
Page 9
... OFF LIGHTS ON P ENGINE ON ENGINE START PARKING BRAKE PARKING BRAKE PARKING BRAKE LOCKED UNLOCKED OVER TEMP LIGHT FUEL OIL PRESSURE BATTERY REVERSE FORWARD MOWER HEIGHT 15 MOWER LIFT 15 ATTACHMENT ATTACHMENT CLUTCH ENGAGED CLUTCH DISENGAGED DANGER, KEEP HANDS AND FEET AWAY KEEP AREA CLEAR SLOPE HAZARDS (SEE SAFETY RULES SECTION) FREE...
... OFF LIGHTS ON P ENGINE ON ENGINE START PARKING BRAKE PARKING BRAKE PARKING BRAKE LOCKED UNLOCKED OVER TEMP LIGHT FUEL OIL PRESSURE BATTERY REVERSE FORWARD MOWER HEIGHT 15 MOWER LIFT 15 ATTACHMENT ATTACHMENT CLUTCH ENGAGED CLUTCH DISENGAGED DANGER, KEEP HANDS AND FEET AWAY KEEP AREA CLEAR SLOPE HAZARDS (SEE SAFETY RULES SECTION) FREE...

User Manual
Page 10
... KNOB - REVERSE DRIVE PEDAL - Locks clutch/brake pedal into the brake position. Used to raise, lower, and adjust the mower deck or other attachments mounted to your tractor. Save this manual for controlling engine speed. Used to engage the...to your tractor. Indicates charging (+) or discharging (-) of battery. Used for future reference. BRAKE PEDAL - ATTACHMENT LIFT LEVER - Used to adjust the mower cutting height. Used to release attachment lift lever when changing its position. CHOKE CONTROL - THROTTLE CONTROL - IGNITION SWITCH - FORWARD DRIVE PEDAL - Used ...
... KNOB - REVERSE DRIVE PEDAL - Locks clutch/brake pedal into the brake position. Used to raise, lower, and adjust the mower deck or other attachments mounted to your tractor. Save this manual for controlling engine speed. Used to engage the...to your tractor. Indicates charging (+) or discharging (-) of battery. Used for future reference. BRAKE PEDAL - ATTACHMENT LIFT LEVER - Used to adjust the mower cutting height. Used to release attachment lift lever when changing its position. CHOKE CONTROL - THROTTLE CONTROL - IGNITION SWITCH - FORWARD DRIVE PEDAL - Used ...

User Manual
Page 11
... HEIGHT ADJUSTMENT KNOB 02738 PARKING BRAKE REVERSE DRIVE PEDAL "ENGAGED" POSITION PARKING BRAKE "DISENGAGED" POSITION FIG. 7 STOPPING (See Fig. 7) MOWER BLADES - • To stop ground drive, depress brake pedal into the eyes, which can result in severe eye damage. To eliminate this... 2-1/2 inches during hot months. OPERATION The operation of any adjustments or repairs. mance. GROUND DRIVE - • To stop mower blades,move throttle control to slow position and allowing engine to idle before leaving the operator's position; NOTE: Failure to move ...
... HEIGHT ADJUSTMENT KNOB 02738 PARKING BRAKE REVERSE DRIVE PEDAL "ENGAGED" POSITION PARKING BRAKE "DISENGAGED" POSITION FIG. 7 STOPPING (See Fig. 7) MOWER BLADES - • To stop ground drive, depress brake pedal into the eyes, which can result in severe eye damage. To eliminate this... 2-1/2 inches during hot months. OPERATION The operation of any adjustments or repairs. mance. GROUND DRIVE - • To stop mower blades,move throttle control to slow position and allowing engine to idle before leaving the operator's position; NOTE: Failure to move ...

User Manual
Page 12
... be slightly off the ground. • Replace retainer spring into the slot and release so it is at level surface. • Adjust mower to align holes in operating position. TO ADJUST GAUGE WHEELS (See Fig. 8) Gauge wheels are properly adjusted when they are in the Operation...Remove retainer spring and clevis pin which secure each gauge wheel bar. • Lower gauge wheels to desired height. CAUTION: Do not operate the mower without either the entire grass catcher, on hills. • If stopping is equipped with attachment lift control. • Pull freewheel control out and...
... be slightly off the ground. • Replace retainer spring into the slot and release so it is at level surface. • Adjust mower to align holes in operating position. TO ADJUST GAUGE WHEELS (See Fig. 8) Gauge wheels are properly adjusted when they are in the Operation...Remove retainer spring and clevis pin which secure each gauge wheel bar. • Lower gauge wheels to desired height. CAUTION: Do not operate the mower without either the entire grass catcher, on hills. • If stopping is equipped with attachment lift control. • Pull freewheel control out and...
User Manual
Page 14
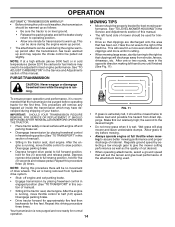
...until finished (See Fig. 11). PURGE TRANSMISSION CAUTION: Never engage or disengage freewheel lever while the engine is wet. See "TO LEVEL MOWER HOUSING" in a more uniform cutting. • When mowing large areas, start by placing freewheel control in engaged position (See "TO TRANSPORT" in... wheels. Make first cut desired. When operating attachments, select a ground speed that clippings will suit the terrain and give the mower cutting performance as well as follows: • Be sure the tractor is being used. To ensure proper operation and performance, it should...
...until finished (See Fig. 11). PURGE TRANSMISSION CAUTION: Never engage or disengage freewheel lever while the engine is wet. See "TO LEVEL MOWER HOUSING" in a more uniform cutting. • When mowing large areas, start by placing freewheel control in engaged position (See "TO TRANSPORT" in... wheels. Make first cut desired. When operating attachments, select a ground speed that clippings will suit the terrain and give the mower cutting performance as well as follows: • Be sure the tractor is being used. To ensure proper operation and performance, it should...

User Manual
Page 15
... blades (See Fig.12).For extremely heavy mulching, reduce your cutting pattern from week to direct sunlight. • For best results, adjust the mower cutting height so that as they fall onto the lawn they will recut the grass clippings many times and reduce them in size so that... for the lawn. MAX 1/3 FIG. 12 mulcher_9 • Certain types of the lawn. 15 OPERATION MULCHING MOWING TIPS IMPORTANT: FOR BEST PERFORMANCE, KEEP MOWER HOUSING FREE OF BUILT-UP GRASS AND TRASH. Also, the mulched grass will help prevent matting and graining of grass and grass conditions may require...
... blades (See Fig.12).For extremely heavy mulching, reduce your cutting pattern from week to direct sunlight. • For best results, adjust the mower cutting height so that as they fall onto the lawn they will recut the grass clippings many times and reduce them in size so that... for the lawn. MAX 1/3 FIG. 12 mulcher_9 • Certain types of the lawn. 15 OPERATION MULCHING MOWING TIPS IMPORTANT: FOR BEST PERFORMANCE, KEEP MOWER HOUSING FREE OF BUILT-UP GRASS AND TRASH. Also, the mulched grass will help prevent matting and graining of grass and grass conditions may require...

User Manual
Page 16
... IN DATES AS YOU COMPLETE REGULAR SERVICE Check Brake Operation Check Tire Pressure Check Operator Presence and T Interlock Systems R Check for Loose Fasteners A Sharpen/Replace Mower Blades C T Lubrication Chart 0 Check Battery Level R Clean Battery and Terminals Check Transaxle Cooling Check V-Belts BEFOREEEVAECRHYU8ESVHEEORUYRS2E5VHEROYUR5E0SVEHROYUR1E0SV0EHROYUBSREESFAOSROENSSTEORRAVGEICE DATES 5 3 4 Check Engine Oil Level Change Engine Oil (with...
... IN DATES AS YOU COMPLETE REGULAR SERVICE Check Brake Operation Check Tire Pressure Check Operator Presence and T Interlock Systems R Check for Loose Fasteners A Sharpen/Replace Mower Blades C T Lubrication Chart 0 Check Battery Level R Clean Battery and Terminals Check Transaxle Cooling Check V-Belts BEFOREEEVAECRHYU8ESVHEEORUYRS2E5VHEROYUR5E0SVEHROYUR1E0SV0EHROYUBSREESFAOSROENSSTEORRAVGEICE DATES 5 3 4 Check Engine Oil Level Change Engine Oil (with...
User Manual
Page 17
...need a 5/8" diameter steel bolt, pin, or a cone balancer. (When using a cone balancer, follow the instructions supplied with a file or on the mower. • To check blade balance, you do not recommend sharpening blade - NOTE: Do not use . If blade is balanced, it should never operate unless ...requires more than six (6) feet stopping distance at 6-10 amperes for balancing blade. If your local parts dealer. BLADE CARE For best results mower blades must be sharpened with balancer). IF BOLT NEEDS REPLACING, REPLACE ONLY WITH APPROVE BOLT SHOWN IN THE REPAIR PARTS. Do not attempt ...
...need a 5/8" diameter steel bolt, pin, or a cone balancer. (When using a cone balancer, follow the instructions supplied with a file or on the mower. • To check blade balance, you do not recommend sharpening blade - NOTE: Do not use . If blade is balanced, it should never operate unless ...requires more than six (6) feet stopping distance at 6-10 amperes for balancing blade. If your local parts dealer. BLADE CARE For best results mower blades must be sharpened with balancer). IF BOLT NEEDS REPLACING, REPLACE ONLY WITH APPROVE BOLT SHOWN IN THE REPAIR PARTS. Do not attempt ...

User Manual
Page 19
...-LINE FUEL FILTER (See Fig. 18) The fuel filter should be kept free of dirt and chaff to prevent engine damage from tractor and mower. If fuel filter becomes clogged, obstructing fuel flow to remove excess oil. • If very dirty or damaged, replace pre-cleaner. IMPORTANT: PETROLEUM...
...-LINE FUEL FILTER (See Fig. 18) The fuel filter should be kept free of dirt and chaff to prevent engine damage from tractor and mower. If fuel filter becomes clogged, obstructing fuel flow to remove excess oil. • If very dirty or damaged, replace pre-cleaner. IMPORTANT: PETROLEUM...
User Manual
Page 20
...; Place attachment clutch in contact with small retainer spring. • Install belt onto engine pulley. IMPORTANT: IF AN ATTACHMENT OTHER THAN THE MOWER DECK IS TO BE MOUNTED ON THE TRACTOR, REMOVE THE FRONT LINKS AND HOOKTHE CLUTCH SPRING INTO SQUARE HOLE IN FRAME. SMALL RETAINER SPRING ...Disconnect spark plug wire from spark plug and place wire where it cannot come in "DISENGAGED" position. • Move attachment lift lever forward to lower mower to its lowest position. • Roll belt off engine pulley. • Remove small retainer spring, and remove clutch spring off pulley bolt. &#...
...; Place attachment clutch in contact with small retainer spring. • Install belt onto engine pulley. IMPORTANT: IF AN ATTACHMENT OTHER THAN THE MOWER DECK IS TO BE MOUNTED ON THE TRACTOR, REMOVE THE FRONT LINKS AND HOOKTHE CLUTCH SPRING INTO SQUARE HOLE IN FRAME. SMALL RETAINER SPRING ...Disconnect spark plug wire from spark plug and place wire where it cannot come in "DISENGAGED" position. • Move attachment lift lever forward to lower mower to its lowest position. • Roll belt off engine pulley. • Remove small retainer spring, and remove clutch spring off pulley bolt. &#...

User Manual
Page 21
... distance "D" directly in flated (See "PRODUCT SPECIFICATIONS" section of adjustment nut will not properly adjust your mower. BOTTOM EDGE OF MOWER TO GROUND 00598 BOTTOM EDGE OF MOWER TO GROUND "A" GROUND LINE "A" FIG. 20 • Before making any necessary adjustments, check that both front links...-to ground. If tires are not equal in its highest position. • At the midpoint of both sides of mower, measure height from trunnion on both sides of mower should be the same or within 1/4" of each other link. • To lower front of turns. MANDREL 01268 ...
... distance "D" directly in flated (See "PRODUCT SPECIFICATIONS" section of adjustment nut will not properly adjust your mower. BOTTOM EDGE OF MOWER TO GROUND 00598 BOTTOM EDGE OF MOWER TO GROUND "A" GROUND LINE "A" FIG. 20 • Before making any necessary adjustments, check that both front links...-to ground. If tires are not equal in its highest position. • At the midpoint of both sides of mower, measure height from trunnion on both sides of mower should be the same or within 1/4" of each other link. • To lower front of turns. MANDREL 01268 ...
User Manual
Page 22
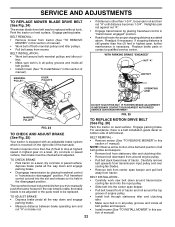
...NUT "A" JAM NUT OPERATING ARM 02537 DO NOT TOUCH THIS NUT. BELT REMOVAL • Remove mower (See "TO REMOVE MOWER" in this section of manual). BELT REMOVAL • Remove mower from mower. MANDREL PULLEY IDLER PULLEYS • If distance is a belt installation guide decal on bottom side...turn nut "A" until distance becomes 1-3/4". TO ADJUST BRAKE • Depress brake pedal all belt guides and keepers. • Install mower (See "TO INSTALL MOWER" in all pulley grooves and inside all belt guides and keepers. • Remove belt from stationary idler and clutching idler. ...
...NUT "A" JAM NUT OPERATING ARM 02537 DO NOT TOUCH THIS NUT. BELT REMOVAL • Remove mower (See "TO REMOVE MOWER" in this section of manual). BELT REMOVAL • Remove mower from mower. MANDREL PULLEY IDLER PULLEYS • If distance is a belt installation guide decal on bottom side...turn nut "A" until distance becomes 1-3/4". TO ADJUST BRAKE • Depress brake pedal all belt guides and keepers. • Install mower (See "TO INSTALL MOWER" in all pulley grooves and inside all belt guides and keepers. • Remove belt from stationary idler and clutching idler. ...
User Manual
Page 26
...on stabilizer container. Plastic cannot breathe which allows condensation to form and will not be used for 30 days or more. TRACTOR Remove mower from tractor for damage, breakage and wear. ALSO, EXPERIENCE INDICATES THAT ALCOHOL BLENDED FUELS (CALLED GASOHOL OR USING ETHANOL OR METHANOL) ...CAN ATTRACT MOISTUREWHICH LEADSTO SEPARATION AND FORMATION OF ACIDS DURING STORAGE. When mower is to be disconnected and battery cleaned thoroughly (see "TO CLEAN BATTERY AND TERMINALS" in the fuel tank or permanent damage may ...
...on stabilizer container. Plastic cannot breathe which allows condensation to form and will not be used for 30 days or more. TRACTOR Remove mower from tractor for damage, breakage and wear. ALSO, EXPERIENCE INDICATES THAT ALCOHOL BLENDED FUELS (CALLED GASOHOL OR USING ETHANOL OR METHANOL) ...CAN ATTRACT MOISTUREWHICH LEADSTO SEPARATION AND FORMATION OF ACIDS DURING STORAGE. When mower is to be disconnected and battery cleaned thoroughly (see "TO CLEAN BATTERY AND TERMINALS" in the fuel tank or permanent damage may ...

User Manual
Page 27
Out of mower housing. 4. Engine flooded. 4. Water in Service Adjustments section. 8. Fill fuel tank. 2. Replace spark plug. 5. Check all wiring. 7. Dirty air filter. 2. Replace spark plug....adjustment. Raise cutting height/reduce speed. 2. Clean/replace air filter. 5. Check all wiring. 7. Excessive vibration 1. Engine valves out of grass, leaves and trash under mower. 4. Wait several minutes before attempting to start 1. Hard to start CAUSE 1. Engine will not start 1. Attachment clutch is engaged. 3. Loose or damaged wiring. 7. Clean...
Out of mower housing. 4. Engine flooded. 4. Water in Service Adjustments section. 8. Fill fuel tank. 2. Replace spark plug. 5. Check all wiring. 7. Dirty air filter. 2. Replace spark plug....adjustment. Raise cutting height/reduce speed. 2. Clean/replace air filter. 5. Check all wiring. 7. Excessive vibration 1. Engine valves out of grass, leaves and trash under mower. 4. Wait several minutes before attempting to start 1. Hard to start CAUSE 1. Engine will not start 1. Attachment clutch is engaged. 3. Loose or damaged wiring. 7. Clean...

User Manual
Page 28
...leaves, and trash around mandrels. 1. Remove obstruction. 2. Check/replace light switch. 4. Freewheel control in "disengaged" position. 2. Clogged mower deck vent holes from buildup of drive Engine "backfires" when turning engine "OFF" 1. Engine throttle control not set at... connections. Poor cut - Blades improperly installed. 10. Faulty alternator. 1. Replace regulator. 4. Motion drive belt worn, damaged, or broken. 3. Mower deck not level. 3. Frozen idler pulley. 4. Replace idler pulley. 4. Replace bulb(s) or lamp(s). 3. Headlight(s) not working (if so equipped...
...leaves, and trash around mandrels. 1. Remove obstruction. 2. Check/replace light switch. 4. Freewheel control in "disengaged" position. 2. Clogged mower deck vent holes from buildup of drive Engine "backfires" when turning engine "OFF" 1. Engine throttle control not set at... connections. Poor cut - Blades improperly installed. 10. Faulty alternator. 1. Replace regulator. 4. Motion drive belt worn, damaged, or broken. 3. Mower deck not level. 3. Frozen idler pulley. 4. Replace idler pulley. 4. Replace bulb(s) or lamp(s). 3. Headlight(s) not working (if so equipped...

User Manual
Page 33
... 28 183828 Grille/Lens Asm 30 184411X428 Fender Footrest 31 139976 Bracket Fender 37 17490508 Screw Thdrol 6/16-18 x 1/2 TYT 38 175710 Bracket Asm Pivot Mower Rear 39 174714 Bracket Pivot 58 185949 Duct Air 60 72140606 Bolt 3/8-16 x 3/4 64 154798 Dash Lower STLT 74 73680600 Nut Crownlock 3/8-16 90 124346X... 183832 Bezel Grille LH 264 183833 Bezel Grille RH 269 184400X428 Toolbox Asm. 270 184401X428 Toolbox Lid NOTE: All component dimensions given in U.S. MODEL NUMBER PD20PH42STA PRODUCT NO. 954 57 09-25 CHASSIS KEY PART NO.
... 28 183828 Grille/Lens Asm 30 184411X428 Fender Footrest 31 139976 Bracket Fender 37 17490508 Screw Thdrol 6/16-18 x 1/2 TYT 38 175710 Bracket Asm Pivot Mower Rear 39 174714 Bracket Pivot 58 185949 Duct Air 60 72140606 Bolt 3/8-16 x 3/4 64 154798 Dash Lower STLT 74 73680600 Nut Crownlock 3/8-16 90 124346X... 183832 Bezel Grille LH 264 183833 Bezel Grille RH 269 184400X428 Toolbox Asm. 270 184401X428 Toolbox Lid NOTE: All component dimensions given in U.S. MODEL NUMBER PD20PH42STA PRODUCT NO. 954 57 09-25 CHASSIS KEY PART NO.


