

User Manual
Page 1
ENGLISH EN DATA PROJECTOR MODEL XD500U-ST User Manual This User Manual is important to you. Please read it before using your projector.
ENGLISH EN DATA PROJECTOR MODEL XD500U-ST User Manual This User Manual is important to you. Please read it before using your projector.

User Manual
Page 2
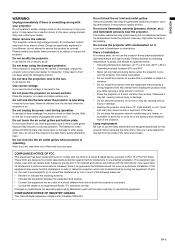
...their connection to conserve the environment we live in! WARNING Use the attached specified power supply cord. When using the projector in the Standard for the Protection of operation are separate collection systems for used exclusively for other products. All places of... Electronic Computer/Data Processing Equipment, ANSI/NFPA 75. If a chemical symbol is intended to alert the user to the directive 2006/66/EC Article 20 Information...
...their connection to conserve the environment we live in! WARNING Use the attached specified power supply cord. When using the projector in the Standard for the Protection of operation are separate collection systems for used exclusively for other products. All places of... Electronic Computer/Data Processing Equipment, ANSI/NFPA 75. If a chemical symbol is intended to alert the user to the directive 2006/66/EC Article 20 Information...

User Manual
Page 4
... surfaces may result in fire, electric shock or other controls may result in damage and may touch dangerous voltage points or short-out parts that the projector is in performance this projector from the wall outlet and refer servicing to be operated only from overheating. Servicing Do not attempt to . 4. Damage requiring service...
... surfaces may result in fire, electric shock or other controls may result in damage and may touch dangerous voltage points or short-out parts that the projector is in performance this projector from the wall outlet and refer servicing to be operated only from overheating. Servicing Do not attempt to . 4. Damage requiring service...
User Manual
Page 5
...encouraged to try to use flammable solvents (benzene, thinner, etc.) and flammable aerosols near any heat-producing device under the projector to the air outlet grilles because they are designed to radio communications. If they become hot during operation. Please maintain an ...noise or odor comes out of your eyes. EN-5 In this equipment does cause harmful interference to vibration. • Do not install the projector near the projector. Otherwise it . Except as specified below. • Operating temperature: between +41°F (+5°C) and +95°F (+35°...
...encouraged to try to use flammable solvents (benzene, thinner, etc.) and flammable aerosols near any heat-producing device under the projector to the air outlet grilles because they are designed to radio communications. If they become hot during operation. Please maintain an ...noise or odor comes out of your eyes. EN-5 In this equipment does cause harmful interference to vibration. • Do not install the projector near the projector. Otherwise it . Except as specified below. • Operating temperature: between +41°F (+5°C) and +95°F (+35°...

User Manual
Page 6
...) 10 Adjustment feet (rear) 11 Lock bar 12 Foot Adjustment button (Front) 13 Lamp cover Caution: Do not replace the lamp immediately after using the projector because the lamp would be extremely hot and it may cause burns. 10 7 Control panel 8 11 10 6 3 9 5 4 7 Terminal board 3 2 8 9 6 7 11 5 ... VIDEO terminal 10 Lock bar 11 SERIAL (RS-232C) terminal (D-SUB 9-pin) 12 AUDIO L/R terminals 13 Kensington Lock Kensington Lock This projector has a Kensington Security Standard connector for use with the Kensington System for instructions on the screen, the KEYSTONE button functions as the W, ...
...) 10 Adjustment feet (rear) 11 Lock bar 12 Foot Adjustment button (Front) 13 Lamp cover Caution: Do not replace the lamp immediately after using the projector because the lamp would be extremely hot and it may cause burns. 10 7 Control panel 8 11 10 6 3 9 5 4 7 Terminal board 3 2 8 9 6 7 11 5 ... VIDEO terminal 10 Lock bar 11 SERIAL (RS-232C) terminal (D-SUB 9-pin) 12 AUDIO L/R terminals 13 Kensington Lock Kensington Lock This projector has a Kensington Security Standard connector for use with the Kensington System for instructions on the screen, the KEYSTONE button functions as the W, ...

User Manual
Page 8
...batteries according to +, and - Keep a distance at the remote control sensor of the arrow. 2. Inverted fluorescent light, if located near the projector, may not work correctly. to -). • Load the batteries from the remote control to the instructions. • Load the battery with ... rinse them tightly. 3. spring side, and make sure to direct sunlight or fluorescent. If the solution comes in the direction of the projector. Reception angle (vertical) Reception angle (horizontal) Reception angle (vertical), ceiling mount Important: • Do not expose the remote control sensor...
...batteries according to +, and - Keep a distance at the remote control sensor of the arrow. 2. Inverted fluorescent light, if located near the projector, may not work correctly. to -). • Load the batteries from the remote control to the instructions. • Load the battery with ... rinse them tightly. 3. spring side, and make sure to direct sunlight or fluorescent. If the solution comes in the direction of the projector. Reception angle (vertical) Reception angle (horizontal) Reception angle (vertical), ceiling mount Important: • Do not expose the remote control sensor...

User Manual
Page 9
..., consult your dealer. • For rear projection, set IMAGE REVERSE in the INSTALLATION menu to MIRROR INVERT See page 18. • When the projector is lower than +41°F (or +5°C) or higher than those projected in the case of tabletop mounting. This isn't a product malfunction. Front...projection, ceiling mounting Caution: For ceiling mounting, you need the ceiling mount kit designed for installation. Put a hard board under the projector to MIRROR. Rear projection • Where the temperature is mounted on the ceiling, images may appear darker than +95°F (or...
..., consult your dealer. • For rear projection, set IMAGE REVERSE in the INSTALLATION menu to MIRROR INVERT See page 18. • When the projector is lower than +41°F (or +5°C) or higher than those projected in the case of tabletop mounting. This isn't a product malfunction. Front...projection, ceiling mounting Caution: For ceiling mounting, you need the ceiling mount kit designed for installation. Put a hard board under the projector to MIRROR. Rear projection • Where the temperature is mounted on the ceiling, images may appear darker than +95°F (or...

User Manual
Page 10
... cable (option) COMPUTER IN Important: • The terminal's names Y, PB, and PR are located too close to RGB in the power cords of the projector and the connected devices firmly. BNC conversion cable for 3-line fitting (Y, CB, CR). Do not pull the cord. • When the...(option) to audio output (L) to audio output (R) to audio output B R BNC - VCR, etc. RCA connector (option) No connection Mini D-SUB 15-pin - Basic connections This projector can also be affected by their interference. • See the owner's guide of each device for details about its connections.
... cable (option) COMPUTER IN Important: • The terminal's names Y, PB, and PR are located too close to RGB in the power cords of the projector and the connected devices firmly. BNC conversion cable for 3-line fitting (Y, CB, CR). Do not pull the cord. • When the...(option) to audio output (L) to audio output (R) to audio output B R BNC - VCR, etc. RCA connector (option) No connection Mini D-SUB 15-pin - Basic connections This projector can also be affected by their interference. • See the owner's guide of each device for details about its connections.

User Manual
Page 11
...OUTPUT to the AUDIO OUT terminal, the speaker output is required. For monitor connection: Connect the RGB cable from both a PC monitor and the projector. For Macintosh • If your dealer for further information. • Some Macintoshes require a MAC adapter for the RGB cable for connection with ... end of the RGB cable to both COMPUTER IN terminals (1, 2), images are coming from the monitor to the MONITOR OUT terminal of the projector. • Images may not be displayed correctly depending on the type of the computer. See the instruction manual of the monitor. •...
...OUTPUT to the AUDIO OUT terminal, the speaker output is required. For monitor connection: Connect the RGB cable from both a PC monitor and the projector. For Macintosh • If your dealer for further information. • Some Macintoshes require a MAC adapter for the RGB cable for connection with ... end of the RGB cable to both COMPUTER IN terminals (1, 2), images are coming from the monitor to the MONITOR OUT terminal of the projector. • Images may not be displayed correctly depending on the type of the computer. See the instruction manual of the monitor. •...
User Manual
Page 12
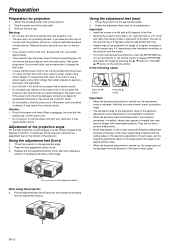
...position of lengthwise direction of three-pin grounding type. Rotate the adjustment feet (rear) for the U.S is provided appropriately. • This projector uses the power plug of the image. Note that the power cord for fine adjustment. Foot adjustment button After using the two adjustment ...The lens cap is indicated. Using the adjustment feet (front) 1. Put the adjustment feet (front) back into the lens directly when the projector is on the installation conditions of the keystone adjustment. In addition, stripes may appear or straight lines may bend in a shape of a regular...
...position of lengthwise direction of three-pin grounding type. Rotate the adjustment feet (rear) for the U.S is provided appropriately. • This projector uses the power plug of the image. Note that the power cord for fine adjustment. Foot adjustment button After using the two adjustment ...The lens cap is indicated. Using the adjustment feet (front) 1. Put the adjustment feet (front) back into the lens directly when the projector is on the installation conditions of the keystone adjustment. In addition, stripes may appear or straight lines may bend in a shape of a regular...

User Manual
Page 13
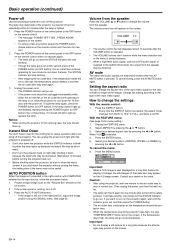
...on even if you cannot switch the LAMP MODE in the INSTALLATION menu, the STANDARD lamp mode is activated by default whenever the projector is chosen as the source, images supplied from the computer may not be replaced soon. Choose your dealer to the power interruption...PAGE KEYSTONE DOWN MENU AUTO POSITION AV MUTE ENTER FREEZE VIEWER UNPLUG 1 COMPUTER 2 VIDEO S-VIDEO 5 Power-on the control panel. • The projector automatically selects the appropriate signal format. Wait a few minutes and try to interference with the lens cap while the lamp is on the device connected...
...on even if you cannot switch the LAMP MODE in the INSTALLATION menu, the STANDARD lamp mode is activated by default whenever the projector is chosen as the source, images supplied from the computer may not be replaced soon. Choose your dealer to the power interruption...PAGE KEYSTONE DOWN MENU AUTO POSITION AV MUTE ENTER FREEZE VIEWER UNPLUG 1 COMPUTER 2 VIDEO S-VIDEO 5 Power-on the control panel. • The projector automatically selects the appropriate signal format. Wait a few minutes and try to interference with the lens cap while the lamp is on the device connected...
User Manual
Page 14
...buttons don't function while the menu selection bar or the menu is kept displayed for safety purpose. The lamp may deteriorate if the projector is supplied to light up immediately, repeat pressing the POWER button (or OFF button) two or three times. The STATUS indicator will ... 19 for cancel.) 2. Select your desired position (CENTER, UPPER or LOWER) by pressing the S or T button. 3. If you shut down the projector while the STATUS indicator is pressed. If it down for a long time because the afterimages may not be shortened. (Wait about 10 minutes before displaying...
...buttons don't function while the menu selection bar or the menu is kept displayed for safety purpose. The lamp may deteriorate if the projector is supplied to light up immediately, repeat pressing the POWER button (or OFF button) two or three times. The STATUS indicator will ... 19 for cancel.) 2. Select your desired position (CENTER, UPPER or LOWER) by pressing the S or T button. 3. If you shut down the projector while the STATUS indicator is pressed. If it down for a long time because the afterimages may not be shortened. (Wait about 10 minutes before displaying...
User Manual
Page 15
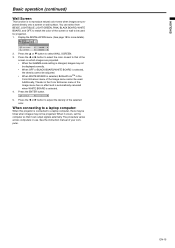
... selected, BrilliantColorTM in the Color Enhancer menu of the Image menu cannot be used . Press the ENTER button. When connecting to a laptop computer: When this projector is connected to that it occurs, set the computer so that of the screen on which images are projected directly onto a screen or wall surface...
... selected, BrilliantColorTM in the Color Enhancer menu of the Image menu cannot be used . Press the ENTER button. When connecting to a laptop computer: When this projector is connected to that it occurs, set the computer so that of the screen on which images are projected directly onto a screen or wall surface...

User Manual
Page 16
... COMPUTER/COMPONENT VIDEO IN-1 terminal. *5 The range that can be specified varies across input signals. *6 Available only when the input signal is supplied to the projector. POSITION FINE SYNC. *1 *2 TRACKING *2 COMPUTER INPUT *2 OVER SCAN HOLD *2 USER 0-999 *5 0-999 *5 0-31 0-2800 *5 AUTO, RGB, YCBCR/YPBPR 100-90% *5 OFF ON OK BEGIN END...
... COMPUTER/COMPONENT VIDEO IN-1 terminal. *5 The range that can be specified varies across input signals. *6 Available only when the input signal is supplied to the projector. POSITION FINE SYNC. *1 *2 TRACKING *2 COMPUTER INPUT *2 OVER SCAN HOLD *2 USER 0-999 *5 0-999 *5 0-31 0-2800 *5 AUTO, RGB, YCBCR/YPBPR 100-90% *5 OFF ON OK BEGIN END...

User Manual
Page 17
... Automatically sets an optimal color balance based on the screen. • The closed caption function displays text information included in the NTSC signal, which the projector is inputted. • You cannot adjust COLOR TEMP. Adjusts the color tint of analog video signals. Adjusts the input level of projected images. (See page...
... Automatically sets an optimal color balance based on the screen. • The closed caption function displays text information included in the NTSC signal, which the projector is inputted. • You cannot adjust COLOR TEMP. Adjusts the color tint of analog video signals. Adjusts the input level of projected images. (See page...

User Manual
Page 18
...a well-lit room. Select this setting when you want to view images from the front with the projector set to SPLASH ID, as the password lock is on the floor. Use the remote control to ... flicker. • If this mode is set to view images from behind the screen with the projector set to the desired level on the lamp. Select this setting when you want to view images ...is selected, the splash screen is displayed. opt. Select ON to display the splash screen when the projector is set to capture the screen for an extended period of the screen or wall on which images ...
...a well-lit room. Select this setting when you want to view images from the front with the projector set to SPLASH ID, as the password lock is on the floor. Use the remote control to ... flicker. • If this mode is set to view images from behind the screen with the projector set to the desired level on the lamp. Select this setting when you want to view images ...is selected, the splash screen is displayed. opt. Select ON to display the splash screen when the projector is set to capture the screen for an extended period of the screen or wall on which images ...

User Manual
Page 19
.... Select this setting when images are projected, either. • Use a SCART-Mini D-SUB 15-pin cable (optional) when you connect the projector to a device equipped with a SCART terminal that you want to project images in relative to ON, nothing is a WXGA video signal. AUTO ...SCART INPUT A è LANGUAGE RESET ALL AUTO DISPLAY INPUT 1. No computer signals are dark. cel function for most cases. Use this projector. Select the appropriate format when the input signal is output to change the SETUP mode. Select this setting to connect with the SCART terminal...
.... Select this setting when images are projected, either. • Use a SCART-Mini D-SUB 15-pin cable (optional) when you connect the projector to a device equipped with a SCART terminal that you want to project images in relative to ON, nothing is a WXGA video signal. AUTO ...SCART INPUT A è LANGUAGE RESET ALL AUTO DISPLAY INPUT 1. No computer signals are dark. cel function for most cases. Use this projector. Select the appropriate format when the input signal is output to change the SETUP mode. Select this setting to connect with the SCART terminal...

User Manual
Page 20
...malfunction. • When you are not a malfunction. • SHUTTER does not work correctly during keystone adjustment. • When you connect the projector to adjust projected images when noise appears in the bottom part of projected images. Use this setting to correct solid black that LAMP MODE is...when you change the value of the image. Use this setting to eliminate vertical wide stripes, if they appear, when you connect the projector to which the currently projected video signal is being input. Use this setting when you are displayed. • When the lamp operating ...
...malfunction. • When you are not a malfunction. • SHUTTER does not work correctly during keystone adjustment. • When you connect the projector to adjust projected images when noise appears in the bottom part of projected images. Use this setting to correct solid black that LAMP MODE is...when you change the value of the image. Use this setting to eliminate vertical wide stripes, if they appear, when you connect the projector to which the currently projected video signal is being input. Use this setting when you are displayed. • When the lamp operating ...

User Manual
Page 22
... SIGNAL menu. 2. Vertical or horizontal streaks may not be projected, depending on the type of the color wheel is pressed, the color becomes lighter. This projector automatically and properly projects video signals being input from the computer using the SIGNAL menu. in the SIGNAL menu. When the motion is pressed, the...
... SIGNAL menu. 2. Vertical or horizontal streaks may not be projected, depending on the type of the color wheel is pressed, the color becomes lighter. This projector automatically and properly projects video signals being input from the computer using the SIGNAL menu. in the SIGNAL menu. When the motion is pressed, the...
User Manual
Page 23
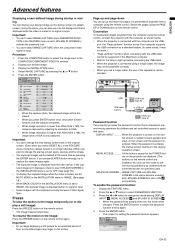
...; When image resolution is higher than XGA(1024 x 768), the image is captured by children and set , the mode never changes. USB USB 4-pin (type B) USB cable (option) to USB port USB 4-pin (type A) Password function This projector provides the password function that is displayed ...image is input. opt. Display the INSTALLATION menu. 4. Important: • Do not keep displaying a still picture for the POWER button on the projector are disabled. (The buttons on the remote control are enabled.) You can use of a presentation projected from the computer using a longer cable, the ...
...; When image resolution is higher than XGA(1024 x 768), the image is captured by children and set , the mode never changes. USB USB 4-pin (type B) USB cable (option) to USB port USB 4-pin (type A) Password function This projector provides the password function that is displayed ...image is input. opt. Display the INSTALLATION menu. 4. Important: • Do not keep displaying a still picture for the POWER button on the projector are disabled. (The buttons on the remote control are enabled.) You can use of a presentation projected from the computer using a longer cable, the ...