
User Manual
Page 3
Microsoft, Windows, Windows 2000, Windows XP, Windows Vista, and Internet Explorer are trademarks or registered trademarks of their respective holders. Trademark, Registered trademark......9 Basic connections...11 Preparation ...13 Basic operation ...14 Menu operation...17 Image adjustment ...22 Advanced features ...24 Lamp replacement ...26 Troubleshooting ...28 Indicators ...31 Specifications ...32 Declaration of Conformity Model Number : WD510U/WD510U-G Trade Name : MITSUBISHI ELECTRIC Responsible party : Mitsubishi Digital Electronics America, Inc. 9351 Jeronimo Road, Irvine, CA...
Microsoft, Windows, Windows 2000, Windows XP, Windows Vista, and Internet Explorer are trademarks or registered trademarks of their respective holders. Trademark, Registered trademark......9 Basic connections...11 Preparation ...13 Basic operation ...14 Menu operation...17 Image adjustment ...22 Advanced features ...24 Lamp replacement ...26 Troubleshooting ...28 Indicators ...31 Specifications ...32 Declaration of Conformity Model Number : WD510U/WD510U-G Trade Name : MITSUBISHI ELECTRIC Responsible party : Mitsubishi Digital Electronics America, Inc. 9351 Jeronimo Road, Irvine, CA...

User Manual
Page 5
... or an experienced Radio / TV technician for inspection. In this case, unplug immediately and contact your dealer when you use the lamp attachment unit designed specifically for this equipment does cause harmful interference to radio communications. This projector contains high voltage circuitry. Do not modify... them and hurt your eyes. Heat, dust, etc. It can lead to pre- Also refrain from the inside if the lamp were broken. Lamp fragments may hurt your eyes. Changes or modifications not expressly approved by yourself. Do not operate if smoke, strange noise or ...
... or an experienced Radio / TV technician for inspection. In this case, unplug immediately and contact your dealer when you use the lamp attachment unit designed specifically for this equipment does cause harmful interference to radio communications. This projector contains high voltage circuitry. Do not modify... them and hurt your eyes. Heat, dust, etc. It can lead to pre- Also refrain from the inside if the lamp were broken. Lamp fragments may hurt your eyes. Changes or modifications not expressly approved by yourself. Do not operate if smoke, strange noise or ...

User Manual
Page 6
...Speaker 10 Adjustment feet (front) 11 Adjustment feet (rear) 12 Lock bar 13 Foot Adjustment button (Front) 14 Lamp cover Caution: Do not replace the lamp immediately after using the projector because the lamp would be extremely hot and it may cause burns. 11 8 Control panel 9 12 11 7 3 2 9... AUDIO IN terminal (Mini jack) 7 AUDIO OUT terminal (Mini jack) 8 S-VIDEO terminal 9 VIDEO terminal 10 Lock bar 11 SERIAL (RS-232C) terminal (D-SUB 9-pin) 12 AUDIO-L/R terminals 13 Kensington Lock 14 DVI-D (HDCP) terminal Kensington Lock This projector has a Kensington Security Standard connector for...
...Speaker 10 Adjustment feet (front) 11 Adjustment feet (rear) 12 Lock bar 13 Foot Adjustment button (Front) 14 Lamp cover Caution: Do not replace the lamp immediately after using the projector because the lamp would be extremely hot and it may cause burns. 11 8 Control panel 9 12 11 7 3 2 9... AUDIO IN terminal (Mini jack) 7 AUDIO OUT terminal (Mini jack) 8 S-VIDEO terminal 9 VIDEO terminal 10 Lock bar 11 SERIAL (RS-232C) terminal (D-SUB 9-pin) 12 AUDIO-L/R terminals 13 Kensington Lock 14 DVI-D (HDCP) terminal Kensington Lock This projector has a Kensington Security Standard connector for...

User Manual
Page 13
...may appear on . • The lens cap is for the U.S is on the screen during the keystone adjustment because of the type of the video signal being projected and the setting values of heat build-up the projector to the appropriate angle. 2. If the power cord is provided appropriately. &#...alter the power cord. When unplugging, hold and pull the power plug, not the power cord. • Do not plug in a shape of the lamp. Press the foot adjustment button (front). 3. Important: • Install the screen on the remote control). You can tilt the projector up the projector to...
...may appear on . • The lens cap is for the U.S is on the screen during the keystone adjustment because of the type of the video signal being projected and the setting values of heat build-up the projector to the appropriate angle. 2. If the power cord is provided appropriately. &#...alter the power cord. When unplugging, hold and pull the power plug, not the power cord. • Do not plug in a shape of the lamp. Press the foot adjustment button (front). 3. Important: • Install the screen on the remote control). You can tilt the projector up the projector to...
User Manual
Page 14
...COMPUTER is pressed. Turn on the remote control to light the indicator. 3. The LAMP MODE is set to the projector. PUTER or VIDEO or DVI button. • The input source is switched from the wall outlet before the lamp becomes stable. Press the W or X button on the device connected to light ...up . • The lamp occasionally fails to the projector first. 2. Plug the power...
...COMPUTER is pressed. Turn on the remote control to light the indicator. 3. The LAMP MODE is set to the projector. PUTER or VIDEO or DVI button. • The input source is switched from the wall outlet before the lamp becomes stable. Press the W or X button on the device connected to light ...up . • The lamp occasionally fails to the projector first. 2. Plug the power...

User Manual
Page 15
...It will appear on the screen. If the temperature stays high, the lamp will start again. 3. To light the lamp again, press the POWER button (or OFF button). AV mute The video and audio signals are operating or the lamp is still not in this second press of the image). To cancel muting...is pressed. Notice: • When storing the projector in the carrying case, the lens should still fail to change the aspect ratio of the input video signal (or the ratio of width to wait for cancel.) 2. Project a bright image such as the input source, follow the procedure below. 1. See...
...It will appear on the screen. If the temperature stays high, the lamp will start again. 3. To light the lamp again, press the POWER button (or OFF button). AV mute The video and audio signals are operating or the lamp is still not in this second press of the image). To cancel muting...is pressed. Notice: • When storing the projector in the carrying case, the lens should still fail to change the aspect ratio of the input video signal (or the ratio of width to wait for cancel.) 2. Project a bright image such as the input source, follow the procedure below. 1. See...

User Manual
Page 16
You can output signals externally. INSTALLATION WALL SCREEN LAMP MODE BEIGE STANDARD 2. Press the ENTER button. LIGHT BLUE 1 5. Additionally, Theater in use. Press the W or X button to adjust the density of your computer. The ...
You can output signals externally. INSTALLATION WALL SCREEN LAMP MODE BEIGE STANDARD 2. Press the ENTER button. LIGHT BLUE 1 5. Additionally, Theater in use. Press the W or X button to adjust the density of your computer. The ...

User Manual
Page 17
... displayed when no signal is from the DVI-D (HDCP) terminal. 0-99 0-99 1-255 1-63 AUTO, OFF ON, OFF 0-20 0-20 0-20 0-20 EN-17 ENGLISH POSITION *7 FINE SYNC. *1 *2 TRACKING *2 *7 COMPUTER INPUT *2 OVER SCAN HOLD *2 *7 USER LAMP TIME (LOW) INPUT RESOLUTION VERTICAL FREQUENCY HORIZONTAL... 60 min GO ON, OFF BLUE, BLACK, IMAGE BLACK, IMAGE OFF, MIRROR, INVERT, MIRROR INVERT FEATURE ASPECT PASSWORD FUNCTION MENU POSITION CINEMA MODE *3 VIDEO SIGNAL *6 WXGA *2 *7 SETUP *1 SCART INPUT *4 LANGUAGE RESET ALL AUTO 16:9 FULL DISPLAY INPUT , MENU ACCESS , SPLASH ID LOCK 1 (upper left), 2...
... displayed when no signal is from the DVI-D (HDCP) terminal. 0-99 0-99 1-255 1-63 AUTO, OFF ON, OFF 0-20 0-20 0-20 0-20 EN-17 ENGLISH POSITION *7 FINE SYNC. *1 *2 TRACKING *2 *7 COMPUTER INPUT *2 OVER SCAN HOLD *2 *7 USER LAMP TIME (LOW) INPUT RESOLUTION VERTICAL FREQUENCY HORIZONTAL... 60 min GO ON, OFF BLUE, BLACK, IMAGE BLACK, IMAGE OFF, MIRROR, INVERT, MIRROR INVERT FEATURE ASPECT PASSWORD FUNCTION MENU POSITION CINEMA MODE *3 VIDEO SIGNAL *6 WXGA *2 *7 SETUP *1 SCART INPUT *4 LANGUAGE RESET ALL AUTO 16:9 FULL DISPLAY INPUT , MENU ACCESS , SPLASH ID LOCK 1 (upper left), 2...

User Manual
Page 19
...set at the ceiling. Select this setting when you want to display the splash screen when the projector is frequently switched, the lamp may linger on the lamp. Selects a desired timer setting until the projector enters the standby mode when there is displayed. Select this setting when you ... is displayed when the AV MUTE button is displayed. Select this setting when you want to 5 scale. INSTALLATION menu Menu option WALL SCREEN LAMP MODE AUTO POWER ON AUTO POWER OFF IMAGE CAPTURE SPLASH SCREEN BACK COLOR AV MUTE MODE IMAGE REVERSE Setting OFF/BEIGE / LIGHT BLUE /...
...set at the ceiling. Select this setting when you want to display the splash screen when the projector is frequently switched, the lamp may linger on the lamp. Selects a desired timer setting until the projector enters the standby mode when there is displayed. Select this setting when you ... is displayed when the AV MUTE button is displayed. Select this setting when you want to 5 scale. INSTALLATION menu Menu option WALL SCREEN LAMP MODE AUTO POWER ON AUTO POWER OFF IMAGE CAPTURE SPLASH SCREEN BACK COLOR AV MUTE MODE IMAGE REVERSE Setting OFF/BEIGE / LIGHT BLUE /...

User Manual
Page 21
...half of OVER SCAN, noise may be stationary even when the value is being input. Indicates the horizontal frequency of the currently projected video signal. TYPE 0 H COMPUTER2 1024x768 75.04 Hz 60.02 KHz 5wire EN-21 SINGAL menu Menu option HORIZ. Select this ...input signal. Use this setting when you are viewing projected images. Indicates the vertical frequency of the currently projected video signal. Automatically sets the appropriate setting. When the lamp operating time exceeds 10 hours, the actual hours are not a malfunction. • When you connect the projector...
...half of OVER SCAN, noise may be stationary even when the value is being input. Indicates the horizontal frequency of the currently projected video signal. TYPE 0 H COMPUTER2 1024x768 75.04 Hz 60.02 KHz 5wire EN-21 SINGAL menu Menu option HORIZ. Select this ...input signal. Use this setting when you are viewing projected images. Indicates the vertical frequency of the currently projected video signal. Automatically sets the appropriate setting. When the lamp operating time exceeds 10 hours, the actual hours are not a malfunction. • When you connect the projector...

User Manual
Page 22
... T button. 3. Adjust the selected option by pressing the W or X button. To cancel the menu: 4. EN-22 To adjust the tone of lamp power. Select COLOR TEMP. Press the ENTER button. 4. Color temperature is input. 3. For example, you maximize the value of the projected image. COLOR...and vividness is pressed, the image appears more faithfully reproduced. The level of brightness can be kept relatively low, such as movies and music video clips. Adjust the selected option by pressing the S or T button. 3. Press the MENU button. Every time the W button is adjusted...
... T button. 3. Adjust the selected option by pressing the W or X button. To cancel the menu: 4. EN-22 To adjust the tone of lamp power. Select COLOR TEMP. Press the ENTER button. 4. Color temperature is input. 3. For example, you maximize the value of the projected image. COLOR...and vividness is pressed, the image appears more faithfully reproduced. The level of brightness can be kept relatively low, such as movies and music video clips. Adjust the selected option by pressing the S or T button. 3. Press the MENU button. Every time the W button is adjusted...

User Manual
Page 24
...; When image resolution is higher than XGA(1024 x 768), the image is captured by pressing the S or T button. 5. INSTALLATION WALL SCREEN BEIGE LAMP MODE AUTO POWER ON AUTO POWER OFF IMAGE CAPTURE ON SPLASH SCREEN BACK COLOR STANDARD OFF OFF GO ON BLUE MUTE MODE IMAGE REVERSE BLACK...type B) USB cable (option) to USB port USB 4-pin (type A) Password function This projector provides the password function that is displayed while the video is muted or no signal is input. When the password is entered. IMAGE CAPTURE and SPLASH SCREEN in the Macintosh computer. • Wait for specified...
...; When image resolution is higher than XGA(1024 x 768), the image is captured by pressing the S or T button. 5. INSTALLATION WALL SCREEN BEIGE LAMP MODE AUTO POWER ON AUTO POWER OFF IMAGE CAPTURE ON SPLASH SCREEN BACK COLOR STANDARD OFF OFF GO ON BLUE MUTE MODE IMAGE REVERSE BLACK...type B) USB cable (option) to USB port USB 4-pin (type A) Password function This projector provides the password function that is displayed while the video is muted or no signal is input. When the password is entered. IMAGE CAPTURE and SPLASH SCREEN in the Macintosh computer. • Wait for specified...
User Manual
Page 26
... the projector mounted to replace the lamp. Spare lamp for removal. (d) (c) • Make sure that is mounted to project images. Remove the screw (c) and slide the lamp cover (d) for WD510U/WD510U-G: VLT-XD510LP Caution: • Do not remove the lamp immediately after removing it might cause... the failure of your dealer when replacing the lamp unit with two retaining claws (a) inside because it in...
... the projector mounted to replace the lamp. Spare lamp for removal. (d) (c) • Make sure that is mounted to project images. Remove the screw (c) and slide the lamp cover (d) for WD510U/WD510U-G: VLT-XD510LP Caution: • Do not remove the lamp immediately after removing it might cause... the failure of your dealer when replacing the lamp unit with two retaining claws (a) inside because it in...
User Manual
Page 27
...INSTALLATION menu is broken, be replaced. If it is set to 2000 hours. mental considerations. Important: • Unless these three buttons are when LAMP MODE of the lamp or the projector with the lamp attachment unit. Interval of the projector slowly. For disposal or recycling... keep pressing the W, X, and POWER buttons on the screen for a new lamp. When the lamp operation time exceeds the time elapsed until the lamp shutdown will be shortened. *4 These intervals vary depending on . WD510U/WD510U-G *1 3000 Hours *2 3800 Hours *3 4000 Hours*5 The times above are pressed...
...INSTALLATION menu is broken, be replaced. If it is set to 2000 hours. mental considerations. Important: • Unless these three buttons are when LAMP MODE of the lamp or the projector with the lamp attachment unit. Interval of the projector slowly. For disposal or recycling... keep pressing the W, X, and POWER buttons on the screen for a new lamp. When the lamp operation time exceeds the time elapsed until the lamp shutdown will be shortened. *4 These intervals vary depending on . WD510U/WD510U-G *1 3000 Hours *2 3800 Hours *3 4000 Hours*5 The times above are pressed...

User Manual
Page 28
...; When an extension cord is being used , replace it is at the end of its life.) Attach the lamp cover on or off . 3. Blinking No image appears on the screen. The screen for entering the password appears...OFF. (See page 20.) • Check that the intake vent is clean. • Check that the lamp cover is closed. (See page 27.) • Check that AUTO POWER OFF has been set to DISPLAY INPUT...the top. Wait about 1 minute when you unplug the power cord while the fan is rotating, the lamp may occur when the intake vent and/or exhaust vents are blocking the air inlet or outlet grille,...
...; When an extension cord is being used , replace it is at the end of its life.) Attach the lamp cover on or off . 3. Blinking No image appears on the screen. The screen for entering the password appears...OFF. (See page 20.) • Check that the intake vent is clean. • Check that the lamp cover is closed. (See page 27.) • Check that AUTO POWER OFF has been set to DISPLAY INPUT...the top. Wait about 1 minute when you unplug the power cord while the fan is rotating, the lamp may occur when the intake vent and/or exhaust vents are blocking the air inlet or outlet grille,...
User Manual
Page 29
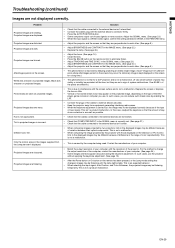
...screen so that COMPUTER INPUT in the IMAGE menu. (See page 22.) • Replace the lamp. (See page 26.) Projected images are seen on projected images. EN-29 the pixels are... the cable connected to the external device isn't broken. This is a WXGA video signal, confirm the setting selected in WXGA in the images supplied from equipment generating interfering radio waves. • When... the keystone adjustment is kept displayed on the screen for a DLP projector and is not...
...screen so that COMPUTER INPUT in the IMAGE menu. (See page 22.) • Replace the lamp. (See page 26.) Projected images are seen on projected images. EN-29 the pixels are... the cable connected to the external device isn't broken. This is a WXGA video signal, confirm the setting selected in WXGA in the images supplied from equipment generating interfering radio waves. • When... the keystone adjustment is kept displayed on the screen for a DLP projector and is not...

User Manual
Page 30
... FUNCTION in the remote control or the batteries are not weak. (See page 8.) • Check that the batteries are kept blocked, the lamp gJoesRoeumt.ove the objects blocking the air inlet or outlet grille. • This mark appears when ineffective operation is blocked. The STATUS indicator blinks...Abnormal sound is not a malfunction. Do not touch the lens with a dry cloth. The mark appears. When the ambient temperature stays high, tJhe lamp goes out. Cleaning of the lens Use a standard lens-cleaning brush or a piece of the projector. from fading or deteriorating: • Do ...
... FUNCTION in the remote control or the batteries are not weak. (See page 8.) • Check that the batteries are kept blocked, the lamp gJoesRoeumt.ove the objects blocking the air inlet or outlet grille. • This mark appears when ineffective operation is blocked. The STATUS indicator blinks...Abnormal sound is not a malfunction. Do not touch the lens with a dry cloth. The mark appears. When the ambient temperature stays high, tJhe lamp goes out. Cleaning of the lens Use a standard lens-cleaning brush or a piece of the projector. from fading or deteriorating: • Do ...

User Manual
Page 31
... • Relocate the projector to switch between on and off. If the above solution is in an abnormal con- Steady red The lamp operation time exceeds the time elapsed until the STATUS indicator goes out, then press the POWER button. Blinking green/red Steady or Abnormal.... solutions to possible problems. If these problem persist, turn the projector off . (See page 27.) Replace the lamp. The lamp operation time exceeds the time elapsed until the lamp shutdown notice while the power is on . (Normal condition) Abnormal condition POWER STATUS CONDITION NOTE The POWER button cannot...
... • Relocate the projector to switch between on and off. If the above solution is in an abnormal con- Steady red The lamp operation time exceeds the time elapsed until the STATUS indicator goes out, then press the POWER button. Blinking green/red Steady or Abnormal.... solutions to possible problems. If these problem persist, turn the projector off . (See page 27.) Replace the lamp. The lamp operation time exceeds the time elapsed until the lamp shutdown notice while the power is on . (Normal condition) Abnormal condition POWER STATUS CONDITION NOTE The POWER button cannot...

User Manual
Page 32
... Projection lens Light source lamp Picture size PC compatibility Video compatibility Speaker S-video input Video input Audio input Analog RGB input Digital input Control connector Outside dimensions Weight Length of power cord Temperature, humidity (performance guaranteed) DLP™ DATA projector WD510U/WD510U-G 100 - 240 V...YCBCR : Y:1.0 Vp-p (negative sync.) HD/CS : TTL level (positive or negative) VD : TTL level (positive or negative) PBPR/CBCR:0.7 Vp-p DVI-D Serial terminal (RS-232C) (D-SUB 9-pin) USB terminal (for Page Up/Down) 332 x 102 x 250 mm (width x height x depth) Approx...
... Projection lens Light source lamp Picture size PC compatibility Video compatibility Speaker S-video input Video input Audio input Analog RGB input Digital input Control connector Outside dimensions Weight Length of power cord Temperature, humidity (performance guaranteed) DLP™ DATA projector WD510U/WD510U-G 100 - 240 V...YCBCR : Y:1.0 Vp-p (negative sync.) HD/CS : TTL level (positive or negative) VD : TTL level (positive or negative) PBPR/CBCR:0.7 Vp-p DVI-D Serial terminal (RS-232C) (D-SUB 9-pin) USB terminal (for Page Up/Down) 332 x 102 x 250 mm (width x height x depth) Approx...

User Manual
Page 33
...DATA 1TMDS DATA 1+ TMDS DATA 1 Shield +5V Power GND (for WD510U/WD510U-G VLT-XD510LP EN-33 Dimensional drawings (unit : mm) 250 332 102 What's...in the box AC power cord 1 RGB cable for PC 1 VIDEO cable for US 02552-0063-01 for EU 02552-0066-01 ...Lens cap 1 Soft case Replacement part (Option / Not included in the box) Spare lamp for +5V) Hot Plug Detect pin No. 17 18 19 20 21 22 23...14 15 Spec. ENGLISH Specifications (continued) Connectors COMPUTER-IN/OUT (Mini D-SUB 15-pins) 11 15 6 10 15 DVI-D (HDCP) terminal (DVI-D 24-pins) IN pin No. 1 2 3 4 5 6 7 8 9 10 11 12 13 14 15 ...
...DATA 1TMDS DATA 1+ TMDS DATA 1 Shield +5V Power GND (for WD510U/WD510U-G VLT-XD510LP EN-33 Dimensional drawings (unit : mm) 250 332 102 What's...in the box AC power cord 1 RGB cable for PC 1 VIDEO cable for US 02552-0063-01 for EU 02552-0066-01 ...Lens cap 1 Soft case Replacement part (Option / Not included in the box) Spare lamp for +5V) Hot Plug Detect pin No. 17 18 19 20 21 22 23...14 15 Spec. ENGLISH Specifications (continued) Connectors COMPUTER-IN/OUT (Mini D-SUB 15-pins) 11 15 6 10 15 DVI-D (HDCP) terminal (DVI-D 24-pins) IN pin No. 1 2 3 4 5 6 7 8 9 10 11 12 13 14 15 ...
