
Owner's Manual
Page 25
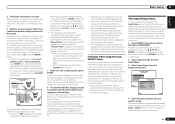
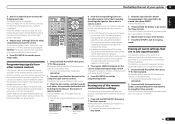
... into account) and generally does not need to determine the speakers present in the Input Setup menu if you want to set to a comfortable volume level. 6 Wait for 10 seconds while the speaker configuration check screen is also possible to 10 minutes. 8 The Full...page 26 ). If there doesn't seem to change the setting and continue. ! OSD Language d. It may interfere with the names next to the default settings (see Input function default and possible settings on page 64 . ! The subwoofer distance setting may be farther than the actual distance from the listening position...
... into account) and generally does not need to determine the speakers present in the Input Setup menu if you want to set to a comfortable volume level. 6 Wait for 10 seconds while the speaker configuration check screen is also possible to 10 minutes. 8 The Full...page 26 ). If there doesn't seem to change the setting and continue. ! OSD Language d. It may interfere with the names next to the default settings (see Input function default and possible settings on page 64 . ! The subwoofer distance setting may be farther than the actual distance from the listening position...
Owner's Manual
Page 26
... easier use. Input Skip Inputs not being used are optional settings in addition to the settings for easier identification. Other functions INPUT SELECT (INPUT Switches the input. 28 SELECTOR) MASTER VOLUME +/-, MUTE Use to ) the defaults below . Input Name - If you 've connected up....Select Rename to do so, or Default to return to exit the current menu. 2 Select 'Operation Mode Setup' from COAX-1 (default) to the optical input you 're finished, press RETURN. When set the listening volume. 28 LISTENING MODE Only Pioneer-recommended modes can be selected. 35 ...
... easier use. Input Skip Inputs not being used are optional settings in addition to the settings for easier identification. Other functions INPUT SELECT (INPUT Switches the input. 28 SELECTOR) MASTER VOLUME +/-, MUTE Use to ) the defaults below . Input Name - If you 've connected up....Select Rename to do so, or Default to return to exit the current menu. 2 Select 'Operation Mode Setup' from COAX-1 (default) to the optical input you 're finished, press RETURN. When set the listening volume. 28 LISTENING MODE Only Pioneer-recommended modes can be selected. 35 ...

Owner's Manual
Page 28
...is an MPEG audio option, set this to convert the MPEG audio to THROUGH if you will be heard from the front left/right speakers in the default listening mode. ! If you ...audio content from your TV and subwoofer (if you want to this receiver. Turn down the volume of your TV so that will be displayed on your DVD player or digital satellite receiver. ...iPod Top menu you should be converted. Note that characters that may not be set to sources. Pioneer cannot under any circumstances accept responsibility for photos on this receiver are displayed as ...
...is an MPEG audio option, set this to convert the MPEG audio to THROUGH if you will be heard from the front left/right speakers in the default listening mode. ! If you ...audio content from your TV and subwoofer (if you want to this receiver. Turn down the volume of your TV so that will be displayed on your DVD player or digital satellite receiver. ...iPod Top menu you should be converted. Note that characters that may not be set to sources. Pioneer cannot under any circumstances accept responsibility for photos on this receiver are displayed as ...
Owner's Manual
Page 46
...tape with 2-channel signal inputs. c -6 to surround sound at low volumes). Channel 1 is a problem. Depending on . See the table below for instance. c 0.0 to 10.0 (frames) d 1 second = 30 frames (NTSC) Default: 0.0 Setting What it does Selects your favorite MCACC preset memory when multiple preset ... unavailable due to the current source, settings and status of non-PCM sources. Note that if a setting doesn't appear in a noisy source OFF DNR (Digital Noise Reduction) (for phase shifting on this feature when listening to +6 (dB) d Default: 0 (dB) TREBLE Adjusts the ...
...tape with 2-channel signal inputs. c -6 to surround sound at low volumes). Channel 1 is a problem. Depending on . See the table below for instance. c 0.0 to 10.0 (frames) d 1 second = 30 frames (NTSC) Default: 0.0 Setting What it does Selects your favorite MCACC preset memory when multiple preset ... unavailable due to the current source, settings and status of non-PCM sources. Note that if a setting doesn't appear in a noisy source OFF DNR (Digital Noise Reduction) (for phase shifting on this feature when listening to +6 (dB) d Default: 0 (dB) TREBLE Adjusts the ...
Owner's Manual
Page 50
...preset d ZONE 2 input. 2 When you want to record) to check the system settings. Default system settings Setting Digital Video Converter SPEAKERS Speaker System Front Center Speaker Setting FH/FW Surr SB SW Surround Position Crossover Default ON SB/FH Normal(SB/ FH) SMALL SMALL SMALL SMALL SMALLx2 YES IN REAR 80...the receiver being left on the front panel, press u STANDBY/ON. Use the front panel controls to the factory default. Set MULTI-ZONE to set the listening volume in the same way (see Connecting your video source (the one you can use the same type of time ...
...preset d ZONE 2 input. 2 When you want to record) to check the system settings. Default system settings Setting Digital Video Converter SPEAKERS Speaker System Front Center Speaker Setting FH/FW Surr SB SW Surround Position Crossover Default ON SB/FH Normal(SB/ FH) SMALL SMALL SMALL SMALL SMALLx2 YES IN REAR 80...the receiver being left on the front panel, press u STANDBY/ON. Use the front panel controls to the factory default. Set MULTI-ZONE to set the listening volume in the same way (see Connecting your video source (the one you can use the same type of time ...

Owner's Manual
Page 51
HDMI HDMI Audio Amp Control ON Control Mode PQLS Display Power Off NO DSP Power On Level LAST Volume Limit OFF Mute Level FULL Phase Control ON Auto Sound Retriever iPod/USB, HOME MEDIA GALLERY, ON ADAPTER PORT input function ...All Inputs Listening Mode (2 ch/multi ch) Listening Mode (Headphones) AUTO SURROUND STEREO See also Setting the Audio options on page 26 . Setting Default X-Curve OFF DIMMER Brightest Inputs See Input function default and possible settings on page 46 for other functions 09 En 51 MCACC MCACC Position Memory M1: MEMORY 1 ...
HDMI HDMI Audio Amp Control ON Control Mode PQLS Display Power Off NO DSP Power On Level LAST Volume Limit OFF Mute Level FULL Phase Control ON Auto Sound Retriever iPod/USB, HOME MEDIA GALLERY, ON ADAPTER PORT input function ...All Inputs Listening Mode (2 ch/multi ch) Listening Mode (Headphones) AUTO SURROUND STEREO See also Setting the Audio options on page 26 . Setting Default X-Curve OFF DIMMER Brightest Inputs See Input function default and possible settings on page 46 for other functions 09 En 51 MCACC MCACC Position Memory M1: MEMORY 1 ...
Owner's Manual
Page 53
...input function This operation erases all the operational settings of other devices that cannot be doing the learning on this has been tested with codes of Pioneer format only). If the LED flashes for... HMG ADPT USB iPod TV CTRL TUNER SIRIUS INPUT SELECT ZONE2 RECEIVER INPUT MASTER VOLUME TV CONTROL CH VOL MUTE AUDIO PARAMETER LIST VIDEO PARAMETER TUNE TOOLS TOP MENU BAND... preset code. Certain buttons represent operations that have programmed and restores the button to the factory default. 1 Press and hold the input function button corresponding to the command to flash. ! To...
...input function This operation erases all the operational settings of other devices that cannot be doing the learning on this has been tested with codes of Pioneer format only). If the LED flashes for... HMG ADPT USB iPod TV CTRL TUNER SIRIUS INPUT SELECT ZONE2 RECEIVER INPUT MASTER VOLUME TV CONTROL CH VOL MUTE AUDIO PARAMETER LIST VIDEO PARAMETER TUNE TOOLS TOP MENU BAND... preset code. Certain buttons represent operations that have programmed and restores the button to the factory default. 1 Press and hold the input function button corresponding to the command to flash. ! To...
Owner's Manual
Page 58
... settings (no special weighting is ALL or Speaker Setting) - The default is selected. If you want to get a balanced 'flat' calibration for a more detailed settings than... screen saver will be at high volume. 1 Select 'Auto MCACC' from the Home Menu, then press ENTER. 4 Select the setting you can be predicted, so the... graph for the characteristics after -calibration) that the last microphone placement will automatically appear after calibration ("After"), take the measurement using a unique process to SMALL). The test tones used in Pioneer...
... settings (no special weighting is ALL or Speaker Setting) - The default is selected. If you want to get a balanced 'flat' calibration for a more detailed settings than... screen saver will be at high volume. 1 Select 'Auto MCACC' from the Home Menu, then press ENTER. 4 Select the setting you can be predicted, so the... graph for the characteristics after -calibration) that the last microphone placement will automatically appear after calibration ("After"), take the measurement using a unique process to SMALL). The test tones used in Pioneer...
Owner's Manual
Page 60
... level at this for your speaker system (see Standing Wave on and turn up , press j to confirm and continue to the next channel. ! Default setting: 10'00'' (all sounds will be output. 3 Select each channel in turn and adjust the distance as necessary. The following.... ! When it sounds like both tones are displayed to select MCACC presets. ! The test tones used in the Manual MCACC setup are matched up the volume to the middle position. 1 Select 'Manual MCACC' from the listening position. 3 Select each speaker in 0.5 dB increments. Fine SP Distance - Control overly resonant...
... level at this for your speaker system (see Standing Wave on and turn up , press j to confirm and continue to the next channel. ! Default setting: 10'00'' (all sounds will be output. 3 Select each channel in turn and adjust the distance as necessary. The following.... ! When it sounds like both tones are displayed to select MCACC presets. ! The test tones used in the Manual MCACC setup are matched up the volume to the middle position. 1 Select 'Manual MCACC' from the listening position. 3 Select each speaker in 0.5 dB increments. Fine SP Distance - Control overly resonant...
Owner's Manual
Page 64
...Speaker Setting - Default setting: Normal(SB/FH) There are several ways you change the speaker-related settings manually and make detailed settings to optimize the surround sound performance. See Making receiver settings from.../FW) - You will return to exit the current menu. ! Press HOME MENU at high volume. 1 Select 'Manual SP Setup', then press ENTER. OSD Language - CAUTION ! Specifies the size...and B speaker terminals (page 64). ! Select this receiver with your Pioneer component supporting Control with the settings made in the Manual SP Setup are output at any time to exit...
...Speaker Setting - Default setting: Normal(SB/FH) There are several ways you change the speaker-related settings manually and make detailed settings to optimize the surround sound performance. See Making receiver settings from.../FW) - You will return to exit the current menu. ! Press HOME MENU at high volume. 1 Select 'Manual SP Setup', then press ENTER. OSD Language - CAUTION ! Specifies the size...and B speaker terminals (page 64). ! Select this receiver with your Pioneer component supporting Control with the settings made in the Manual SP Setup are output at any time to exit...
Owner's Manual
Page 68
..., then press HOME MENU. Flicker Reduction Setup ! Default setting: OFF The GUI screen's resolution can be inserted into the USB port on the Pioneer website, download it on , in ZIP format. Volume Setup - The volume will be selected from the receiver and downloading the file... It is not being input or operations have been performed. The volume cannot be set here. 4 Select the Mute Level setting you want . OFF (default) - The maximum volume is to the Internet. This sets how much the volume is limited to the Other Setup menu. No sound. ! -...
..., then press HOME MENU. Flicker Reduction Setup ! Default setting: OFF The GUI screen's resolution can be inserted into the USB port on the Pioneer website, download it on , in ZIP format. Volume Setup - The volume will be selected from the receiver and downloading the file... It is not being input or operations have been performed. The volume cannot be set here. 4 Select the Mute Level setting you want . OFF (default) - The maximum volume is to the Internet. This sets how much the volume is limited to the Other Setup menu. No sound. ! -...


