User manual
Page 6
... Contents General Care and Safety Information 8 Setup precautions...8 Cleaning discs ...8 About recycling...8 Product Information ...9 Introduction ...9 Accessories supplied ...9 Region codes...9 Copyright notice...9 Special features ...10 Product Overview Main Unit ...11 Remote Control ...12 Using the remote control ...14 Connections Step 1: Basic Recorder Connections 15 Connecting the antenna cables ...15 Connecting the video cable...16...
... Contents General Care and Safety Information 8 Setup precautions...8 Cleaning discs ...8 About recycling...8 Product Information ...9 Introduction ...9 Accessories supplied ...9 Region codes...9 Copyright notice...9 Special features ...10 Product Overview Main Unit ...11 Remote Control ...12 Using the remote control ...14 Connections Step 1: Basic Recorder Connections 15 Connecting the antenna cables ...15 Connecting the video cable...16...

User manual
Page 9
... and sound recordings, may be used for such purposes. 9 English Introduction Your Philips recorder allows you to record TV programs or duplicate camcorder recordings to be played in...DVDs from other regions cannot be played back on DVD players and DVD-ROM drives. Remote control and batteries - This device will playback on other devices Step 3: Basic installation... operation, see the chapter 'Troubleshooting'. - Helpful Hints: - If you have to a specific region code. Refer to read this recorder, complete the basic connections and set -up in the guarantee booklet. ...
... and sound recordings, may be used for such purposes. 9 English Introduction Your Philips recorder allows you to record TV programs or duplicate camcorder recordings to be played in...DVDs from other regions cannot be played back on DVD players and DVD-ROM drives. Remote control and batteries - This device will playback on other devices Step 3: Basic installation... operation, see the chapter 'Troubleshooting'. - Helpful Hints: - If you have to a specific region code. Refer to read this recorder, complete the basic connections and set -up in the guarantee booklet. ...
User manual
Page 40
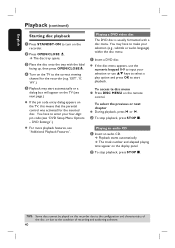
... Features". To access te disc menu Press DISC MENU on the display panel. The track number and elapsed playing time appear on the remote control. C Place the disc onto the tray with a disc menu. English Playback (continued) Starting disc playback A Press STANDBY-ON to... appear on the TV to the correct viewing channel for the recorder (e.g. 'EXT', '0', 'AV'.) E Playback may have to enter your four-digit pin code (see "DVD Setup Menu Options - Playback starts automatically. B To stop playback, press STOP x. B Press OPEN/CLOSE ç. You may start playback....
... Features". To access te disc menu Press DISC MENU on the display panel. The track number and elapsed playing time appear on the remote control. C Place the disc onto the tray with a disc menu. English Playback (continued) Starting disc playback A Press STANDBY-ON to... appear on the TV to the correct viewing channel for the recorder (e.g. 'EXT', '0', 'AV'.) E Playback may have to enter your four-digit pin code (see "DVD Setup Menu Options - Playback starts automatically. B To stop playback, press STOP x. B Press OPEN/CLOSE ç. You may start playback....
User manual
Page 56
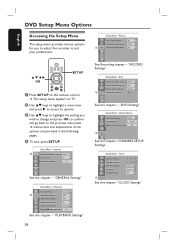
... item and press X to access its options. "PLAYBACK Settings" 56 See Recording chapter - The setup menu appears on the remote control. Setup Menu - Playback TV Aspect Ratio 4:3 Letterbox Video Output Format NTSC HDMI Video Resolution 480i Digital Audio Output All Progressive.../ Interlaced Interlaced Show DivX® Registration Code OK See this chapter - Instructions and explanations of the options are provided in the following pages. Setup Menu - RECMODE...
... item and press X to access its options. "PLAYBACK Settings" 56 See Recording chapter - The setup menu appears on the remote control. Setup Menu - Playback TV Aspect Ratio 4:3 Letterbox Video Output Format NTSC HDMI Video Resolution 480i Digital Audio Output All Progressive.../ Interlaced Interlaced Show DivX® Registration Code OK See this chapter - Instructions and explanations of the options are provided in the following pages. Setup Menu - RECMODE...

User manual
Page 60
...rating level menu appears. 4) Use ST keys to select the desired parental level, then move to OK in the menu and press OK on the remote control. The rating levels range from 1 to certain scenes on the disc. VCD, SVCD, CDs have a parental level assigned to the complete ... instead. - The rating level feature does not prohibit playback of discs. If the selected audio/subtitle language is not available on the remote control to enter your four-digit pin code. - The set a playback limitation level. 1) Use ST keys to select { Parental Rating Level } and press OK. 2) Use the numeric ...
...rating level menu appears. 4) Use ST keys to select the desired parental level, then move to OK in the menu and press OK on the remote control. The rating levels range from 1 to certain scenes on the disc. VCD, SVCD, CDs have a parental level assigned to the complete ... instead. - The rating level feature does not prohibit playback of discs. If the selected audio/subtitle language is not available on the remote control to enter your four-digit pin code. - The set a playback limitation level. 1) Use ST keys to select { Parental Rating Level } and press OK. 2) Use the numeric ...

User manual
Page 61
... select { Parental Rating Level } and press OK. 2) Use the numeric keypad 0-9 to enter your new four-digit pin code, then press T to select the next entry field and enter the same pin code a second time. 6) Move to OK in the menu and press OK to OK in the menu and press OK... to access new password menu. 5) Use the numeric keypad 0-9 to enter your four-digit pin code. 3) Move to confirm. The set rating level menu appears. 4) Move to New in the menu and press OK on the remote control. English DVD Setup Menu Options (continued) DVD settings (underlined options are the factory default...
... select { Parental Rating Level } and press OK. 2) Use the numeric keypad 0-9 to enter your new four-digit pin code, then press T to select the next entry field and enter the same pin code a second time. 6) Move to OK in the menu and press OK to OK in the menu and press OK... to access new password menu. 5) Use the numeric keypad 0-9 to enter your four-digit pin code. 3) Move to confirm. The set rating level menu appears. 4) Move to New in the menu and press OK on the remote control. English DVD Setup Menu Options (continued) DVD settings (underlined options are the factory default...

User manual
Page 66
... HDMI cable from your DVD recorder OUT2 on the rear panel to the TV's Video In and Audio In jacks. 2) Turn on the remote control to enter the code "116811" and press OK. If you are weak, replace the batteries. - No display on the screen. - Press SOURCE on the TV and ...Make sure the AC outlet has power. - Installation and Setup - The blue Philips screen should you see the DVD screen. Aim the remote control towards TV.) - Then use the TV's remote control to Progressive Scan mode while your dealer or Philips for help. Do not open the system as this will invalidate the warranty...
... HDMI cable from your DVD recorder OUT2 on the rear panel to the TV's Video In and Audio In jacks. 2) Turn on the remote control to enter the code "116811" and press OK. If you are weak, replace the batteries. - No display on the screen. - Press SOURCE on the TV and ...Make sure the AC outlet has power. - Installation and Setup - The blue Philips screen should you see the DVD screen. Aim the remote control towards TV.) - Then use the TV's remote control to Progressive Scan mode while your dealer or Philips for help. Do not open the system as this will invalidate the warranty...


