User manual
Page 3
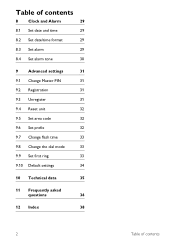
... 20 2.4 Recycle your batteries 7 6.5 Using your phonebook 21 2.5 Service Centers 8 6.6 Using the redial list 23 3 Your phone 9 6.7 Using the call log 23 3.1 What's in the box 9 6.8 Using the intercom 24 3.2 Overview of your phone 10 6.9 Handset locating 26 3.3 Display icons 12 7 Personal settings 27 3.4 Overview of the base station 12 7.1 Change the handset name 27 4 Getting started 13 7.2 Handset Tones 27 4.1 Connect the base station 13 7.3 Change the display language 28 4.2 Wall mounting the base 13 7.4 Activate/deactivate...
... 20 2.4 Recycle your batteries 7 6.5 Using your phonebook 21 2.5 Service Centers 8 6.6 Using the redial list 23 3 Your phone 9 6.7 Using the call log 23 3.1 What's in the box 9 6.8 Using the intercom 24 3.2 Overview of your phone 10 6.9 Handset locating 26 3.3 Display icons 12 7 Personal settings 27 3.4 Overview of the base station 12 7.1 Change the handset name 27 4 Getting started 13 7.2 Handset Tones 27 4.1 Connect the base station 13 7.3 Change the display language 28 4.2 Wall mounting the base 13 7.4 Activate/deactivate...
User manual
Page 4
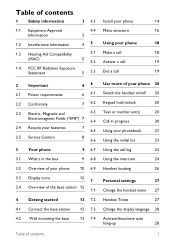
Table of contents 8 Clock and Alarm 29 8.1 Set date and time 29 8.2 Set date/time format 29 8.3 Set alarm 29 8.4 Set alarm tone 30 9 Advanced settings 31 9.1 Change Master PIN 31 9.2 Registration 31 9.3 Unregister 31 9.4 Reset unit 32 9.5 Set area code 32 9.6 Set prefix 32 9.7 Change flash time 33 9.8 Change the dial mode 33 9.9 Set first ring 33 9.10 Default settings 34 10 Technical data 35 11 Frequently asked questions 36 12 Index 38 2 Table of contents
Table of contents 8 Clock and Alarm 29 8.1 Set date and time 29 8.2 Set date/time format 29 8.3 Set alarm 29 8.4 Set alarm tone 30 9 Advanced settings 31 9.1 Change Master PIN 31 9.2 Registration 31 9.3 Unregister 31 9.4 Reset unit 32 9.5 Set area code 32 9.6 Set prefix 32 9.7 Change flash time 33 9.8 Change the dial mode 33 9.9 Set first ring 33 9.10 Default settings 34 10 Technical data 35 11 Frequently asked questions 36 12 Index 38 2 Table of contents
User manual
Page 8
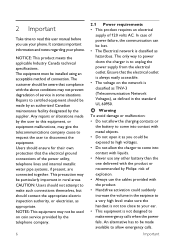
... to make such connections themselves, but should ensure for their own protection that the electrical ground connections of the power utility, telephone lines and internal metallic water pipe systems, if present, are connected together. NOTES: This equipment may be aware that the electrical outlet is always easily accessible. • The voltage on coin service provided by Philips: risk of explosion. • Always use...
... to make such connections themselves, but should ensure for their own protection that the electrical ground connections of the power utility, telephone lines and internal metallic water pipe systems, if present, are connected together. NOTES: This equipment may be aware that the electrical outlet is always easily accessible. • The voltage on coin service provided by Philips: risk of explosion. • Always use...
User manual
Page 11
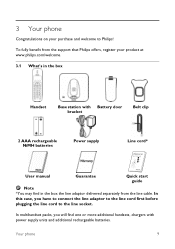
... or more additional handsets, chargers with Battery door bracket Belt clip 2 AAA rechargeable NiMH batteries Power supply Line cord* User manual Guarantee Quick start guide Note *You may find in the box Handset Base station with power supply units and additional rechargeable batteries. To fully benefit from the line cable. In multihandset packs, you have to connect the line adaptor to the line cord first before plugging the line cord to Philips! 3 Your phone Congratulations on your...
... or more additional handsets, chargers with Battery door bracket Belt clip 2 AAA rechargeable NiMH batteries Power supply Line cord* User manual Guarantee Quick start guide Note *You may find in the box Handset Base station with power supply units and additional rechargeable batteries. To fully benefit from the line cable. In multihandset packs, you have to connect the line adaptor to the line cord first before plugging the line cord to Philips! 3 Your phone Congratulations on your...
User manual
Page 12
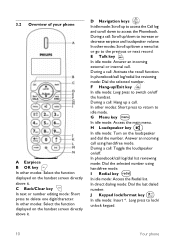
... Your phone During a call log/dial list reviewing mode: Dial the selected number using handsfree mode. In other modes: Short press to return to the previous or next record. Answer an incoming call : Scroll up /down to switch on/off . I Redial key In idle mode: Access the Redial list. In direct dialing mode: Dial the last dialed * number. During a call using l handsfree mode. During a call . In other modes: Select the function displayed on the handset screen directly above it . : D Navigation keys In idle mode...
... Your phone During a call log/dial list reviewing mode: Dial the selected number using handsfree mode. In other modes: Short press to return to the previous or next record. Answer an incoming call : Scroll up /down to switch on/off . I Redial key In idle mode: Access the Redial list. In direct dialing mode: Dial the last dialed * number. During a call using l handsfree mode. During a call . In other modes: Select the function displayed on the handset screen directly above it . : D Navigation keys In idle mode...
User manual
Page 14
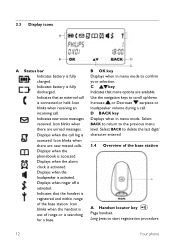
.... Indicates new voice messages received. Indicates that more options are available. C key Indicates that the handset is registered and within range of range or is out of the base station. D BACK key Displays when in menu mode to confirm your selection. Icon blinks when there are new missed calls. Displays when the alarm clock is activated. Select BACK to return to delete the last digit/ character entered. 3.4 Overview of the base station V A Handset locator key Page handset. Indicates battery...
.... Indicates new voice messages received. Indicates that more options are available. C key Indicates that the handset is registered and within range of range or is out of the base station. D BACK key Displays when in menu mode to confirm your selection. Icon blinks when there are new missed calls. Displays when the alarm clock is activated. Select BACK to return to delete the last digit/ character entered. 3.4 Overview of the base station V A Handset locator key Page handset. Indicates battery...
User manual
Page 18
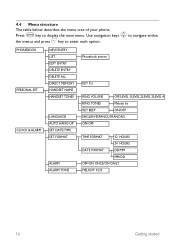
... enter each option. PHONEBOOK PERSONAL SET CLOCK & ALARM NEW ENTRY LIST EDIT ENTRY DELETE ENTRY DELETE ALL DIRECT MEMORY HANDSET NAME HANDSET TONES LANGUAGE AUTO HANG-UP SET DATE/TIME SET FORMAT ALARM ALARM TONE Phonebook entries KEY 1/2 RING VOLUME OFF/LEVEL 1/LEVEL 2/LEVEL 3/LEVEL 4 RING TONES Melody list KEY BEEP ON/OFF ENGLISH/ESPANOL/FRANCAIS ON/OFF TIME FORMAT 12 HOURS 24 HOURS DATE FORMAT DD/MM MM/DD OFF/ON ONCE/ON DAILY...
... enter each option. PHONEBOOK PERSONAL SET CLOCK & ALARM NEW ENTRY LIST EDIT ENTRY DELETE ENTRY DELETE ALL DIRECT MEMORY HANDSET NAME HANDSET TONES LANGUAGE AUTO HANG-UP SET DATE/TIME SET FORMAT ALARM ALARM TONE Phonebook entries KEY 1/2 RING VOLUME OFF/LEVEL 1/LEVEL 2/LEVEL 3/LEVEL 4 RING TONES Melody list KEY BEEP ON/OFF ENGLISH/ESPANOL/FRANCAIS ON/OFF TIME FORMAT 12 HOURS 24 HOURS DATE FORMAT DD/MM MM/DD OFF/ON ONCE/ON DAILY...
User manual
Page 20
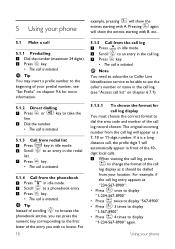
... to Caller Line Identification service to display "1-234-567-8900" again. Pressing again will automatically appear in front of the 10digit local calls. * 1 When viewing the call log, press to change the format of the call log display as it should be able to see the caller's number or name in the call log. (see "Set Prefix" on chapter 6.7.1) r v 5.1.2 Direct dialling 1 Press or key to...
... to Caller Line Identification service to display "1-234-567-8900" again. Pressing again will automatically appear in front of the 10digit local calls. * 1 When viewing the call log, press to change the format of the call log display as it should be able to see the caller's number or name in the call log. (see "Set Prefix" on chapter 6.7.1) r v 5.1.2 Direct dialling 1 Press or key to...
User manual
Page 21
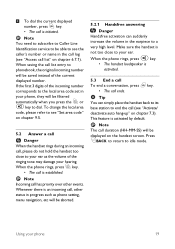
... first 3 digits of the incoming number corresponds to dial. Make sure the handset is established. displayed on chapter 7.3). Using your ear. When saving the call list entry to phonebook, the original incoming number will be filtered r automatically when you press the or v key to the local area code set in your phone, they will be saved instead of the r ringing tone may damage your ear as phone setting, menu...
... first 3 digits of the incoming number corresponds to dial. Make sure the handset is established. displayed on chapter 7.3). Using your ear. When saving the call list entry to phonebook, the original incoming number will be filtered r automatically when you press the or v key to the local area code set in your phone, they will be saved instead of the r ringing tone may damage your ear as phone setting, menu...
User manual
Page 27
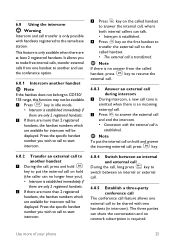
Press the specific handset number you to make free internal calls, transfer external calls from the called handset, press key to resume the external call. 6.8.3 Answer an external call during intercom 1 During intercom, a new call tone is emitted when there is an incoming r external call. 2 Press to answer the external call and end the intercom. • Connection with the external call to start intercom. 6.8.4 Switch between an internal * and external call During the call, long press key to switch between...
Press the specific handset number you to make free internal calls, transfer external calls from the called handset, press key to resume the external call. 6.8.3 Answer an external call during intercom 1 During intercom, a new call tone is emitted when there is an incoming r external call. 2 Press to answer the external call and end the intercom. • Connection with the external call to start intercom. 6.8.4 Switch between an internal * and external call During the call, long press key to switch between...
User manual
Page 28
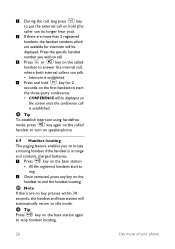
... the specific handset r v number you wish to call. 3 Press or key on the called handset to turn on speakerphone. 6.9 Handset locating The paging feature enables you to locate a missing handset if the handset is in range V and contains charged batteries. 1 Press key on the called handset to answer the internal call is established. 4 Press and hold (the caller can talk. i • Intercom is established. Tip v To establish intercom using handsfree mode, press key again on the base station...
... the specific handset r v number you wish to call. 3 Press or key on the called handset to turn on speakerphone. 6.9 Handset locating The paging feature enables you to locate a missing handset if the handset is in range V and contains charged batteries. 1 Press key on the called handset to answer the internal call is established. 4 Press and hold (the caller can talk. i • Intercom is established. Tip v To establish intercom using handsfree mode, press key again on the base station...
User manual
Page 29
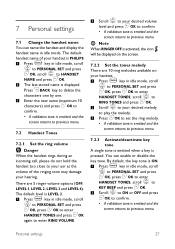
... ring melodies available on the screen. 7.2.2 Set the tones melody There are 5 ringer volume options (OFF, LEVEL 1, LEVEL 2, LEVEL 3 and LEVEL 4). The default level is ON. m 1 Press key in idle mode, scroll : to PERSONAL SET and press < < OK, press OK to enter : HANDSET TONES, scroll to < RING TONES and press OK. : 2 Scroll to previous menu. 7.2.3 Activate/deactivate key tone A single tone is emitted when a key is displayed. By default, the key tone...
... ring melodies available on the screen. 7.2.2 Set the tones melody There are 5 ringer volume options (OFF, LEVEL 1, LEVEL 2, LEVEL 3 and LEVEL 4). The default level is ON. m 1 Press key in idle mode, scroll : to PERSONAL SET and press < < OK, press OK to enter : HANDSET TONES, scroll to < RING TONES and press OK. : 2 Scroll to previous menu. 7.2.3 Activate/deactivate key tone A single tone is emitted when a key is displayed. By default, the key tone...
User manual
Page 33
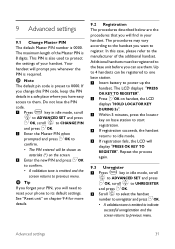
... screen. 3 Enter the new PIN and press OK to confirm. • A validation tone is emitted to indicate successful unregistration and the screen returns to its default settings. See "Reset unit" on chapter 9.4 for more details. 9.2 Registration The procedures described below are the procedures that you will display "PRESS OK KEY TO REGISTER". Up to 4 handsets can use them . If you change this case, please refer to the base unit...
... screen. 3 Enter the new PIN and press OK to confirm. • A validation tone is emitted to indicate successful unregistration and the screen returns to its default settings. See "Reset unit" on chapter 9.4 for more details. 9.2 Registration The procedures described below are the procedures that you will display "PRESS OK KEY TO REGISTER". Up to 4 handsets can use them . If you change this case, please refer to the base unit...
User manual
Page 34
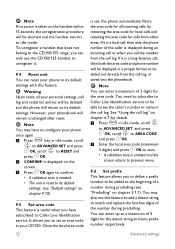
... few digits of the number during an incoming call log, or saved into the phonebook. is displayed on the handset within 15 seconds, the unregistration procedure will be displayed in the call , then both the area code and phone number will be dialed out directly from other areas. You may have subscribed to Caller Line Identification service. Note You may also use the CD150/155 handset to unregister it. 9.4 Reset unit...
... few digits of the number during an incoming call log, or saved into the phonebook. is displayed on the handset within 15 seconds, the unregistration procedure will be displayed in the call , then both the area code and phone number will be dialed out directly from other areas. You may have subscribed to Caller Line Identification service. Note You may also use the CD150/155 handset to unregister it. 9.4 Reset unit...
User manual
Page 35
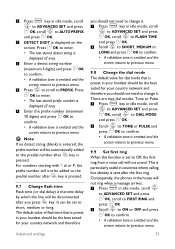
Press 1 m Press key in idle mode, scroll : to ADVANCED SET and press < : OK, scroll to PREFIX. Press OK to enter. • The last stored detect string is displayed (if any). < 3 Enter a detect string number (maximum 5 digits) and press OK to confirm. • A validation tone is emitted and the screen returns to previous menu. : 4 Press to scroll to AUTO PREFIX < and press OK. < 2 DETECT DIGIT is displayed on the screen.
Press 1 m Press key in idle mode, scroll : to ADVANCED SET and press < : OK, scroll to PREFIX. Press OK to enter. • The last stored detect string is displayed (if any). < 3 Enter a detect string number (maximum 5 digits) and press OK to confirm. • A validation tone is emitted and the screen returns to previous menu. : 4 Press to scroll to AUTO PREFIX < and press OK. < 2 DETECT DIGIT is displayed on the screen.
User manual
Page 38
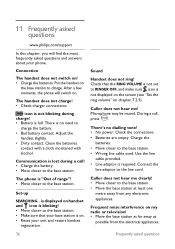
... restart handset registration. The phone is "Out of range"! • Move closer to the base station. • Make sure that the RING VOLUME is not displayed on the screen (see "Set the ring volume" on chapter 7.2.1). The handset does not charge! • Check charger connections. 11 Frequently asked questions www.philips.com/support In this chapter, you will switch on. is displayed on handset and icon is no dialling tone! • No power: Check the connections. • Batteries...
... restart handset registration. The phone is "Out of range"! • Move closer to the base station. • Make sure that the RING VOLUME is not displayed on the screen (see "Set the ring volume" on chapter 7.2.1). The handset does not charge! • Check charger connections. 11 Frequently asked questions www.philips.com/support In this chapter, you will switch on. is displayed on handset and icon is no dialling tone! • No power: Check the connections. • Batteries...
User manual
Page 39
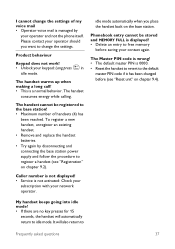
... place the handset back on the base station. The handset warms up when making a long call! • This is displayed! • Delete an entry to free memory before (see "Registration" on chapter 9.4). Caller number is not displayed! • Service is not activated: Check your subscription with your keypad: Long press in idle mode. The Master PIN code is wrong! • The default master PIN is managed by disconnecting and connecting the base station power supply...
... place the handset back on the base station. The handset warms up when making a long call! • This is displayed! • Delete an entry to free memory before (see "Registration" on chapter 9.4). Caller number is not displayed! • Service is not activated: Check your subscription with your keypad: Long press in idle mode. The Master PIN code is wrong! • The default master PIN is managed by disconnecting and connecting the base station power supply...
Quick start guide
Page 1
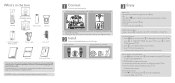
... in China Register your CD150/155. The call is not displayed! • Check your subscription with your network operator Welcome to the base station • Move the base station at www.philips.com/welcome CD150 CD155 Quick start guide 1 Connect 2 Install 3 Enjoy Press . Online help ? p Press on the base station to skip the current message and play phone messages (the first recorded message will be played first). User Manual Refer to adjust speaker volume during message playback. All...
... in China Register your CD150/155. The call is not displayed! • Check your subscription with your network operator Welcome to the base station • Move the base station at www.philips.com/welcome CD150 CD155 Quick start guide 1 Connect 2 Install 3 Enjoy Press . Online help ? p Press on the base station to skip the current message and play phone messages (the first recorded message will be played first). User Manual Refer to adjust speaker volume during message playback. All...
Quick start guide
Page 2
... charge Insert batteries Charge handset for CD150 OR CD155 Battery door Belt clip 2 AAA rechargeable NiMH batteries Power supply Line cord* User manual Guarantee Quick Start Guide *You may find one or more additional handsets, chargers with your desired melody to RING < TONES and press OK. : 2. r Answer a call To end a conversation, press key. A validation tone is emitted and the screen returns to select from the line cable. e End a call When the phone rings, press key. Adjust earpiece volume : During a call...
... charge Insert batteries Charge handset for CD150 OR CD155 Battery door Belt clip 2 AAA rechargeable NiMH batteries Power supply Line cord* User manual Guarantee Quick Start Guide *You may find one or more additional handsets, chargers with your desired melody to RING < TONES and press OK. : 2. r Answer a call To end a conversation, press key. A validation tone is emitted and the screen returns to select from the line cable. e End a call When the phone rings, press key. Adjust earpiece volume : During a call...

Leaflet
Page 2
...; Speakerphone-Talk handsfree Dimensions • Base dimensions: 120 x 114 x 82.5mm • Handset dimensions: 162 x 48.3 x 28.7mm Power • Battery capacity: 550 mAh • Battery type: AAA NiMH • Kind of Battery: Rechargeable • Mains power: AC 120V - 60Hz • Number of batteries: 2 per handset • Standby time: Up to 150 hours • Talk time: Up to change without notice. or their respective owners. Cordless telephone Specifications CD1501B...
...; Speakerphone-Talk handsfree Dimensions • Base dimensions: 120 x 114 x 82.5mm • Handset dimensions: 162 x 48.3 x 28.7mm Power • Battery capacity: 550 mAh • Battery type: AAA NiMH • Kind of Battery: Rechargeable • Mains power: AC 120V - 60Hz • Number of batteries: 2 per handset • Standby time: Up to 150 hours • Talk time: Up to change without notice. or their respective owners. Cordless telephone Specifications CD1501B...


